Edit on GitHub
Auth0
What is Auth0
Auth0 is a service that allows you to integrate authentication and authorization into your applications.
Once your application is connected to Auth0, it can take care of all your authentication requirements.
How to Integrate Auth0 with Hasura
In this guide, you will learn how to integrate Auth0 with Hasura. This is the process which we will be following:
- Create an Auth0 app. In Auth0, an application is a representation of your own software that can request authentication and authorization services from Auth0.
- Create an Auth0 API. An API is a logical entity that represents an external resource, capable of accepting and responding to requests to your authorized Auth0 applications.
- Set Custom JWT claims. We'll use the Actions feature in Auth0 to set custom JWT claims. These claims are just values, encoded into the JWT in order to, for example, provide verified information about the user which Hasura can then use to determine what they can access.
- Sync users between Auth0 and Hasura. We'll use the Actions feature in Auth0 to sync users between Auth0 and Hasura. This will ensure that the users who sign-up or login via Hasura are available in the database and can be used to create permissions and store other user related data.
- Test the integration. We'll use the built-in Actions testing features and the API Debugger extension to test the integration.
Create Auth0 App
To integrate Auth0 with Hasura, you need an Auth0 account. You can manually sign up with a username and password or log in with a third party provider account, such as a Google account.
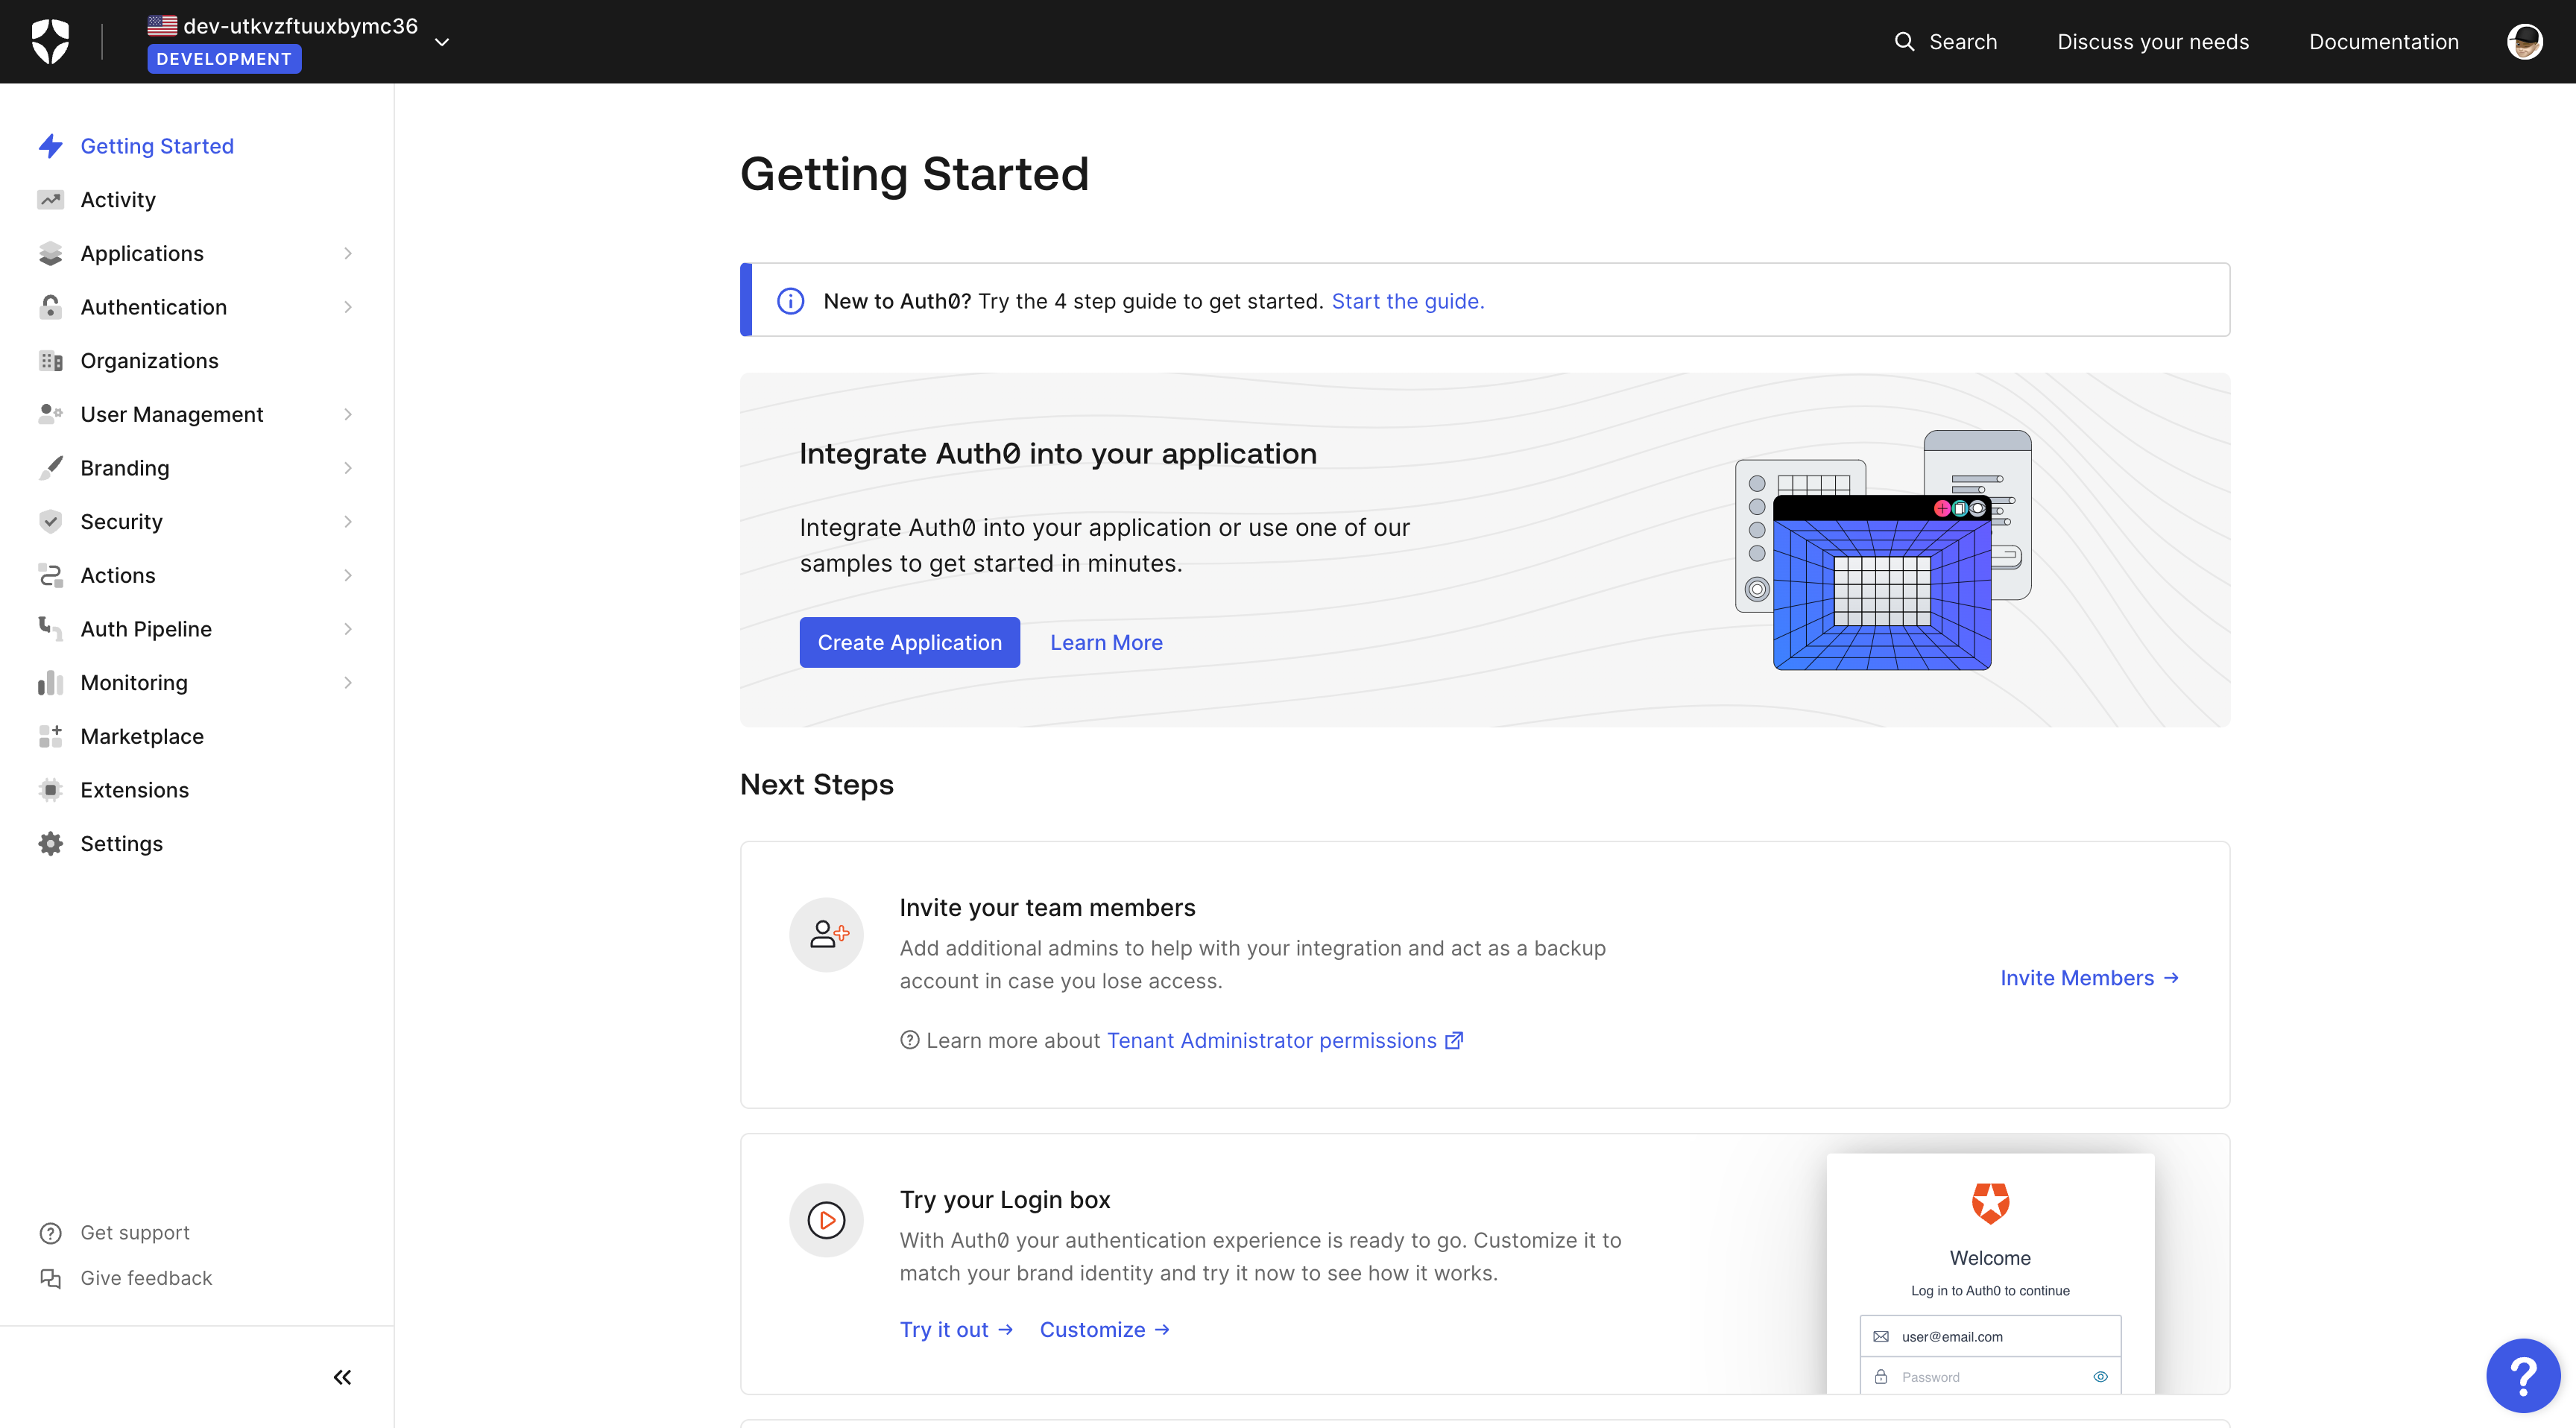
The first step is to navigate to the Auth0 dashboard. Once you log in, you should see the following page:
After that, go to the Applications page and click the + Create Application button.
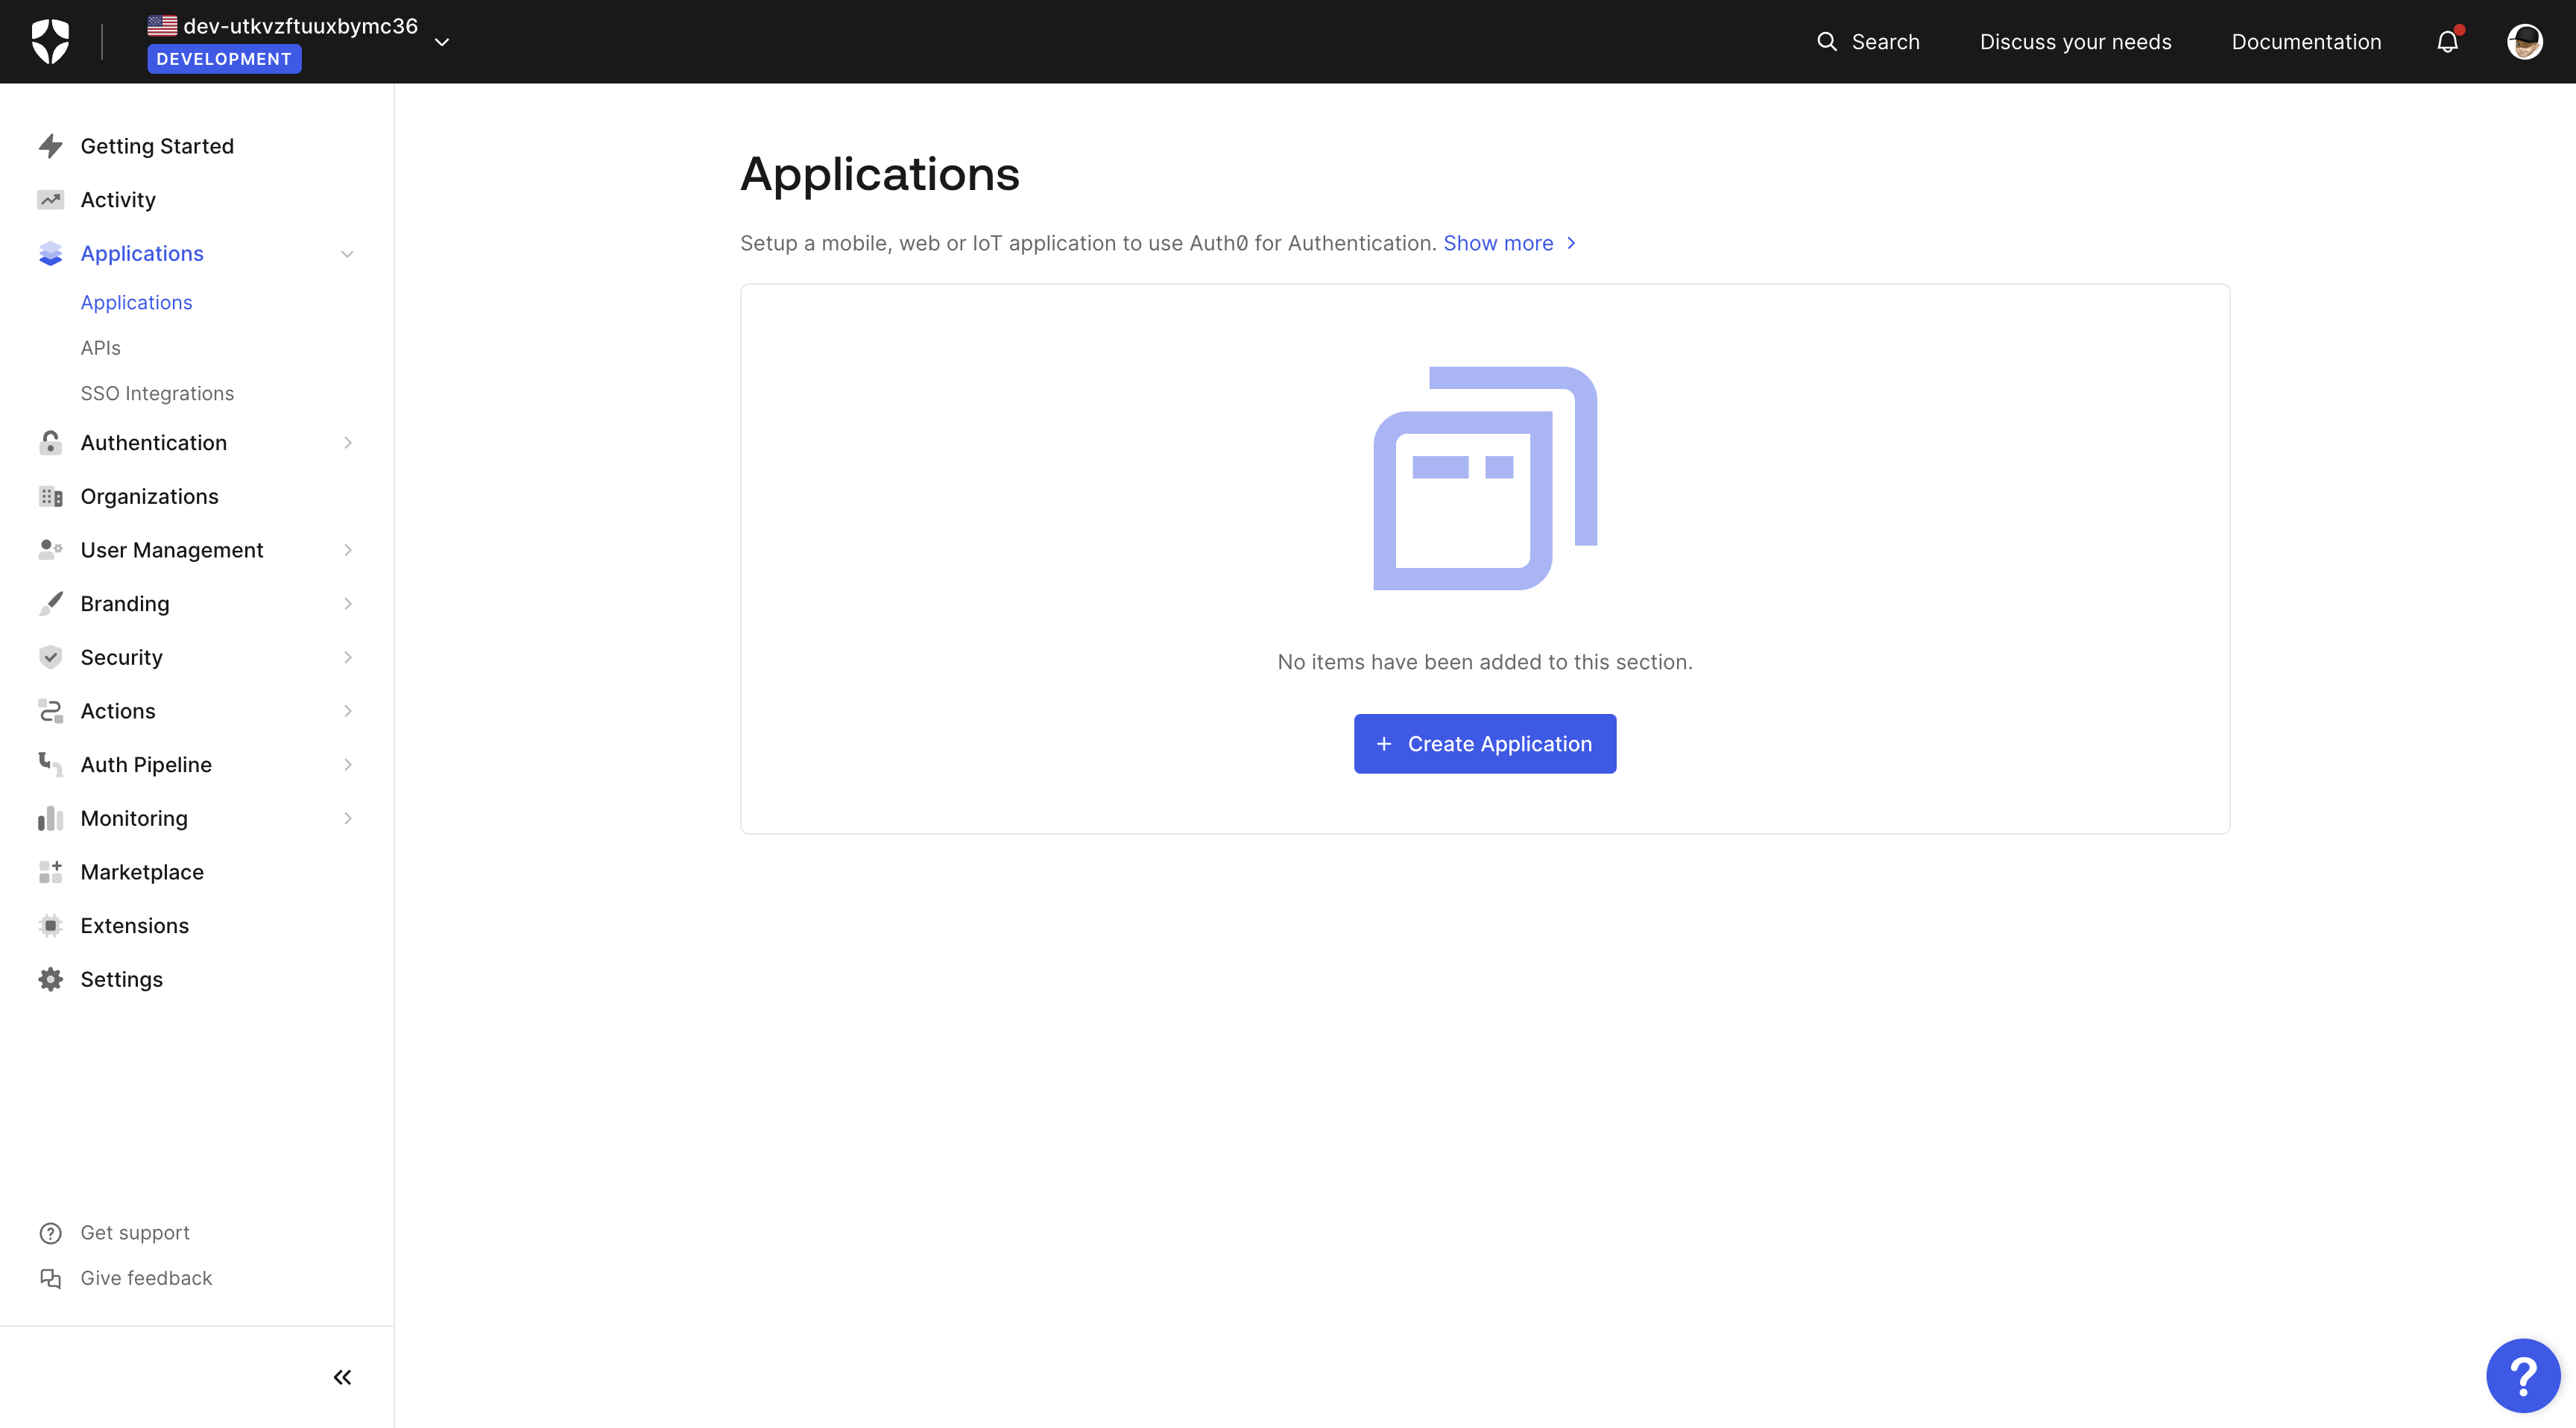
Once you click the button, a new pop-up appears where you can enter the app name and select your application type.
You can choose:
- Native
- Singe Page Web Applications
- Regular Web Applications
- Machine to Machine Applications
This tutorial uses the "Single Page Web Applications" type as an example.
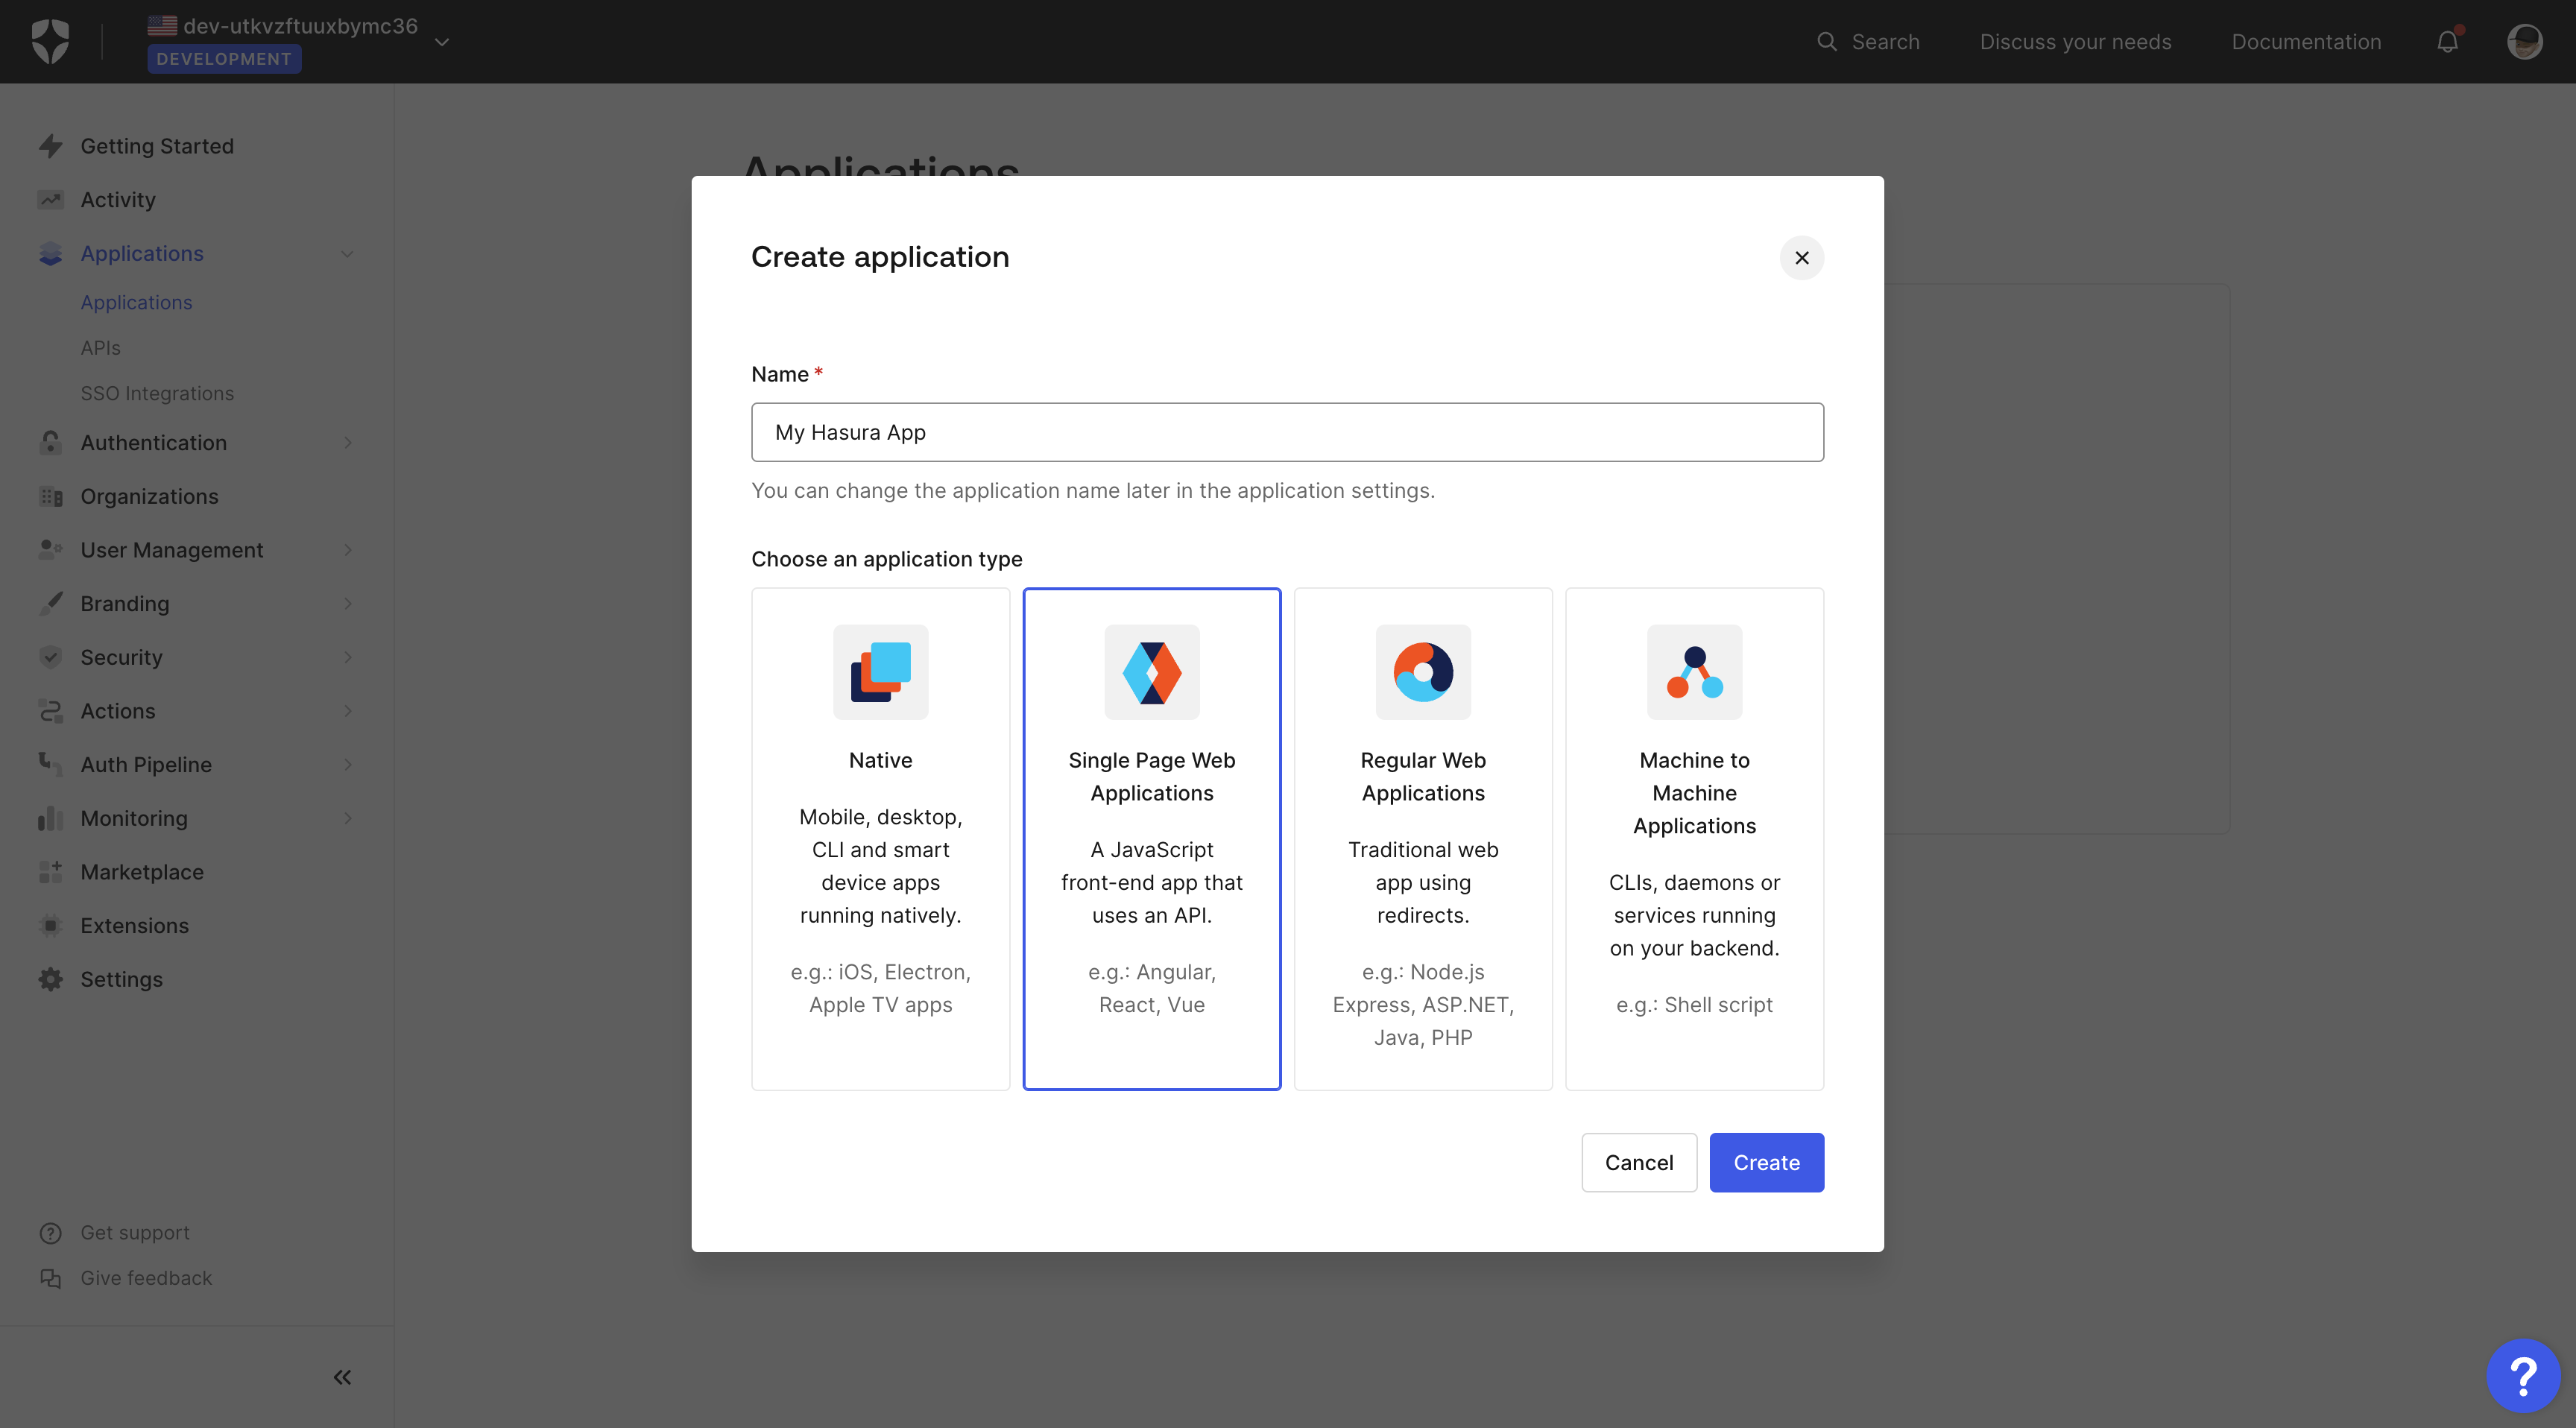
Enter a name such as "My Hasura App" and press the "Create" button to create the application.
Now go to the "Settings" tab and scroll down until you see the options "Allowed Callback URLs" and "Allowed Web Origins".
Enter the following URLs:
- Allowed Callback URLs - https://localhost:8080/callback
- Allowed Web Origins - https://localhost:8080
Note: The "localhost" URLs should reflect the URLs of your app. If your app URL is http://localhost:6000 or
https://my-app.com, that’s what you should use.
Create Auth0 API
The next step is to create an Auth0 API so you can make the accessToken a valid JWT.
Go to the APIs page, as shown in the image below, and click on the + Create API button.
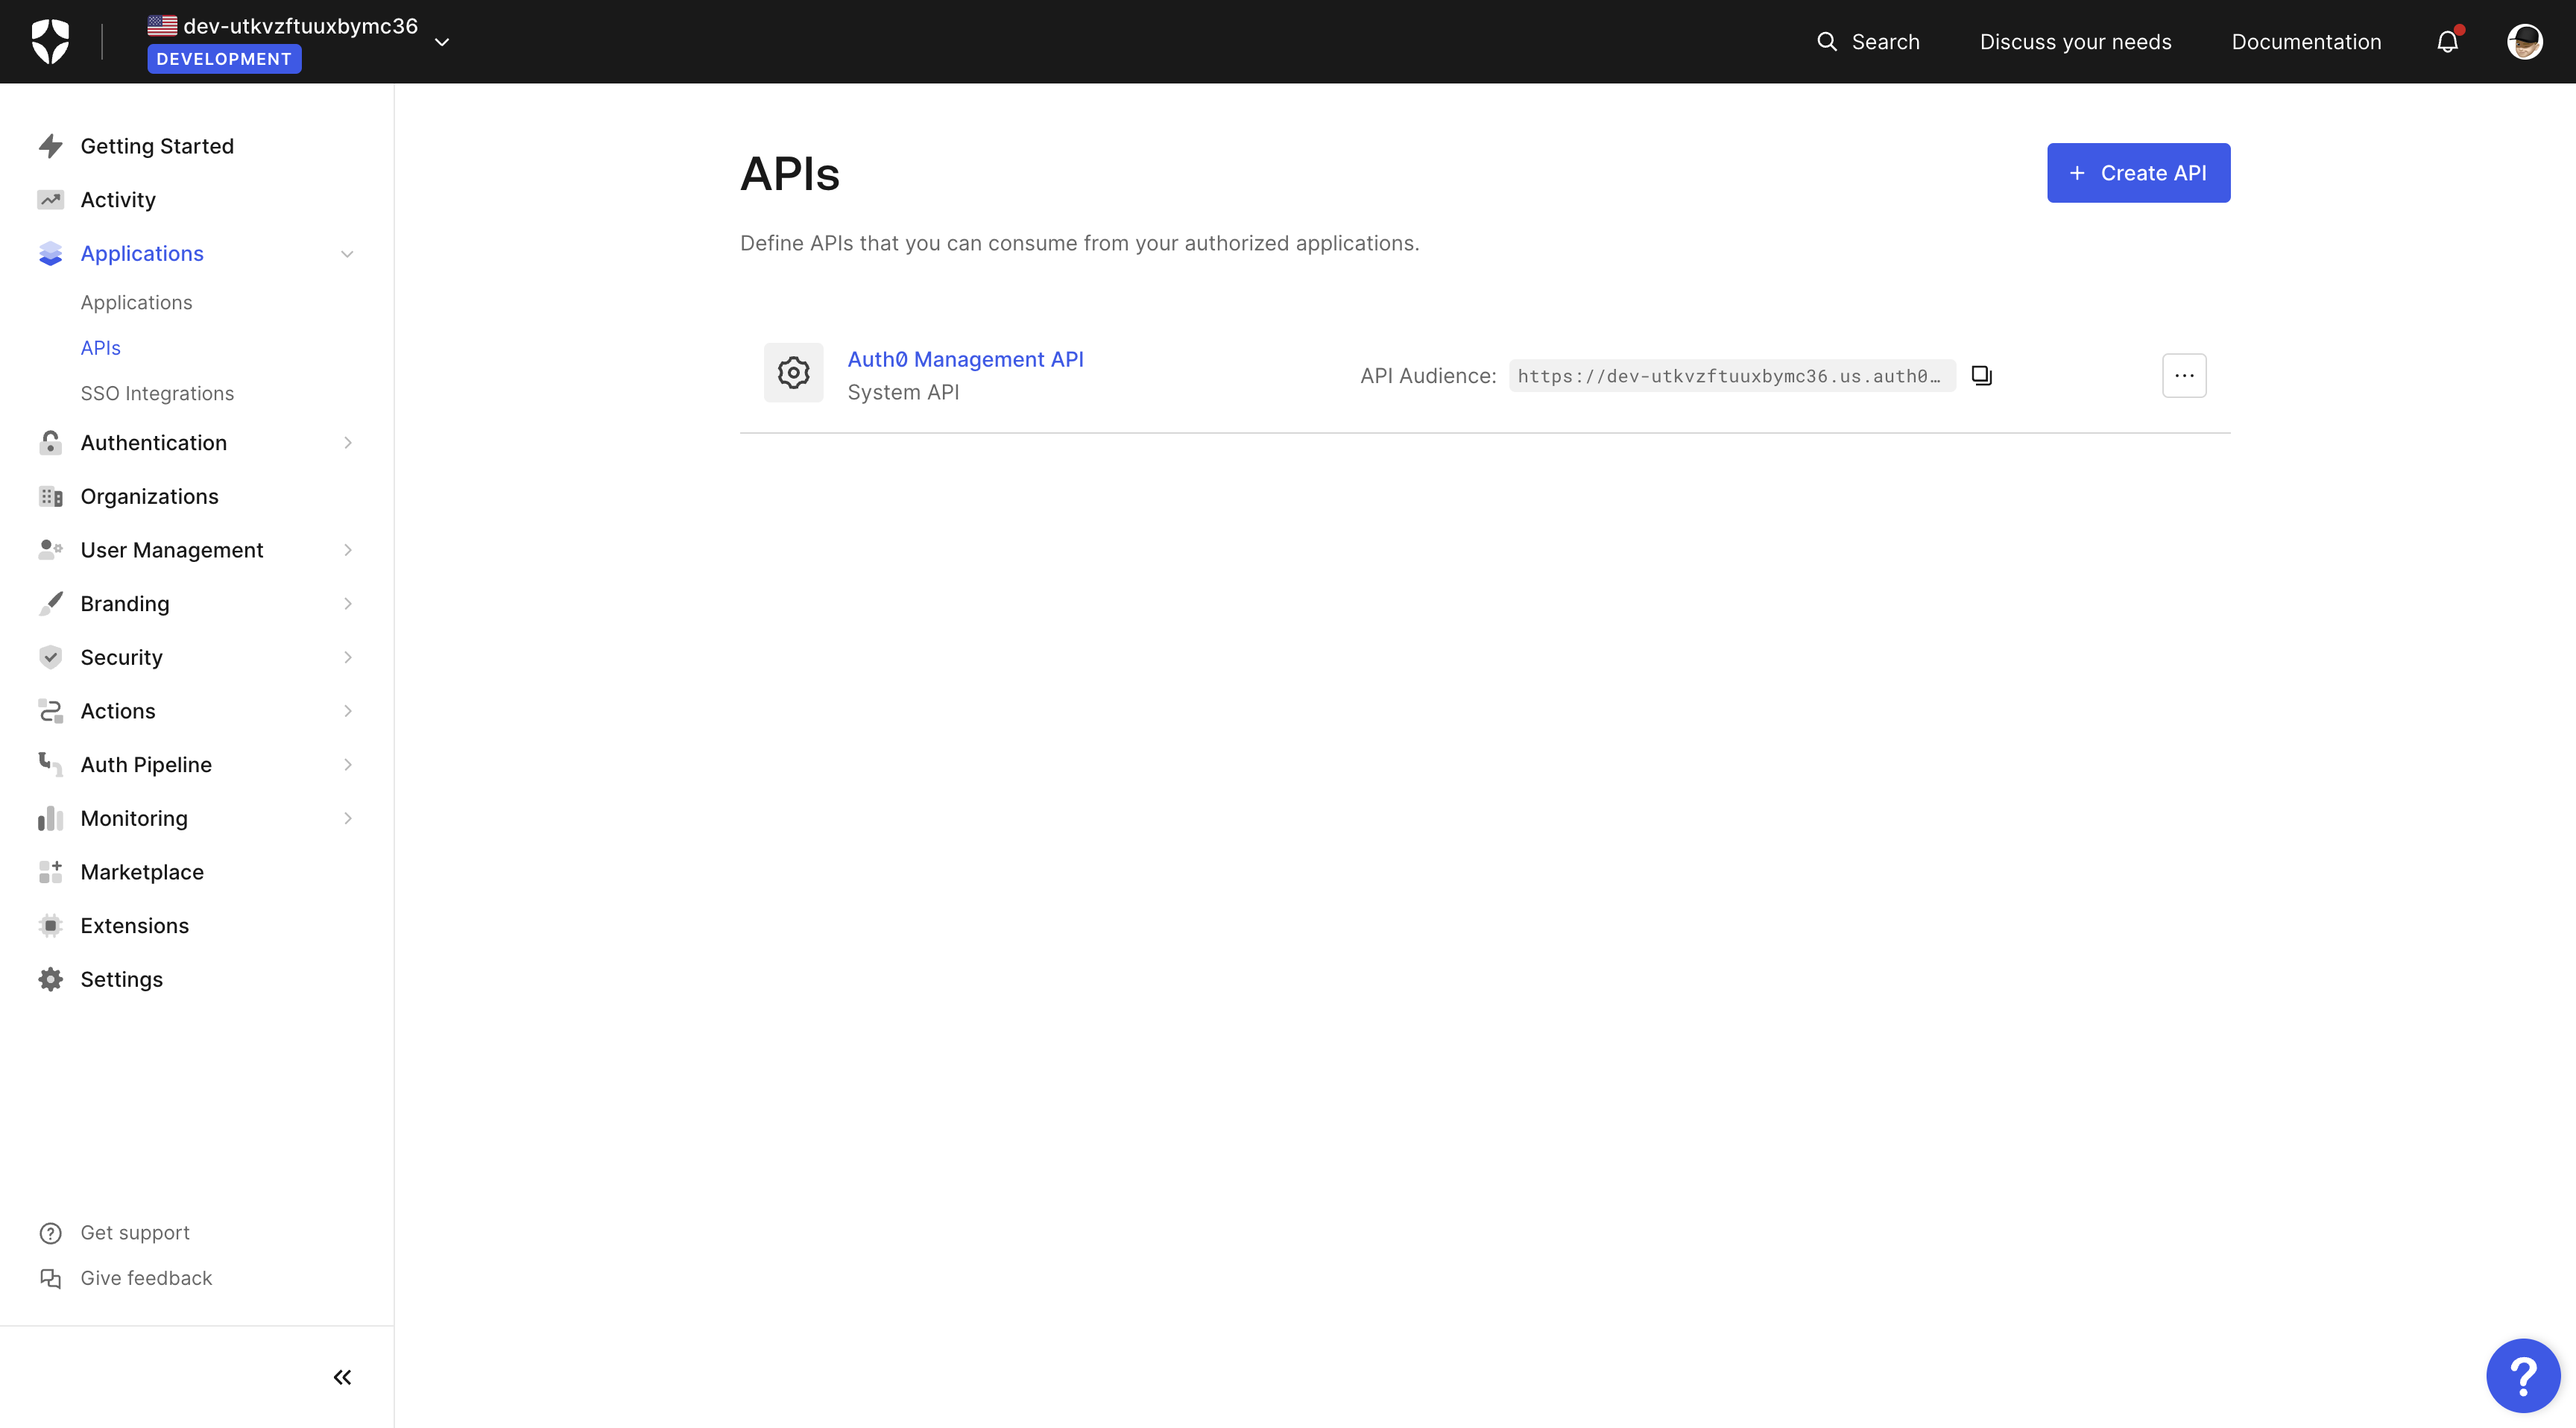
A new pop-up will appear where you can name your API, provide an identifier and select the signing algorithm.
Fill the "Name" and "Identifier" fields, but leave the "Signing Algorithm" field as it is.
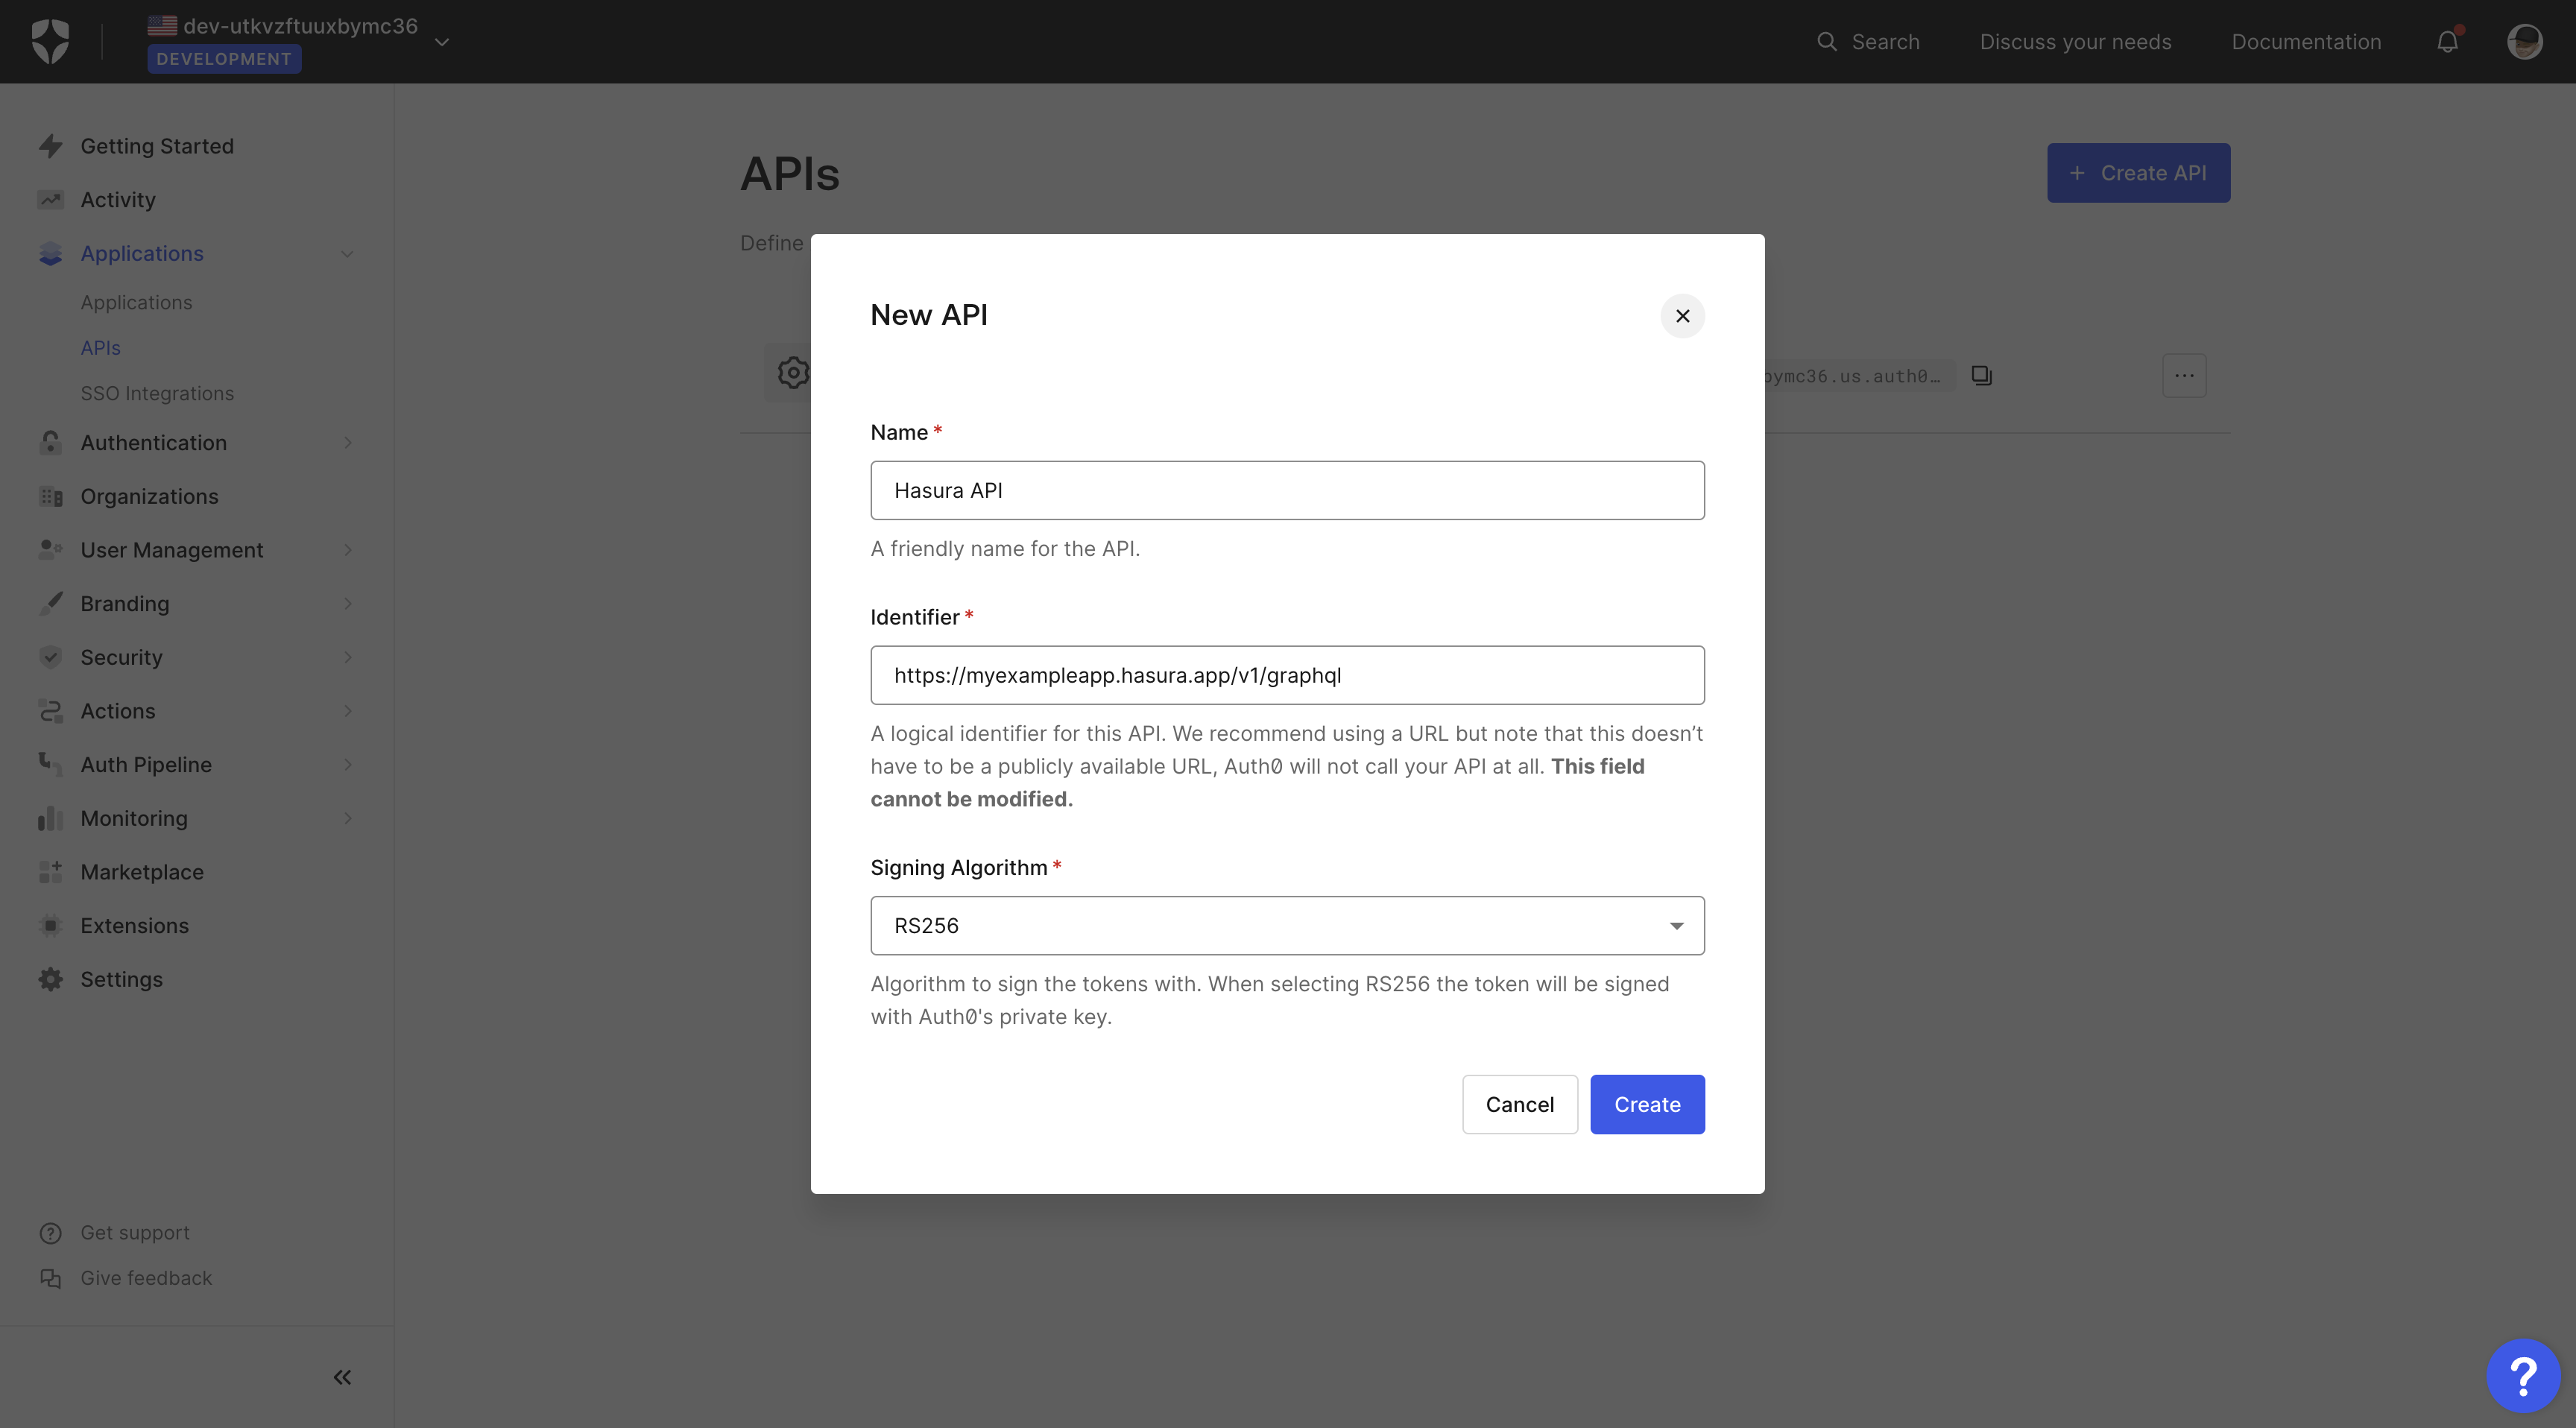
After adding the values, click the Create button.
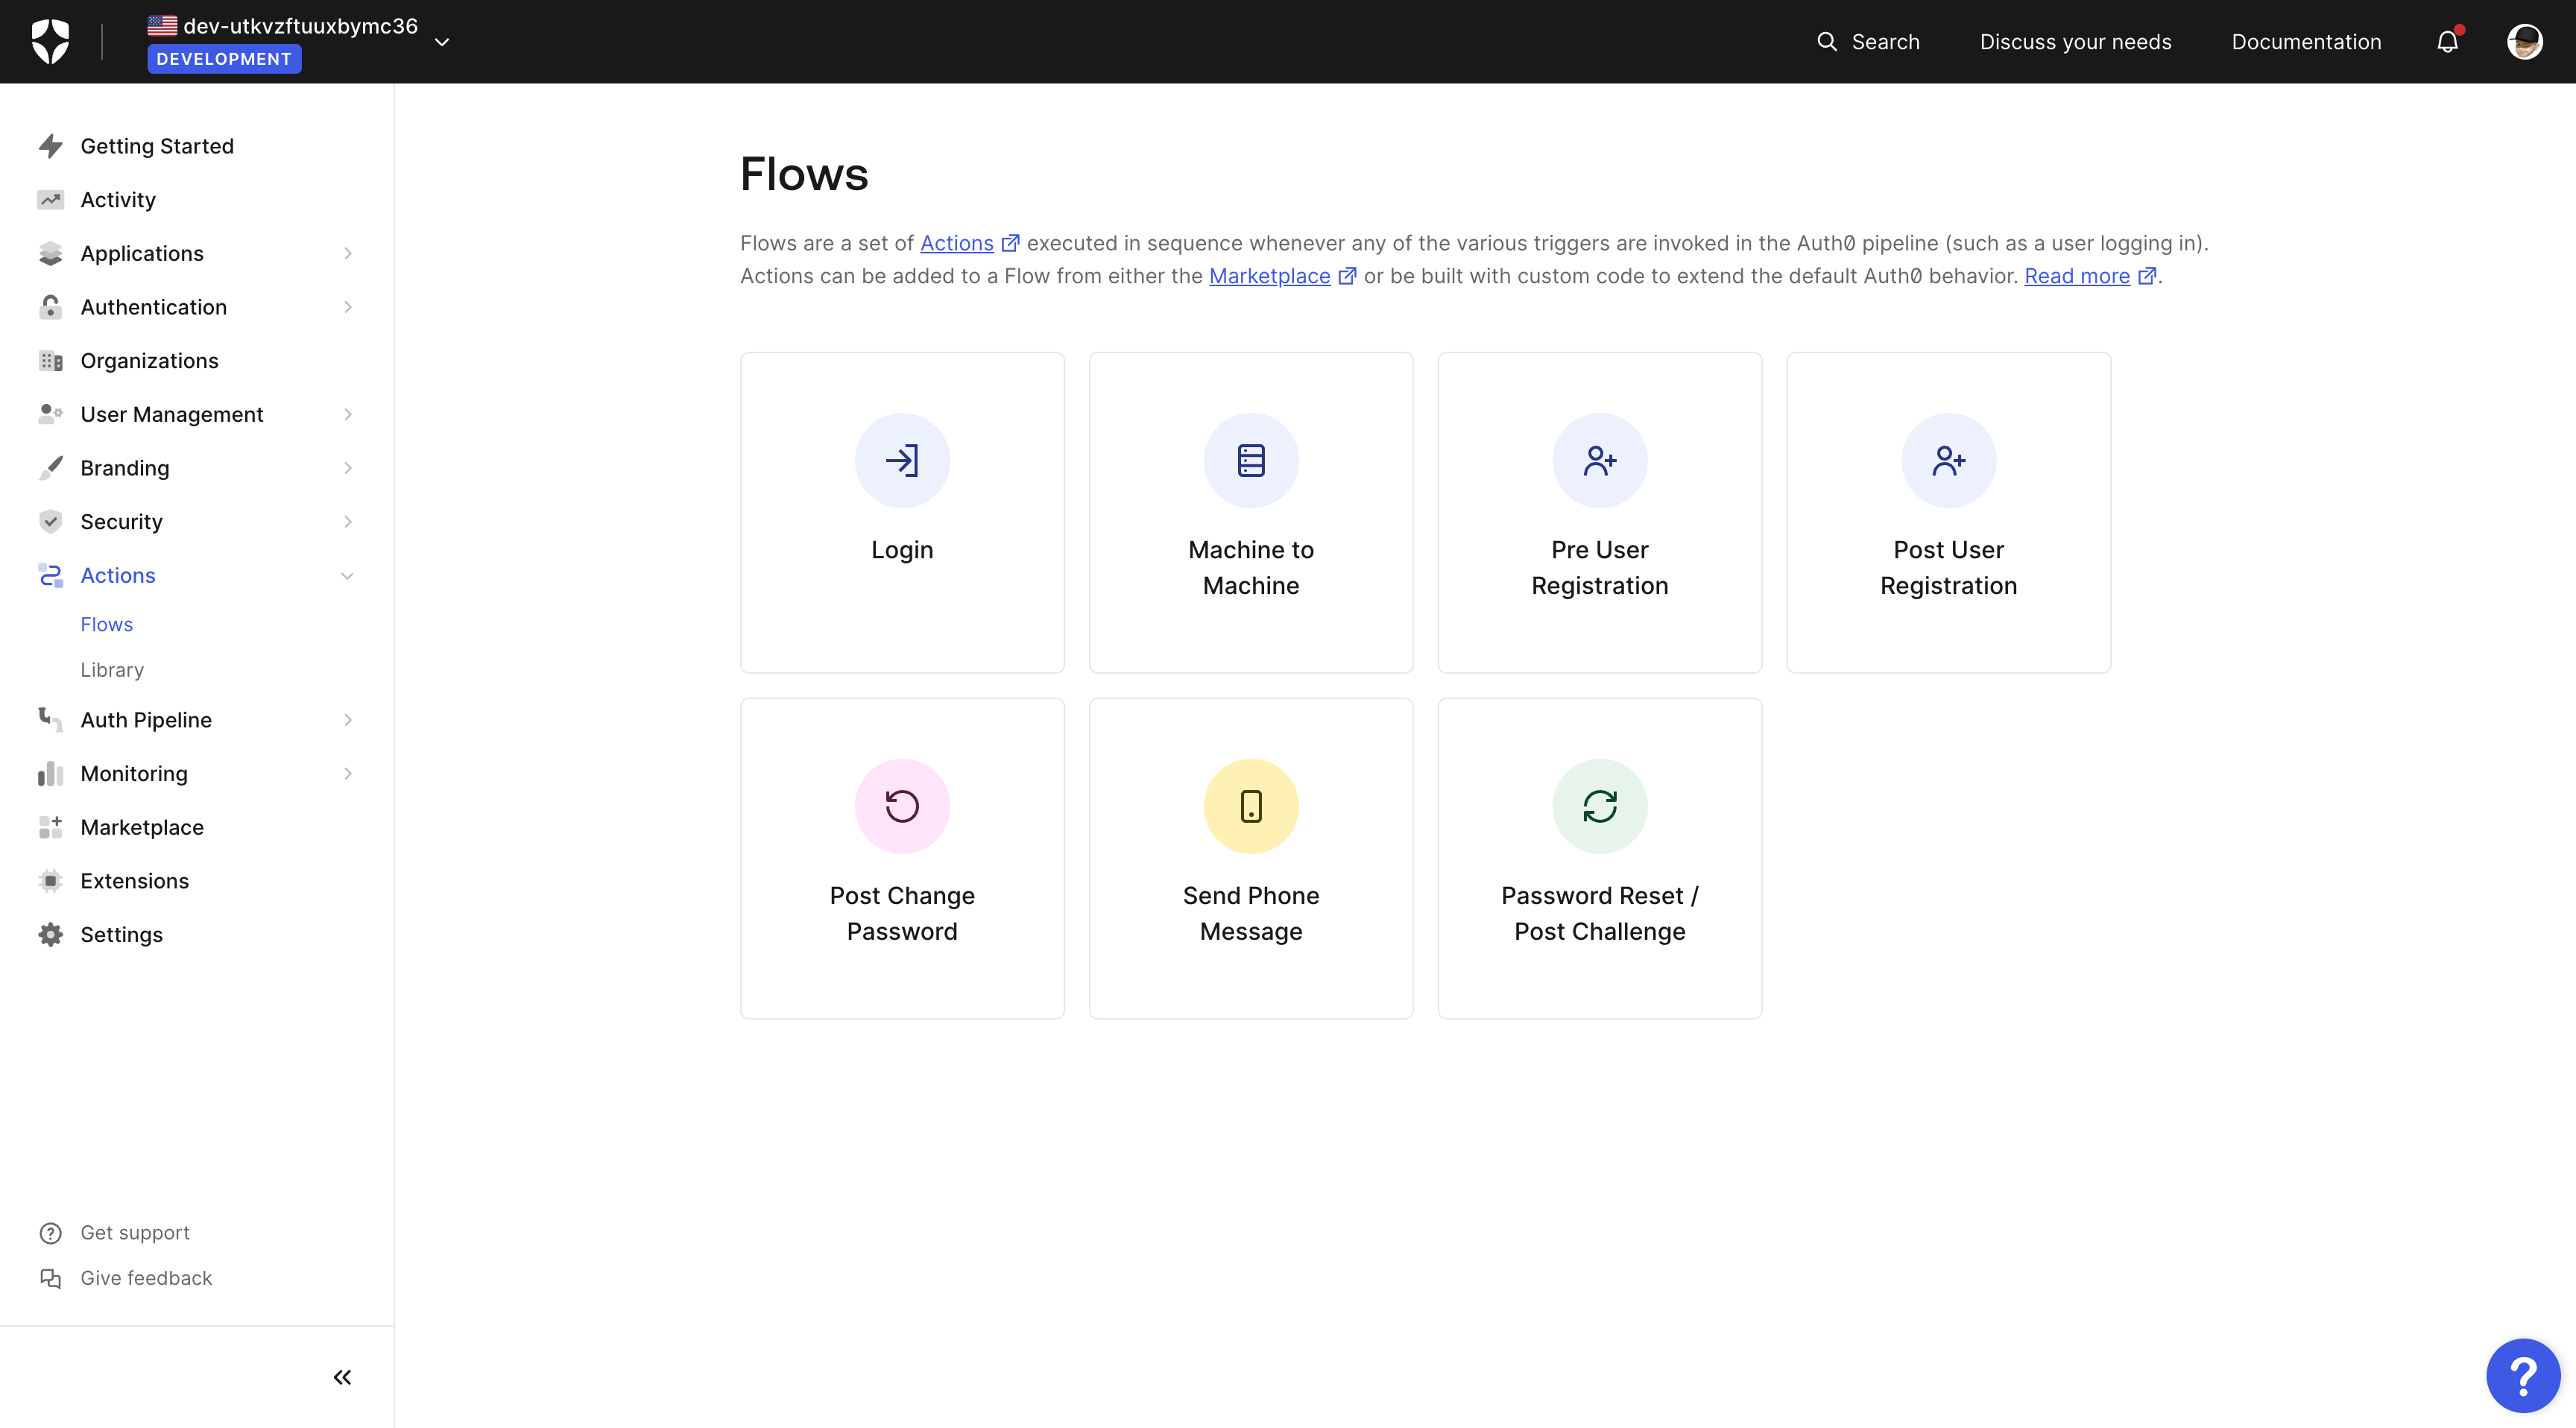
Custom JWT Claims
The custom JWT claims are needed because they tell Hasura about the role of the user making the API call. This way, we can enforce the appropriate authorization permissions on Hasura which define what user is allowed to do.
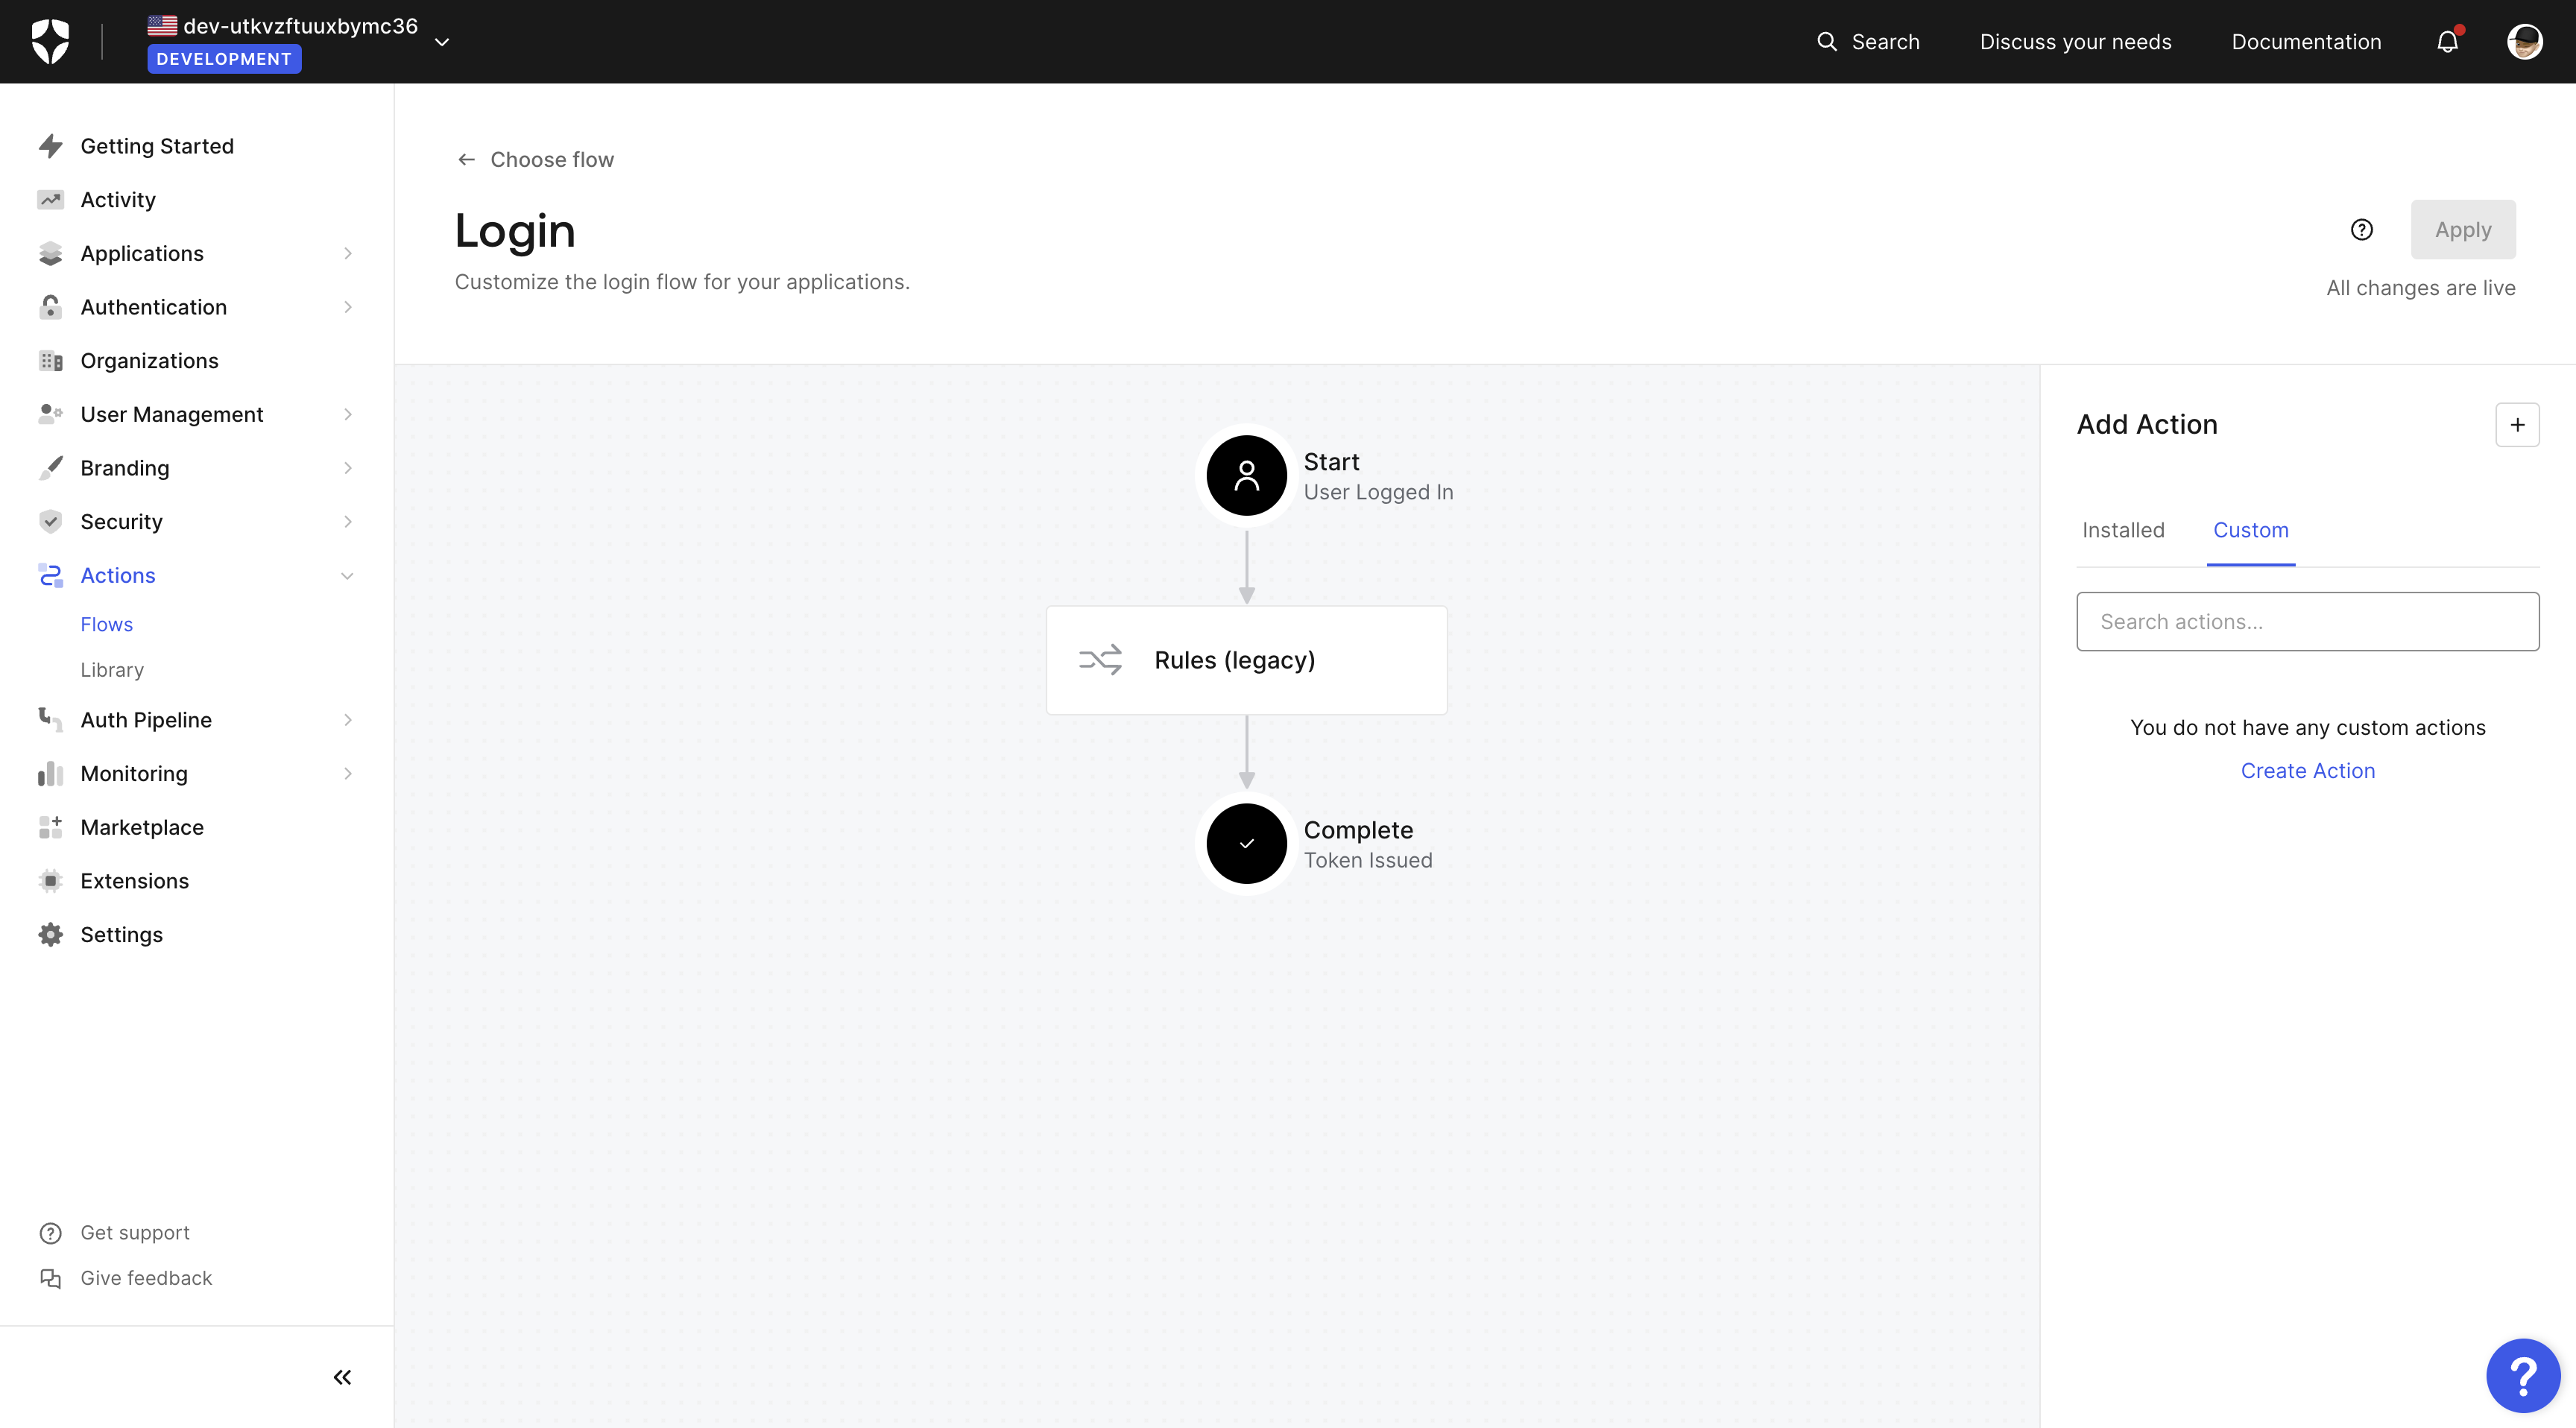
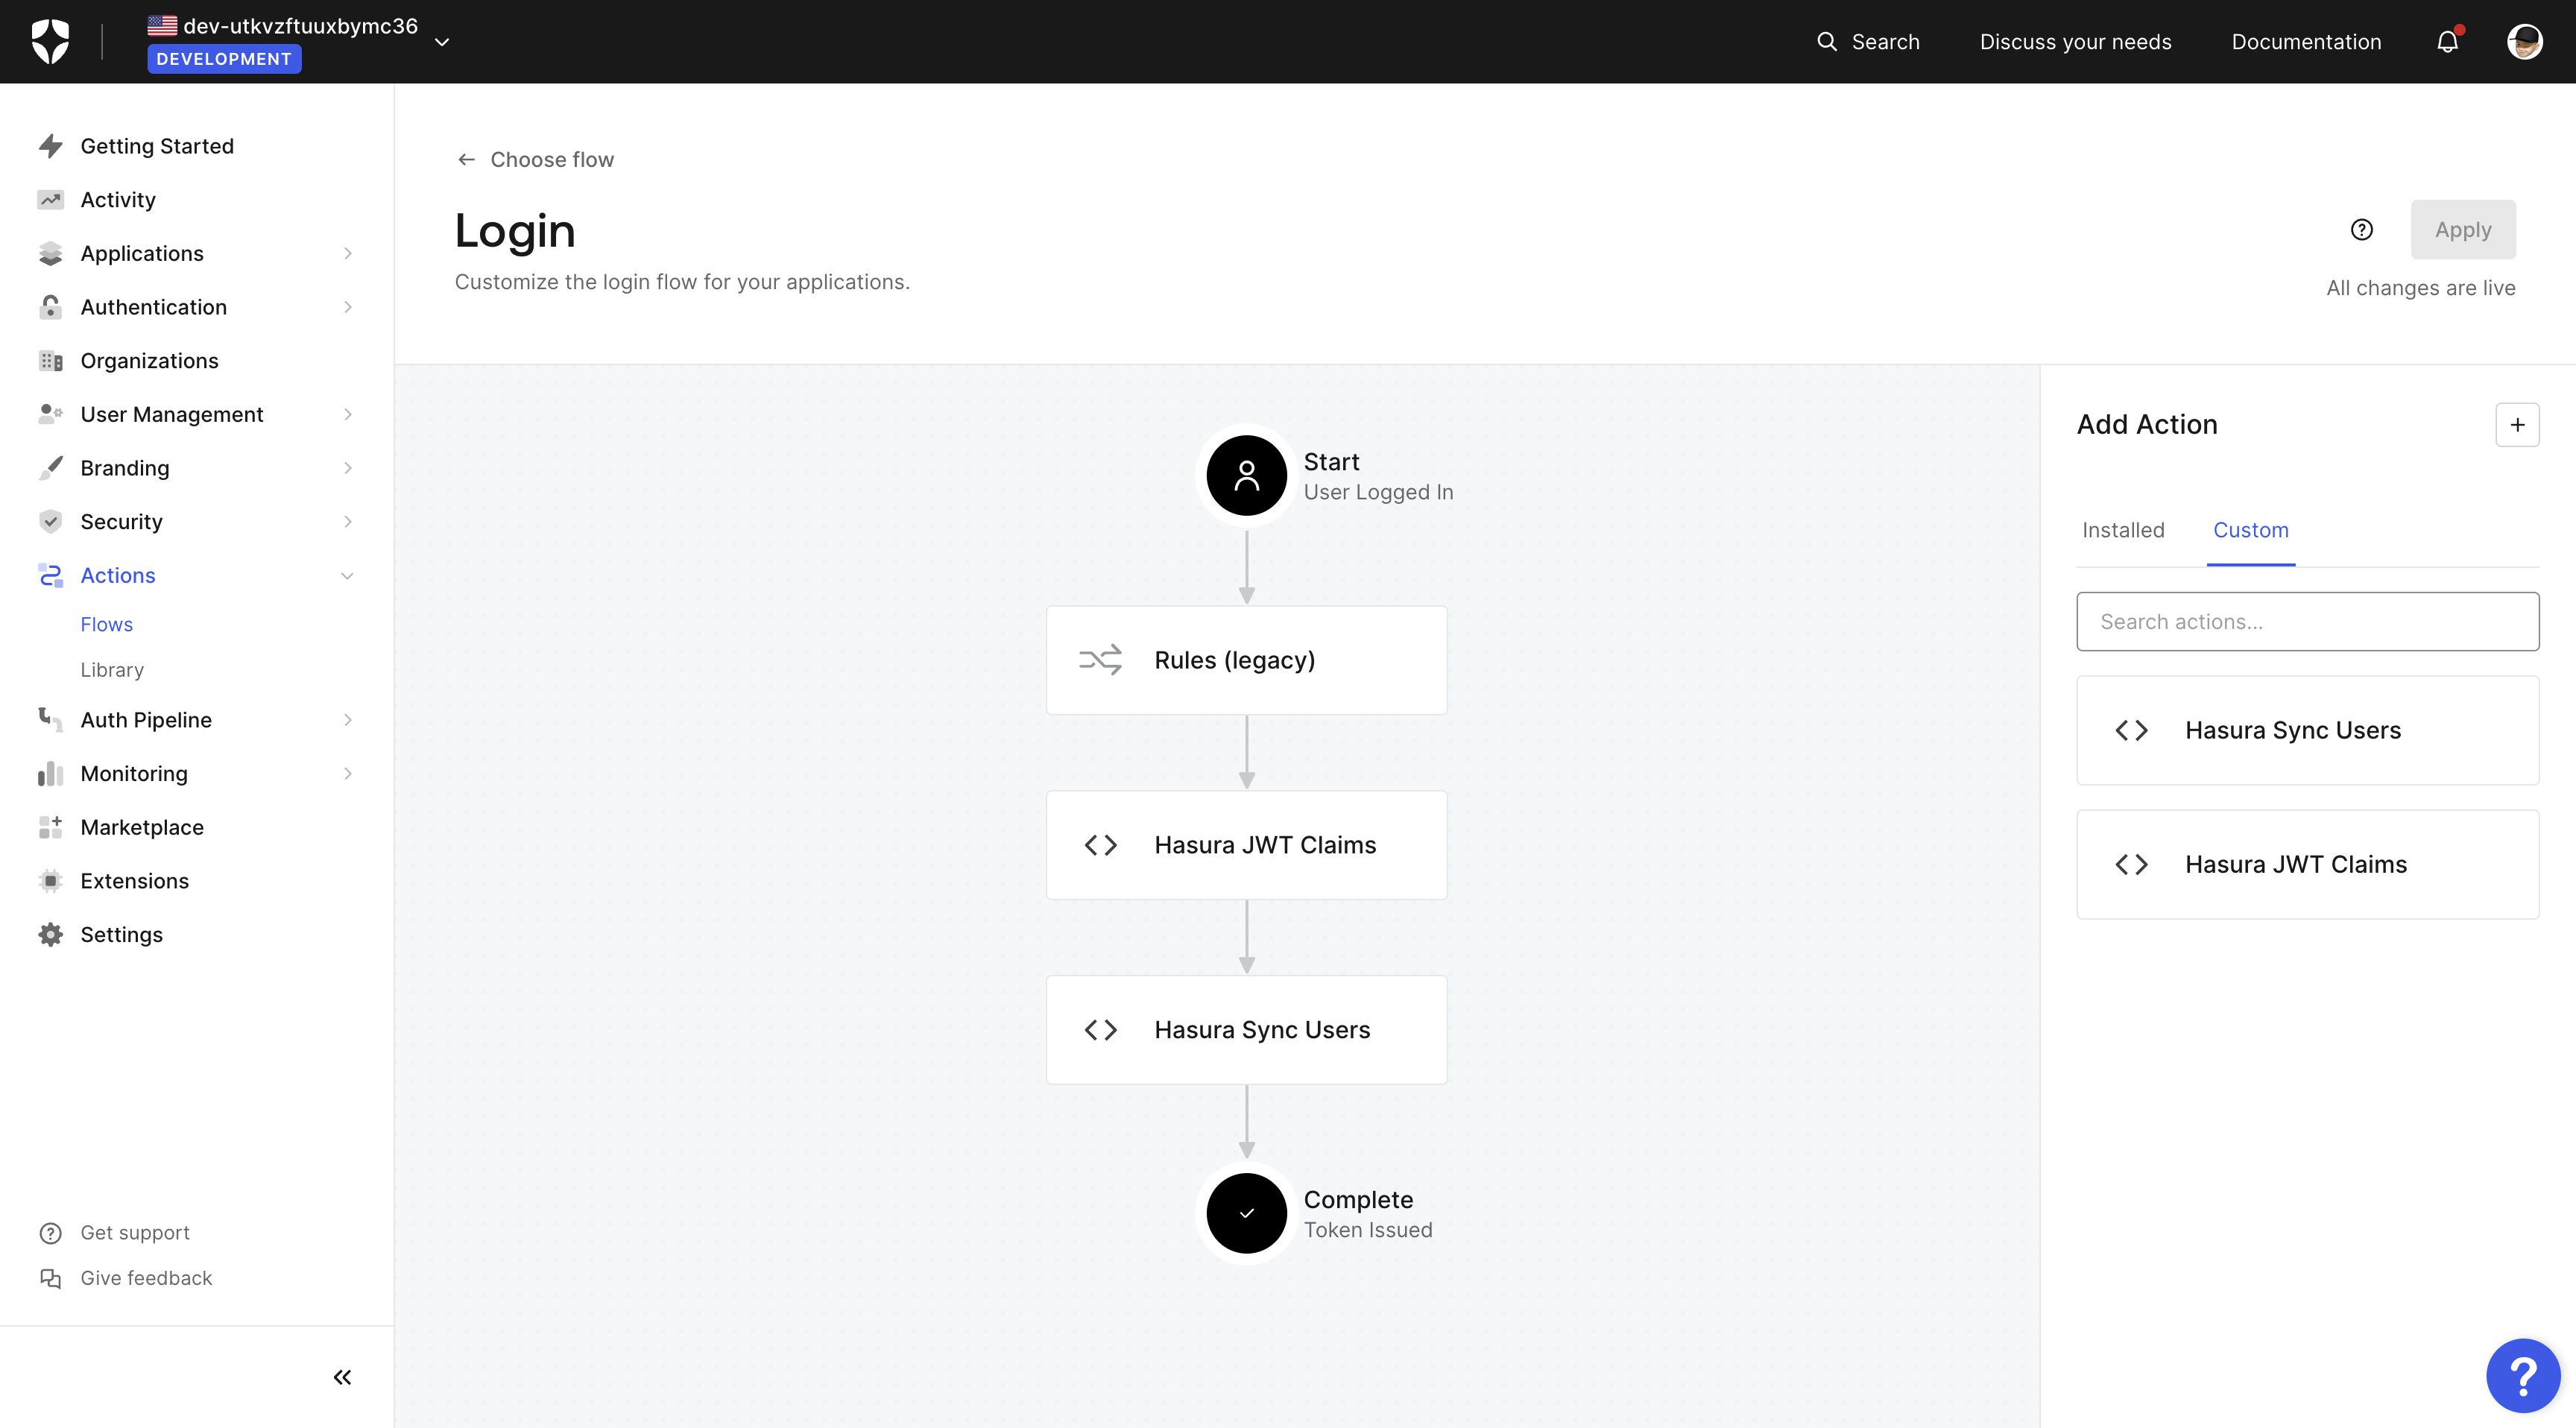
Go to the Actions section and click on Flows, then Login.
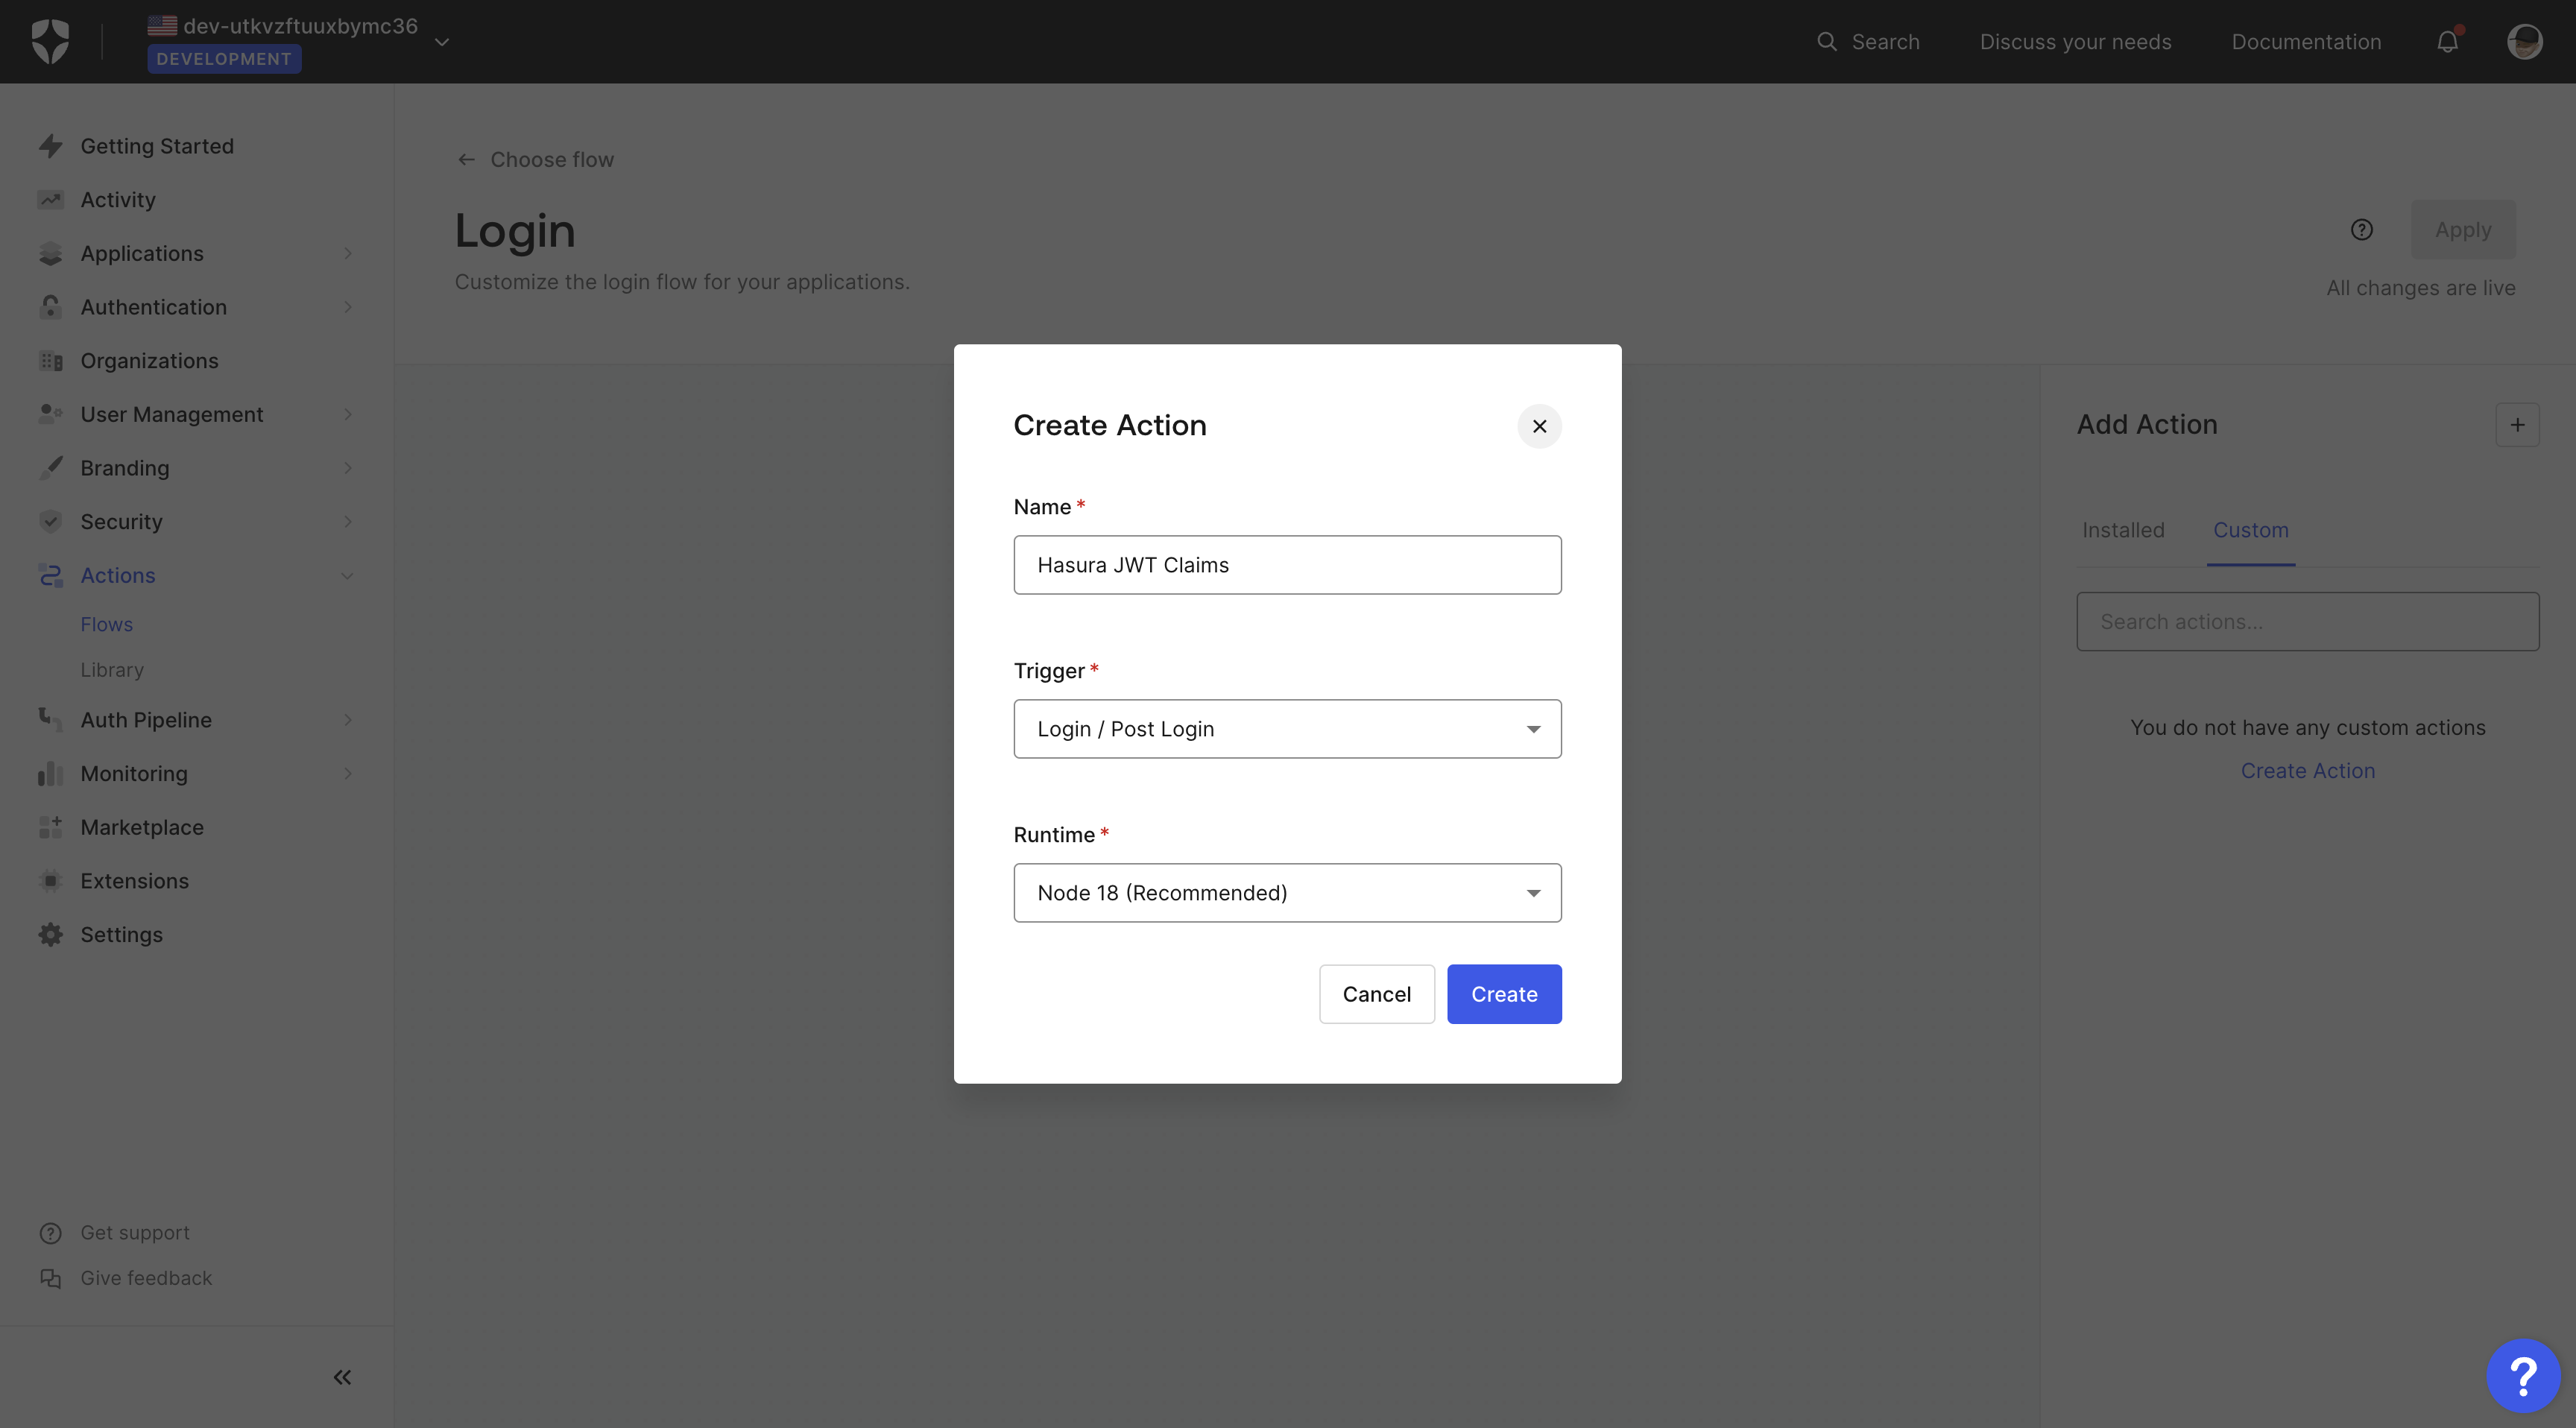
On the Login flow diagram in the right hand Add Action sidebar, go to the Custom tab and click on Create Action.
Choose a name such as Hasura JWT Claims for your action, the trigger as Login / Post Login in Node.js:
Then add the following script:
Choose a name such as hasura-jwt-claims for your rule, and then add the following script:
exports.onExecutePostLogin = async (event, api) => {if (event.authorization) {// do some custom logic to decide allowed rolesconst roles = ['user']api.accessToken.setCustomClaim('https://hasura.io/jwt/claims', {'x-hasura-default-role': 'user',// do some custom logic to decide allowed roles'x-hasura-allowed-roles': roles,'x-hasura-user-id': event.user.user_id});}}
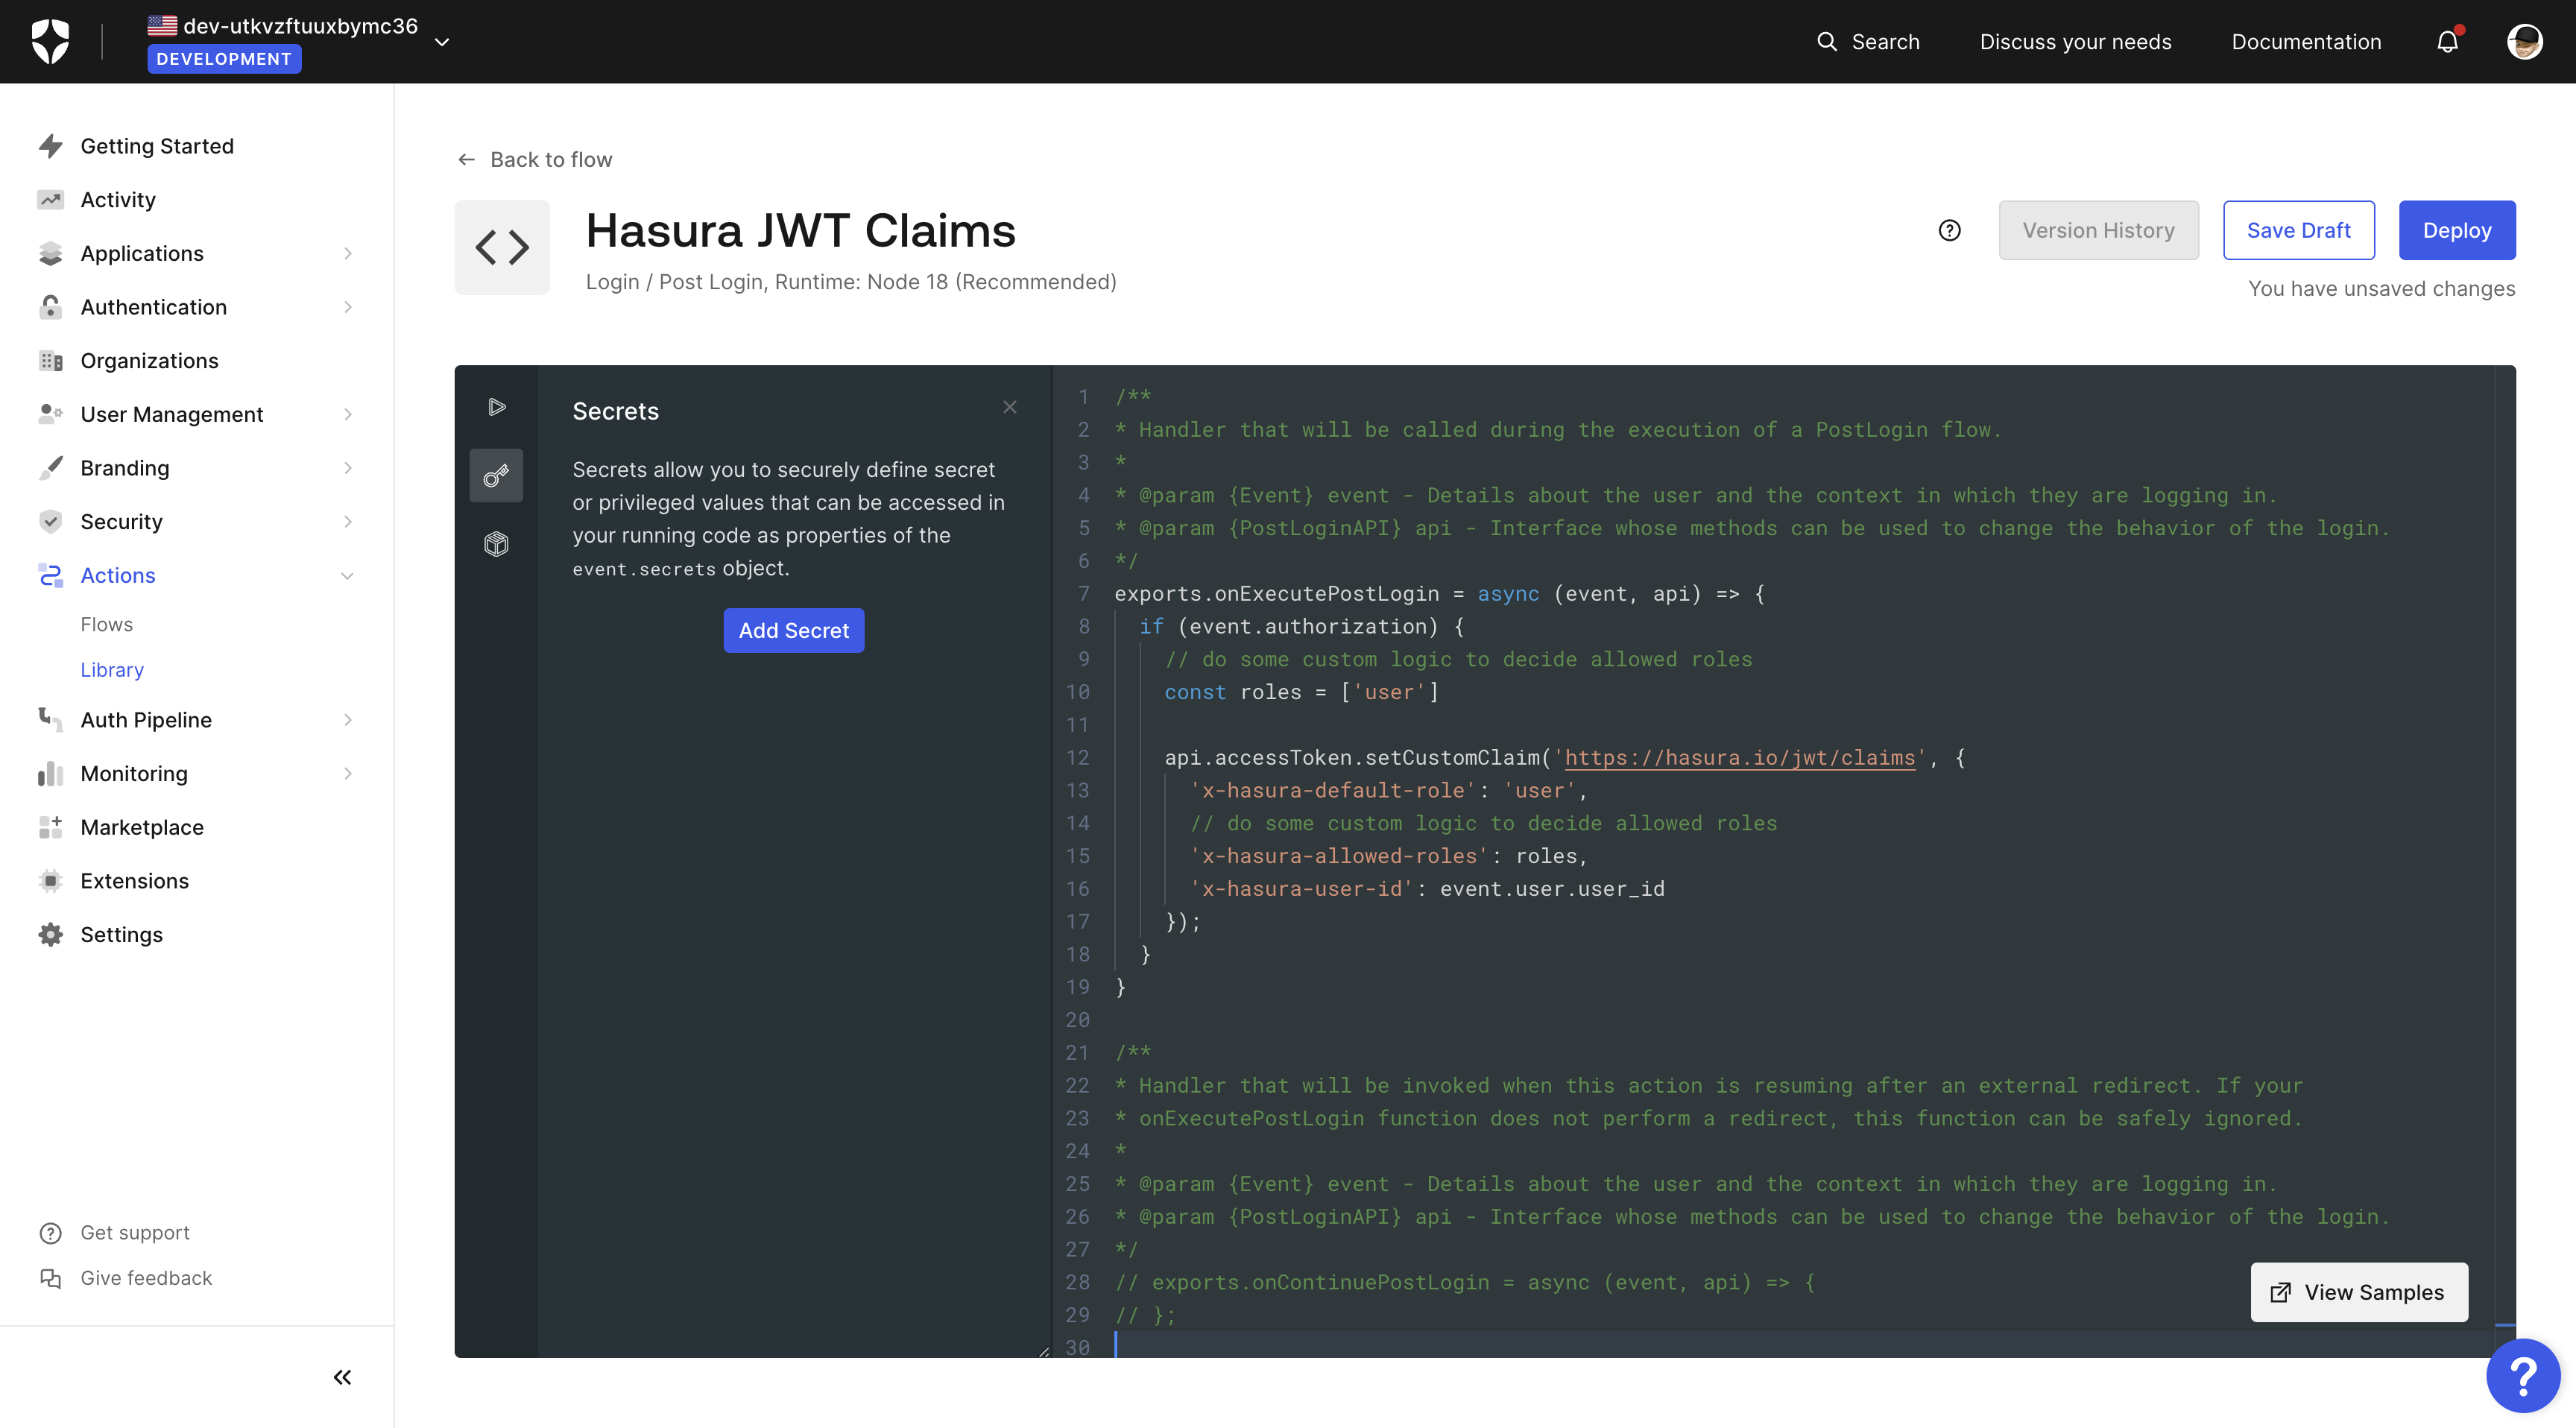
Save the new action by clicking the Deploy button.
The action is now available in your actions library and can be added to the login flow so that every time a user logs in, this code will run and set these custom claims in your JWT. We will add it later after we write another action to synchronize users on Auth0 with users in our database.
Sync Users Between Auth0 and Hasura
You need to ensure that the users from your database are in sync with Auth0. As a result, you will create another action to keep the two in sync.
Create a new action as before and add the following script:
const fetch = require('node-fetch')/*** Handler that will be called during the execution of a PostLogin flow.** @param {Event} event - Details about the user and the context in which they are logging in.* @param {PostLoginAPI} api - Interface whose methods can be used to change the behavior of the login.*/exports.onExecutePostLogin = async (event, api) => {const userId = event.user.user_id;const userName = event.user.username ?? null;const admin_secret = "YOUR_HASURA_GRAPHQL_ADMIN_SECRET";const url = "https://your-hasura-url.hasura.app/v1/graphql";const query = `mutation Auth0SyncUsersAction($userId: String!, $userName: String) {insert_users_one(object: {userId: $userId, userName: $userName}, on_conflict: {constraint: users_pkey, update_columns: userName}) {userIduserName}}`;const variables = { userId, userName };const res = await fetch(url,{method: 'POST',body: JSON.stringify({query: query,variables: variables}),headers: {'content-type' : 'application/json','x-hasura-admin-secret': admin_secret}});console.log("Response", await res.json())return res};
You'll notice that we are also using the node-fetch library to make a request to our Hasura GraphQL API. You can add
this library to your action by clicking on the + Add Dependency button in the Dependencies tab of your action.
Make sure to select version 2.
Before saving the changes, do not forget to replace the admin_secret and url with your values.
The image illustrates the process of adding the action.
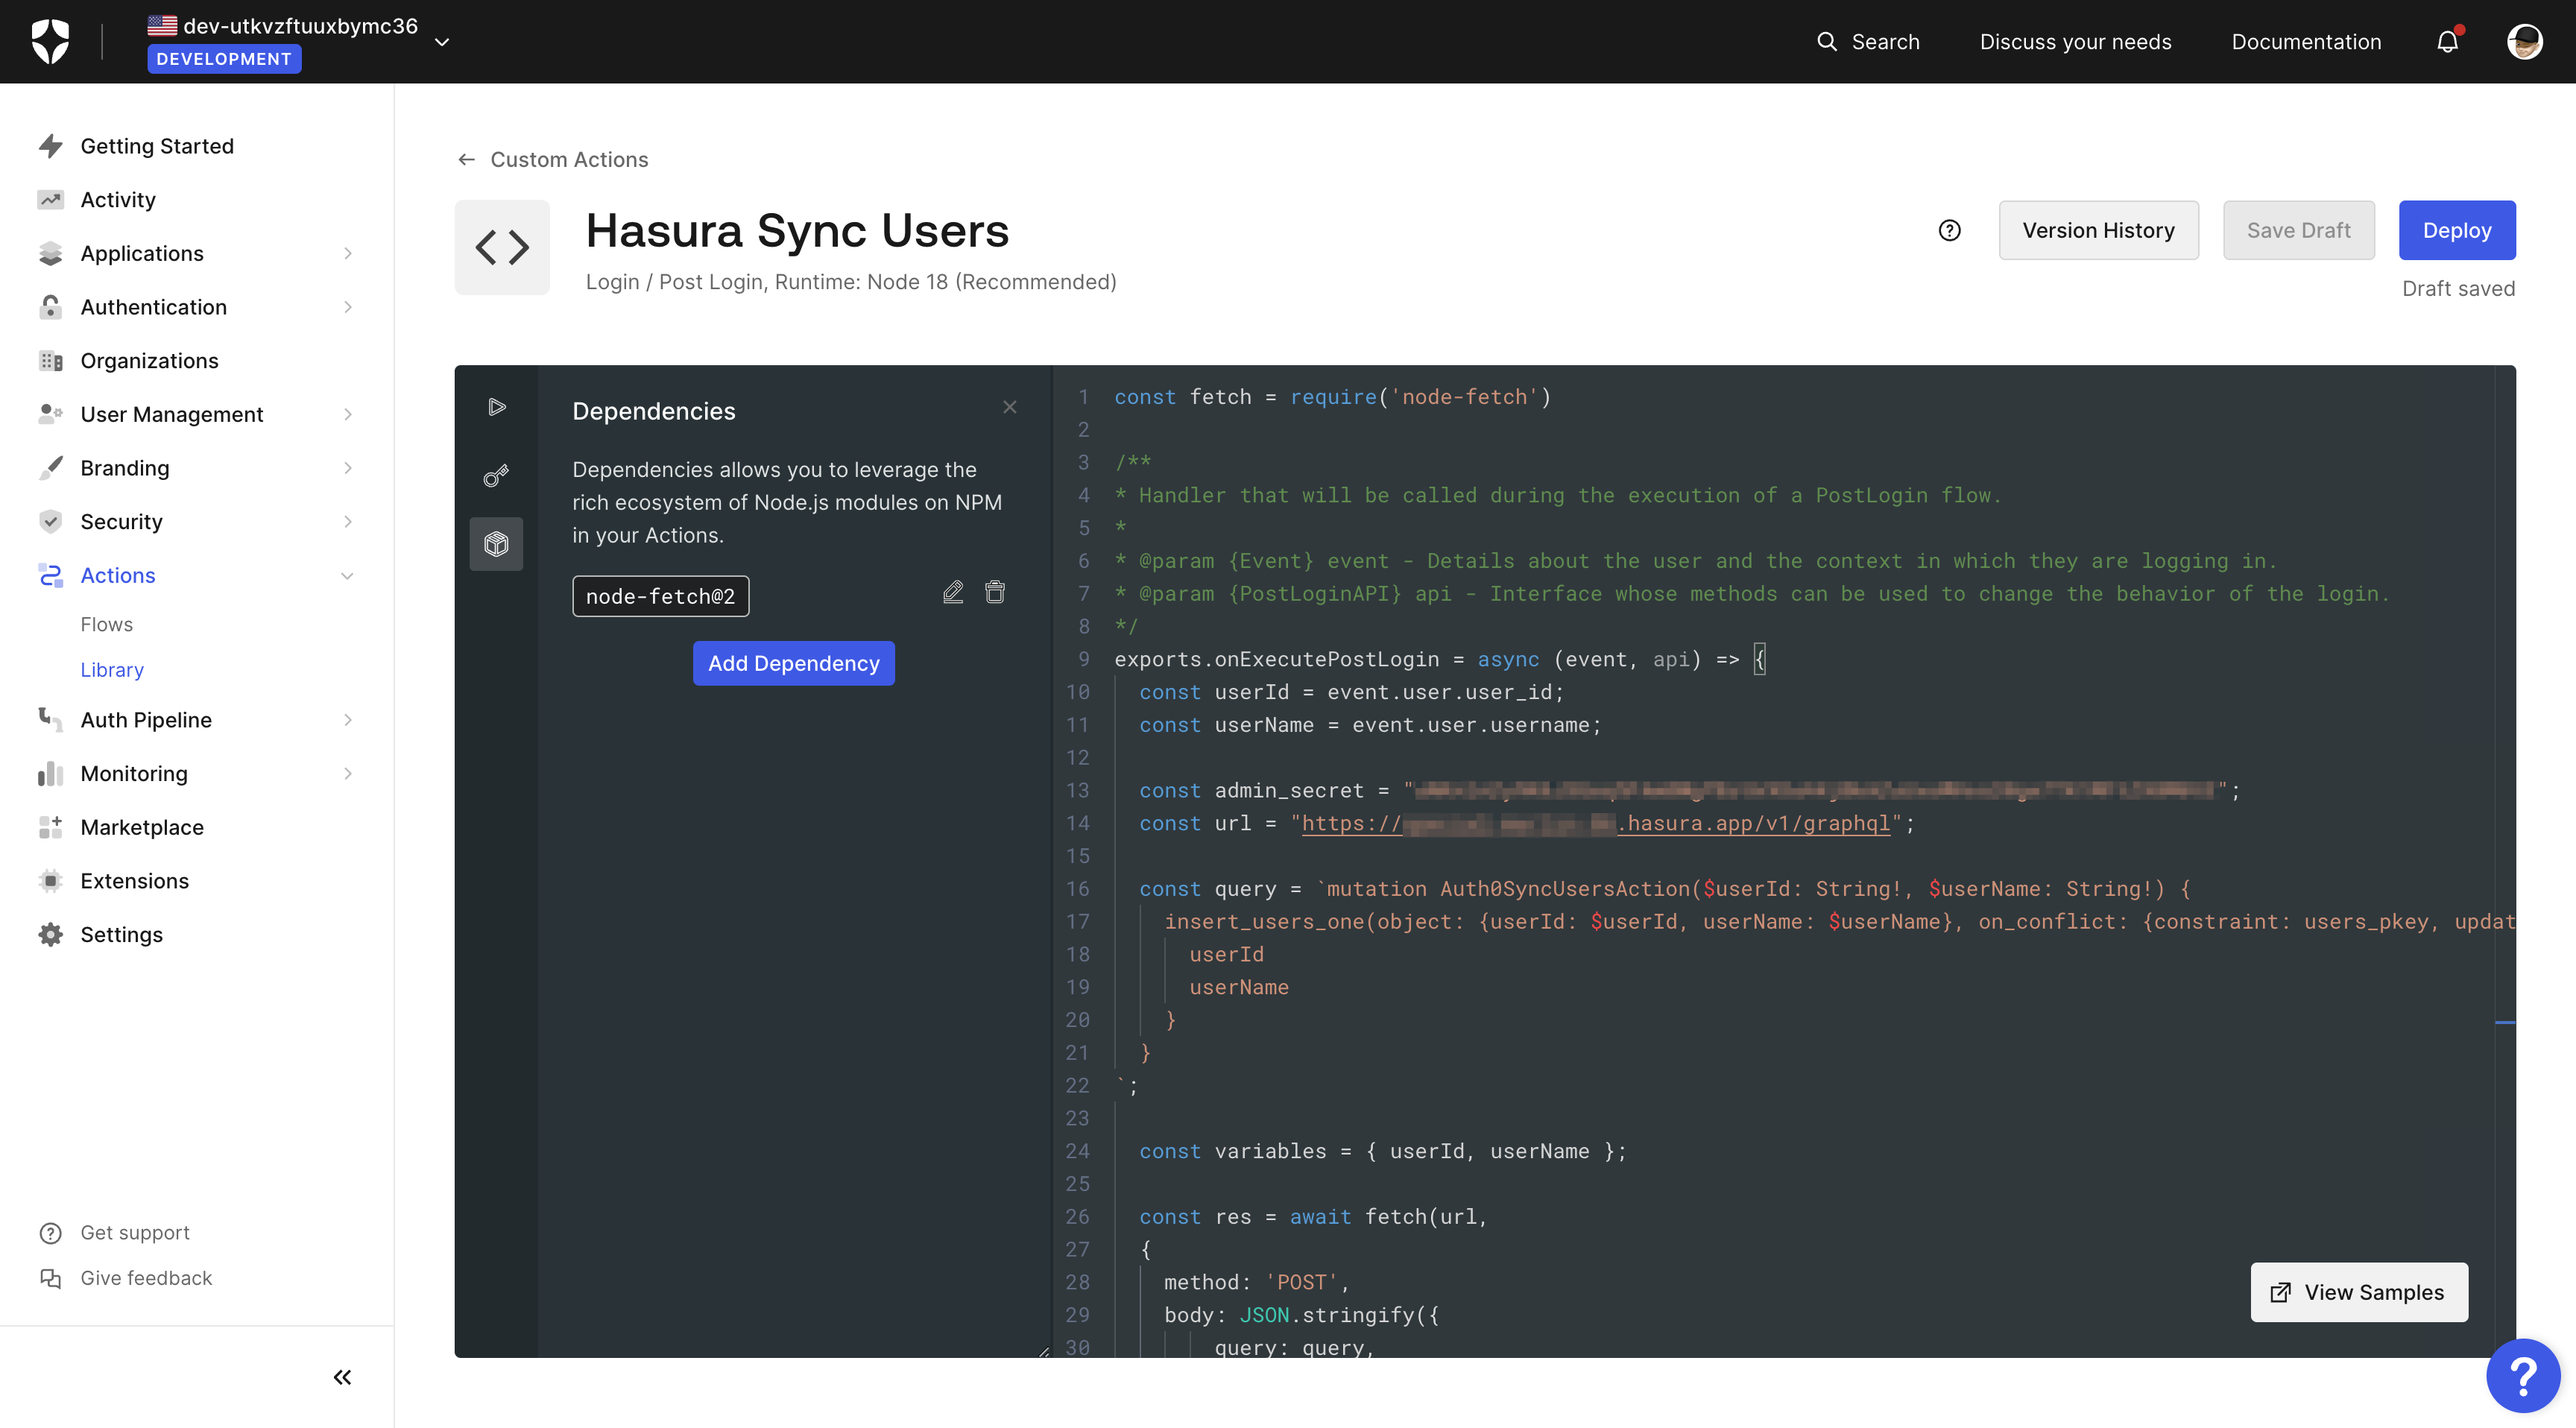
Now click Deploy to save the action and navigate back to the flows > login page to add these actions to your
login flow.
Connect Hasura with Auth0
It's time to integrate the newly created Auth0 application with Hasura.
It's essential to secure your endpoint with an
admin secretbefore going further. Check this guide to learn how to do it.
After adding the admin secret, you need to configure the public keys for Auth0. One way to generate the JWT config is
to use the Hasura JWT configurator.
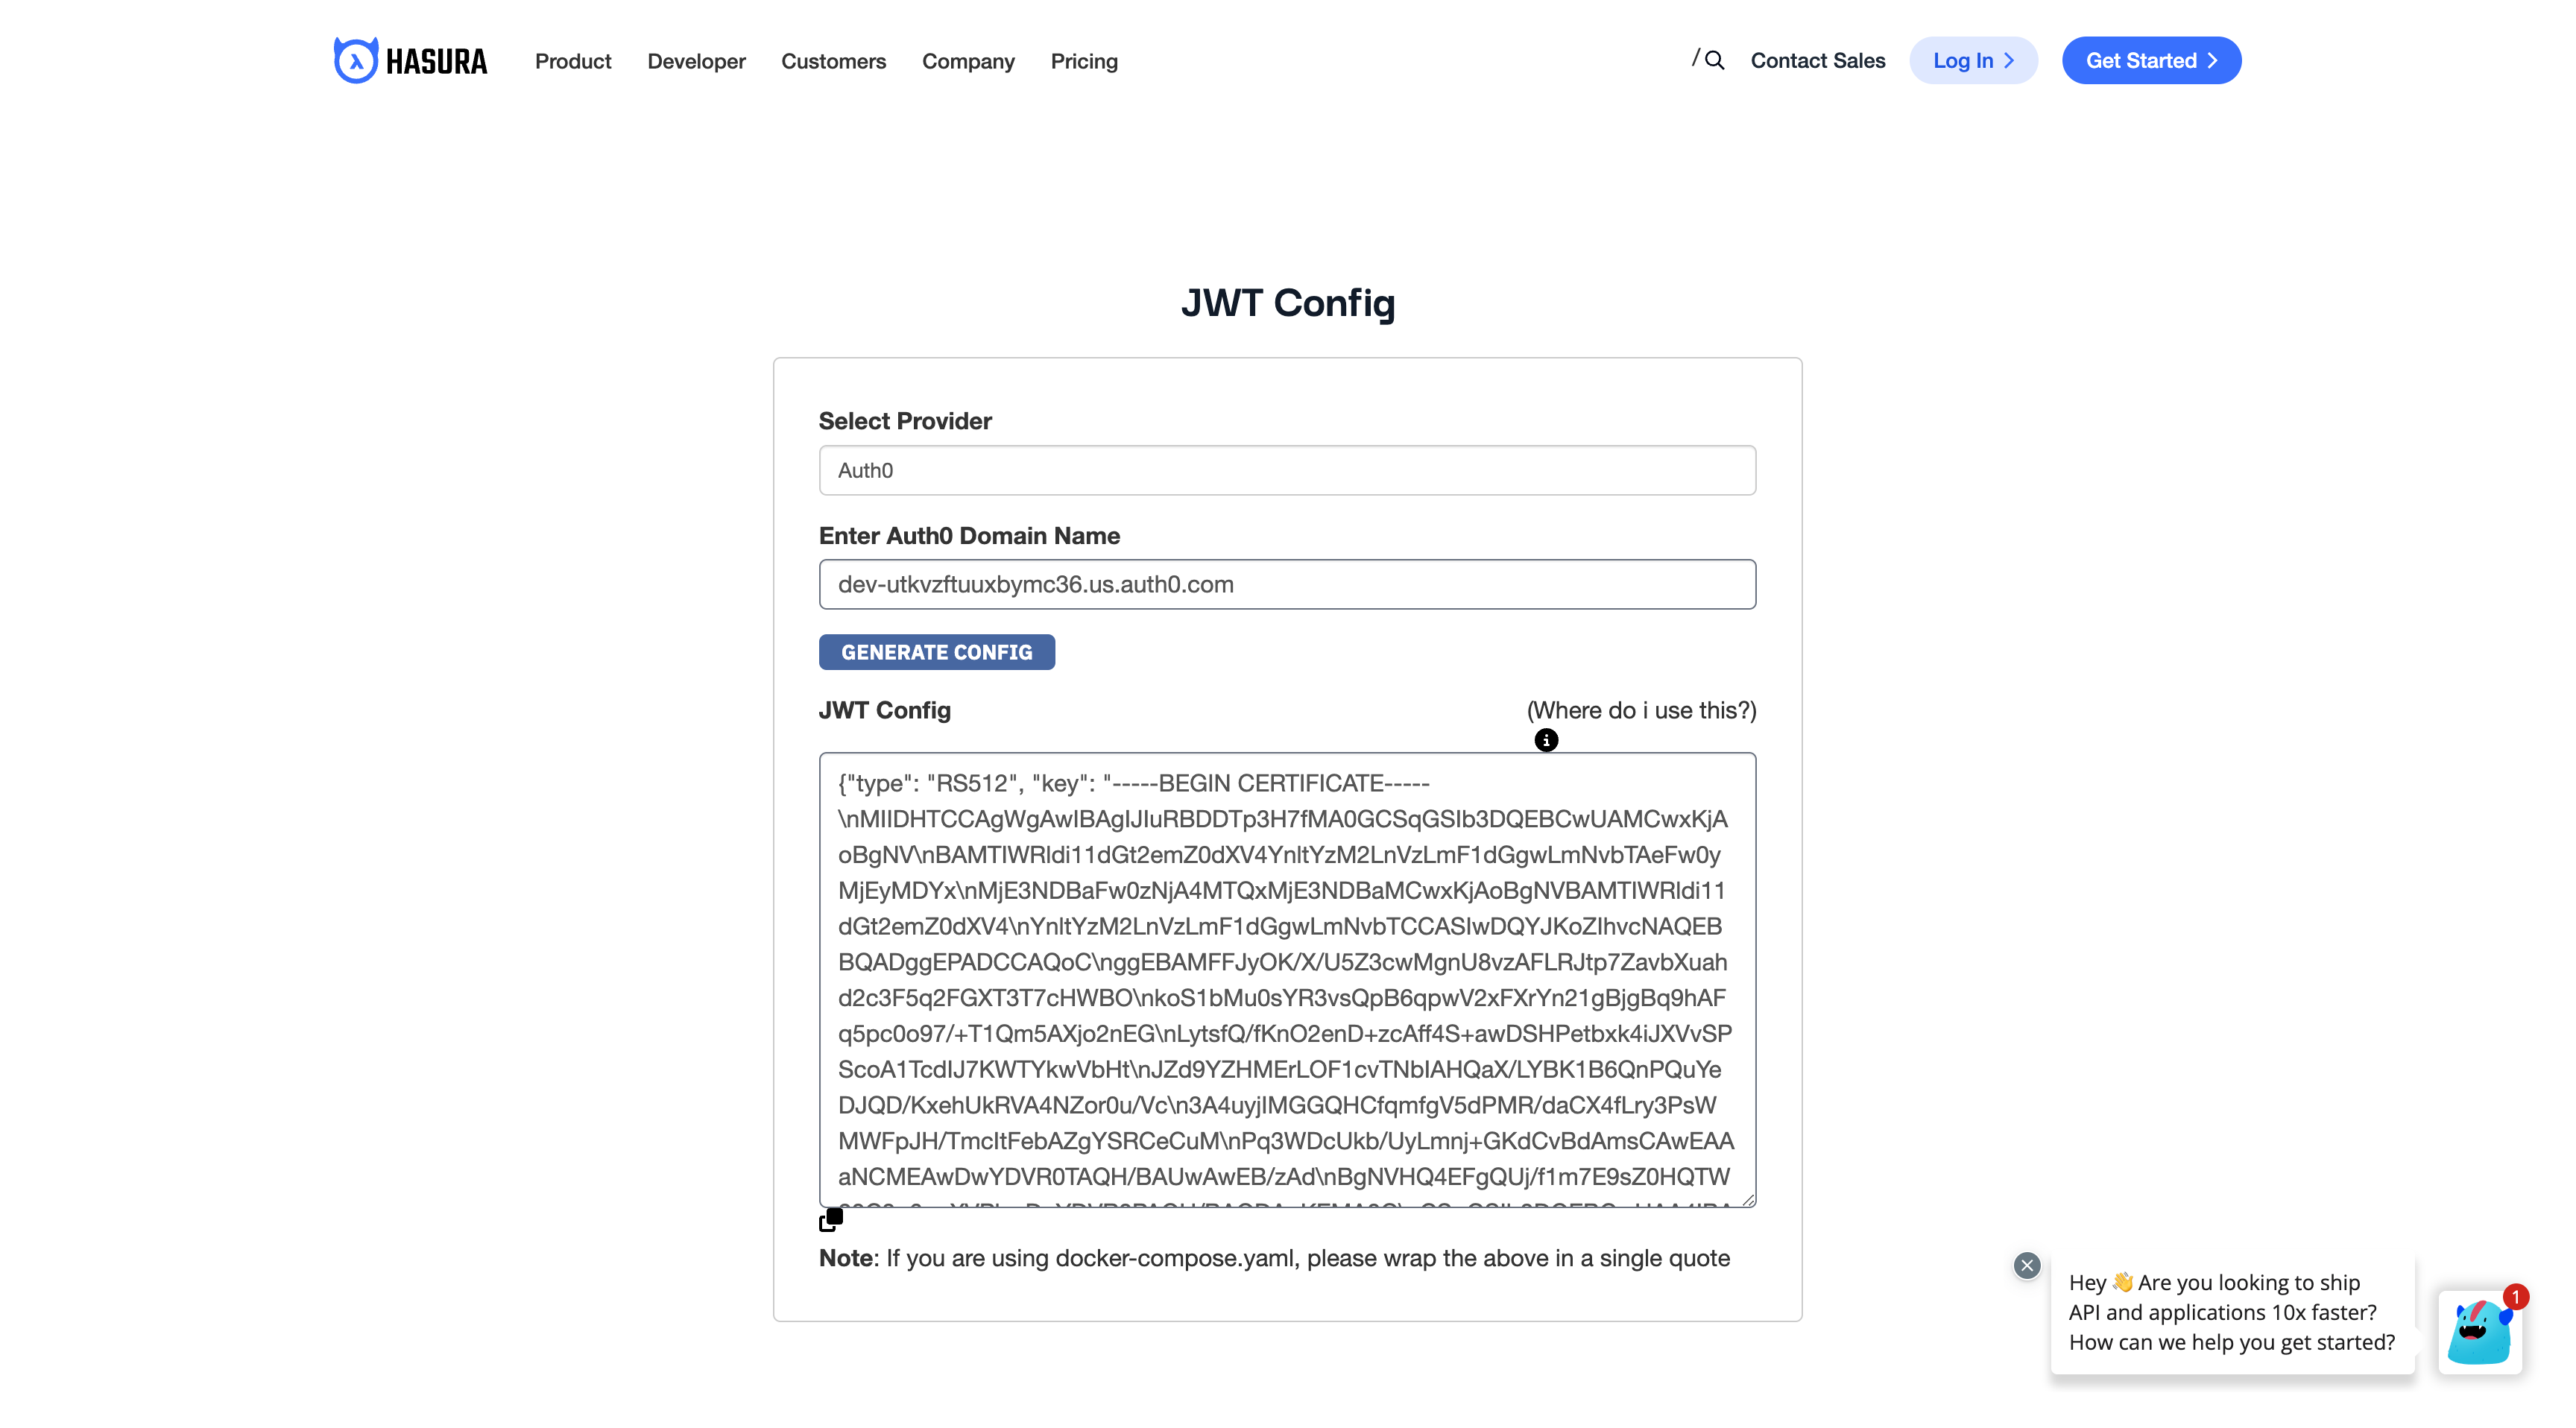
Choose the provider (Auth0) and then enter your "Auth0 Domain Name" which you can find in your Auth0 application. After that, press the button "Generate Config" to get your JWT Config.
You will set the value as an environment variable in your Hasura Project. To do so, go to the Hasura console and then click the "Gear ⚙️" icon.
After that, go to the Env vars section and click the + New Env Var option. See the image for reference.
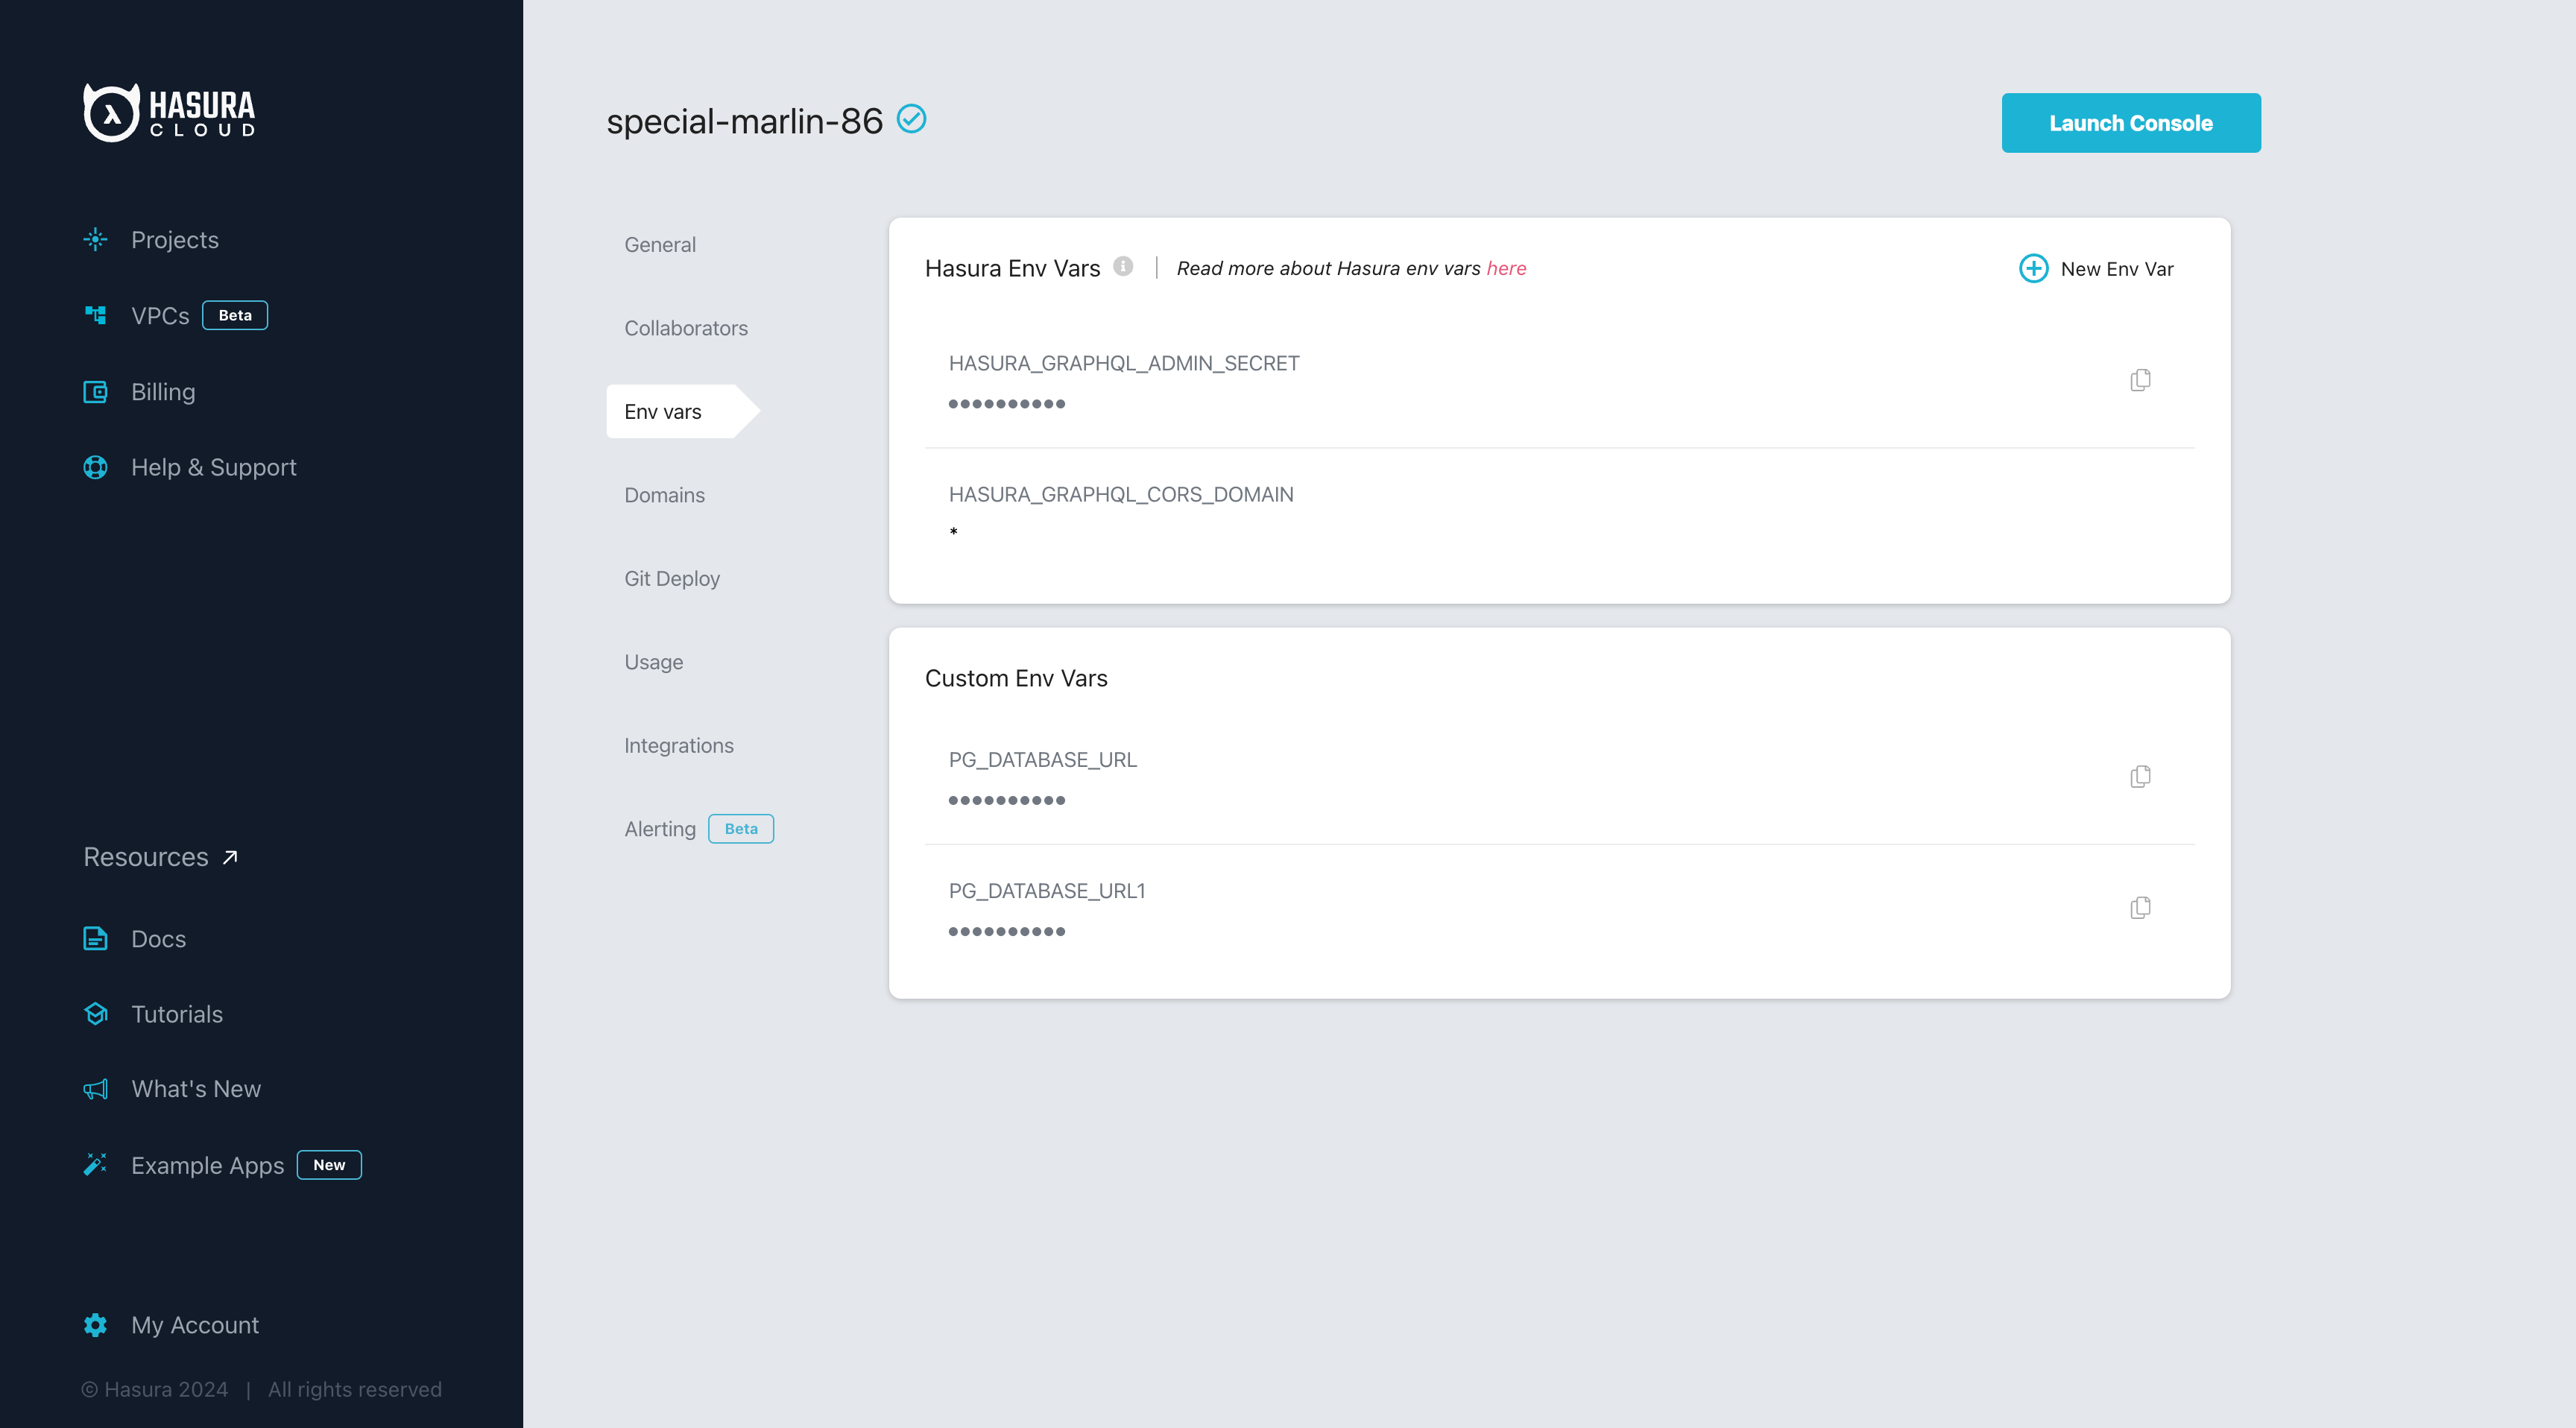
Select HASURA_GRAPHQL_JWT_SECRET for the "Key" and then paste the JWT config generated previously.

Click on Add, and the environment variable will be applied to your project.
Congratulations! Auth0 is successfully integrated with your Hasura instance.
Test Users Syncing Action
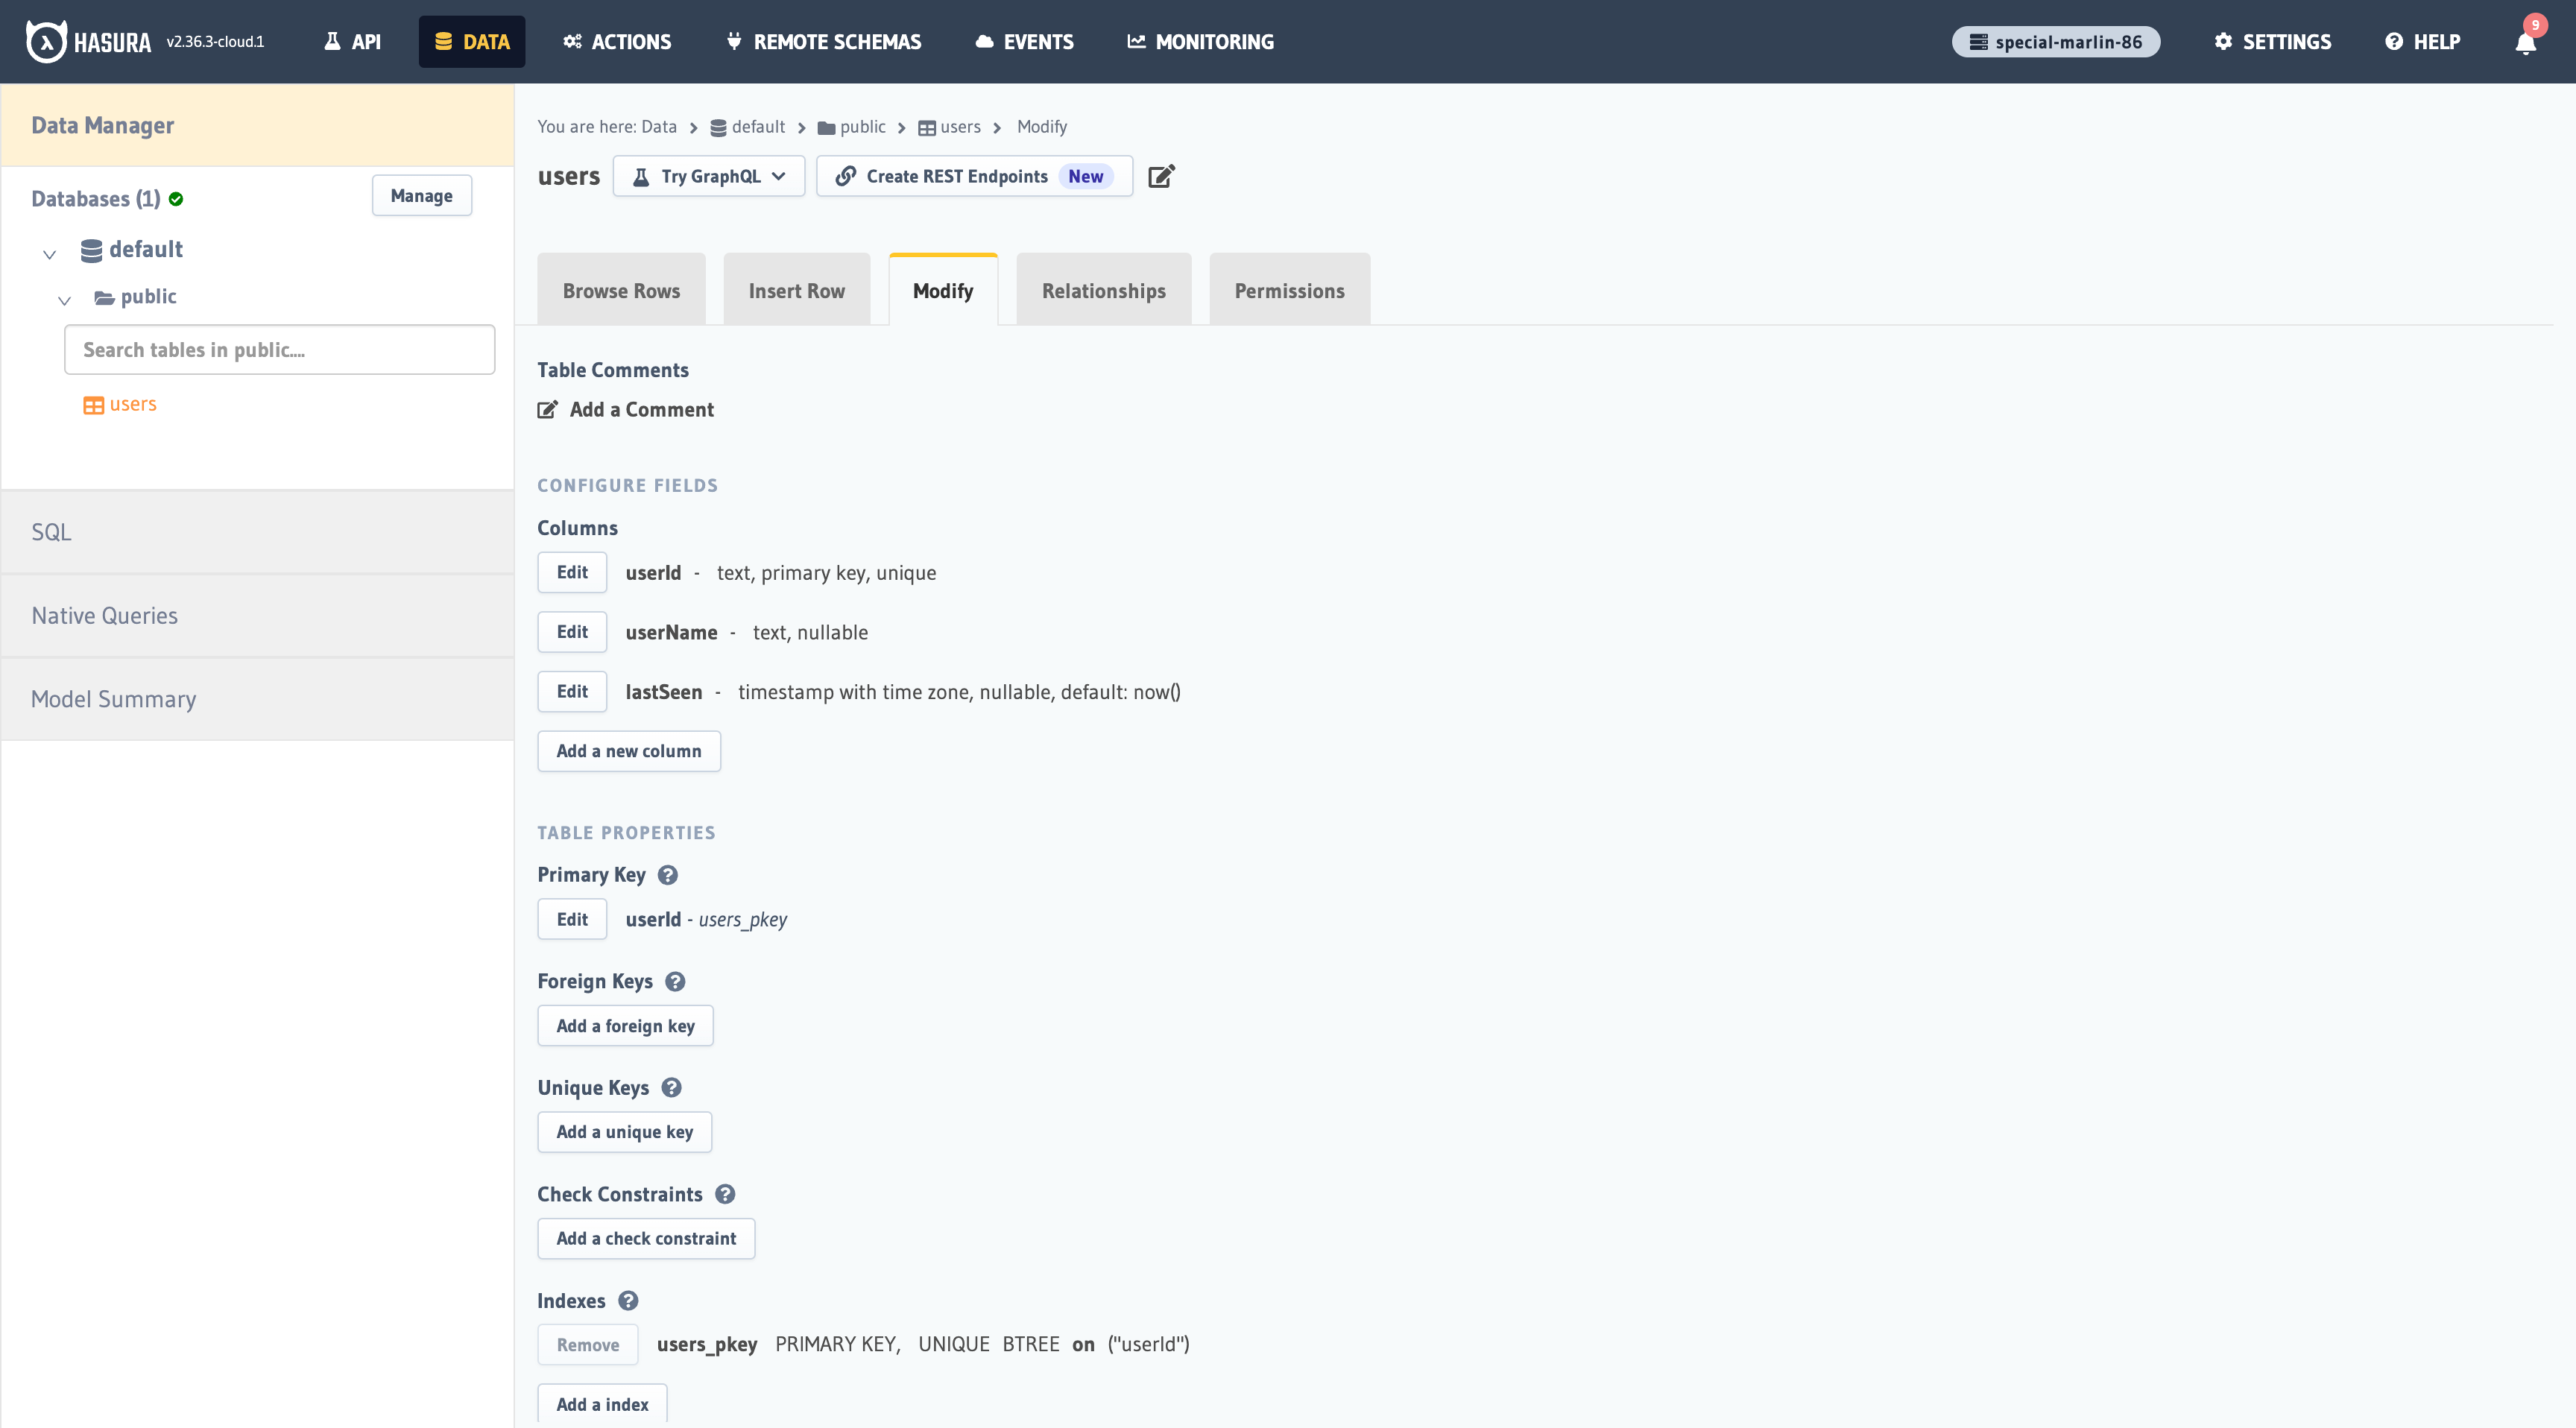
Go to your Hasura console and create a users table with the following columns:
userIdof type Text (Primary key)userNameof type TextlastSeenof type Timestamp with default valuenow()
See the image below for reference.
The next step is to create a user role for the app. Users should be only be able to access their own records, but
not other users' records.
Configure the user role as shown in the image below. For more information, read about
configuring permission rules in Hasura.
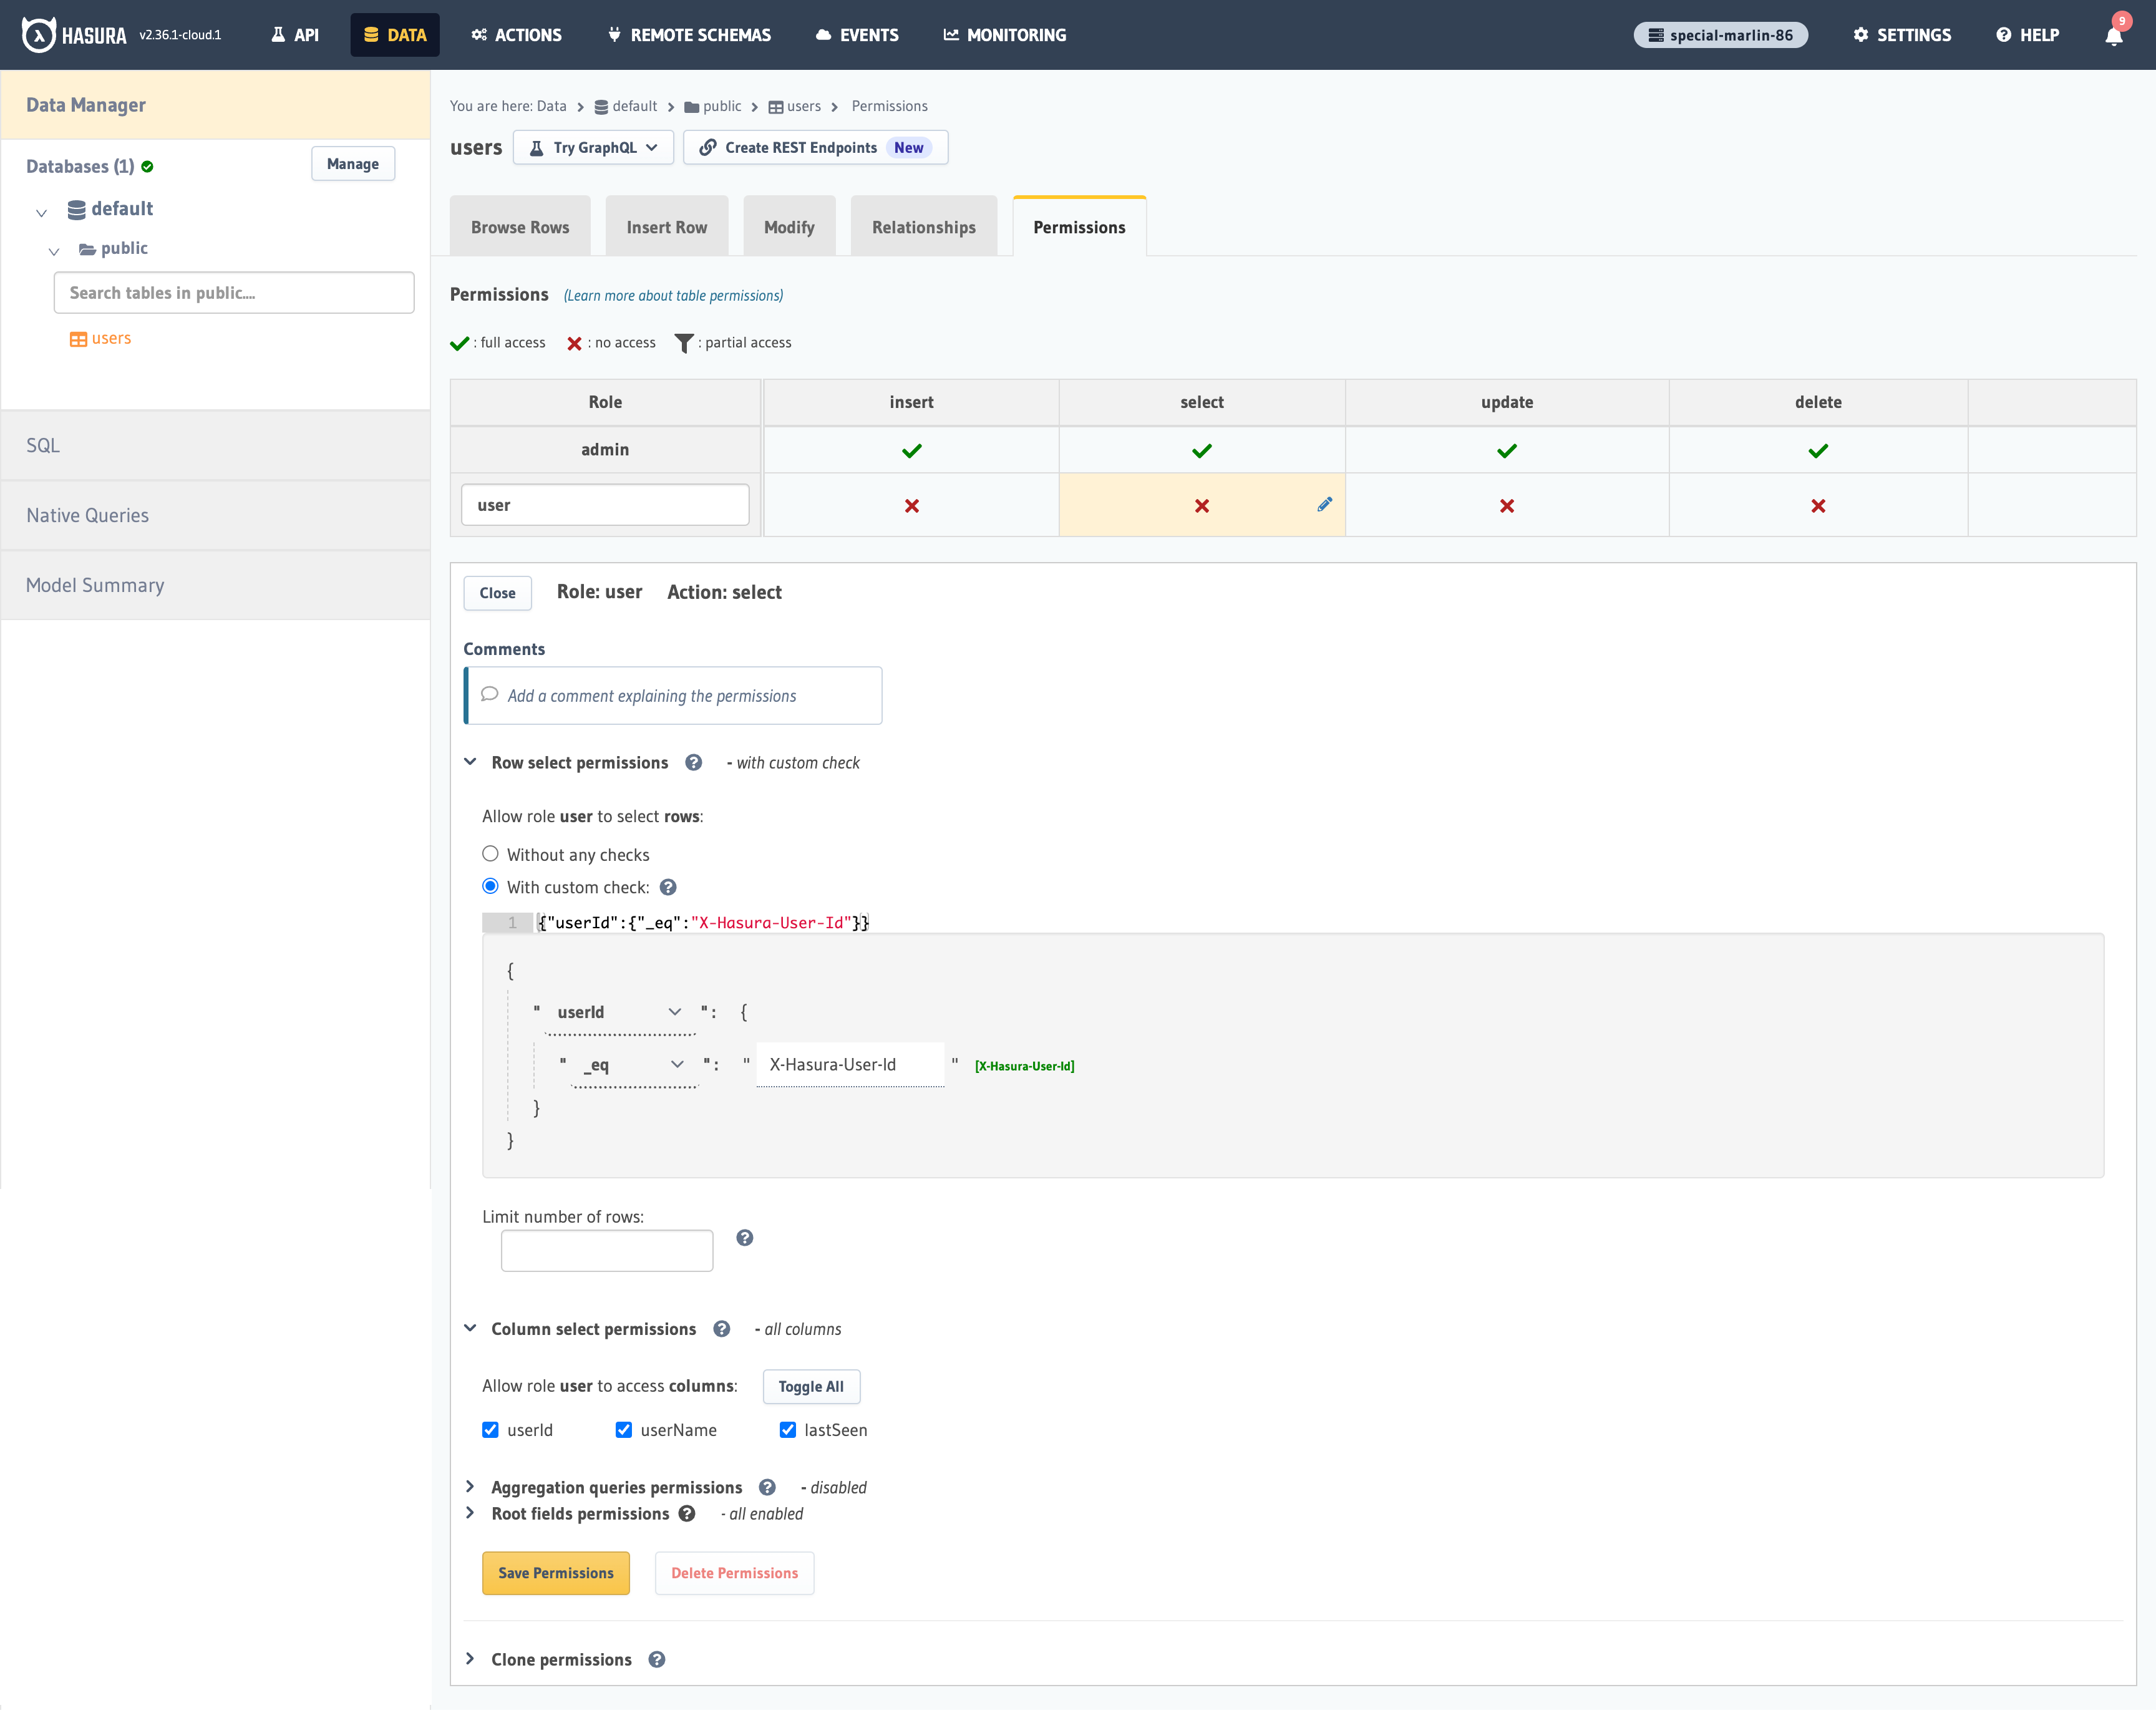
This way, users cannot read other people’s records. They can only access theirs.
Now go back to Auth0 and go to the Actions > Login flow page. Select the Hasura Sync Users or whatever you named
the rule.
Then click on the Test "play" button, and test the action with the default event payload.
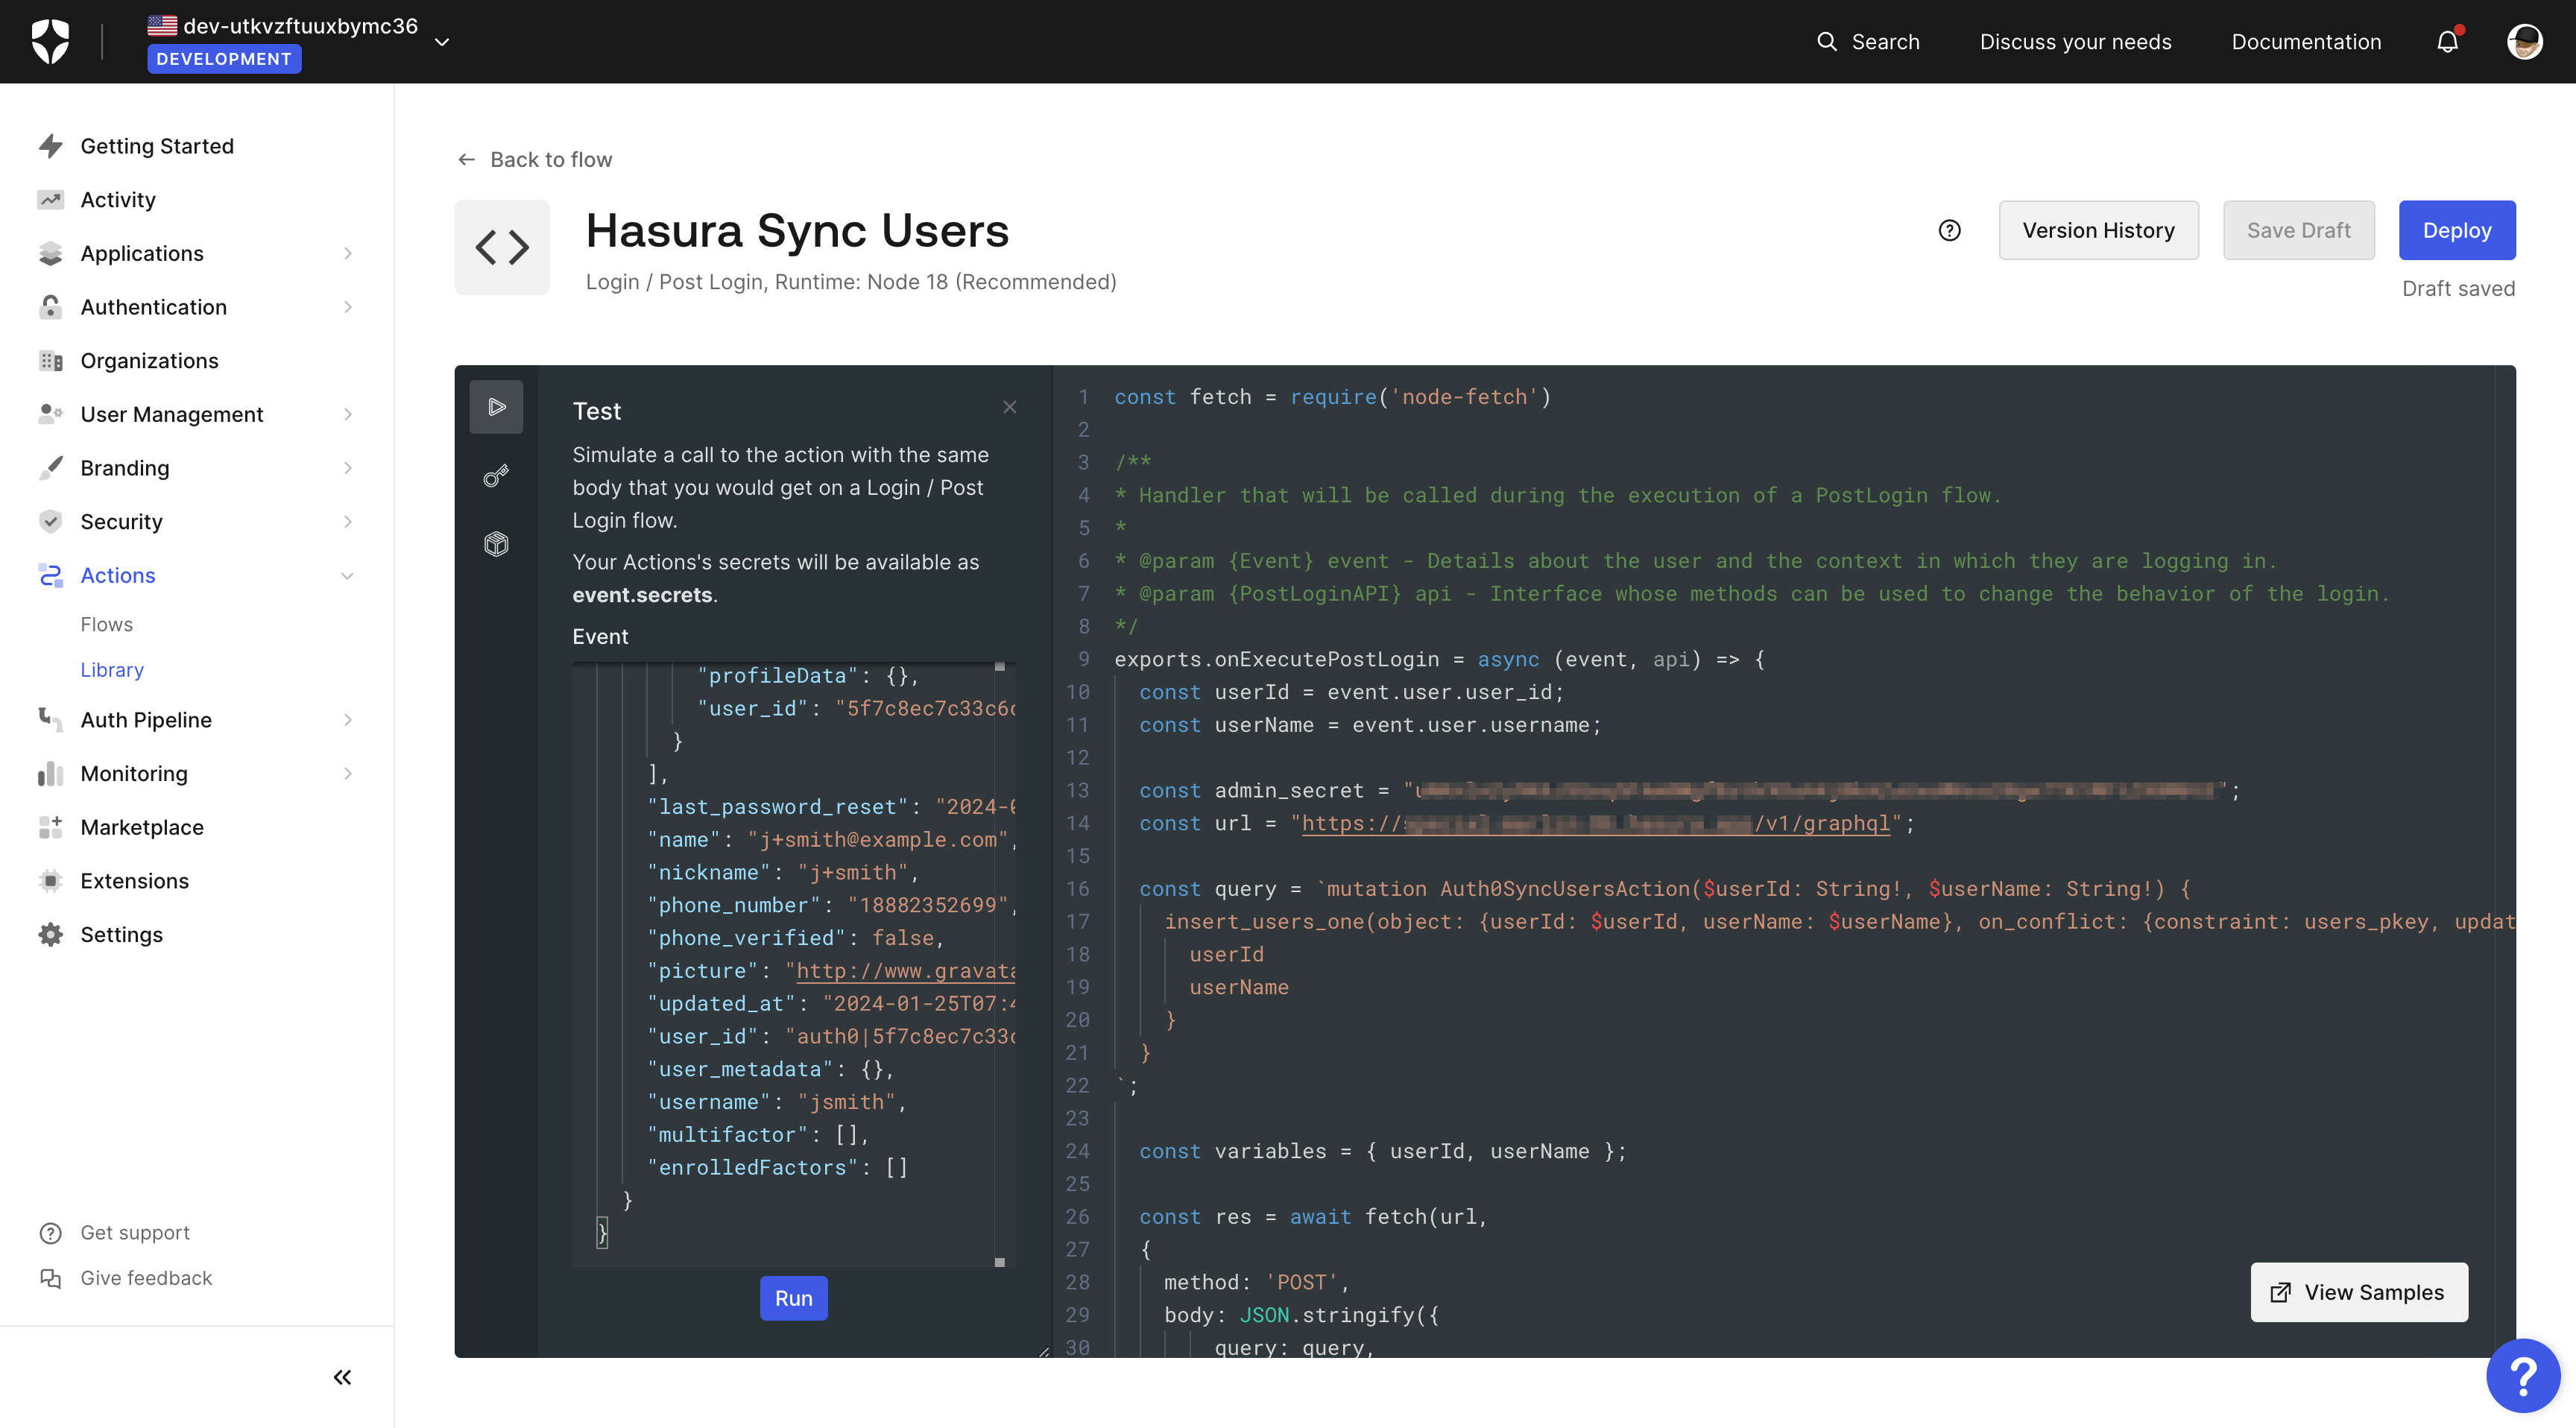
Press the Run button. The test should be successful, and you should see the new user in your Hasura app.
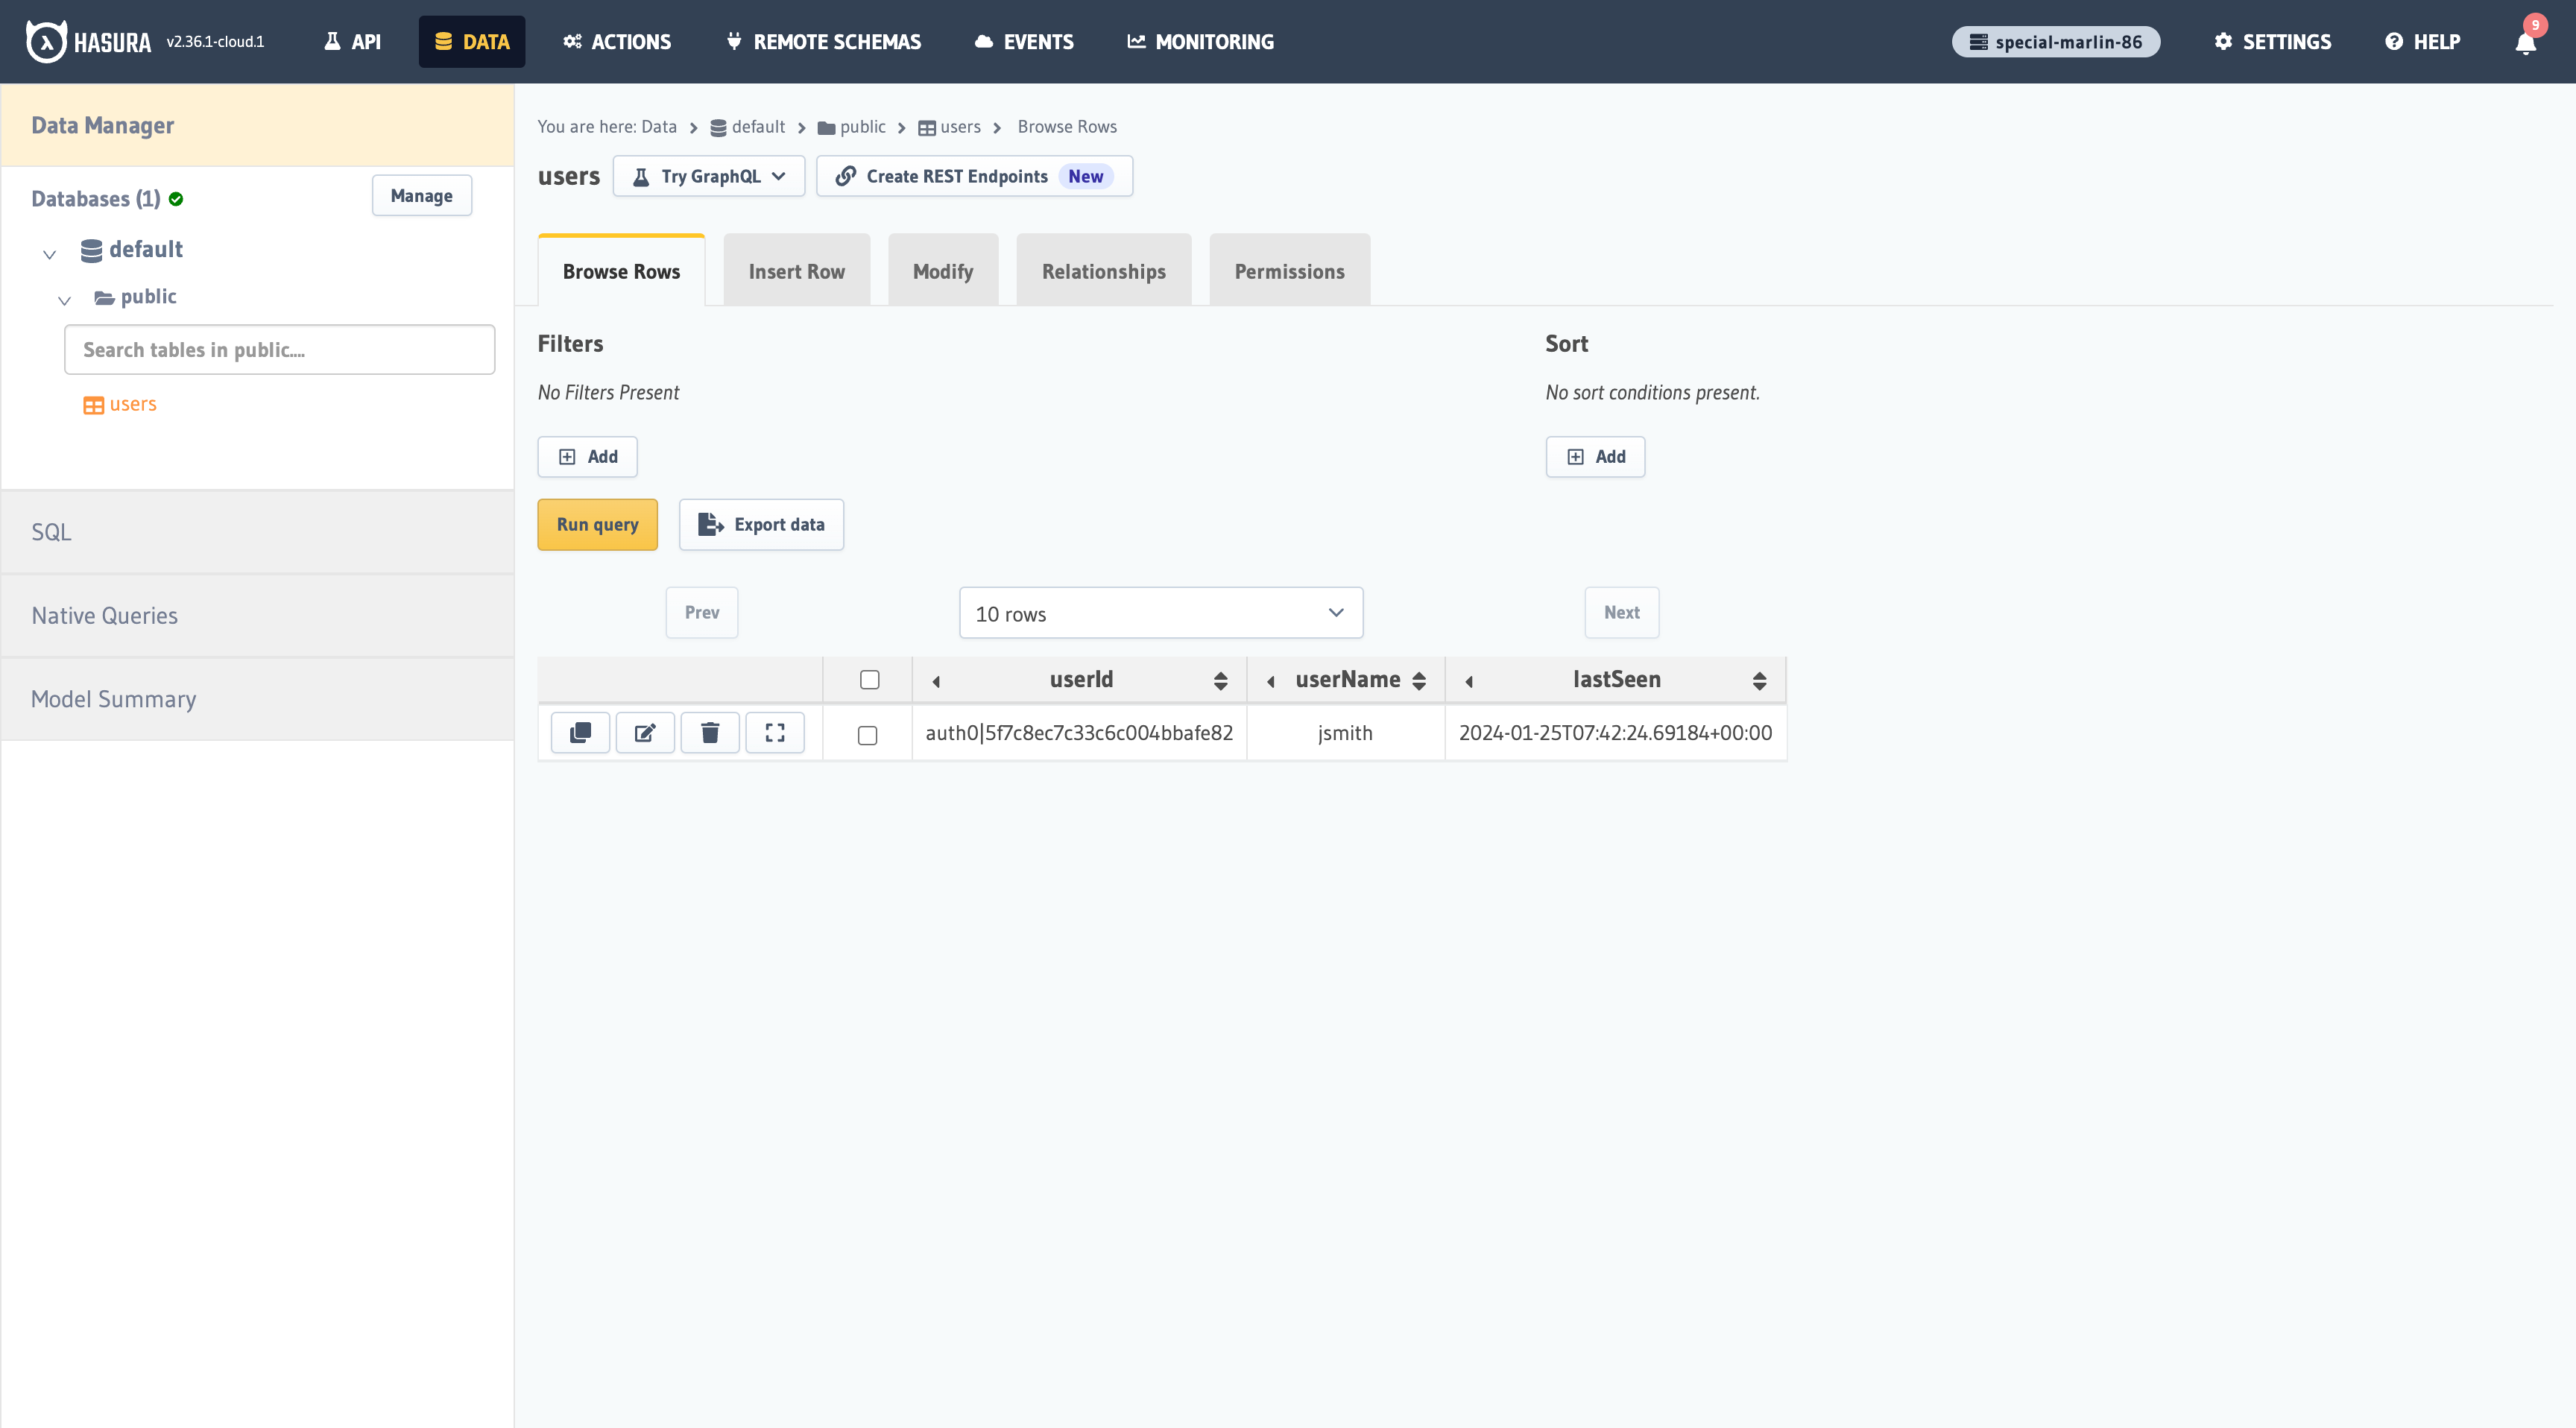
As the image illustrates, the user was successfully added to the database.
Test the Auth0 Token
This step involves testing the Auth0 integration. More specifically, you will get an access token from Auth0, and you will use it with Hasura to make authenticated requests.
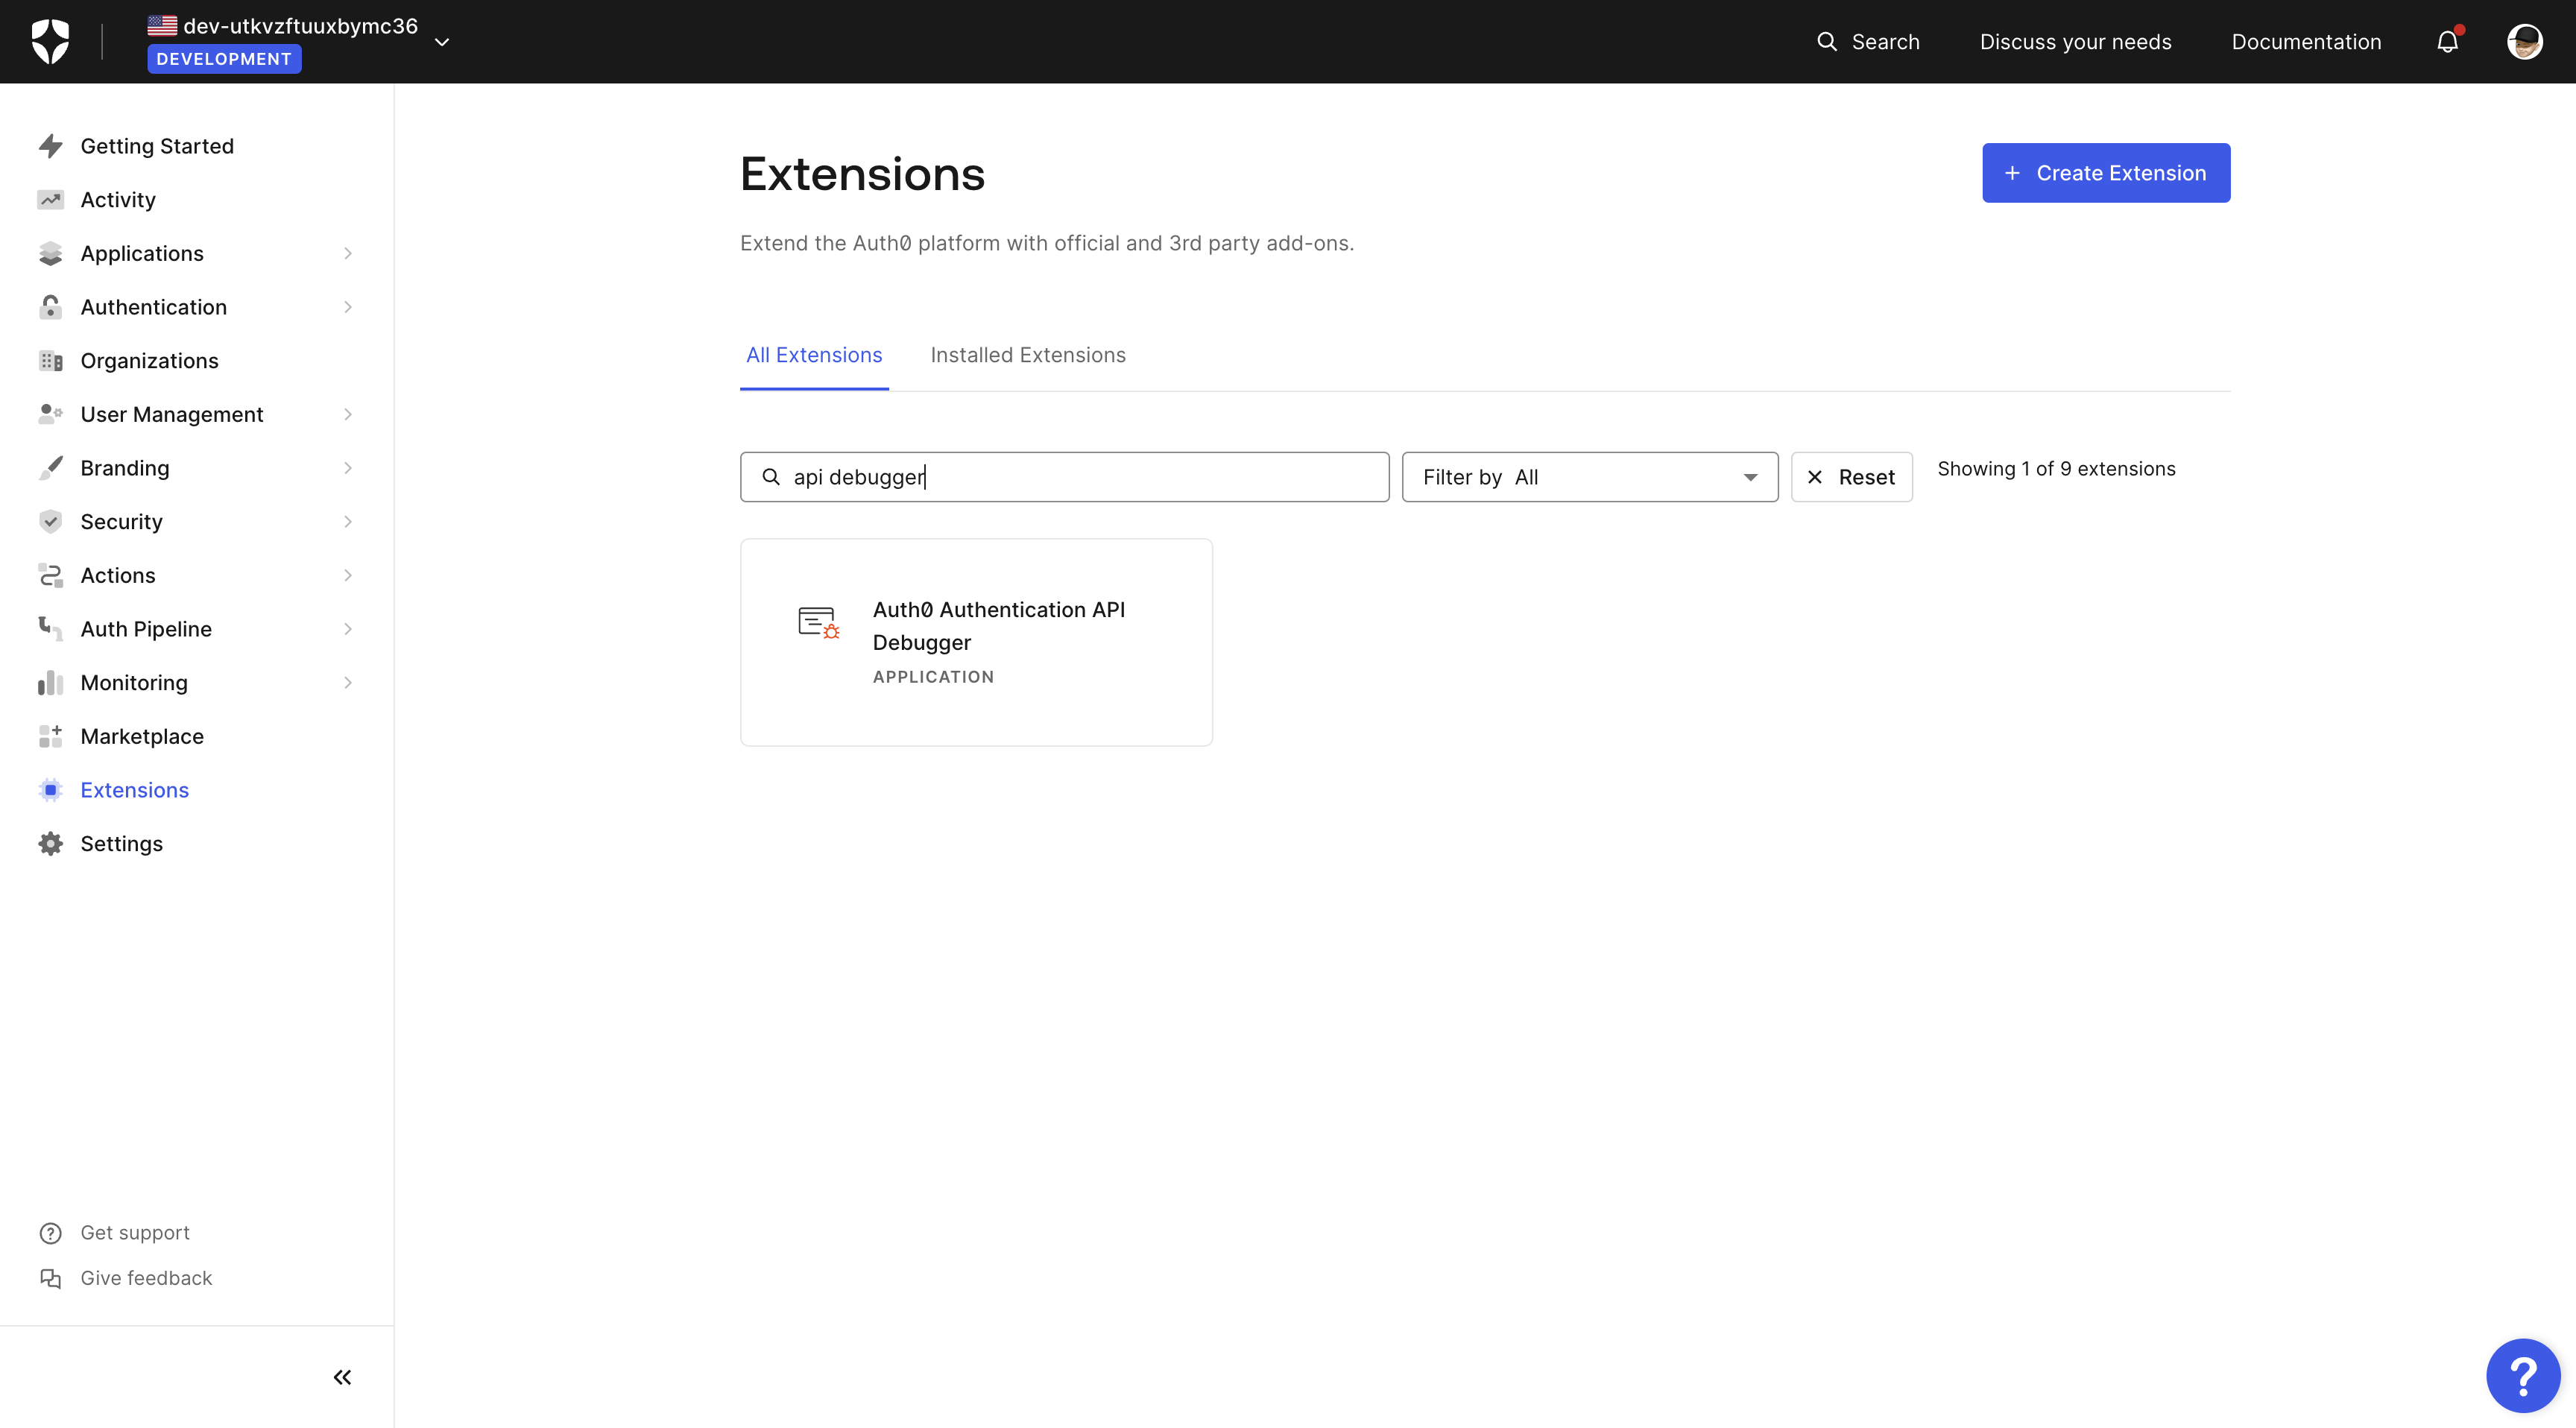
You will get the Auth0 token using the Authentication API Debugger Extension from Auth0. Go to the Extension page
and search for api debugger, as shown in the image below.
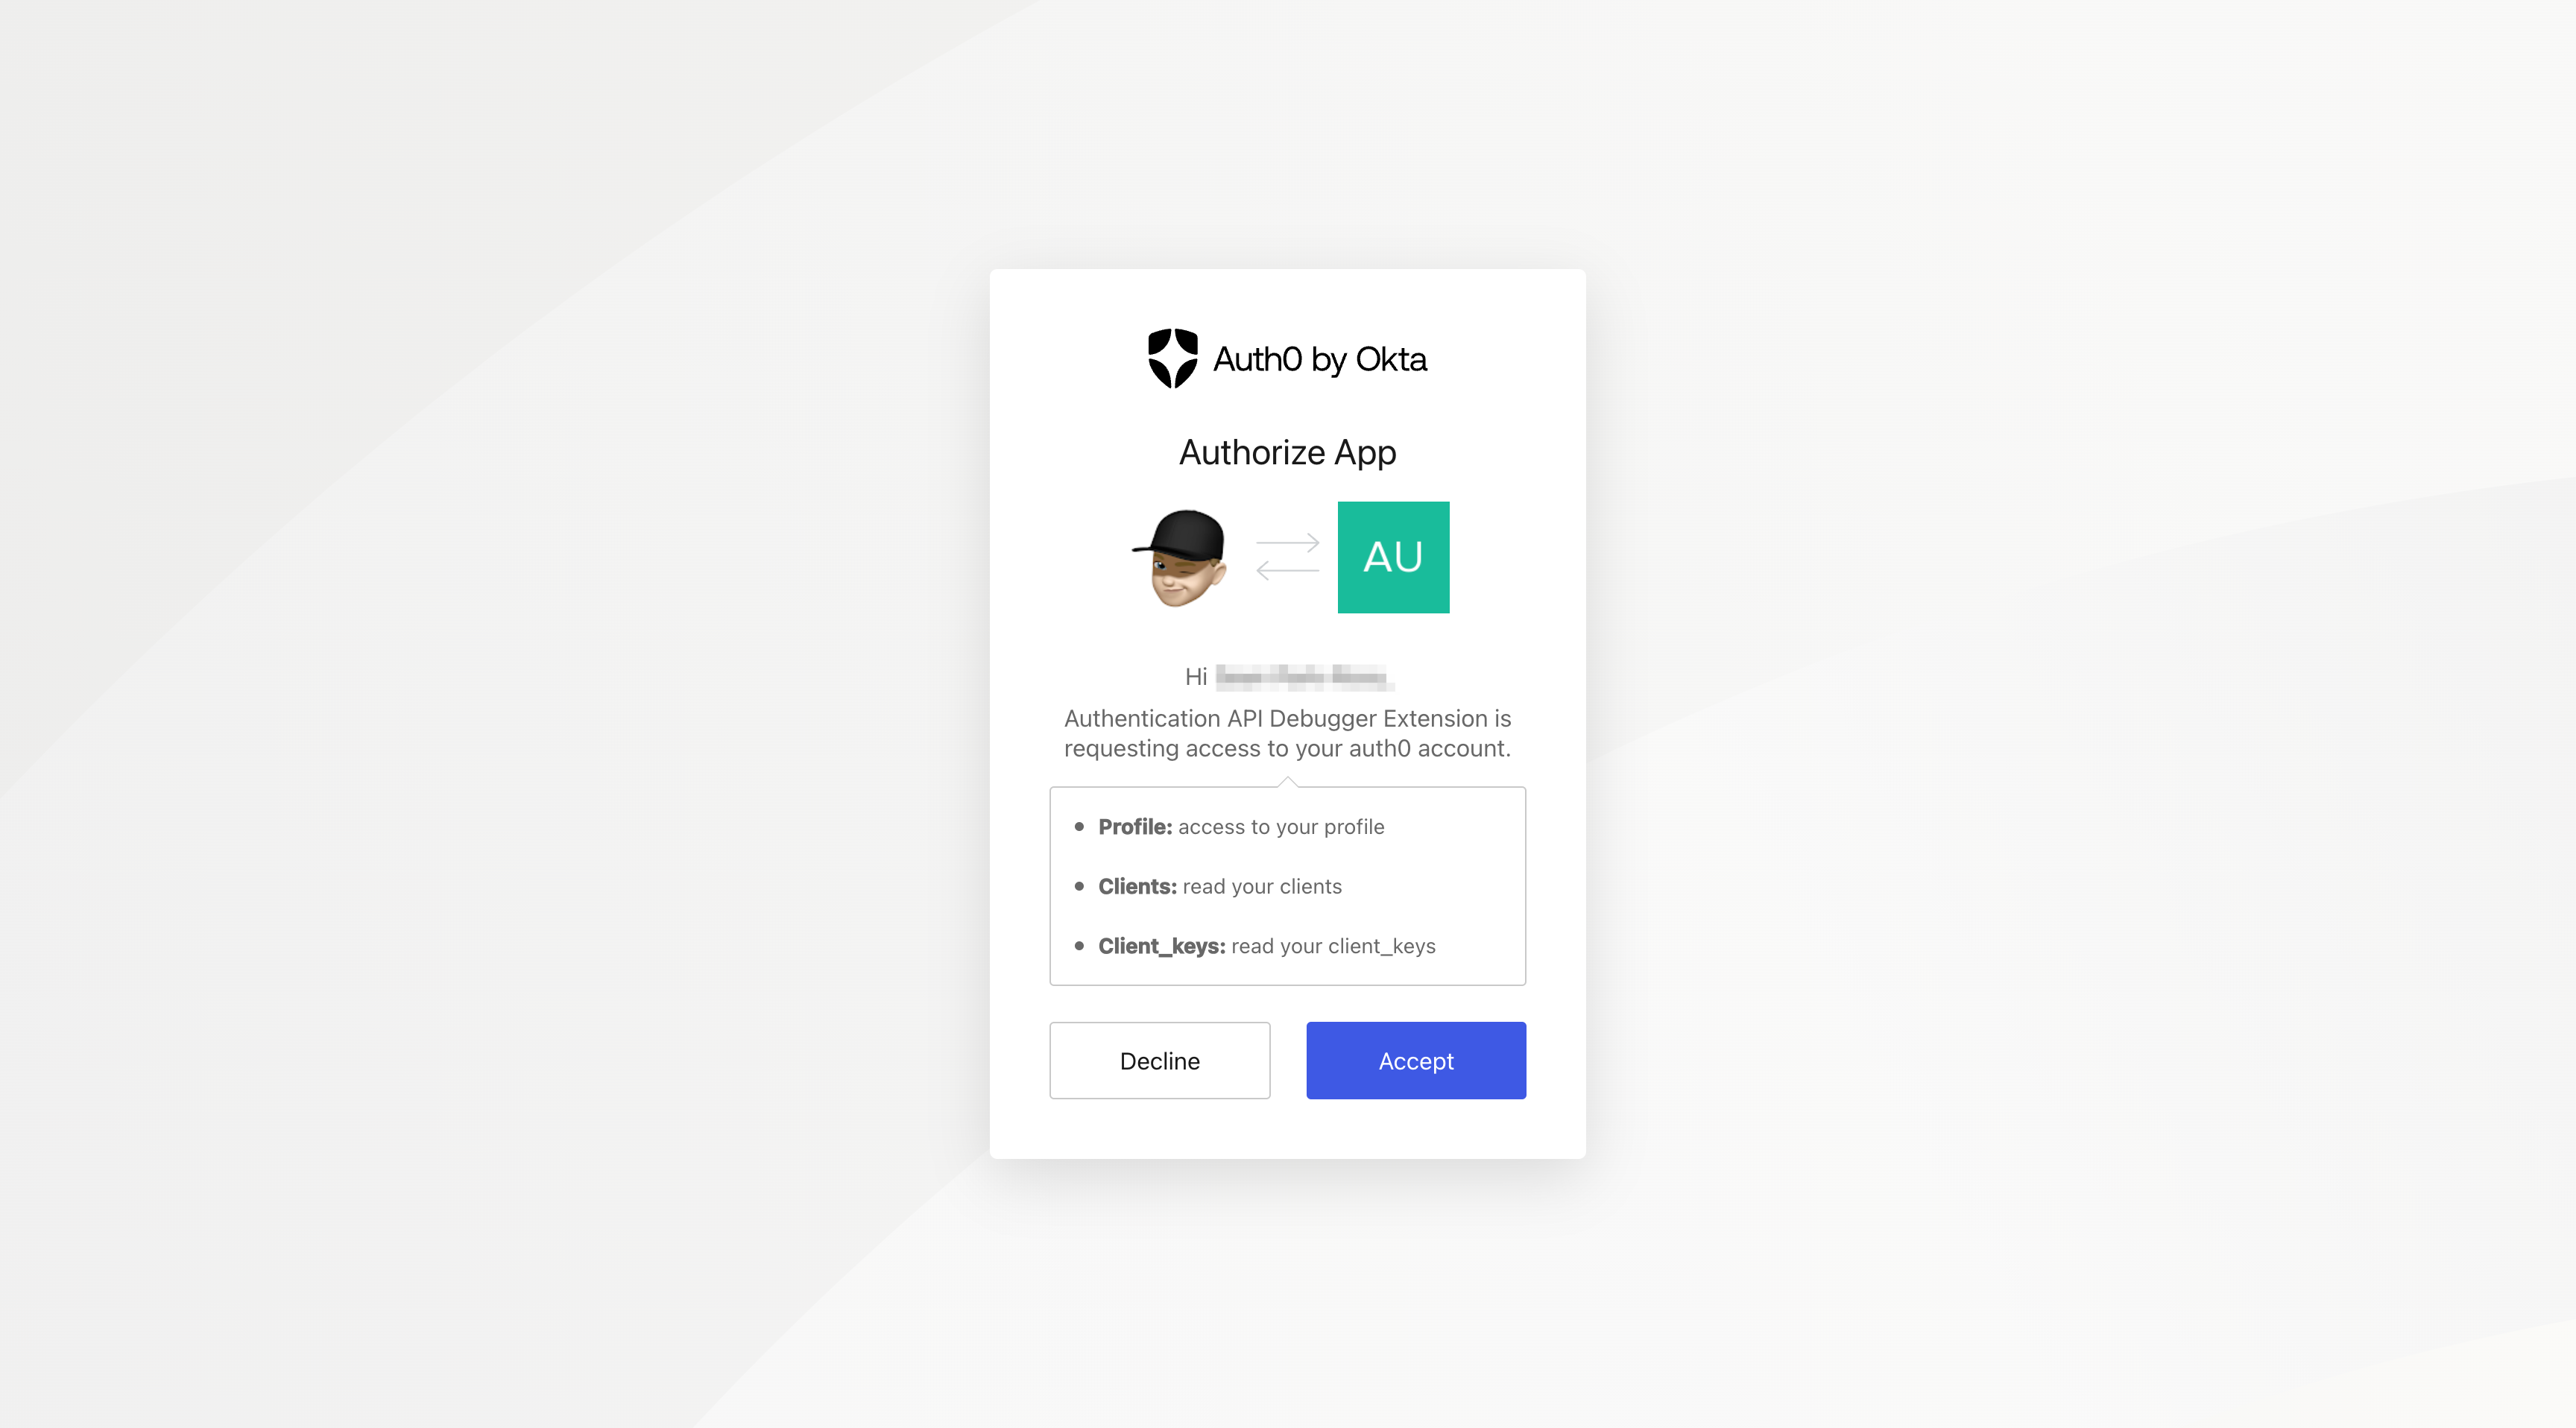
Follow the instructions to install and authorize the extension. Once you are done with that, you need to configure the Authentication API Debugger.
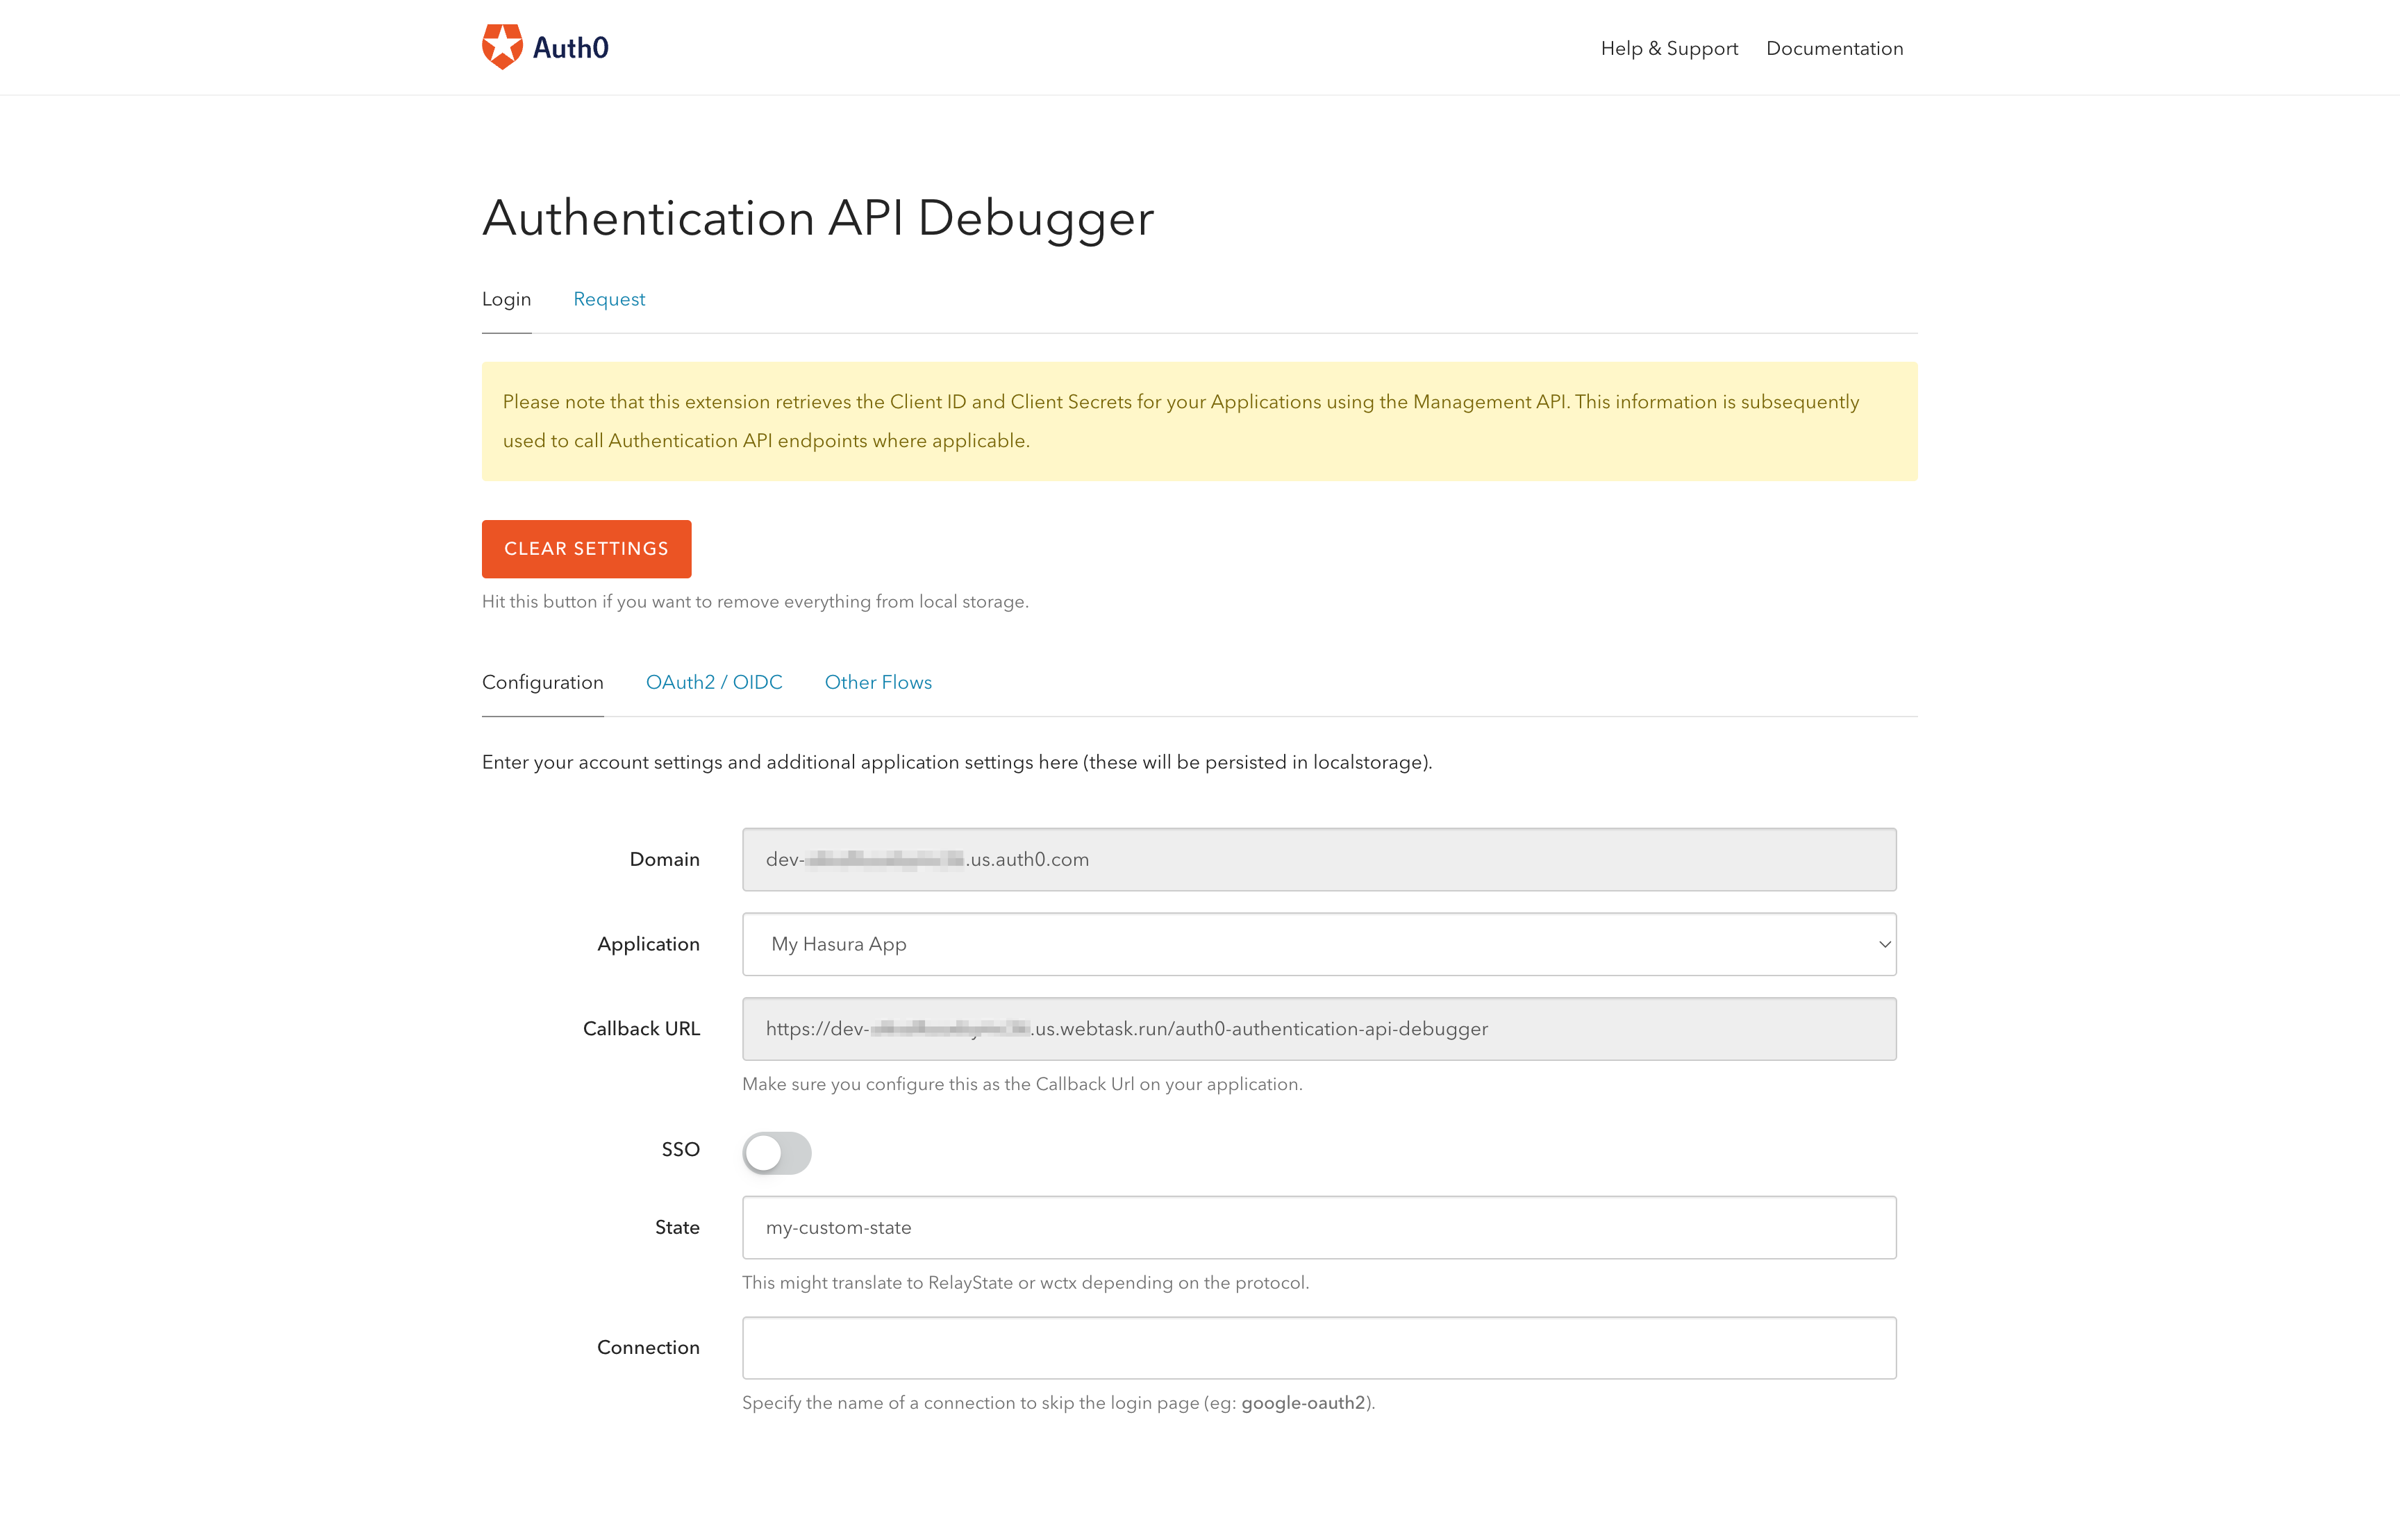
Select the application and copy the callback URL.
You will need the callback URL later.
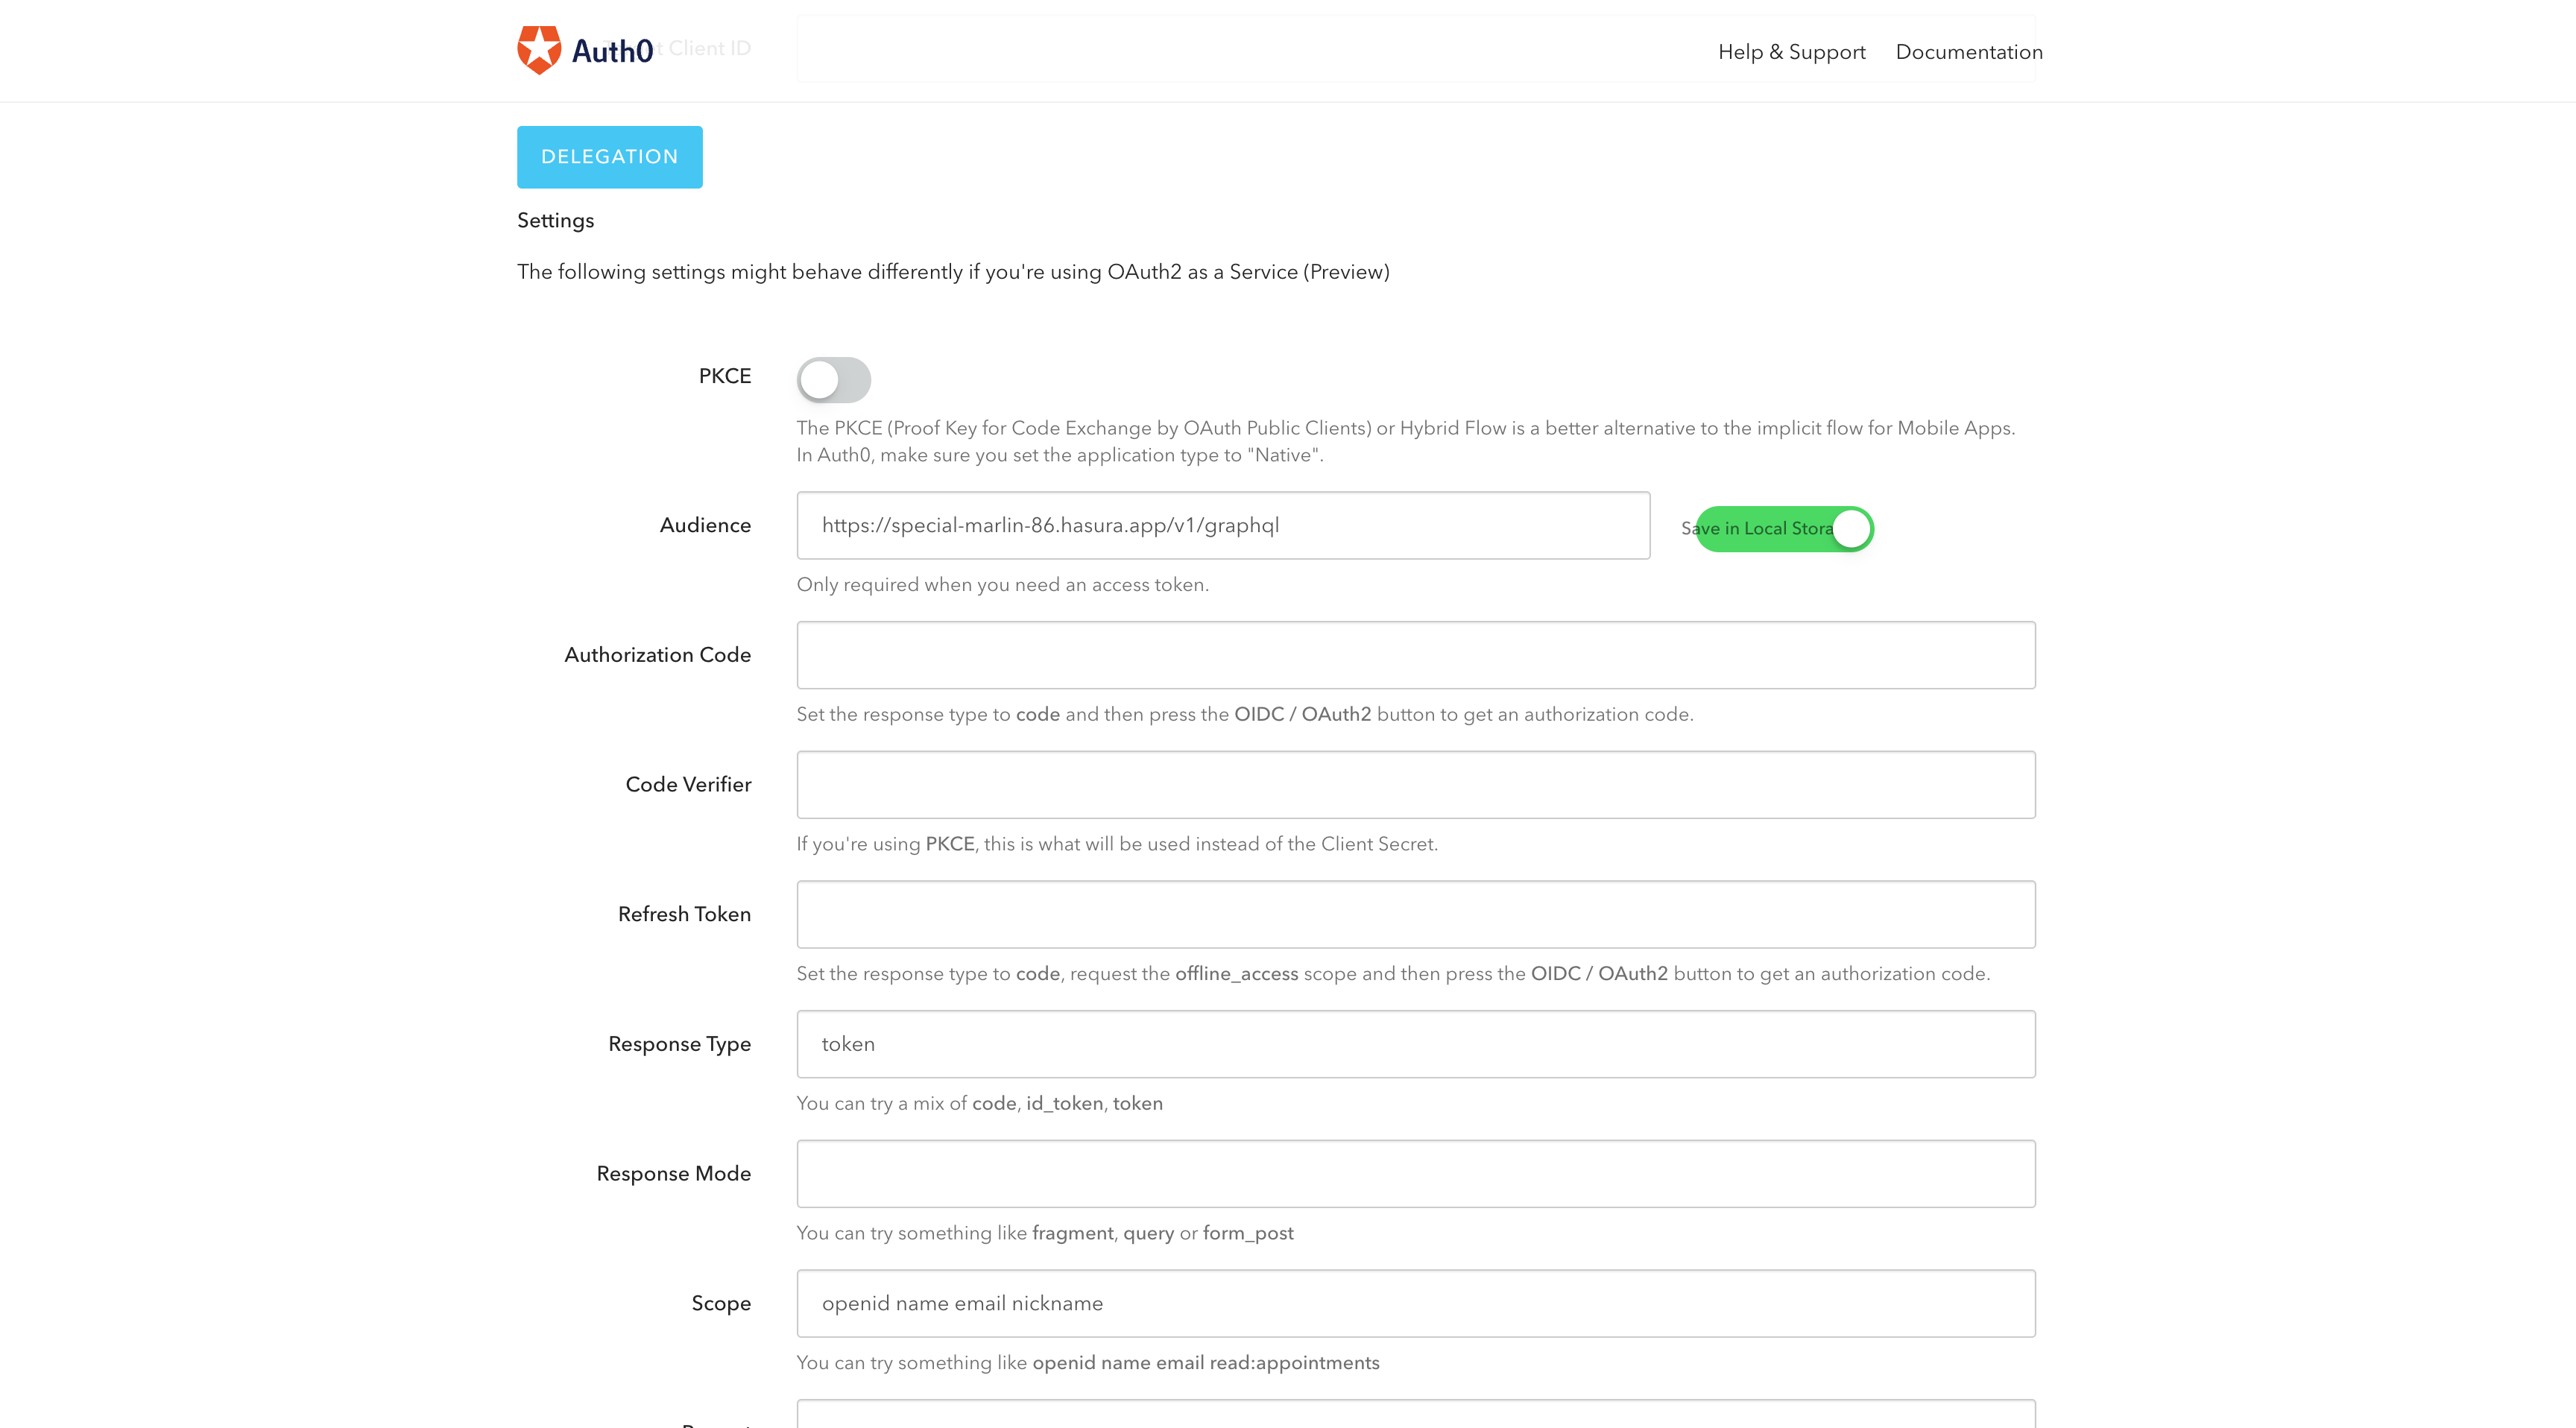
Now click on the OAuth2 / OIDC option to go to the page where you should see a field called Audience. Add your
Hasura app URL and turn on the "Save in Local Storage" option.
See the image for reference.
After that, go to the application you created in the first step and add the callback URL you copied earlier. Save the changes, and you are ready to test the application.

Go back to the "Auth0 Authentication API Debugger" again and then to the "OAuth2 / OIDC" page. You should see an option
called OAUTH2/OIDC LOGIN button under the "User Flows" section. Click that to test the login.
Click on the button, and within a couple of seconds, you will be redirected to another page. On this page, you can see the following:
- Hash Fragment
- Access Token
- Headers
This is where you get the access token that you can use with your Hasura application.
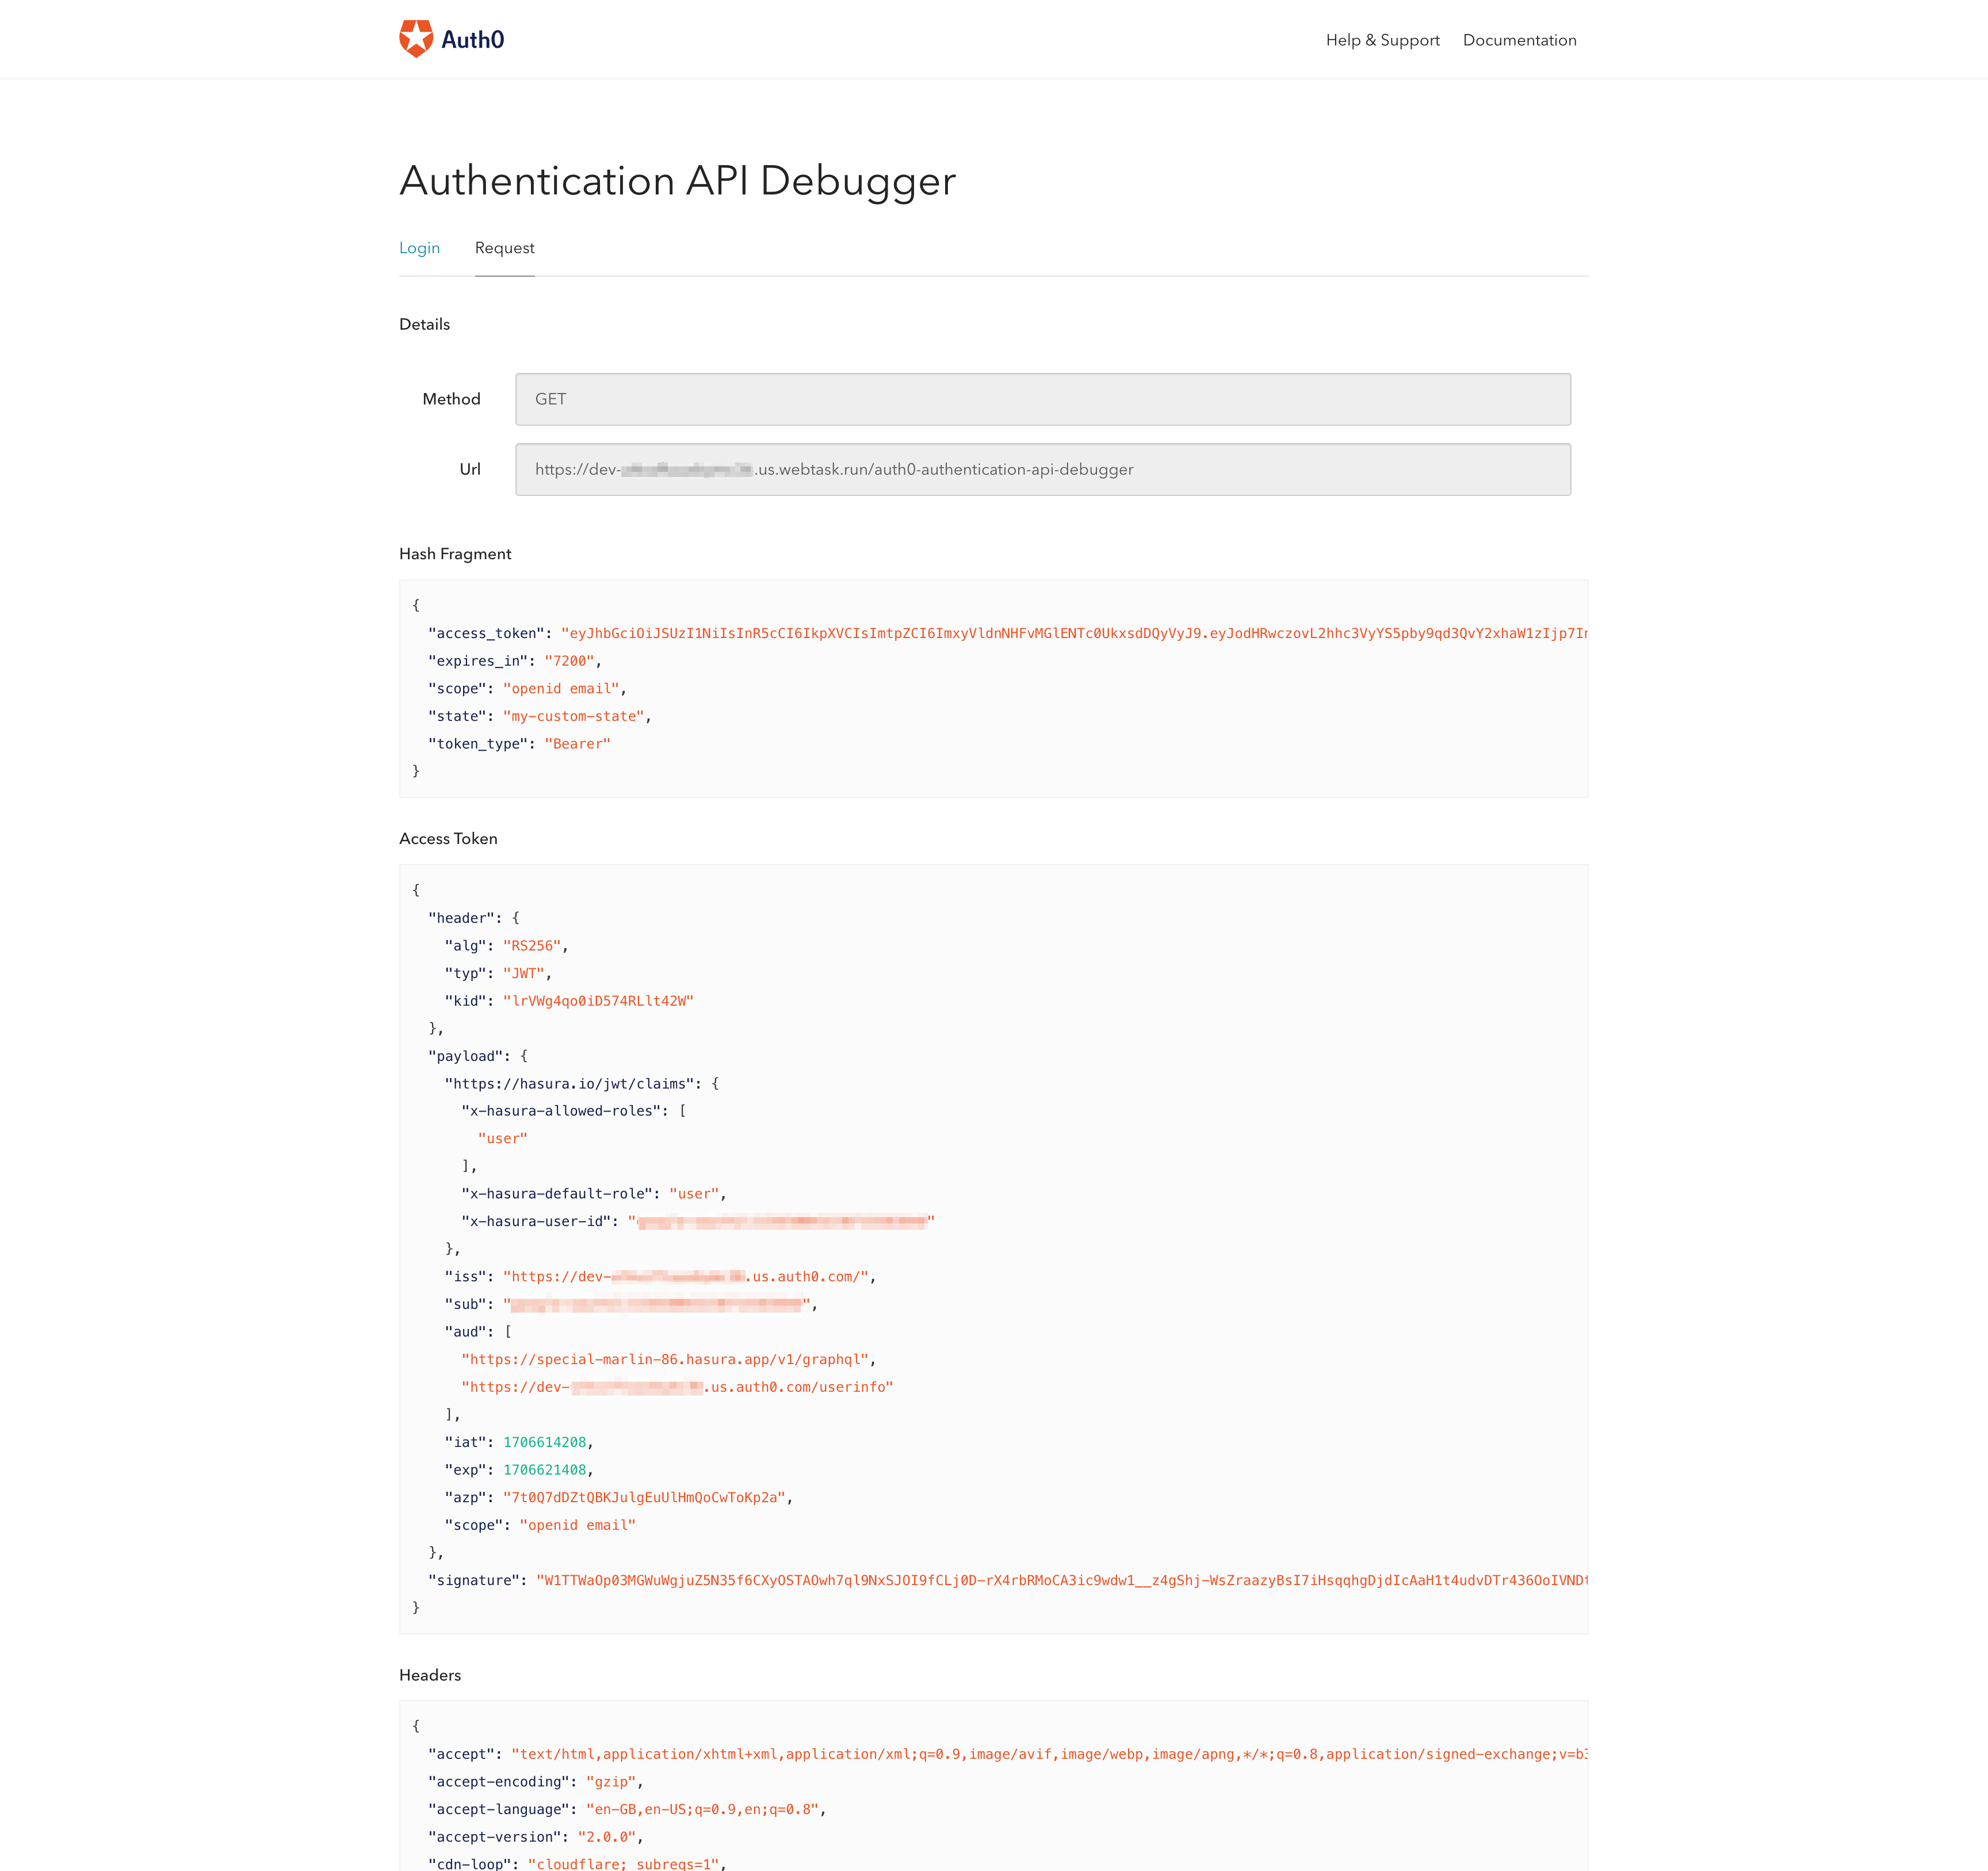
The above image illustrates an example access token. You will use that access token with the Authorization header when you make a request to your Hasura app.
Add an Authorization header with the value Bearer and the token value, eg: Bearer ey92d8h32iufh2978hf....
You can see a successful request to the Hasura app using the Auth0 Bearer token below.

If you remove the Authorization token, you will get an error telling you that the token is missing. As a result, you cannot access the database records.
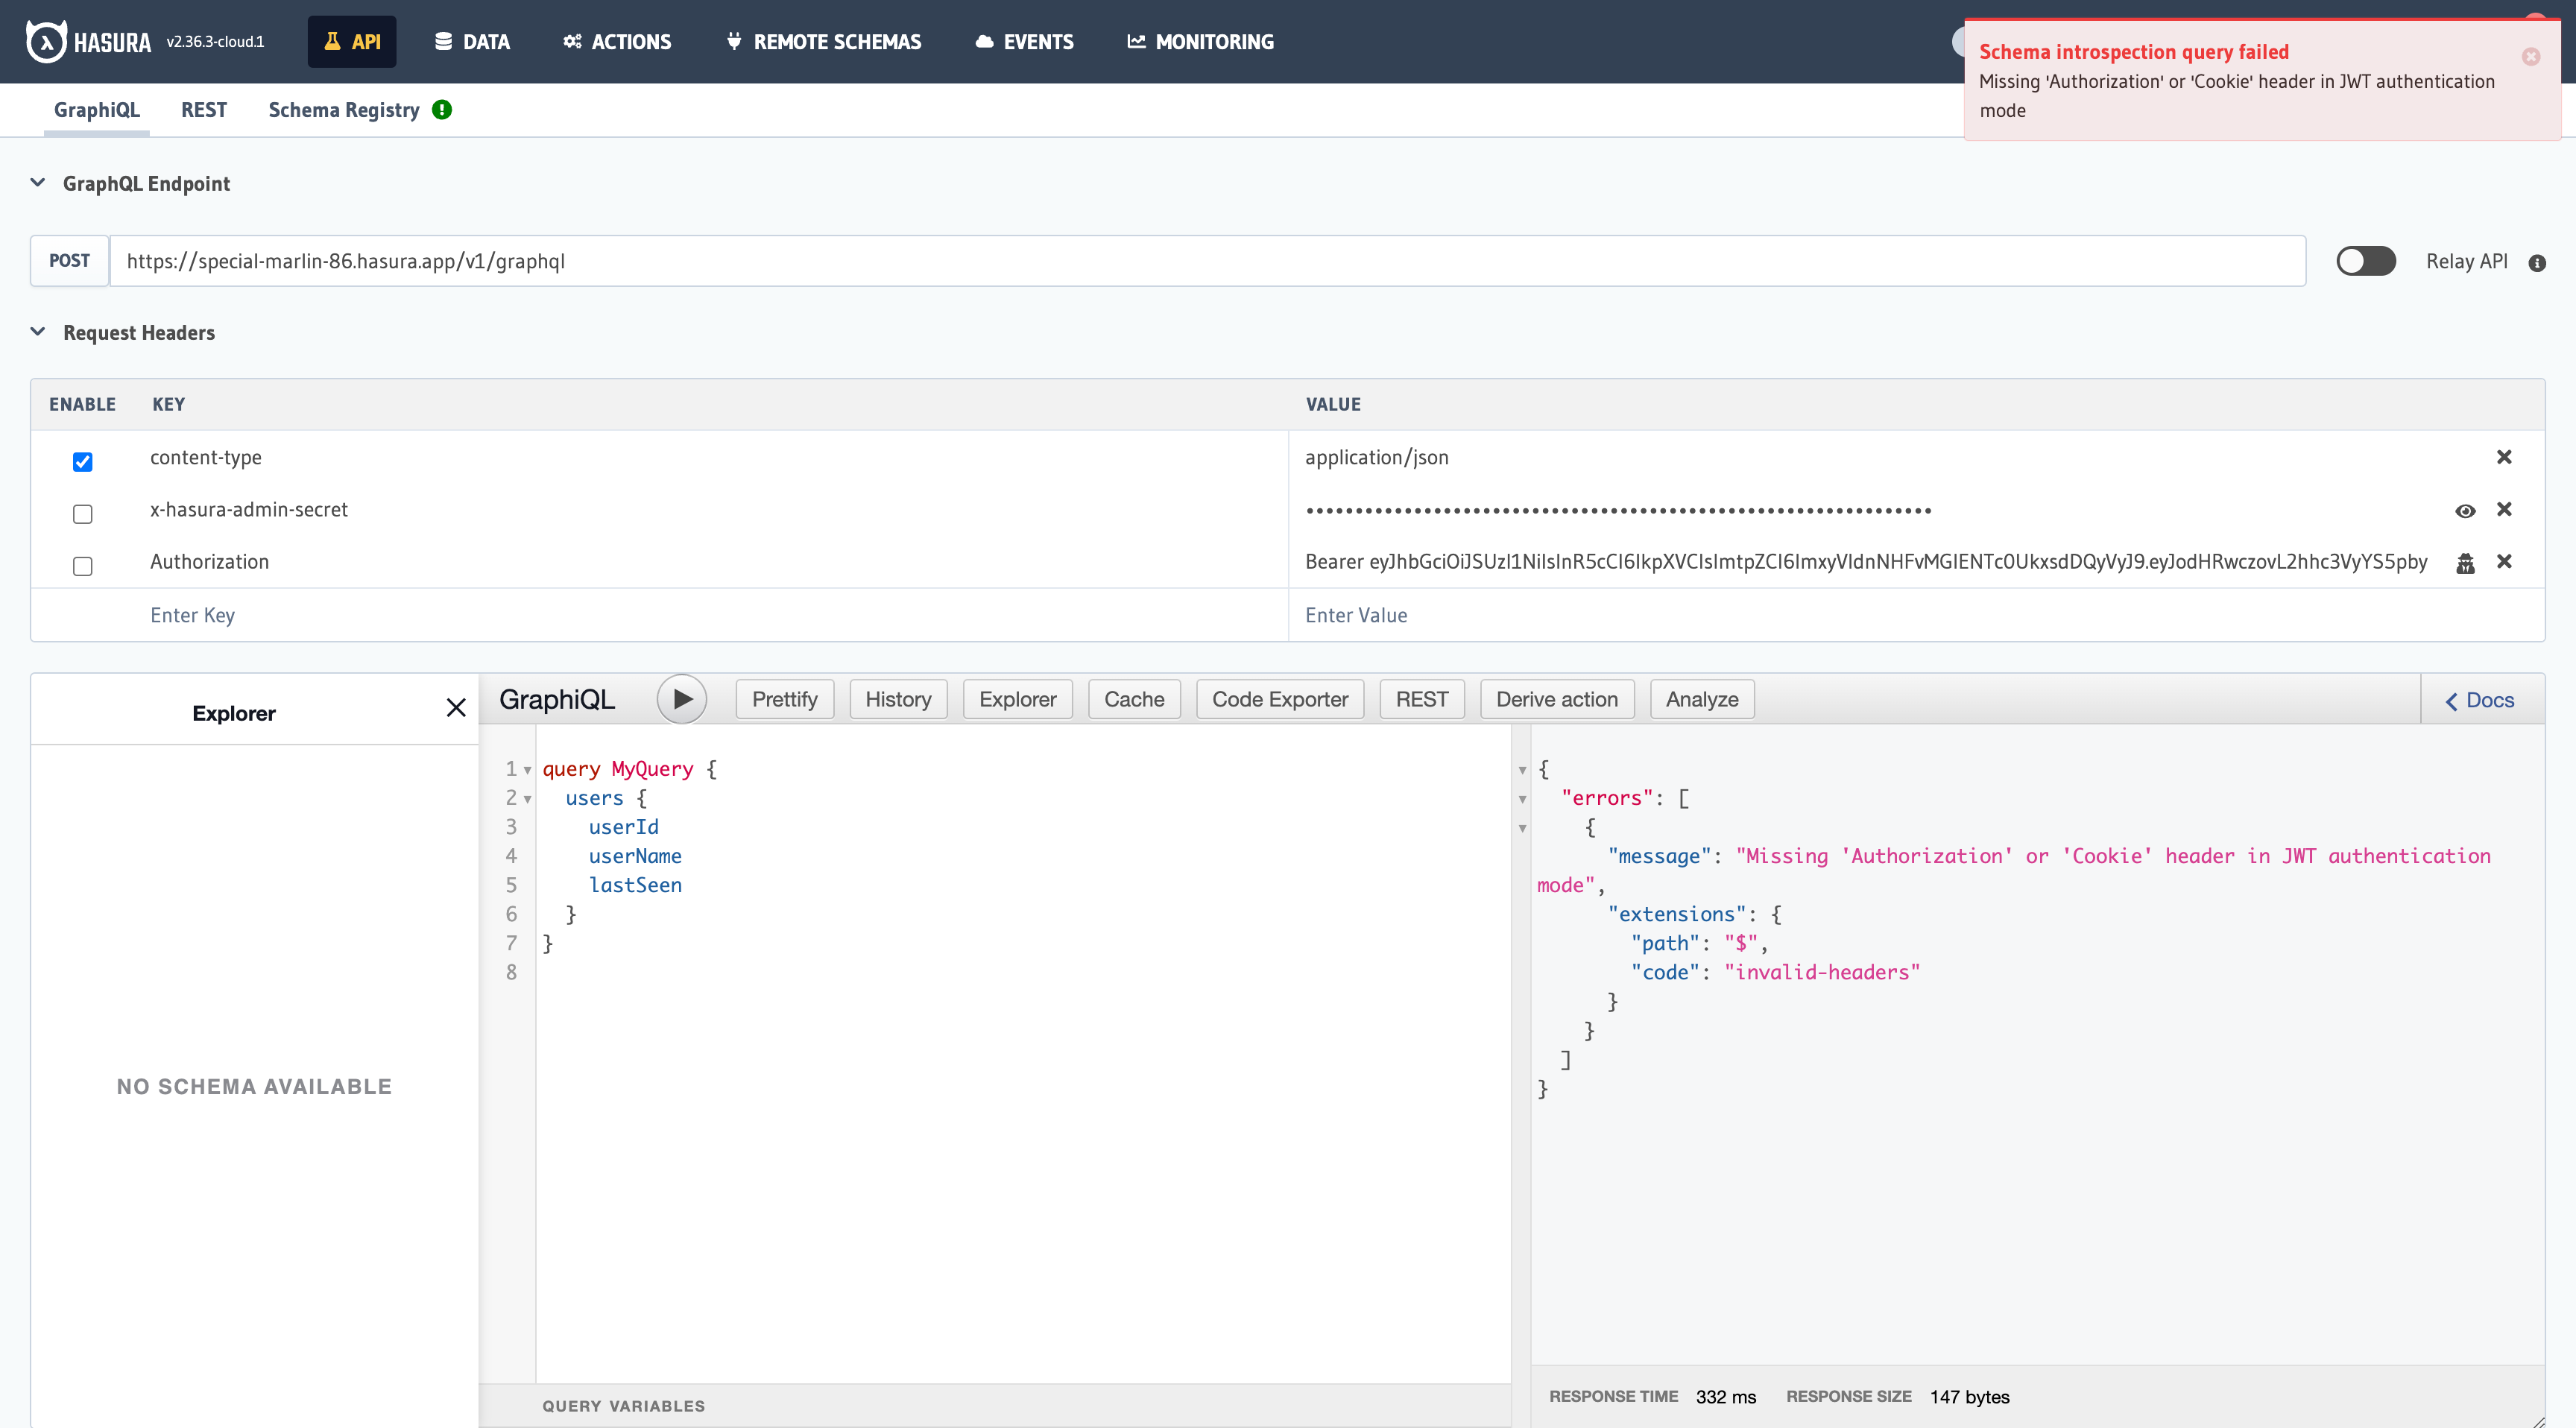
If the Authorization token is present, the users can access their records. If the token is missing, the users cannot access any records. As a result, it can be concluded that the integration works successfully.
 Build apps and APIs 10x faster
- Built-in authorization and caching
- 8x more performant than hand-rolled APIs