Edit on GitHub
Clerk
What is Clerk
Clerk is a SaaS that enables you to seamlessly integrate sign-up, sign-in, and user profiles into your applications.
In this section, you will learn how to integrate Clerk with Hasura.
Create and Configure Clerk Account
Go to the Clerk homepage and click the Sign up button from the top of the page. You have three possibilities to sign up:
- using GitHub
- using Google
- manually by entering your name, email address, and password
You can choose any method to register.
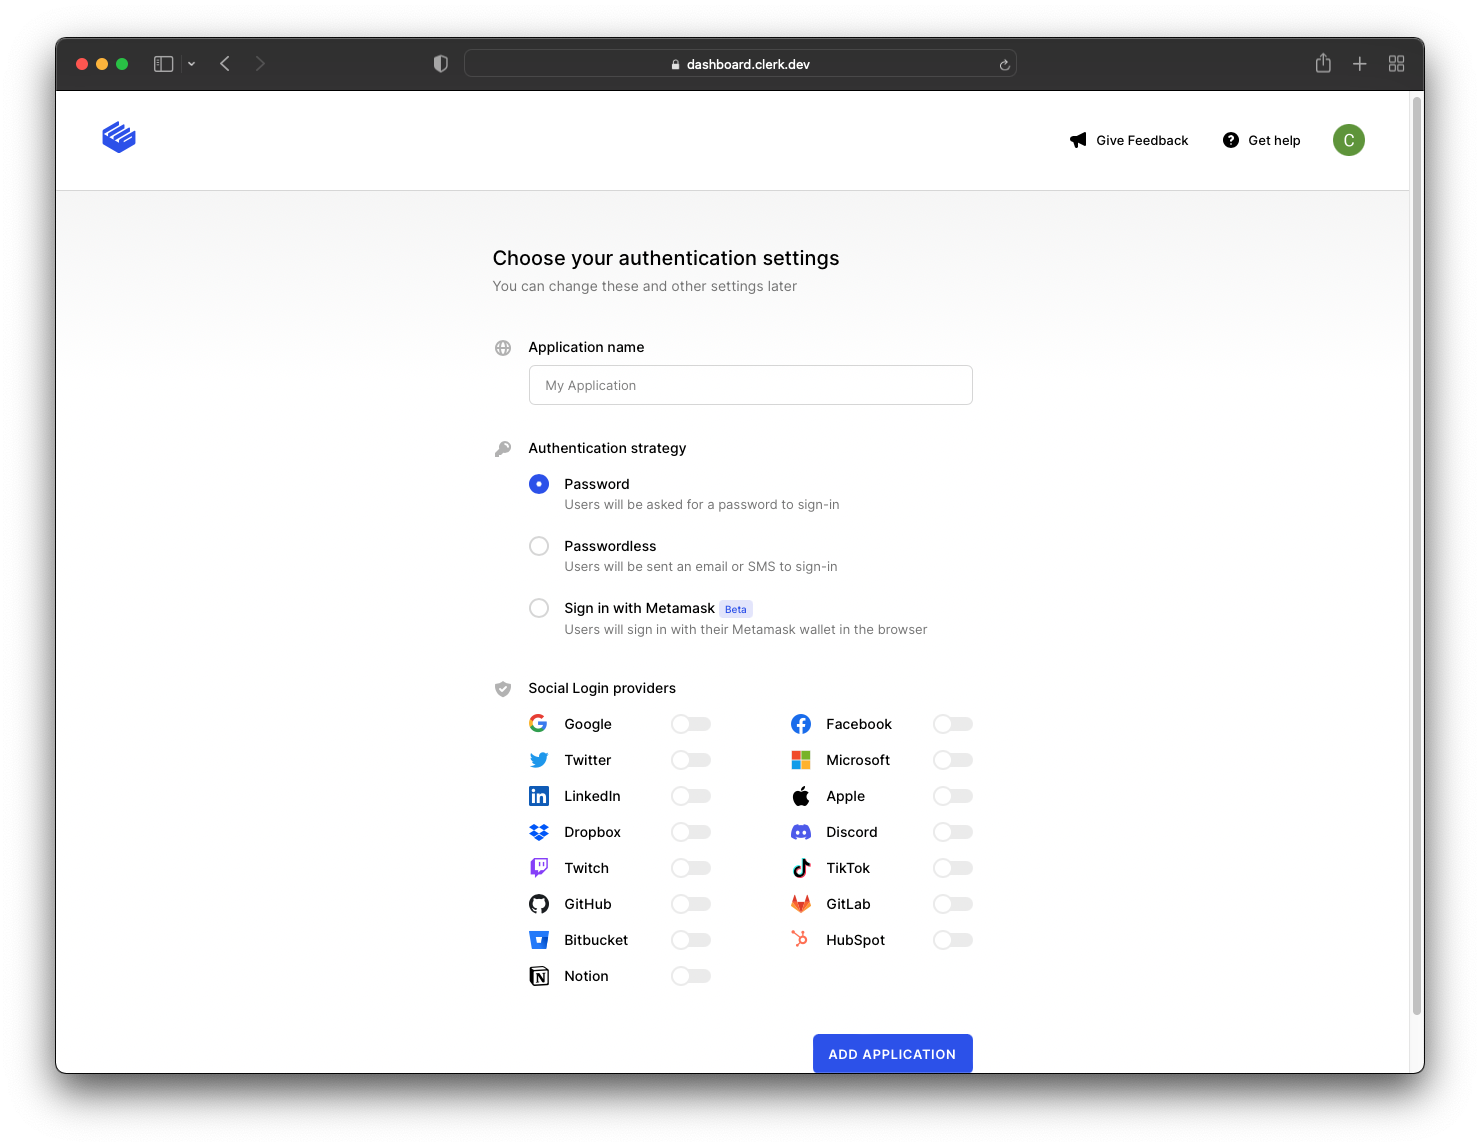
After that, you will be prompted to choose your authentication settings. Enter a name such as my-hasura-app and click the "ADD APPLICATION" button.
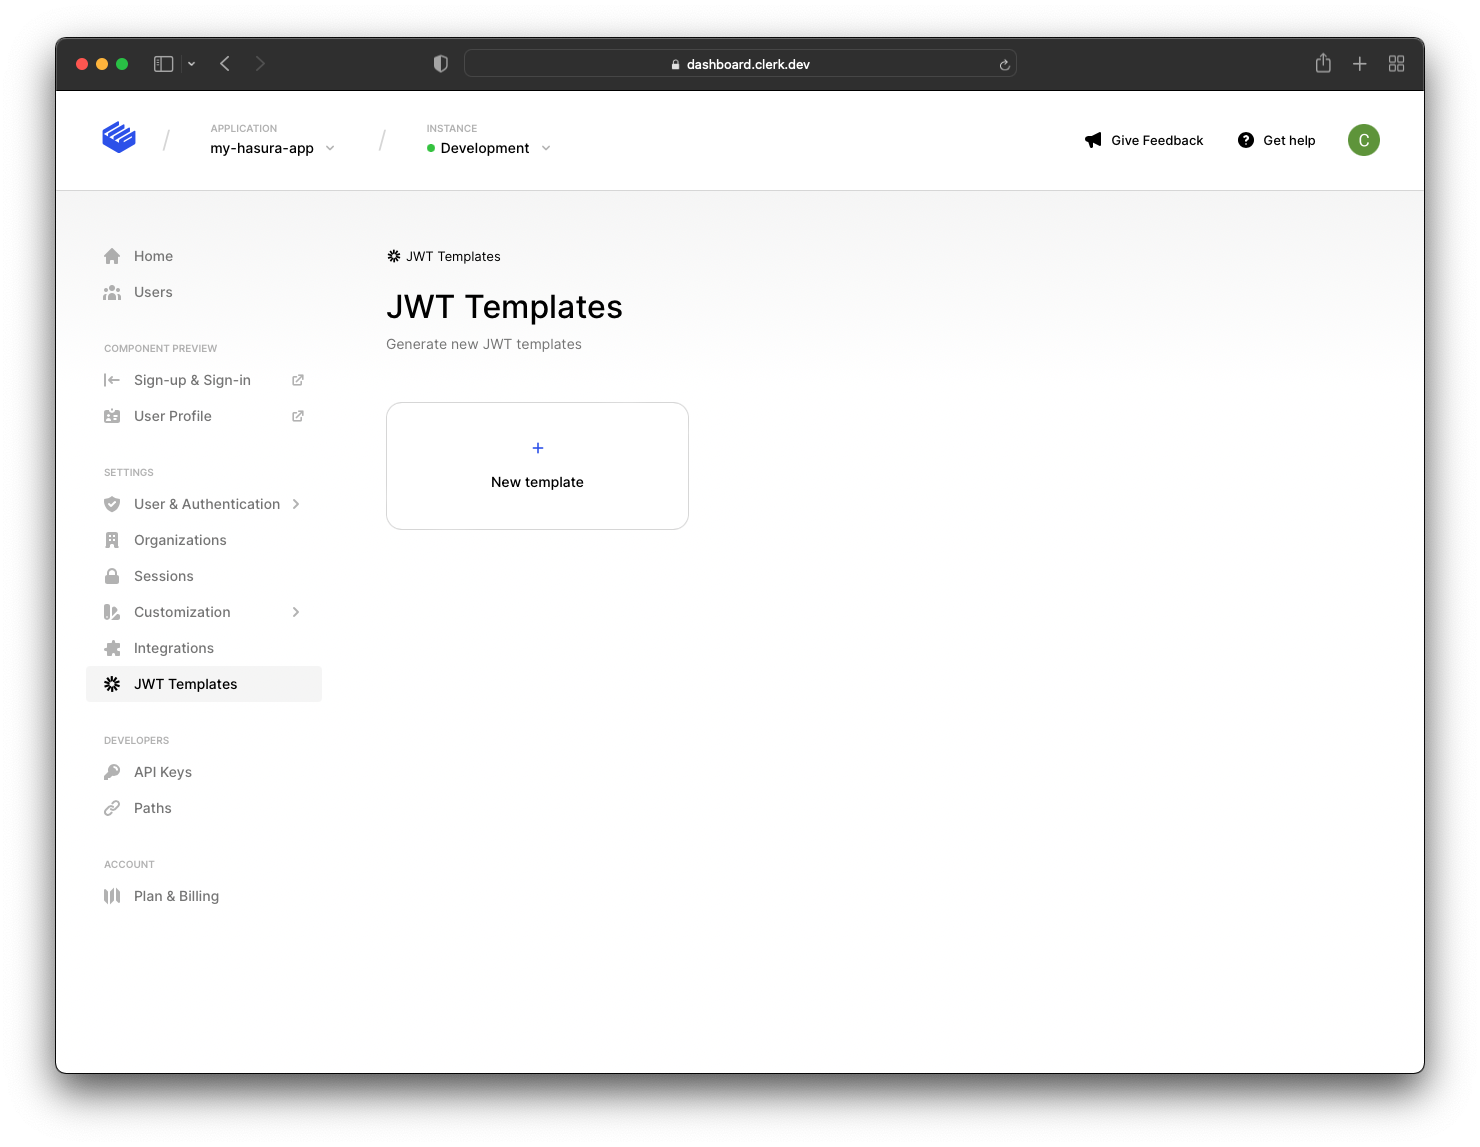
Clerk creates the application and then redirects you to the homepage. Now go to the "JWT Templates" page to create the JWT needed to authenticate requests to Hasura.
Click on "+ New Template".
After that, choose the "Hasura" option, and you will be redirected to a new page where you can create the new template. The page comes pre-configured with default values, but you can change them if you wish.
You can change the:
- name
- token lifetime
- claims
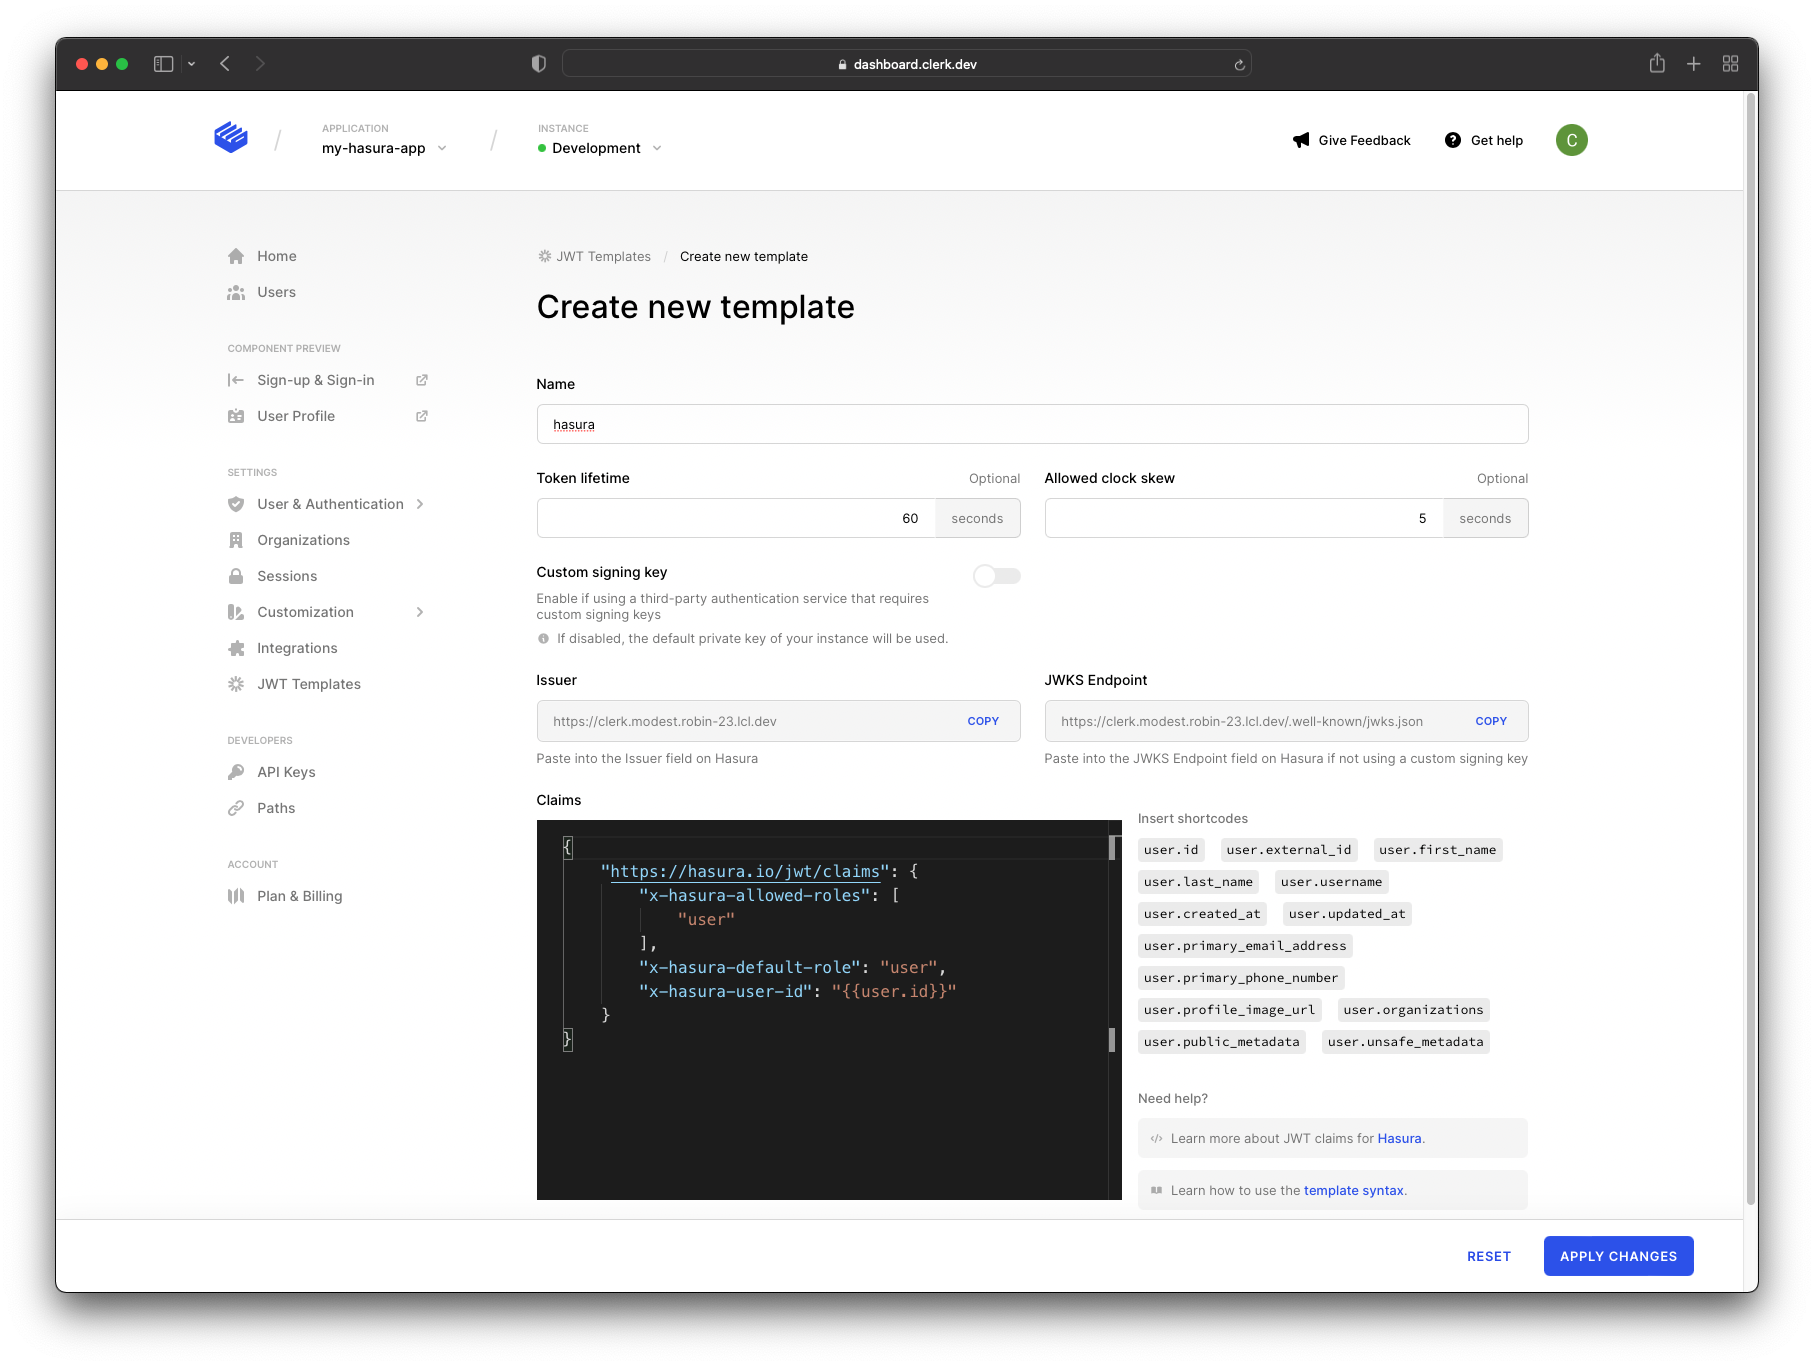
Note: Before saving the template, keep the ISSUER and JWKS Endpoint URLs somewhere safe. You’ll need the JWKS Endpoint URL for Hasura. Alternatively, you can find your APP URL in the dashboard and construct the "JWKS Endpoint" manually.
In this case, the default values are good enough, so you can apply the changes.
Configure Hasura with Clerk
In this step, you need to add the JWKS Endpoint to Hasura.
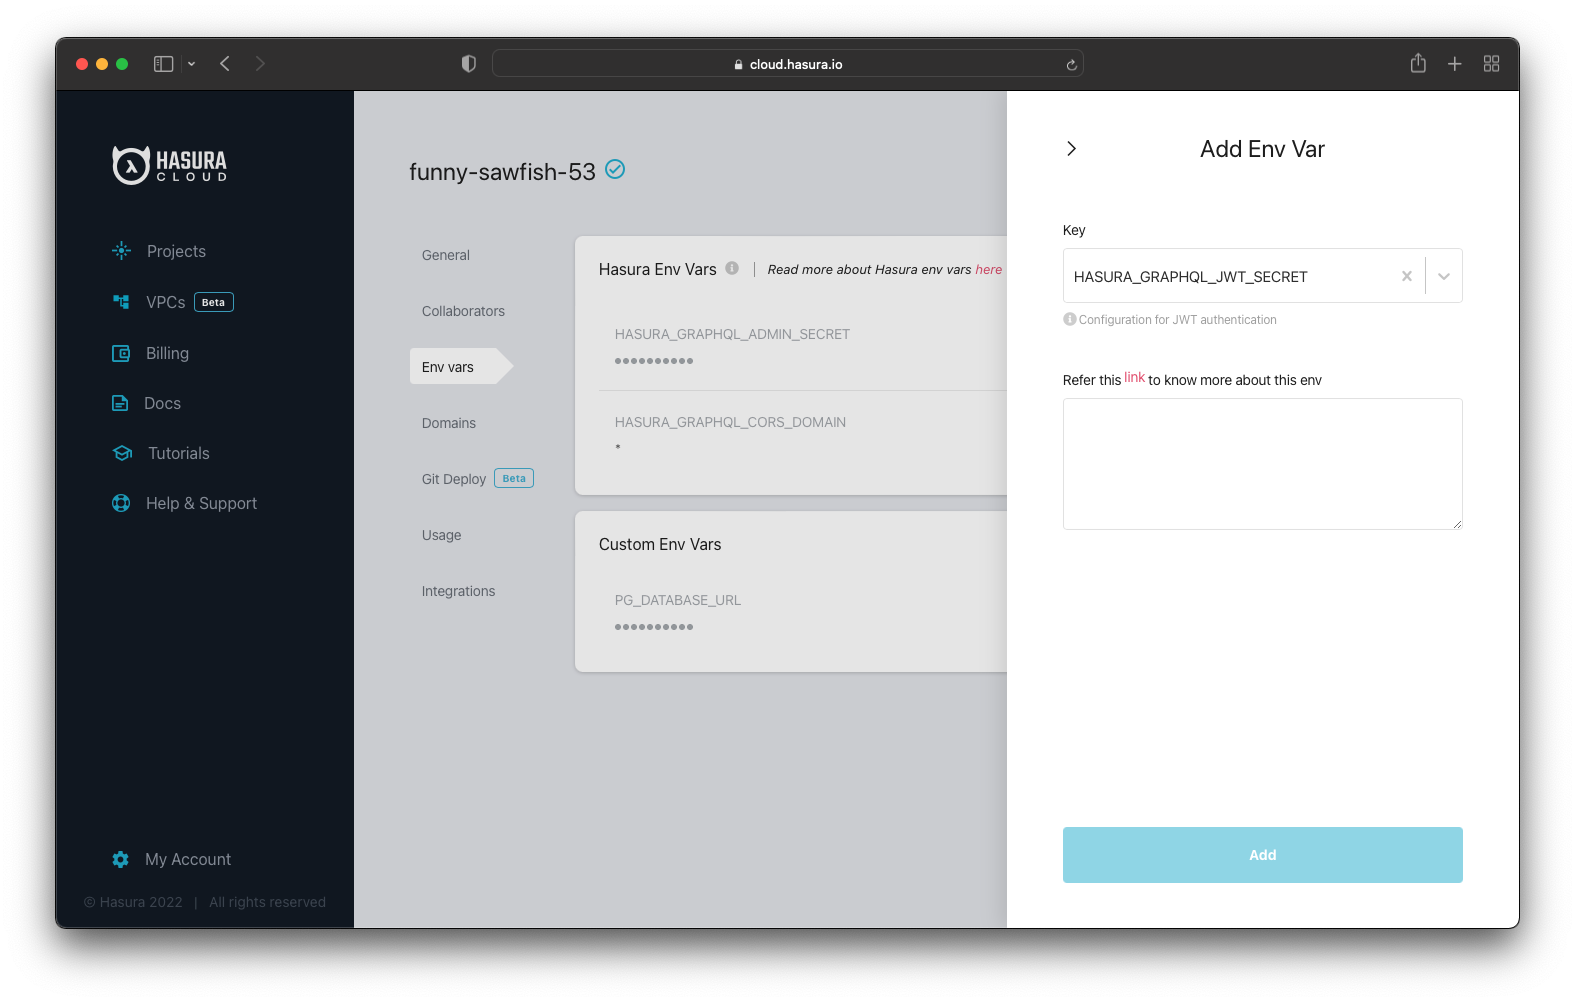
To do so, go to the Hasura Dashboard and then click the "Gear ⚙️" icon. After that, go to the "Env vars" section and click the "+ New Env Var" option.
Select HASURA_GRAPHQL_JWT_SECRET for the "Key" and then paste the JWKS Endpoint. The endpoint should be in the following format:
{"jwk_url":"https://<your-api-endpoint>/.well-known/jwks.json"}
Click on "Add", and the environment variable will be applied to your project.
That means Clerk is successfully integrated with your Hasura instance.
Add Data to Your Hasura App
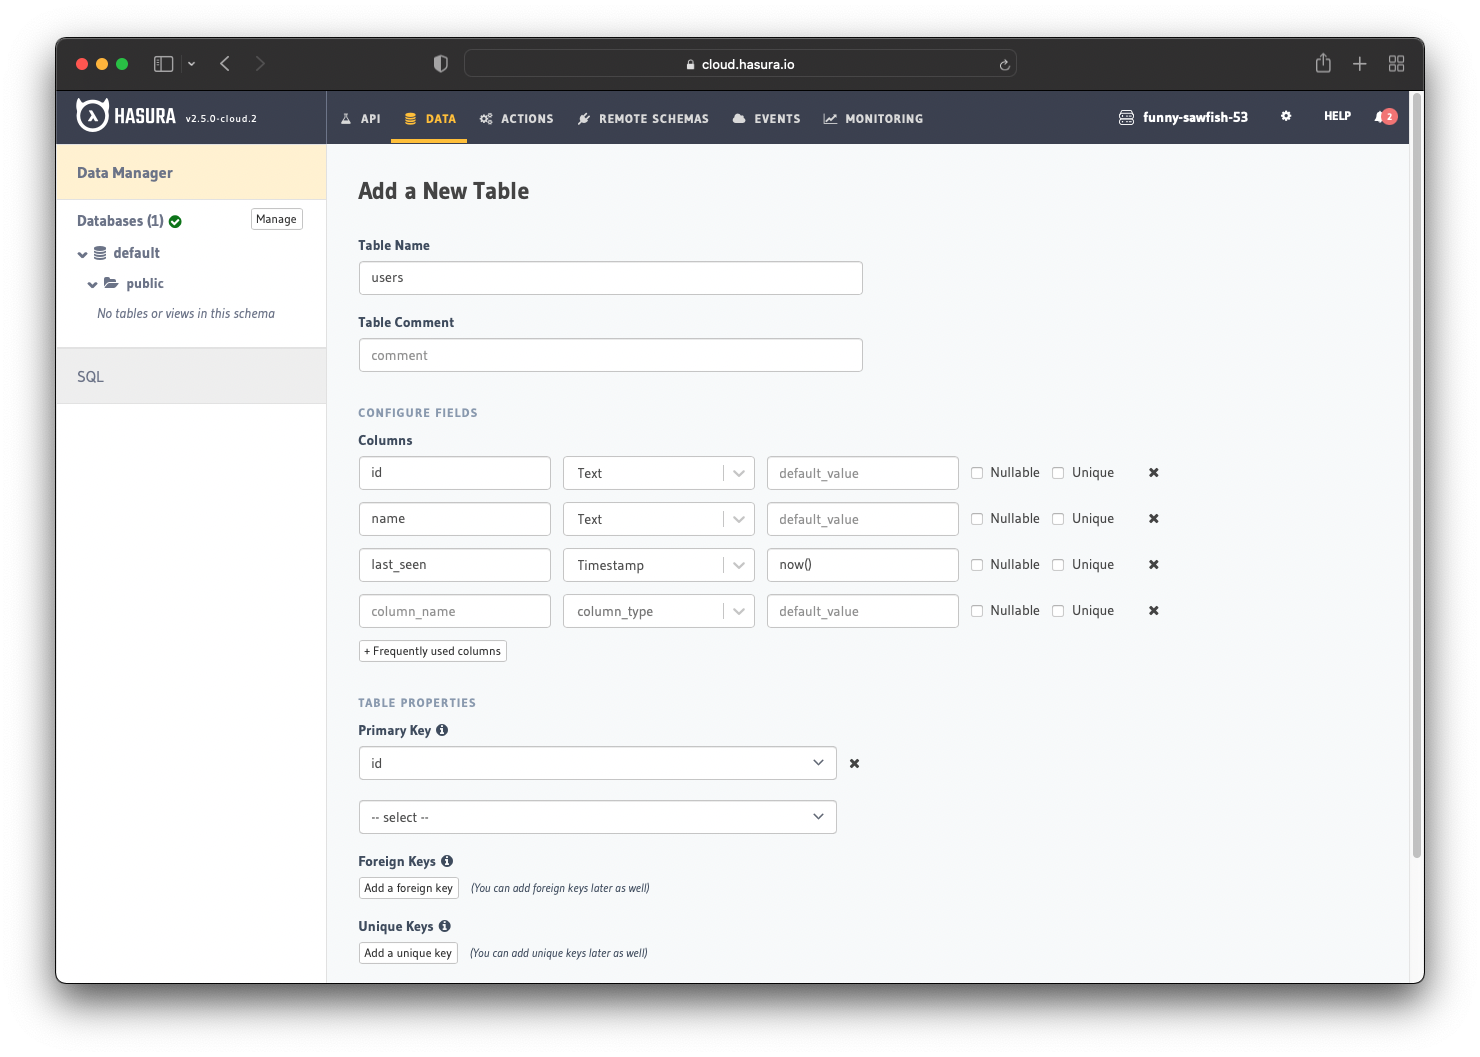
Go to your Hasura app dashboard and create a users table with the following columns:
idof type Text (Primary key)nameof type Textlast_seenof type Timestamp with default valuenow()
See the image below for reference.
The next step is to create a user role for the app. Users should be able to see only their records, but not the other people’s records.
Configure the user role as shown in the image below. For more information, read about configuring permission rules in Hasura.
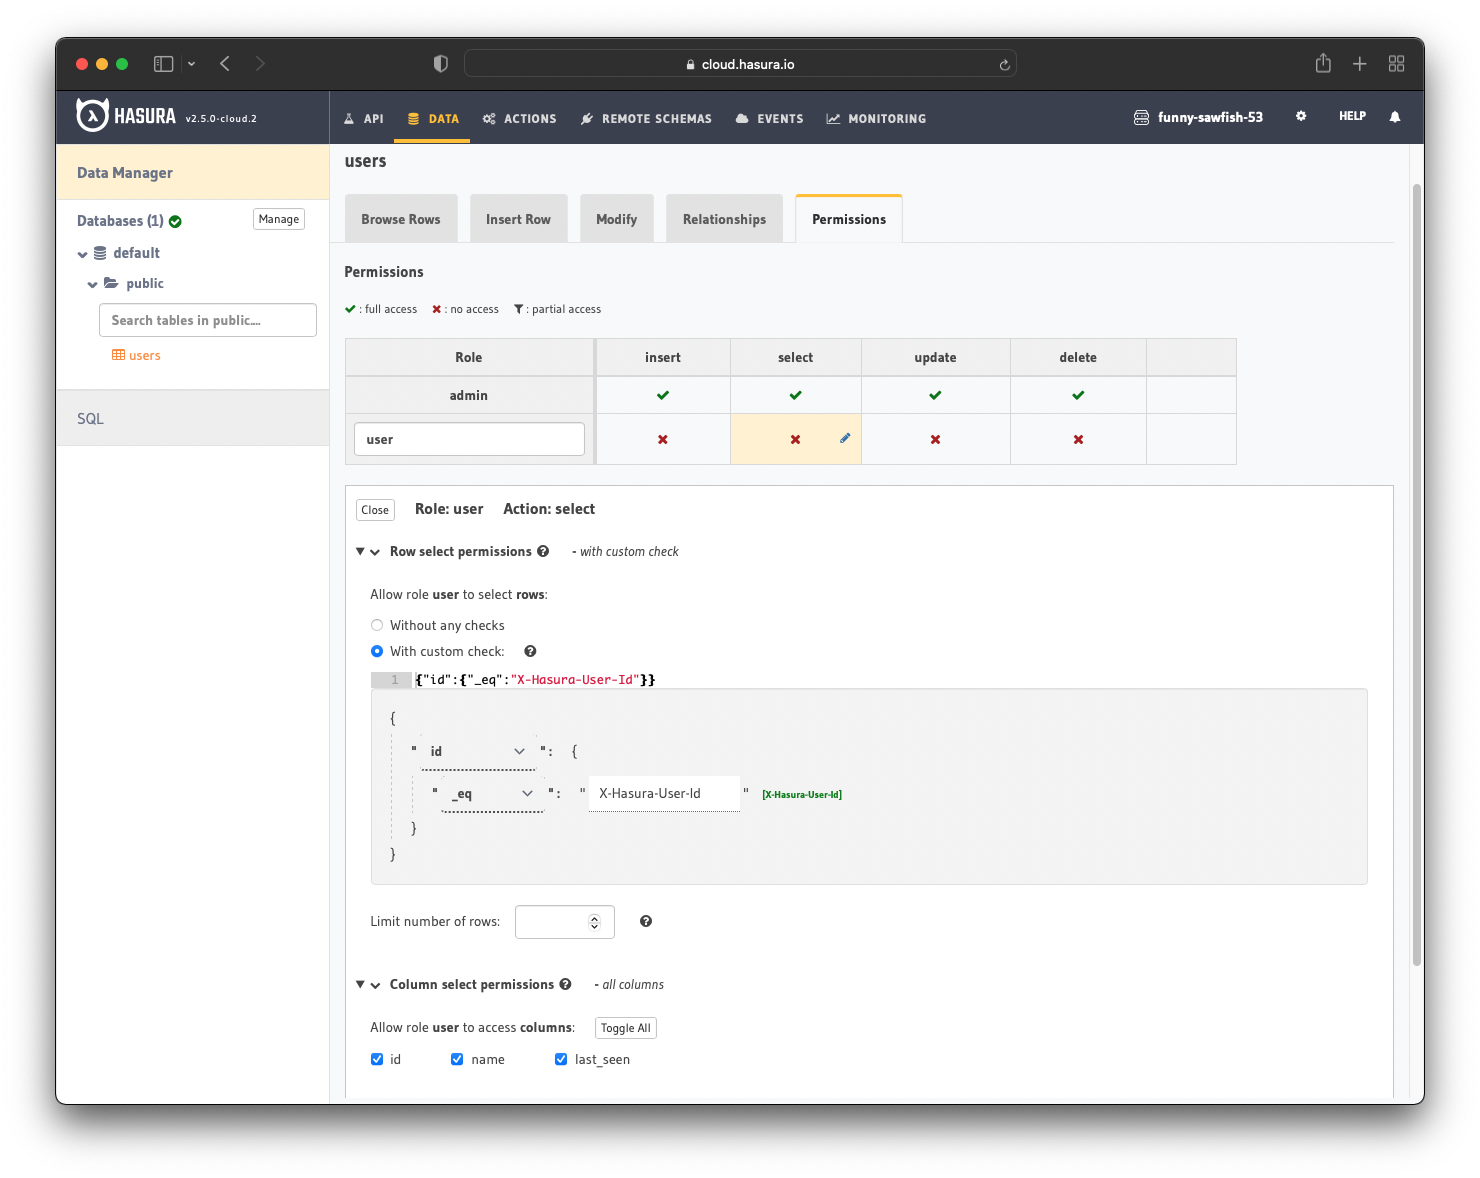
This way, users cannot read other people’s records. They can only access theirs.
Front-end Implementation
The front-end implementation varies greatly because of the diversity of libraries and frameworks available. The implementation depends on the framework/library you use.
However, Clerk provides a getToken function that enables you to retrieve the token required to perform authenticated requests. You’ll have something like this in your code:
getToken({ template: 'hasura' });
Note: In your case, the template name will not be "hasura" but something else.
 Build apps and APIs 10x faster
- Built-in authorization and caching
- 8x more performant than hand-rolled APIs