Edit on GitHub
Casdoor
What is Casdoor?
Casdoor is a UI-first Identity Access Management (IAM) / Single-Sign-On (SSO) platform based on OAuth 2.0, OIDC, SAML and CAS.
Casdoor serves both the web UI and the login requests from the application users.
Casdoor comes with features such as:
- Front-end and back-end separate architecture, developed by Golang, Casdoor supports high concurrency, provides web-based managing UI and supports multiple languages(Chinese, English).
- Casdoor supports third-party applications login, such as GitHub, Google, QQ, WeChat, etc., and supports the extension of third-party login with plugins.
- With Casbin based authorization management, Casdoor supports ACL, RBAC, ABAC, RESTful accessing control models.
- Phone verification code, email verification code and password retrieval functions.
- Accessing logs auditing and recording.
- Alibaba Cloud, Tencent Cloud, Qiniu Cloud image CDN cloud storage.
- Customizable registration, login, and password retrieval pages.
- Casdoor supports integration with existing systems by db sync, so users can transition to Casdoor smoothly.
- Casdoor supports mainstream databases: MySQL, PostgreSQL, SQL Server, etc., and supports the extension of new databases with plugins.
In this section, you will learn how to integrate Casdoor with Hasura.
Deploy Casdoor
Firstly, you should deploy a Casdoor instance.
You can refer to the Casdoor official documentation for the Server Installation.
After a successful deployment, you need to ensure:
- The Casdoor server is successfully running on http://localhost:8000.
- Open your favorite browser and visit http://localhost:7001, you will see the login page of Casdoor.
- Input
adminand123to test login functionality is working fine.
Then you can quickly implement a Casdoor-based login page in your own app with the following steps.
Configure Casdoor application
- Create or use an existing Casdoor application.
- Add a redirect url:
http://CASDOOR_HOSTNAME/login
- Copy the client ID, we will need it in the following steps.
Add organization in Casdoor
Now we can add Hasura organization in Casdoor.
Click "Organization" page and click "add", then fill in the information and save the organization.
Add user in Casdoor
Now you have the application running, but you must create a user and assign them a role next.
Go to the “Users” page and click “Add user” in the top right corner. This will open a new page where you can add the user.
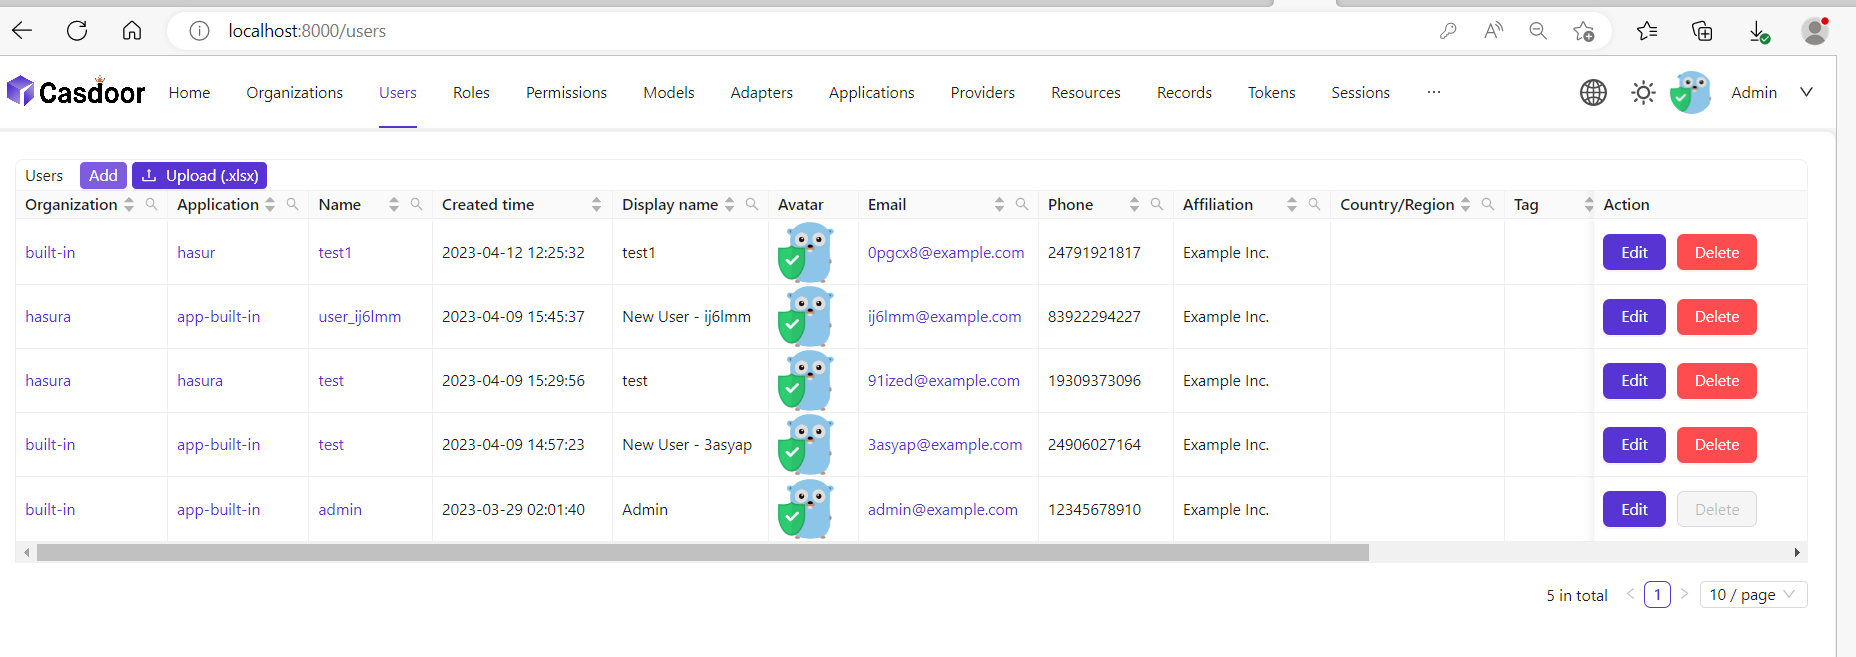
Save the user after adding a username and the organization Hasura (other details are optional).
Now you need to set up a password for your user, which you can do by clicking "Manage Your Password."
Choose a password for your user and confirm it.
Create a Hasura instance
Create a Hasura instance using either Hasura Cloud or Docker.
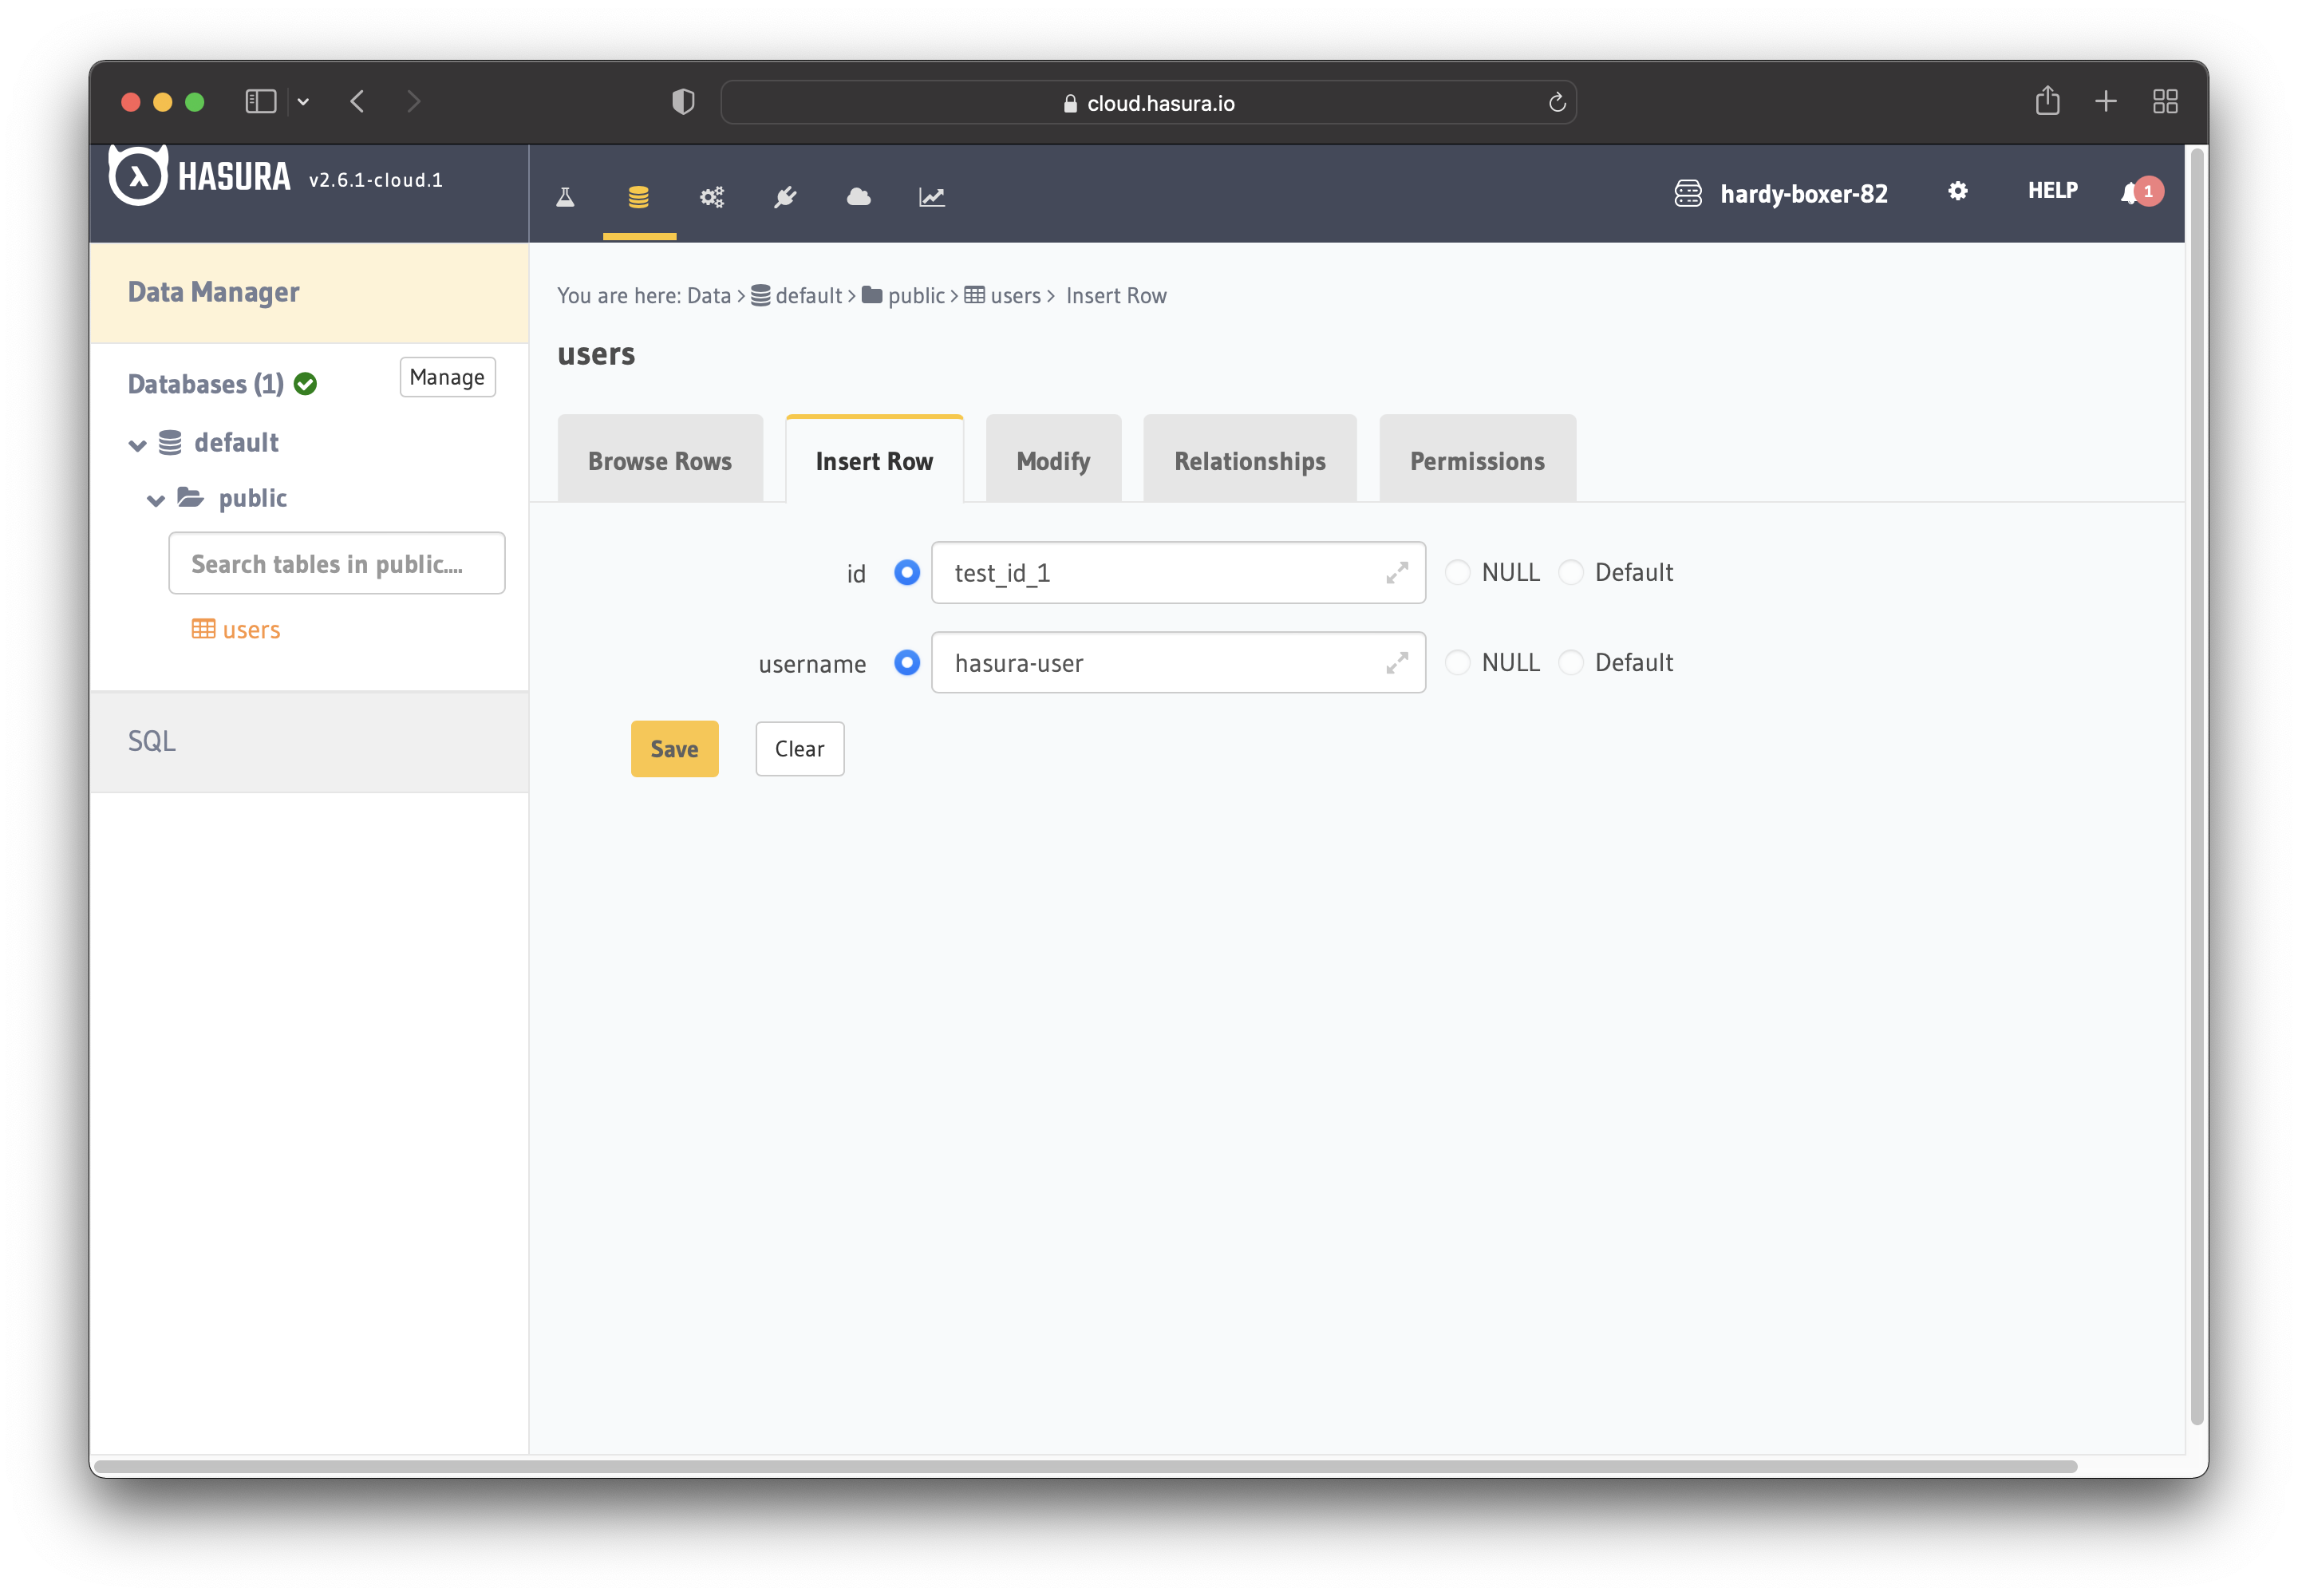
Now, create a users table with the following columns:
idof type Text (Primary Key)usernameof type Text
See the image below for reference.

The next step is to create a user role for the app. Users should be able to see only their records, but not the other
people’s records.
Configure the user role as shown in the image below. For more information, read about
configuring permission rules in Hasura.
Click "Permissions" and assign the permissions for admin,manager and user.
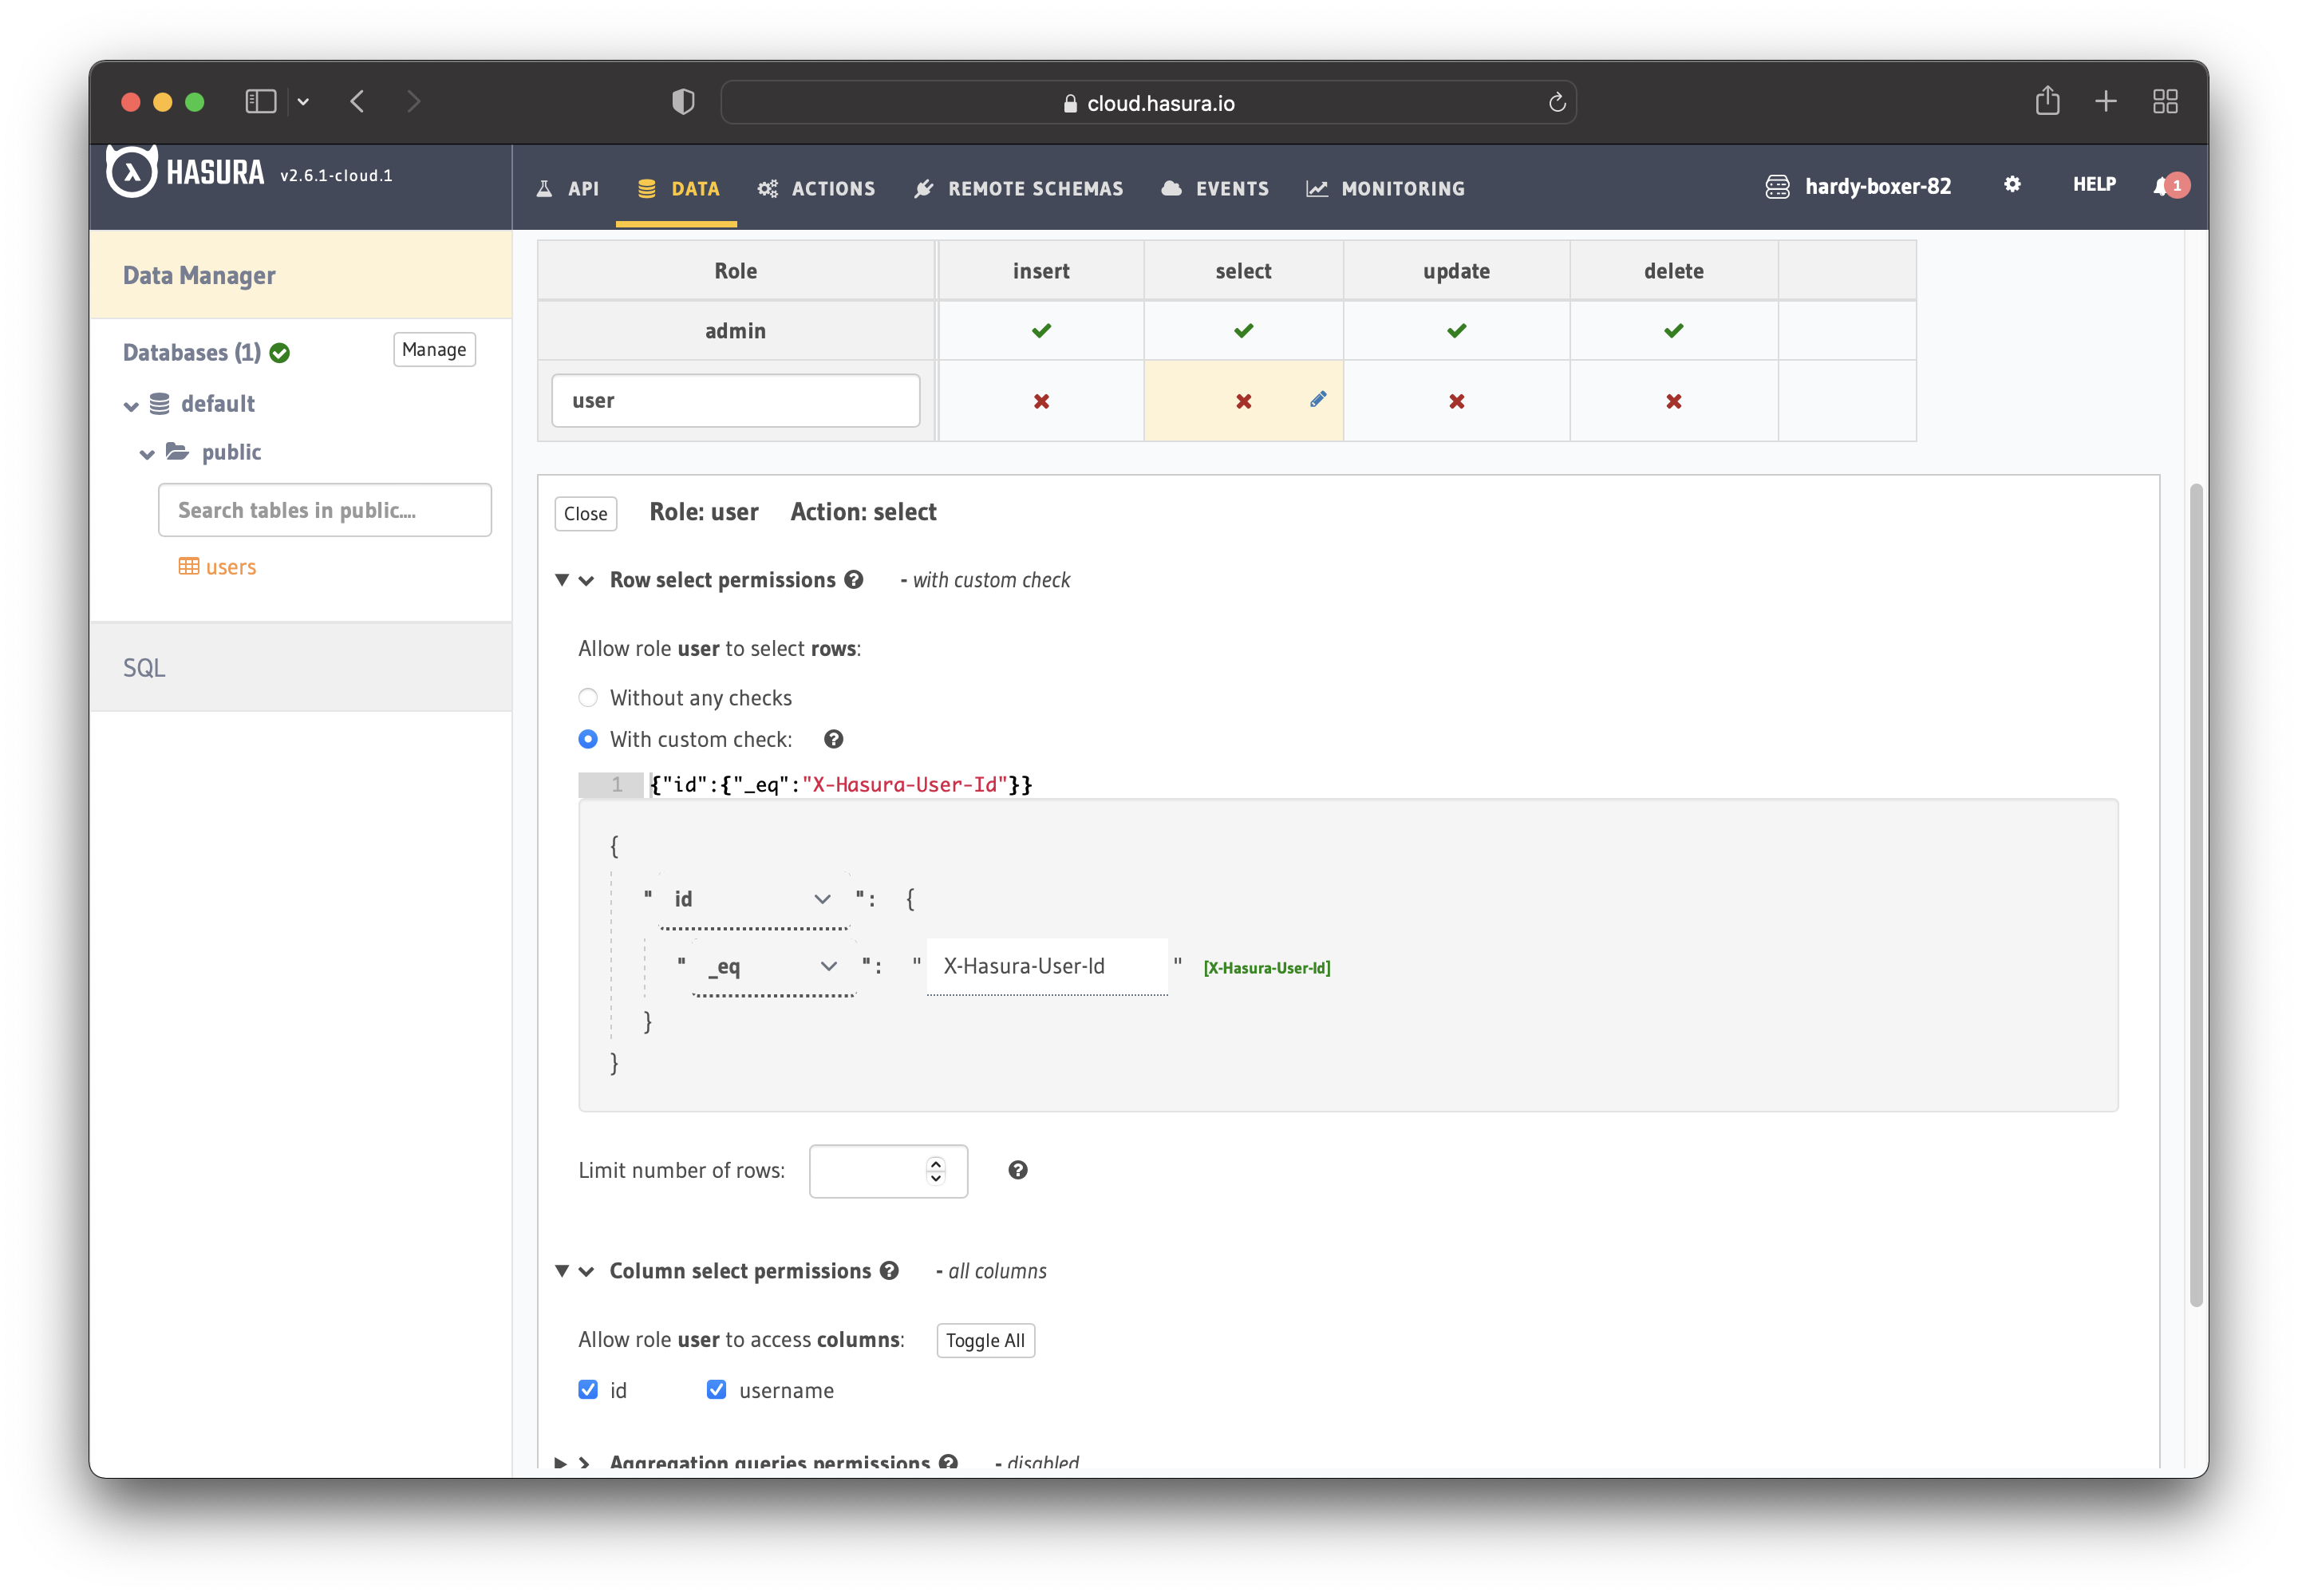
This way, users can only access their own records.
For testing purposes, add a dummy user. This is to ensure that when you use the JWT token, you only see your user’s details and not other users’ details.
Next, set the JWT_SECRET in Hasura.
Configure Hasura with Casdoor
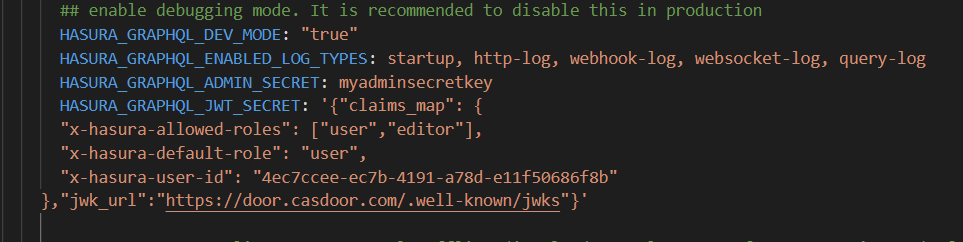
In this step, you need to add the HASURA_GRAPHQL_JWT_SECRET to Hasura.
To do so, if you are running Hasura on docker, please go to the Hasura docker-compose.yaml and then add the new HASURA_GRAPHQL_JWT_SECRET as below.
The HASURA_GRAPHQL_JWT_SECRET should be in the following format:
HASURA_GRAPHQL_JWT_SECRET: '{"claims_map": {"x-hasura-allowed-roles": ["user","editor"],"x-hasura-default-role": "user","x-hasura-user-id": "userID"},"jwk_url":"https://door.casdoor.com/.well-known/jwks"}'
Save the change, and restart the Docker container.
If you are runnning Hasura Cloud, you can configure Hasura on Env vars.

Click "HASURA_GRAPHQL_JWT_SECRET" and input
'{"claims_map": {"x-hasura-allowed-roles": ["user","editor"],"x-hasura-default-role": "user","x-hasura-user-id": "userID"},"jwk_url":"https://door.casdoor.com/.well-known/jwks"}'

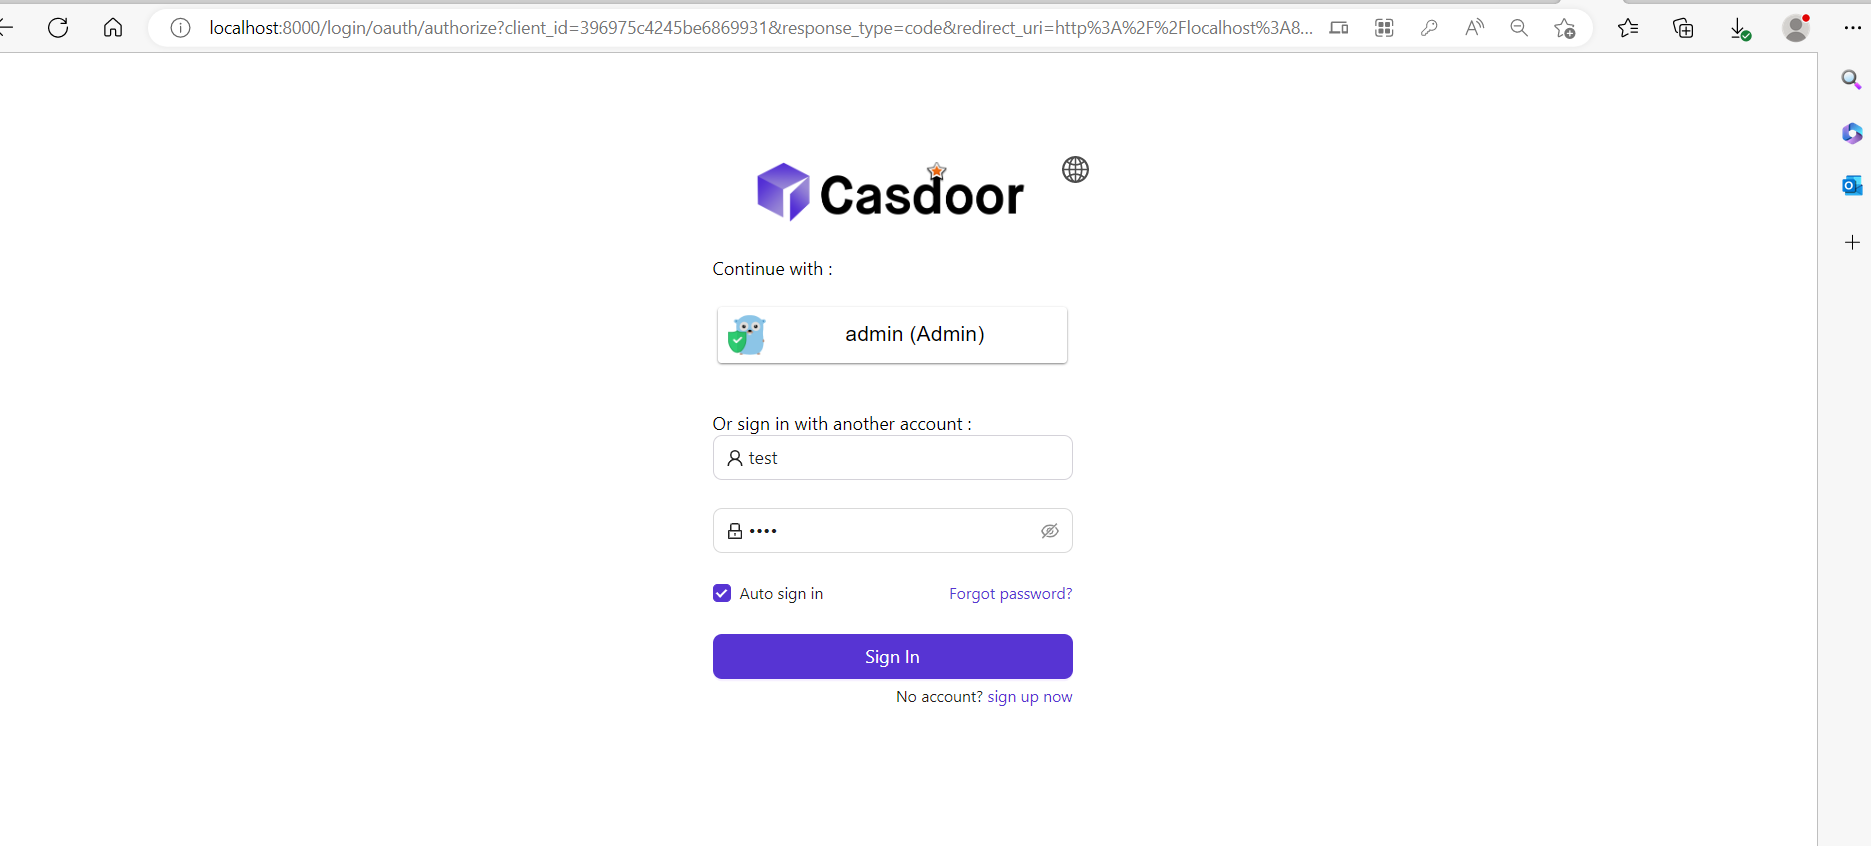
Retrieve JWT Token
Since there is no client implementation, you can get your access token by making a request by below URL:
http://localhost:8000/login/oauth/authorize?client_id=<client ID>>&response_type=code&redirect_uri=http%3A%2F%2Flocalhost%3A8080%2Flogin&scope=read&state=app-built-in<public certificate>>
Change the client ID to the ID you copied before, and input the public certificate of Casdoor, which you can find in
http://CASDOOR_HOSTNAME/Certs.
Then, input the username and password you created for Hasura earlier.
Click Sign in.
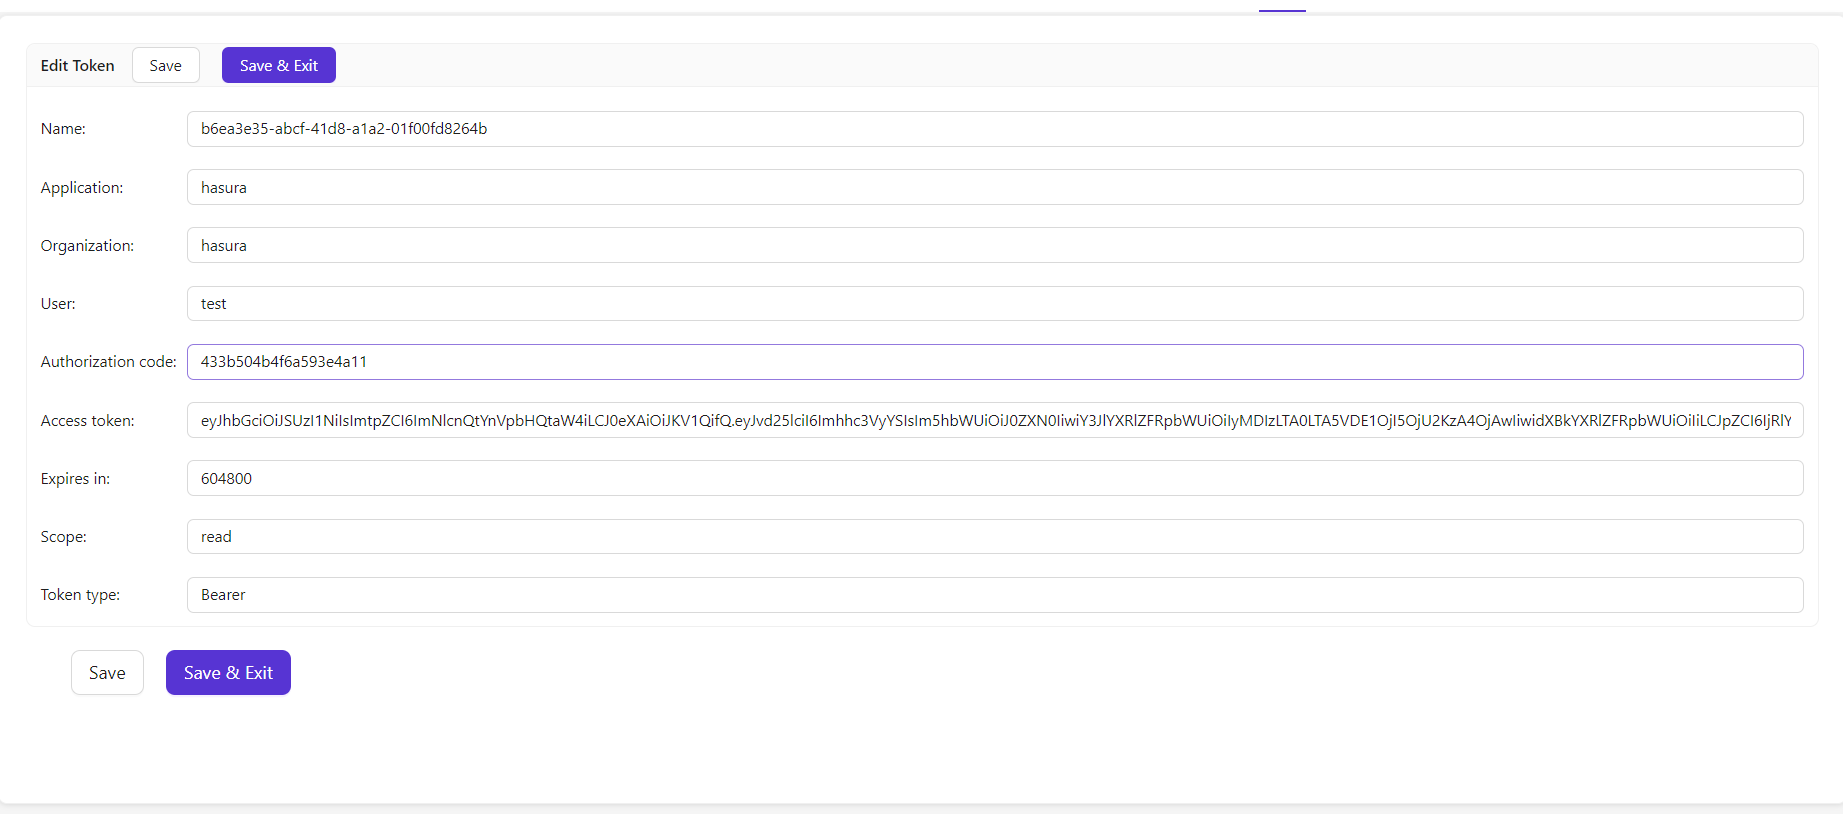
Go back to Casdoor/Token page
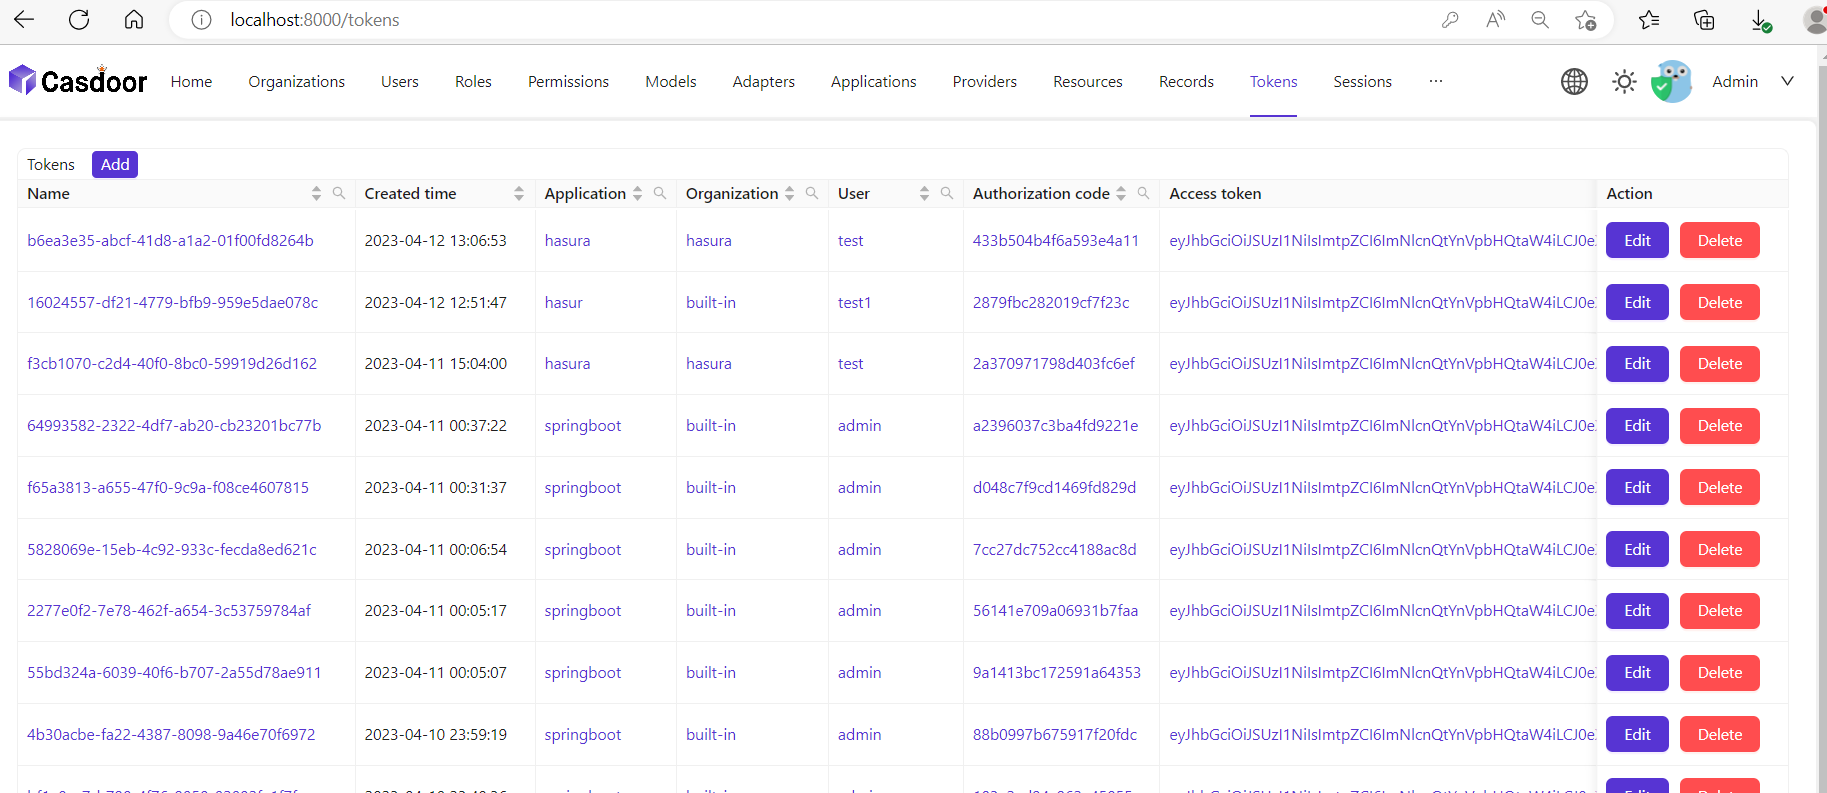
Find the username you entered before then click "Edit" and copy the token.
Now you can use the access token to make the authenticated requests. In the example below, Hasura returned the appropriate user rather than all the users from the database.

 Build apps and APIs 10x faster
- Built-in authorization and caching
- 8x more performant than hand-rolled APIs