Edit on GitHub
FusionAuth
The first step is to create a FusionAuth instance. Check the 5 minute setup guide from FusionAuth to learn how to do it.
Create a new app
Once the instance is up and running, open the admin console and go to the "Applications" page. Click the green "+" button to add a new application.
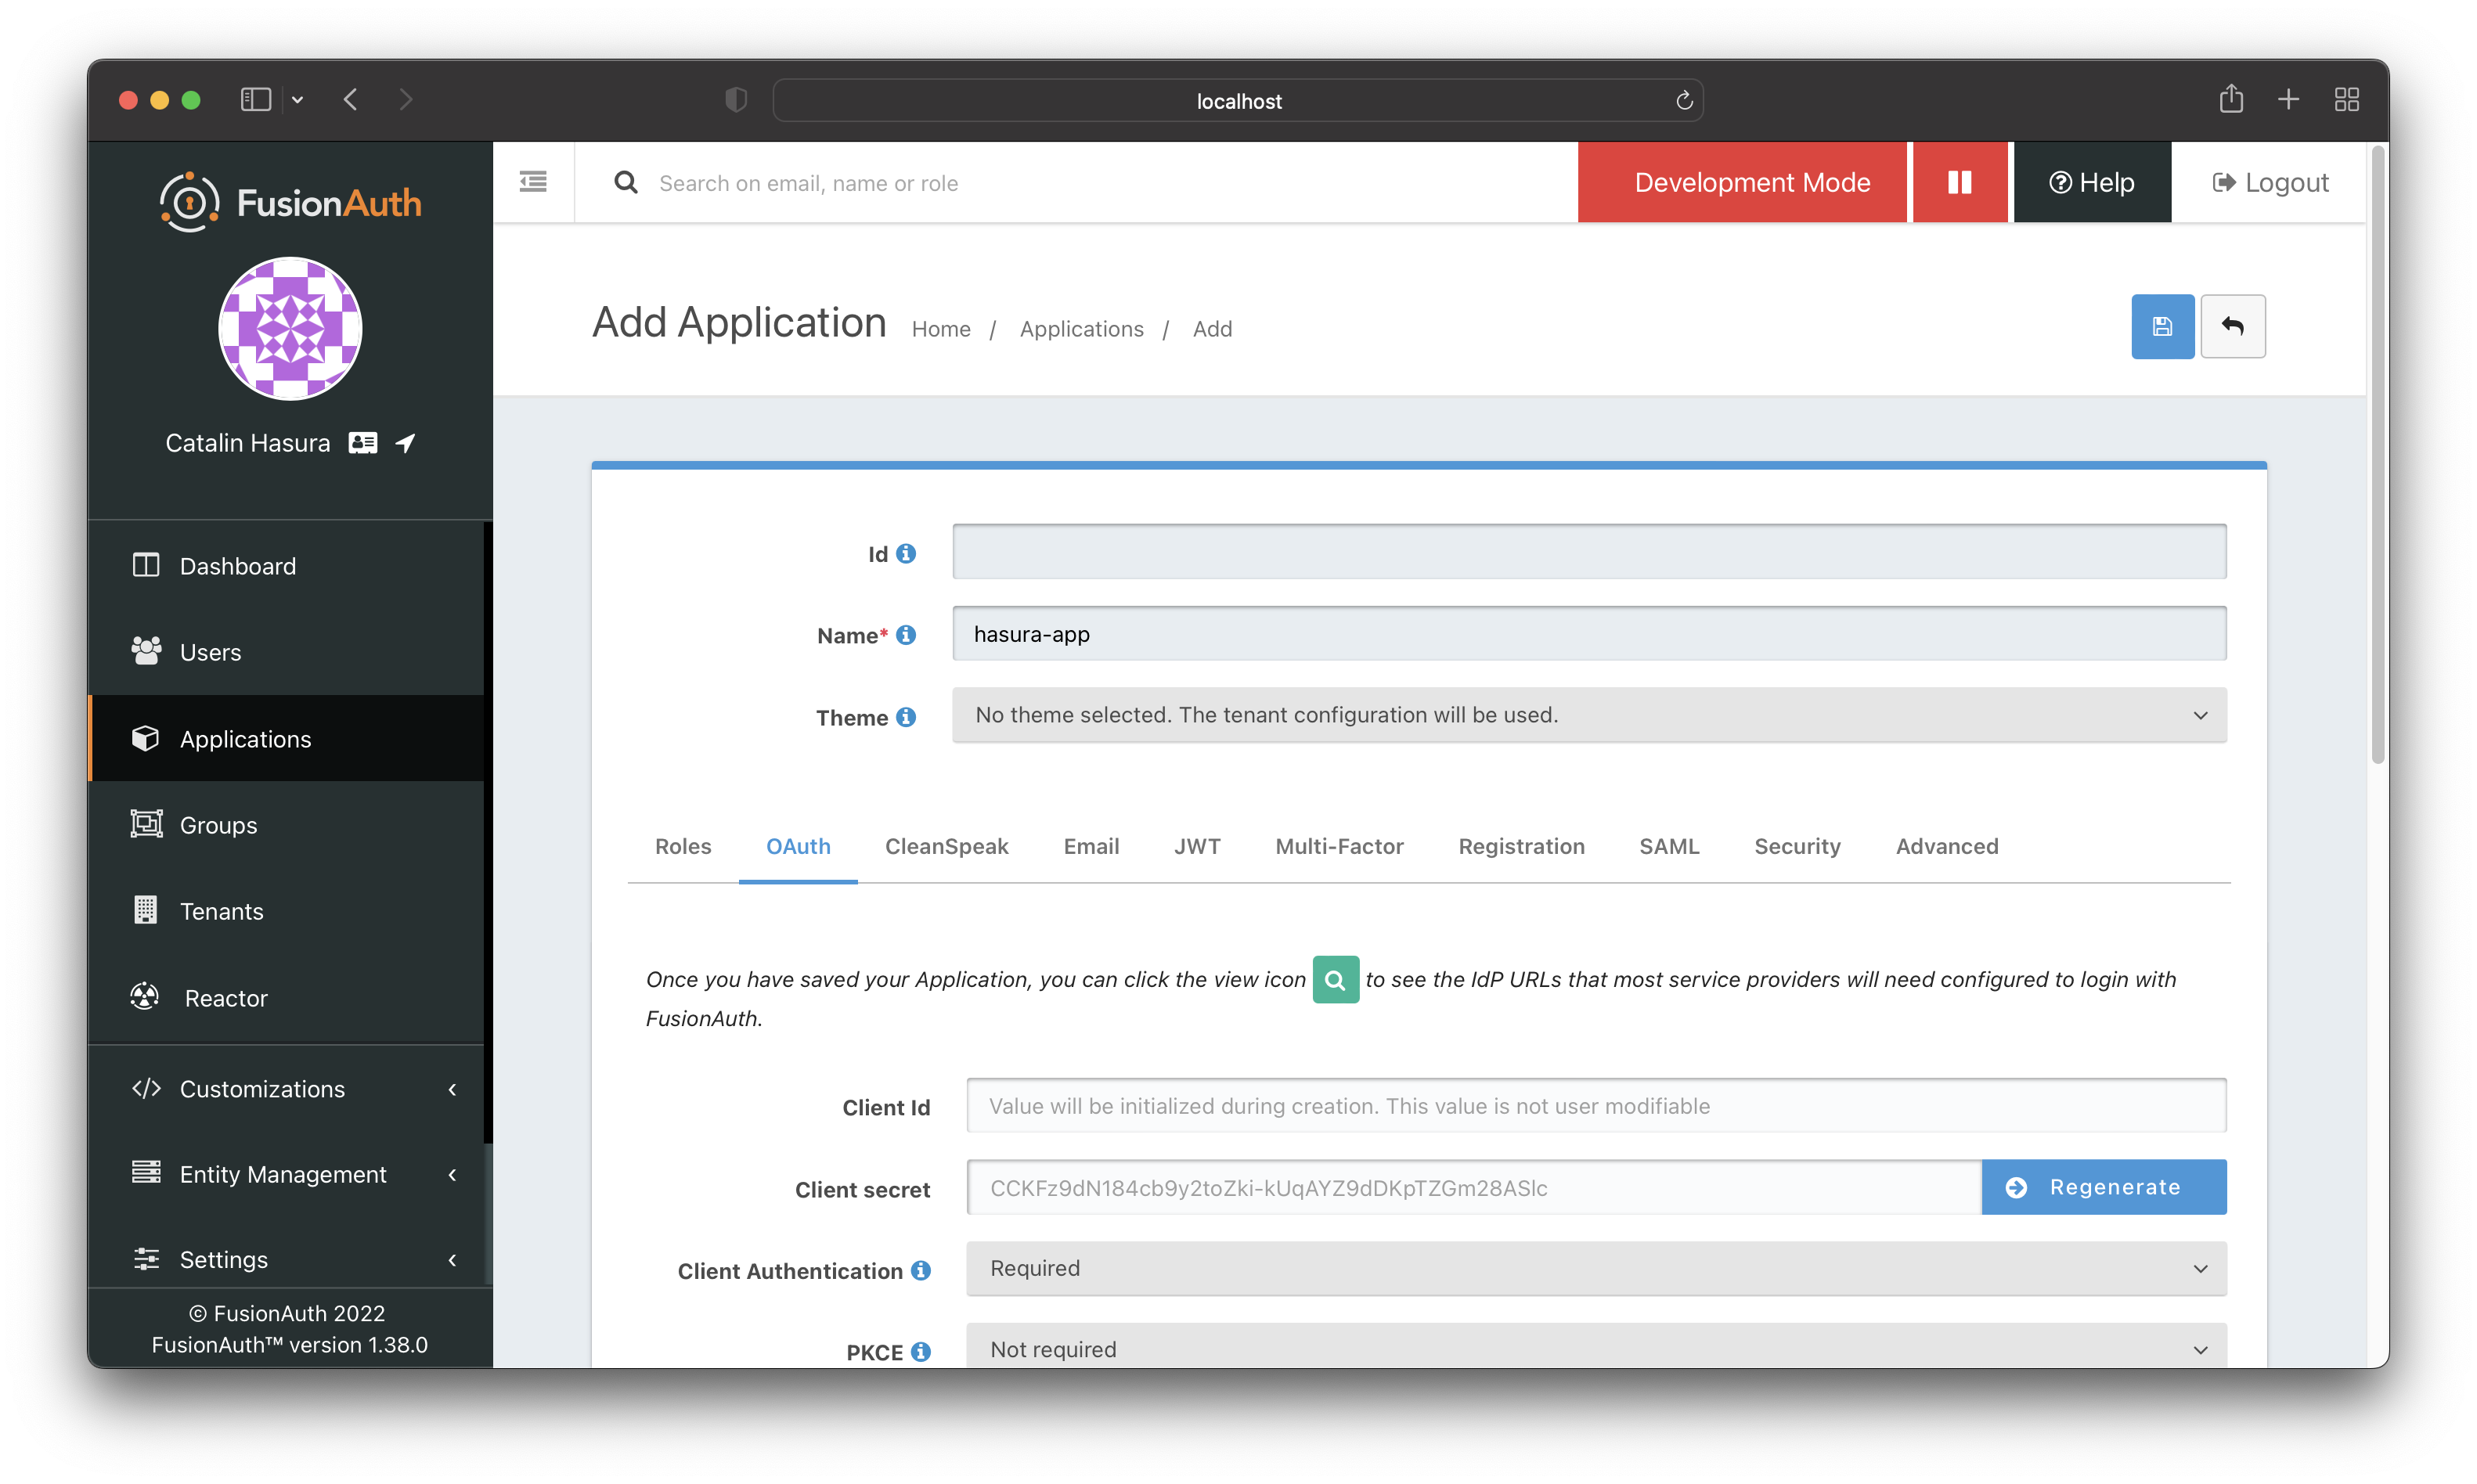
Enter a name for the app and then click on the "OAuth" tab. Make sure:
- you enable "Generate Refresh Tokens" and "Require registration"
- add "Authorized redirect URLs"
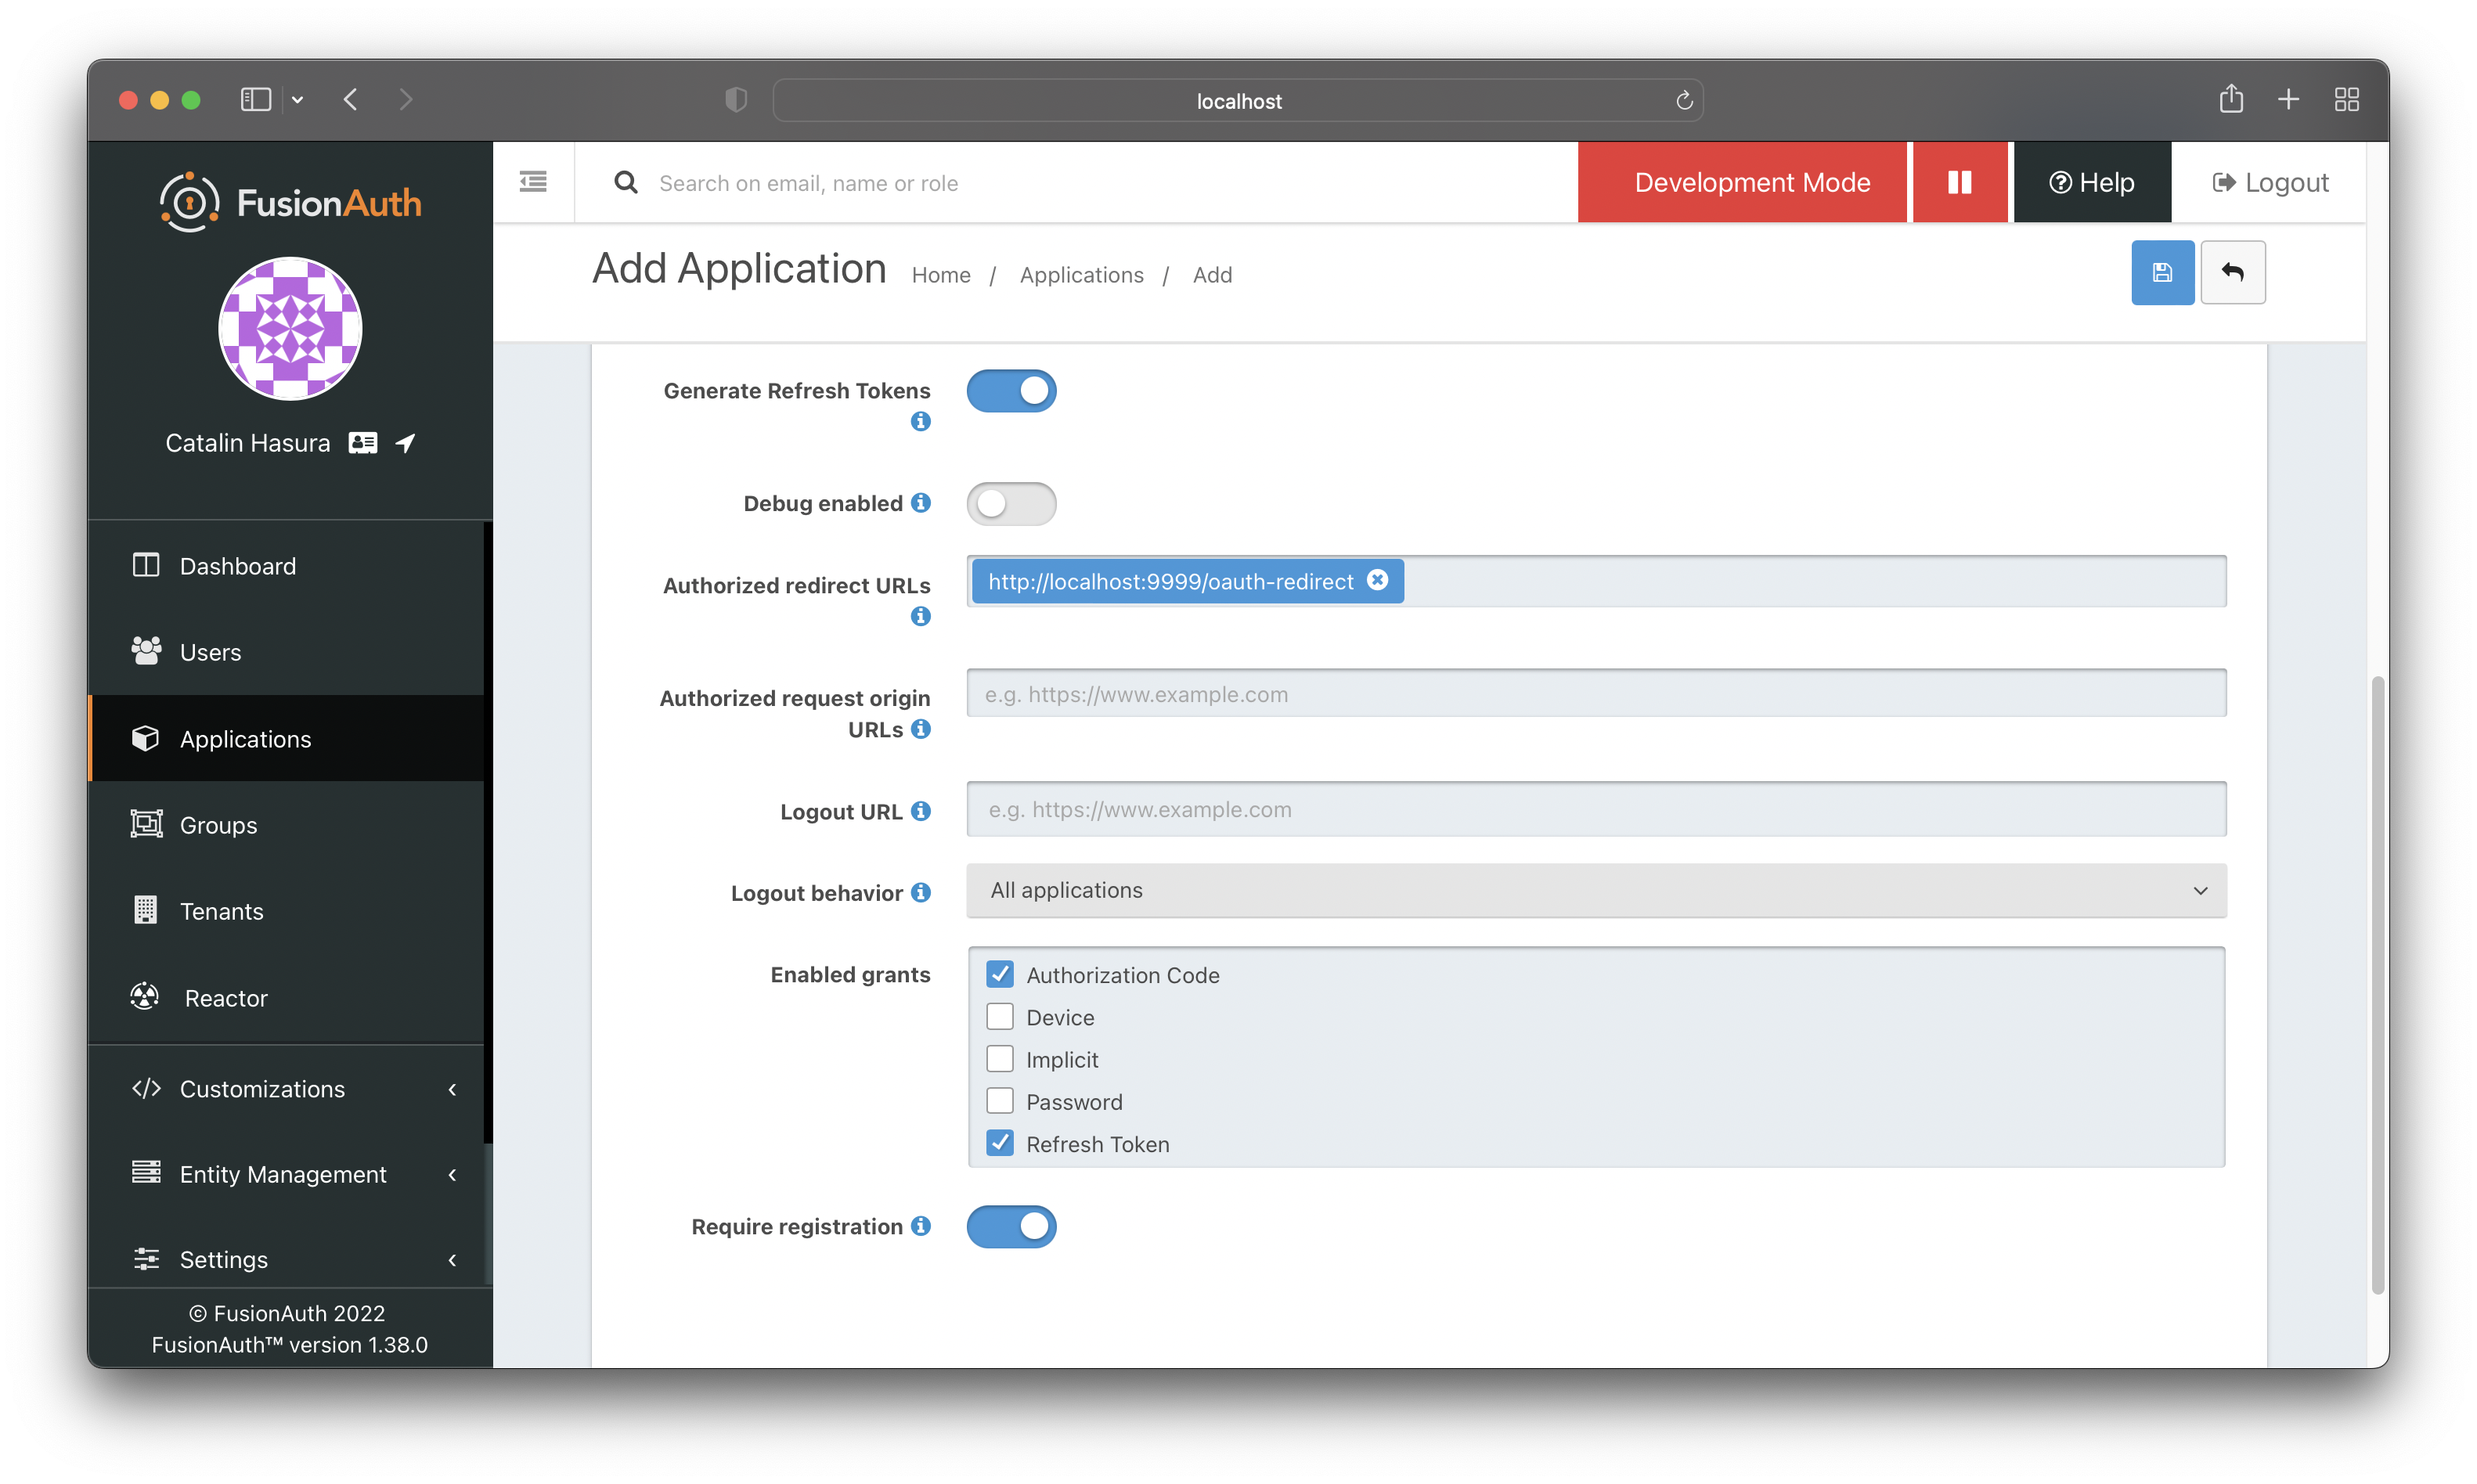
Configure the OAuth settings as shown in the image above.
Create a lambda function
The next step involves creating a lambda function to add custom claims to the JWT. The custom claims from the JWT tell Hasura about the role of the user making the request. As a result, Hasura can enforce the appropriate authorization rules.
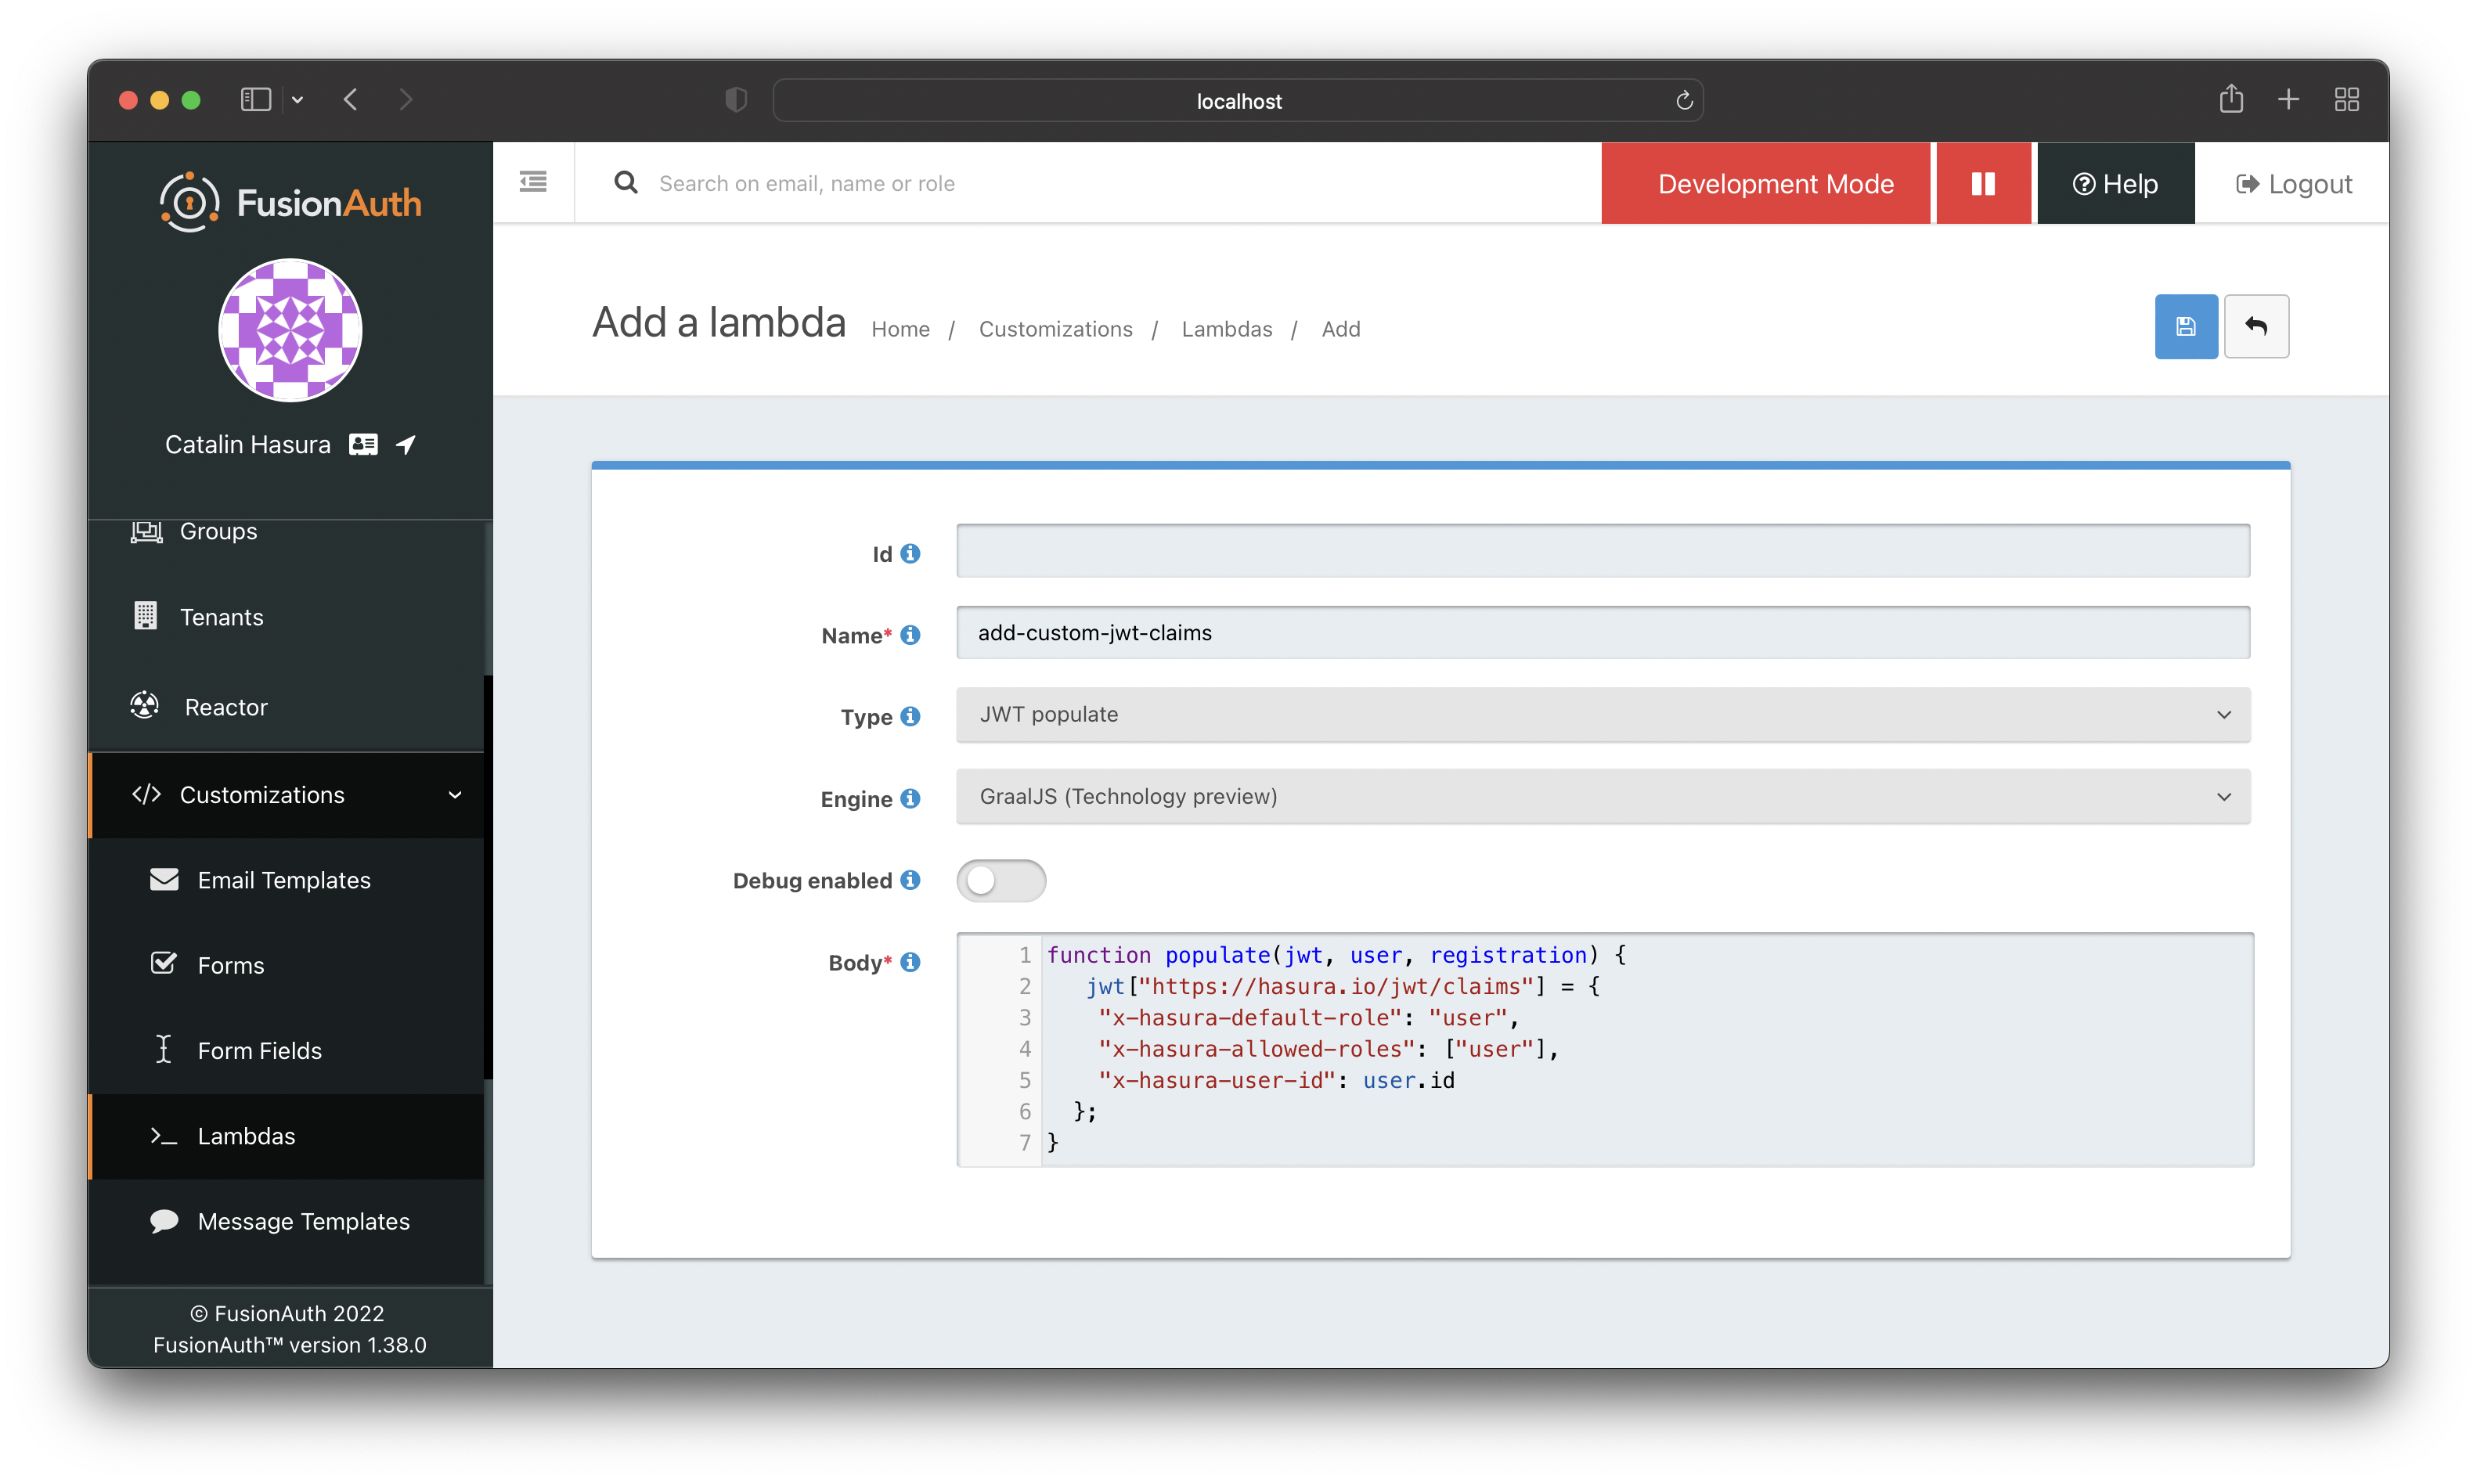
To create a new lambda function, go to "Customizations > Lambdas" and click the green "+" button.
Name the lambda, choose the "JWT populate" type, and add the following code:
function populate(jwt, user, registration) {jwt["https://hasura.io/jwt/claims"] = {"x-hasura-default-role": "user","x-hasura-allowed-roles": ["user"],"x-hasura-user-id": user.id};}
Now you need to configure the previously created app to use this lambda. Navigate to the "Applications" page and edit the app.
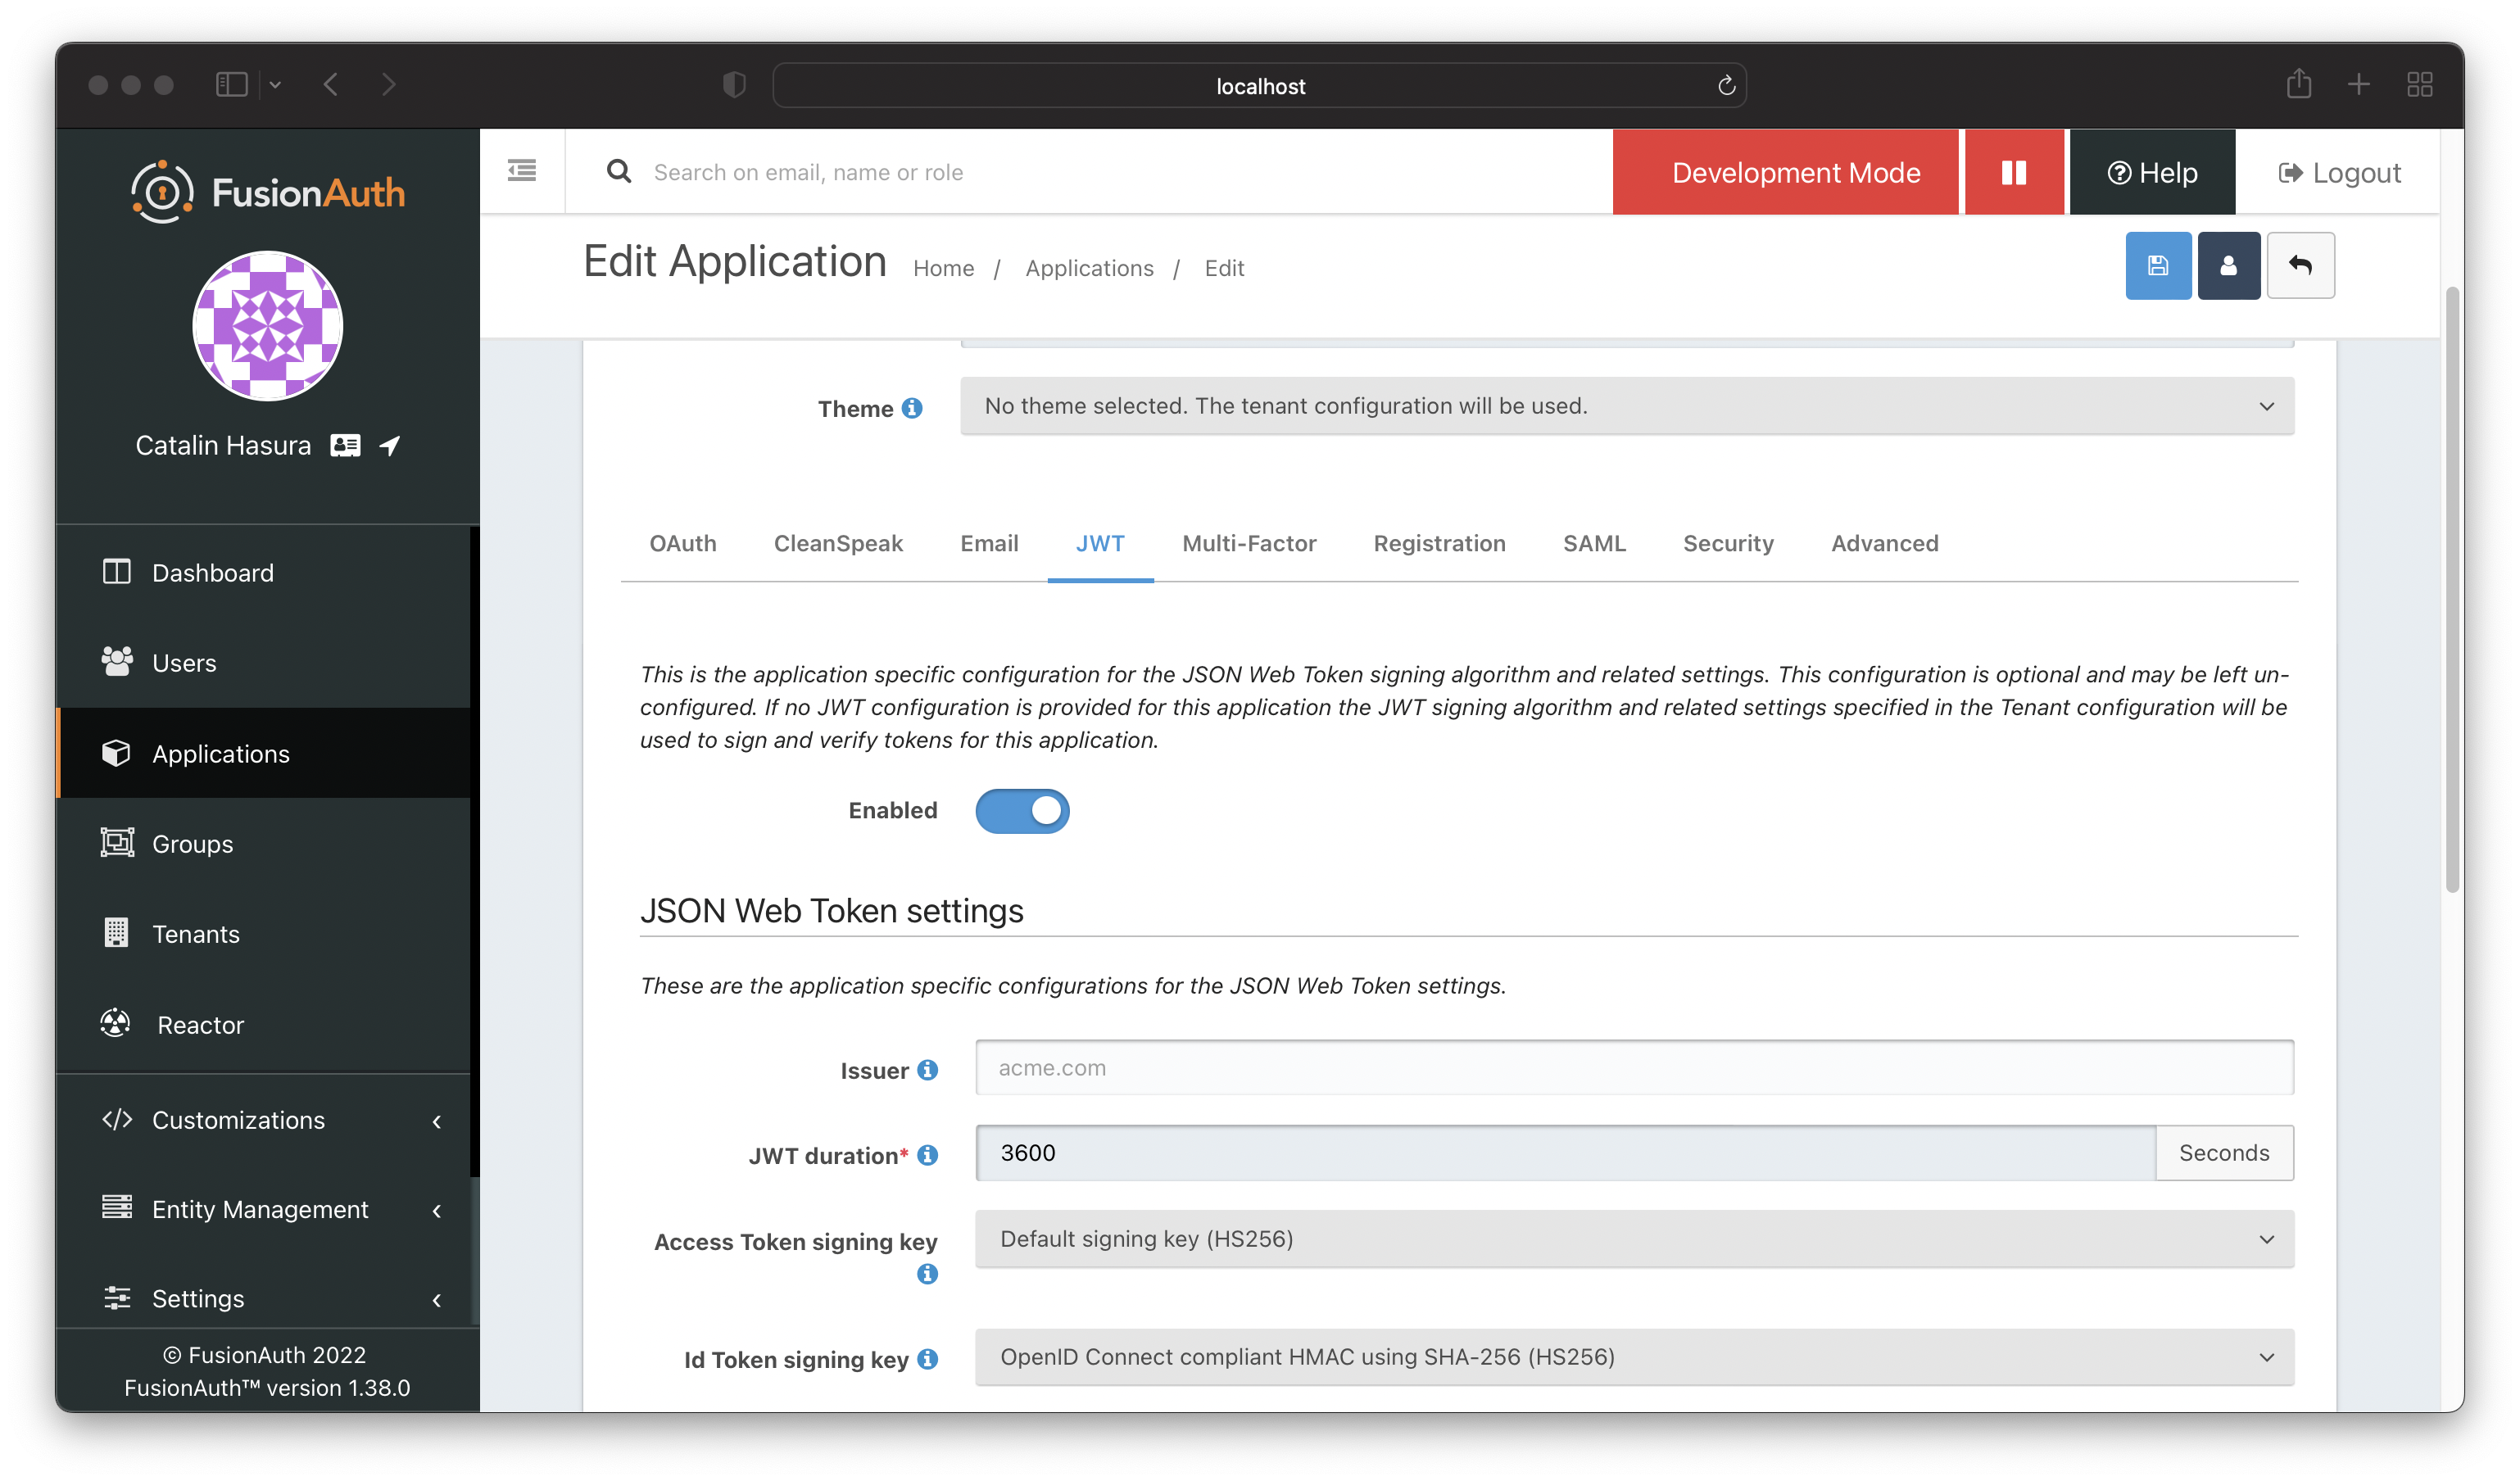
Click on the "JWT" tab and enable the JWT.
Scroll down until you see the "Lambda settings" sections. Once there, add the lambda for the "Access Token populate lambda" field.
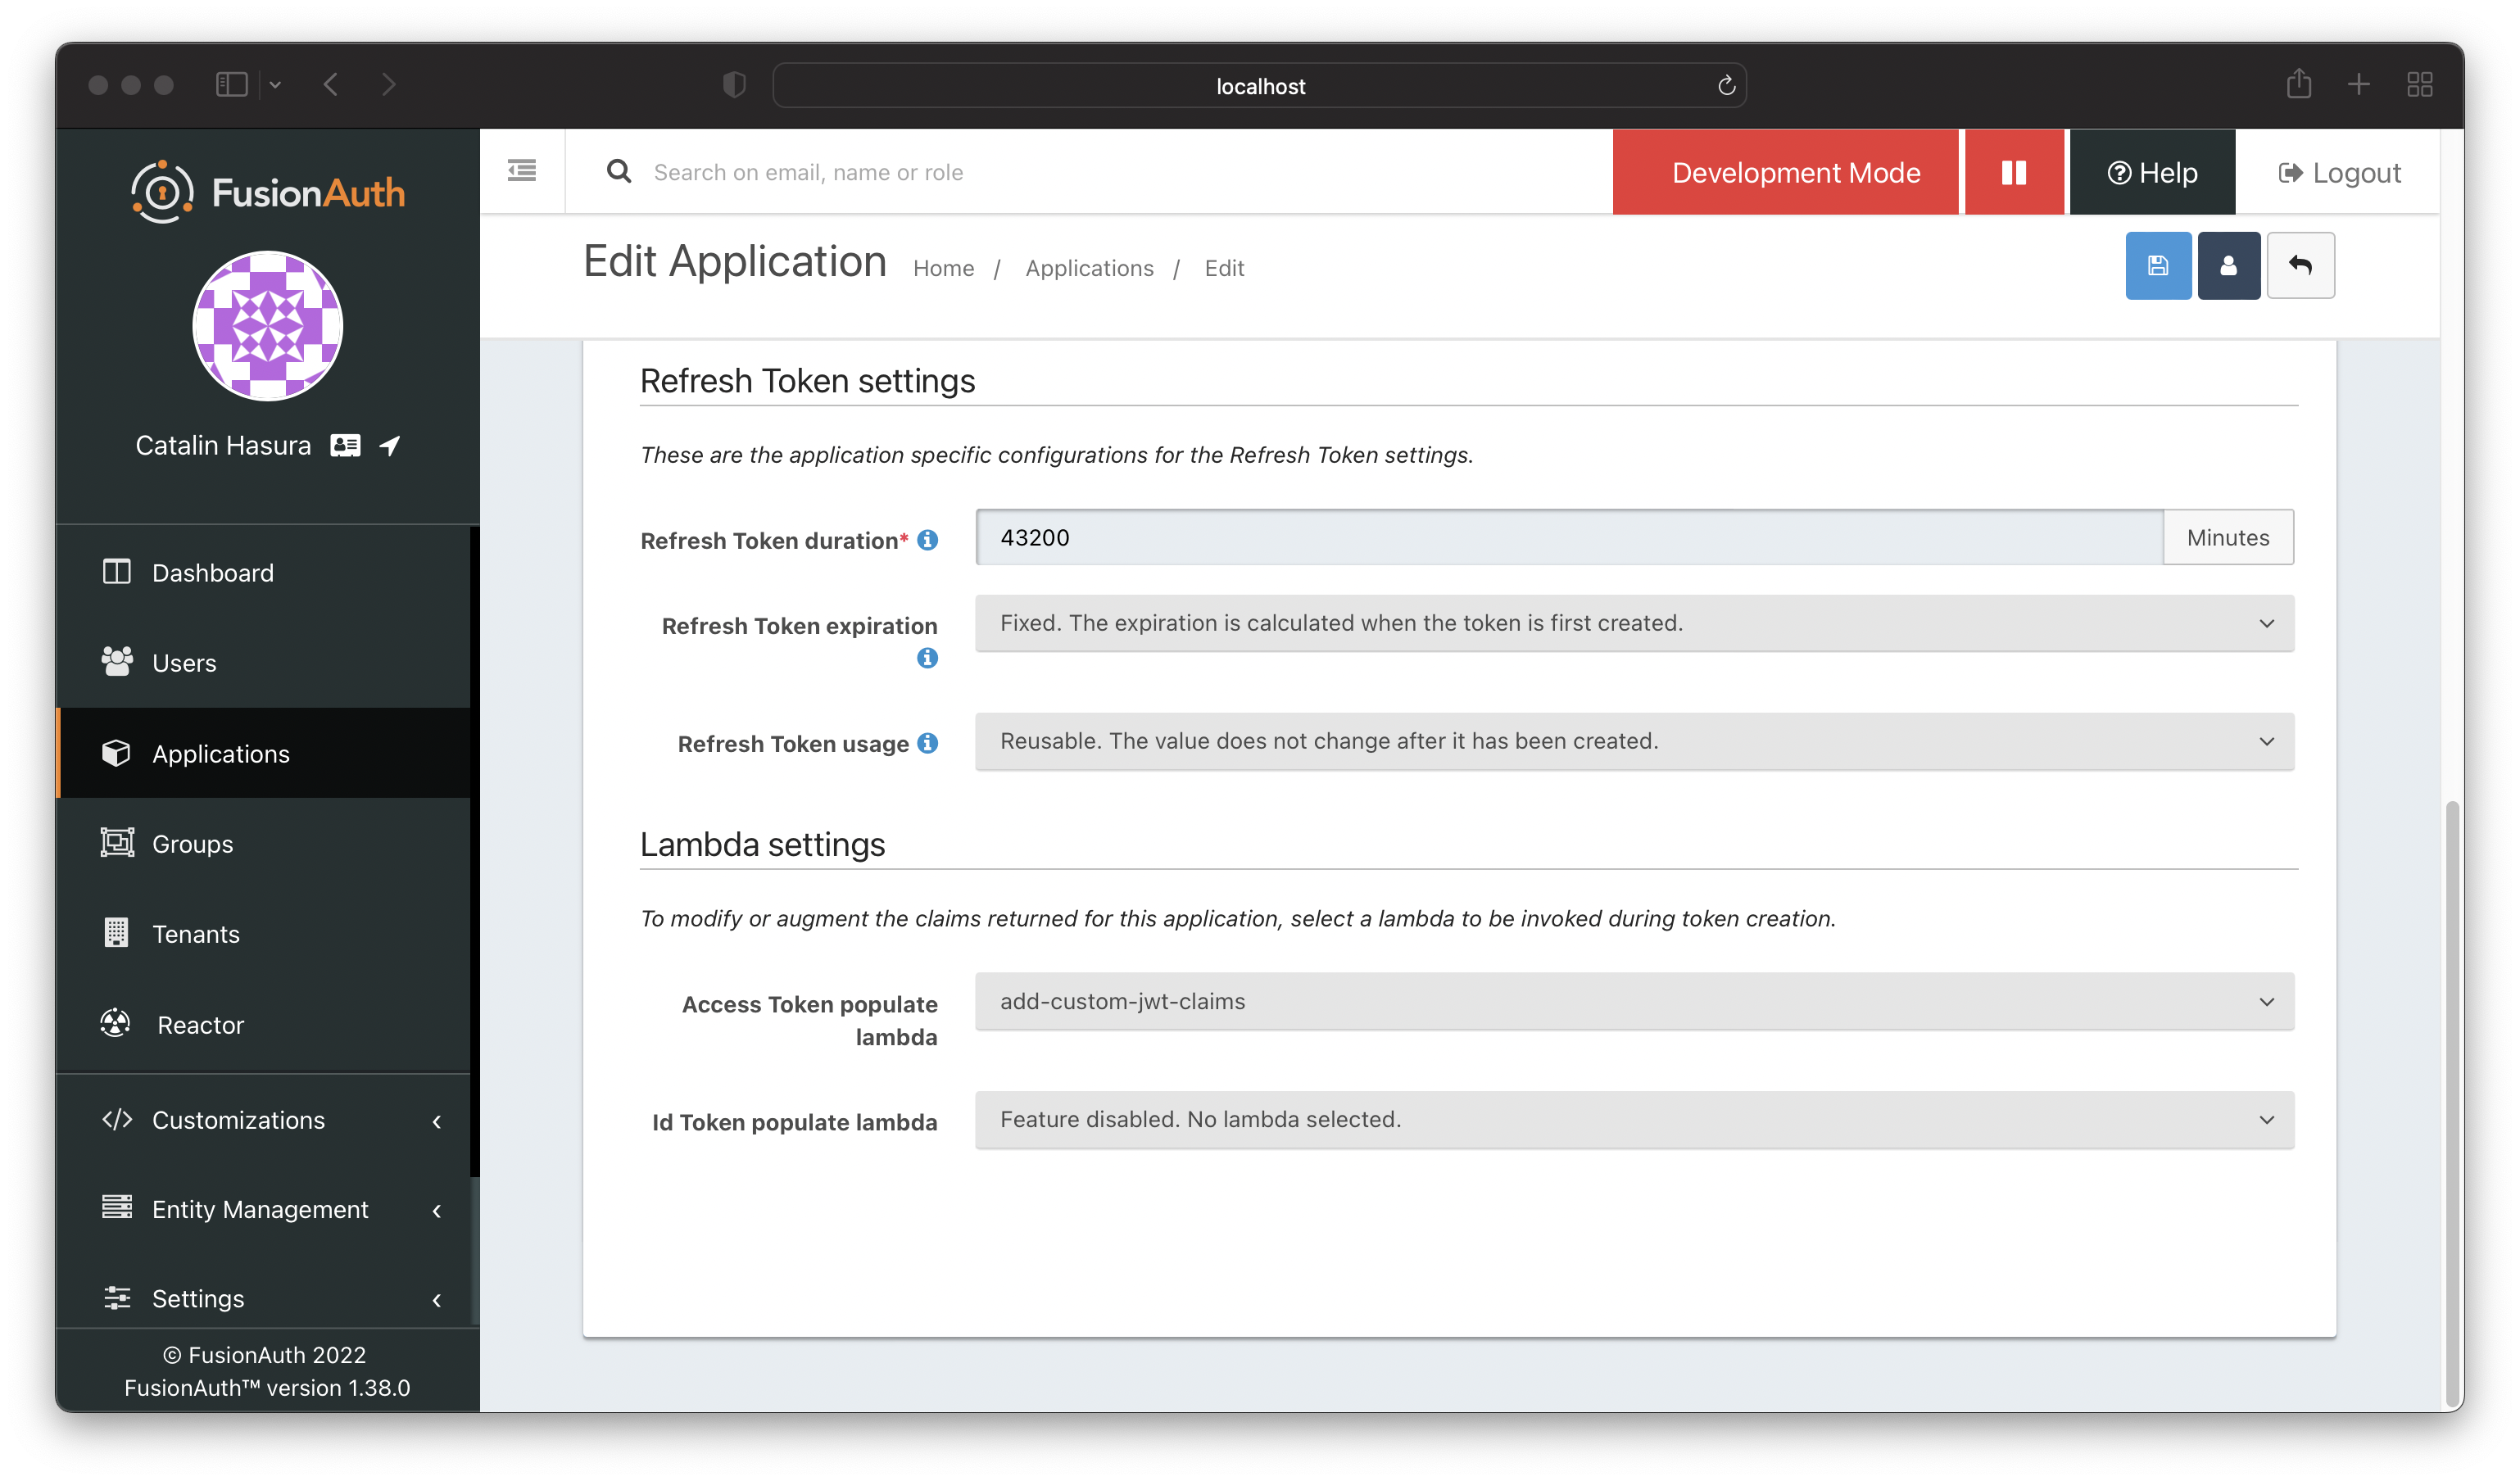
Save the settings.
Create a signing key
Navigate to "Settings > Key Master" and generate an RSA key.
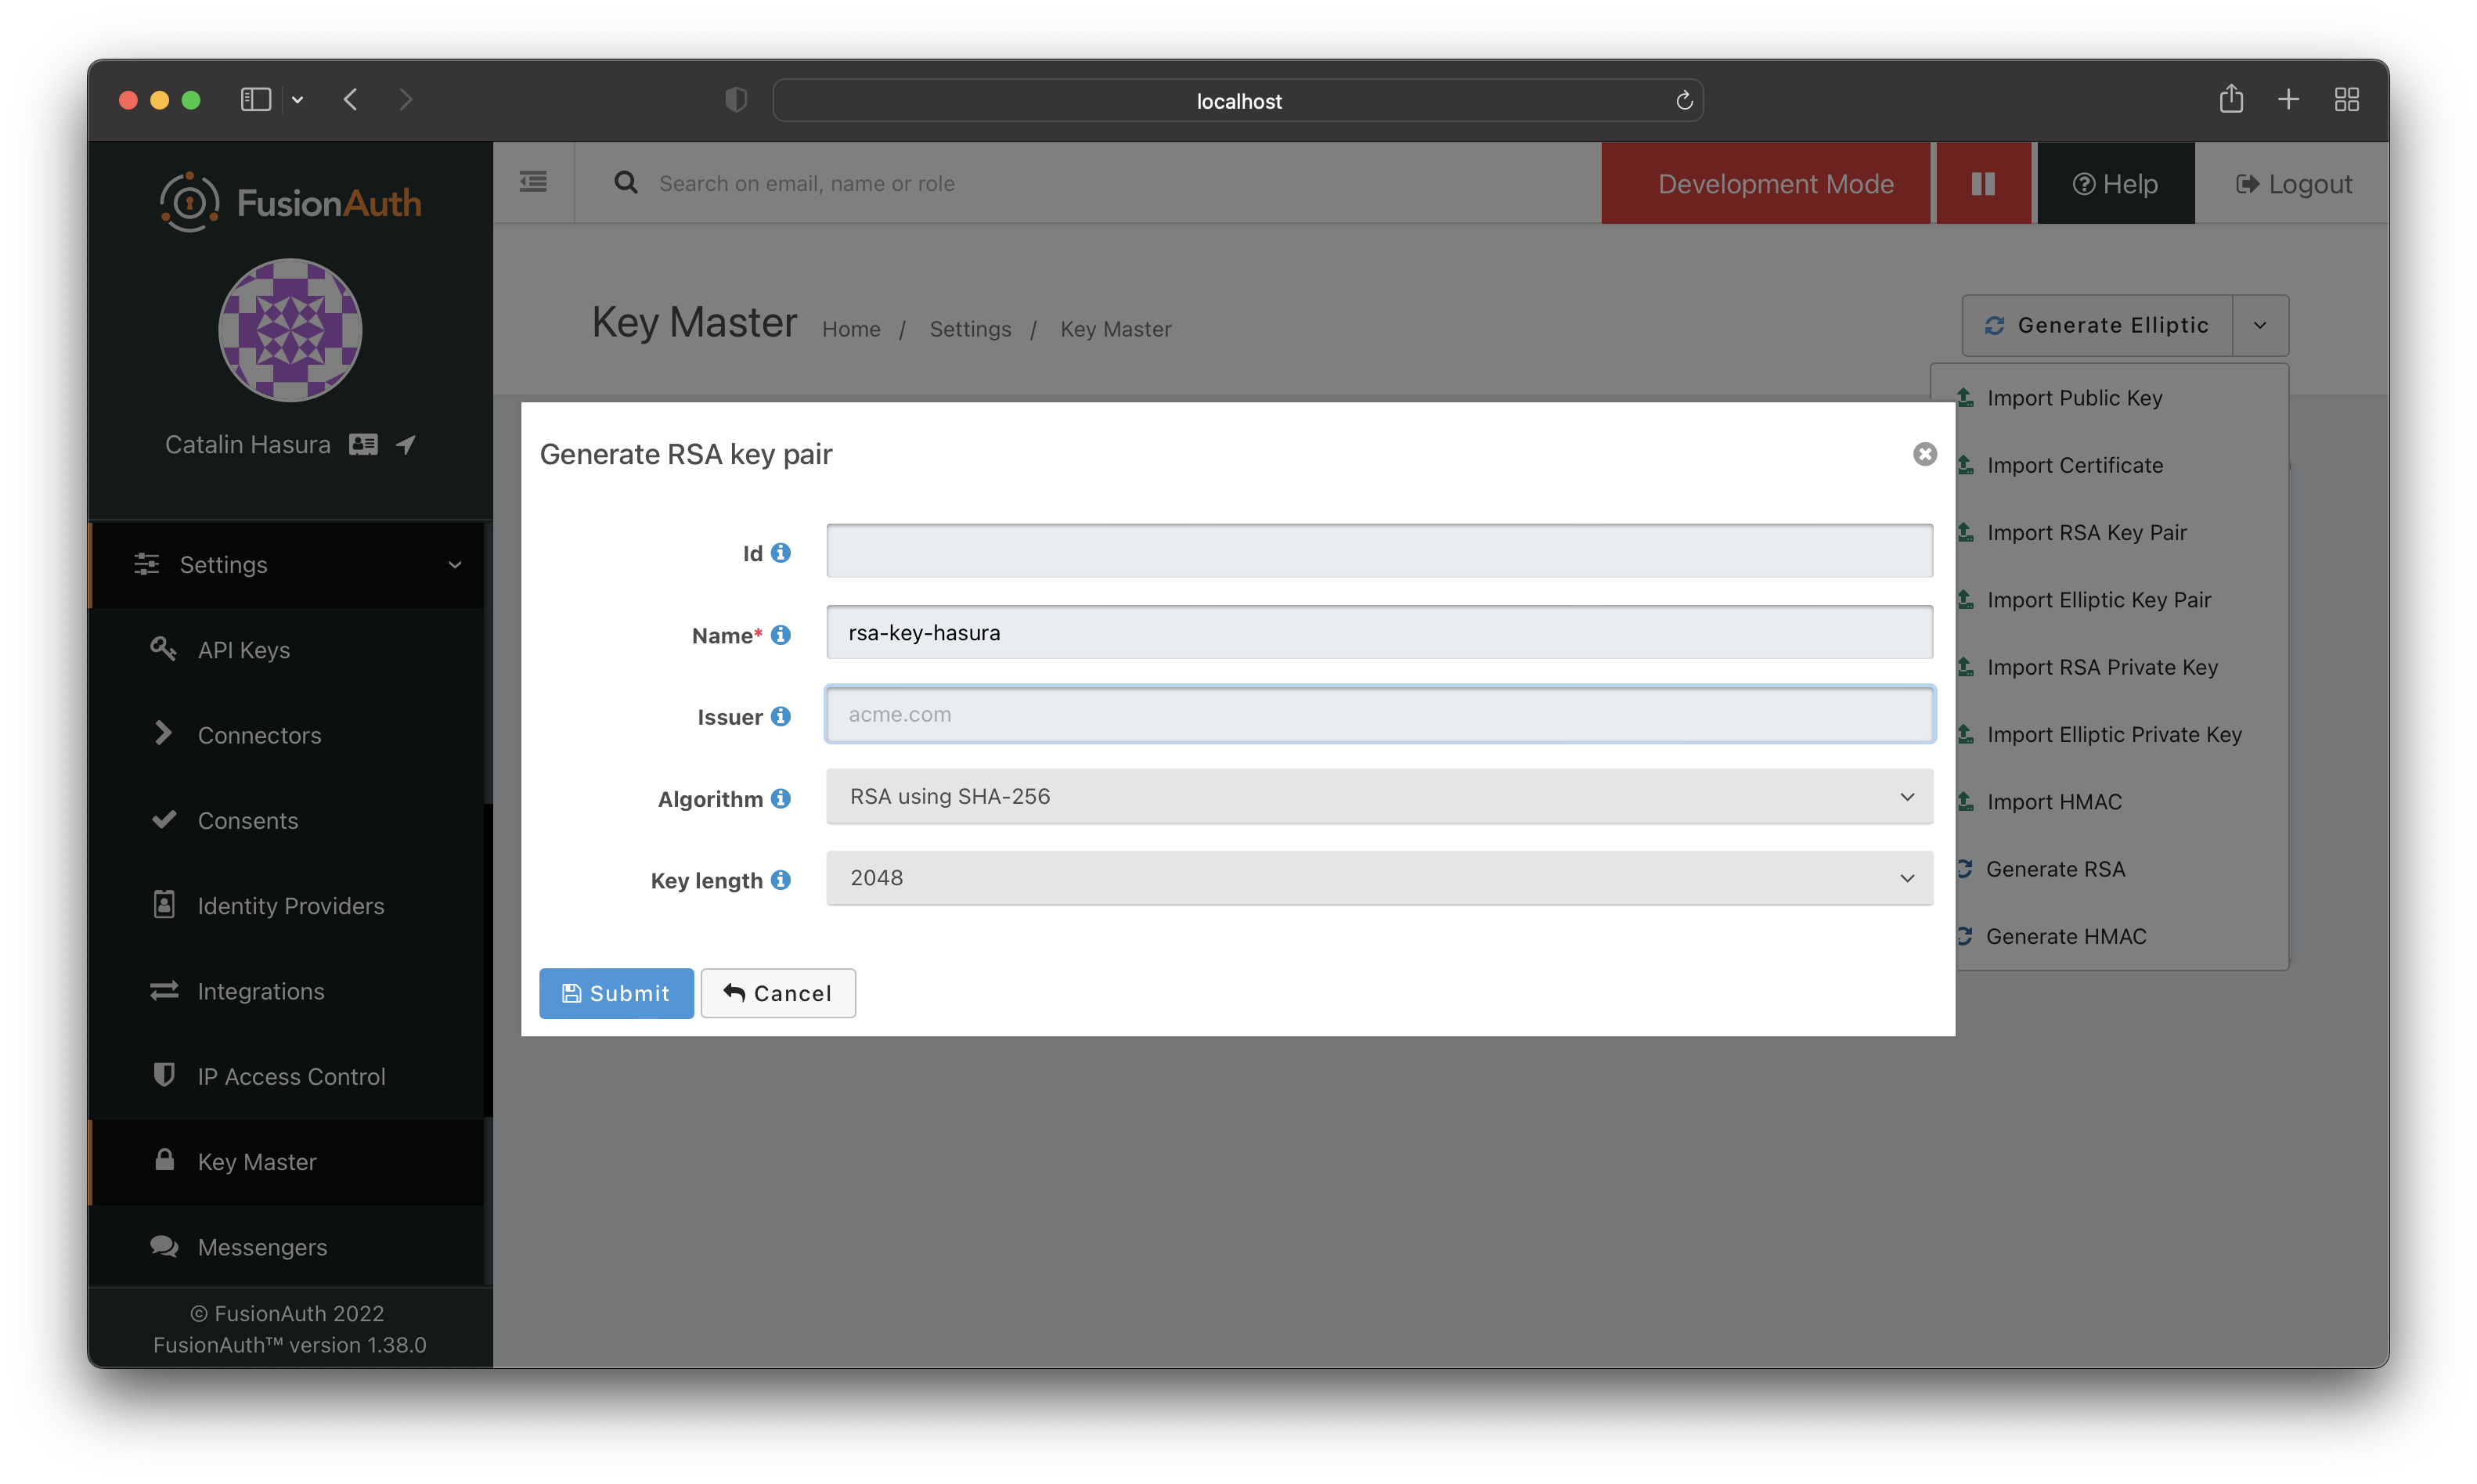
Configure the RSA KEY as shown in the image above.
Now you need to configure the application to use the new RSA key. Go to the JWT tab for your app and select the newly created RSA key for "Access Token signing key" and "Id Token signing key" fields.
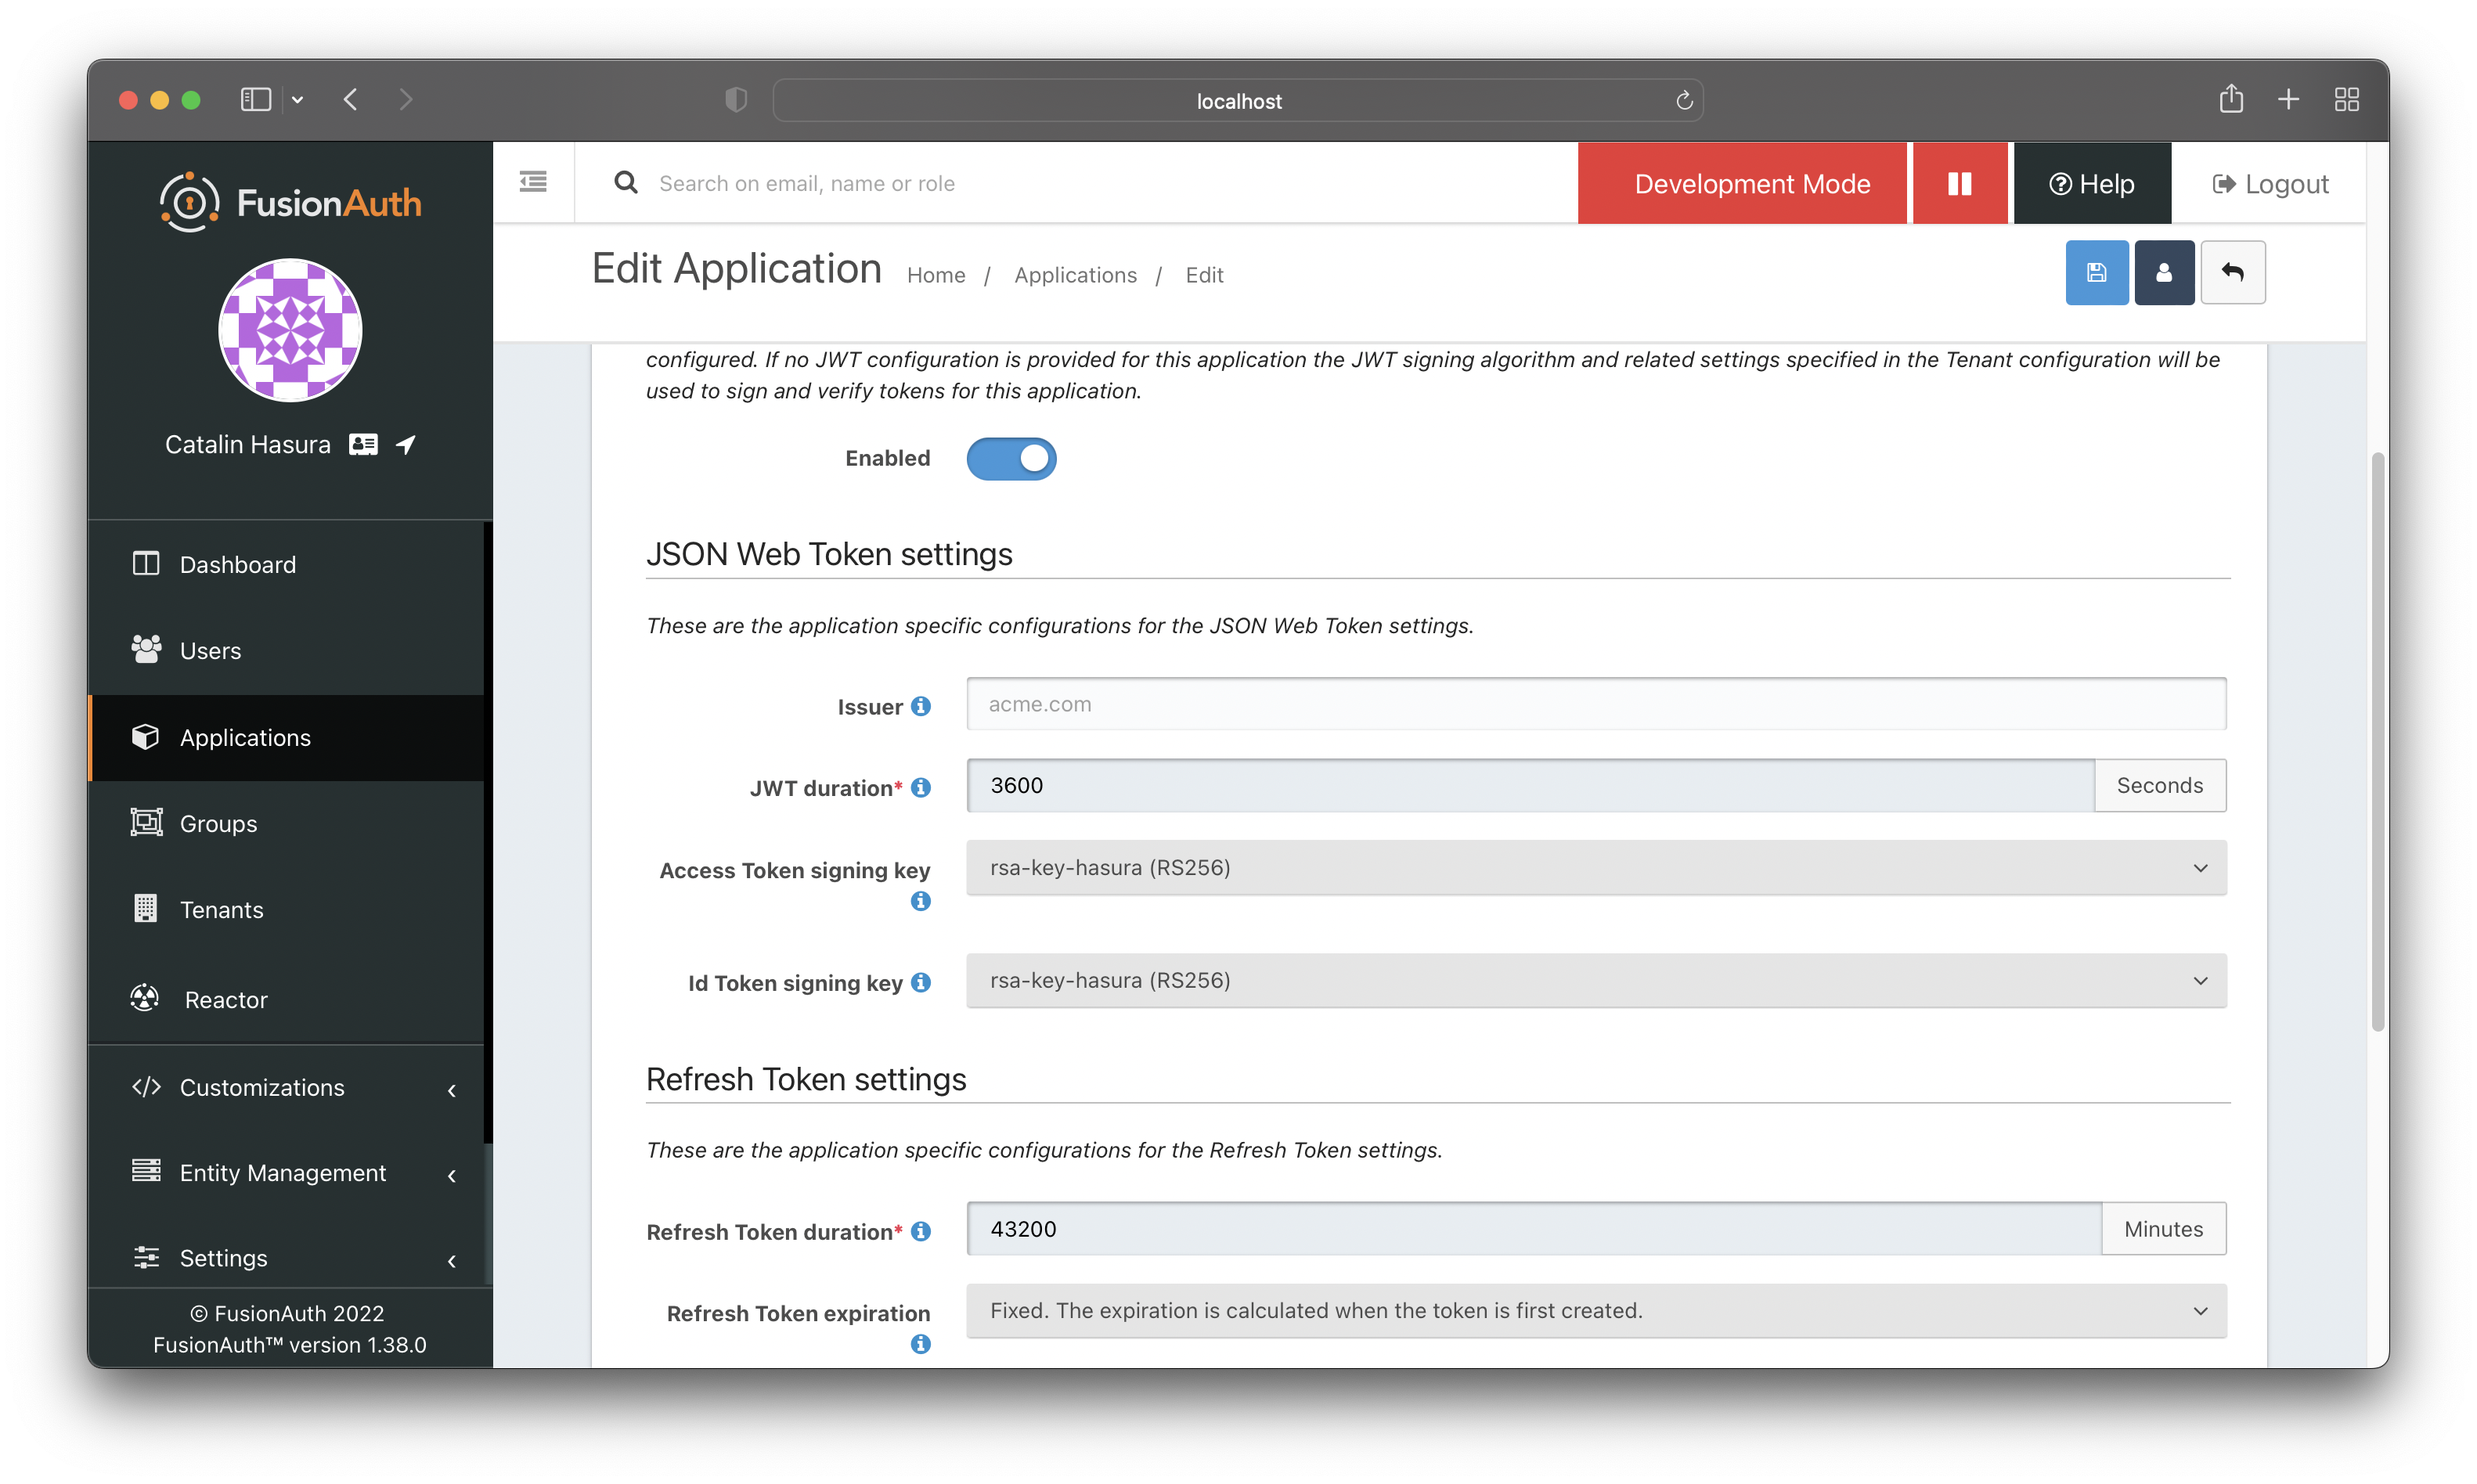
Save the settings, and you are done with FusionAuth for now.
Configure Hasura with FusionAuth
It's time to integrate FusionAuth with Hasura. Open the docker-compose file and add the following line under environment:
HASURA_GRAPHQL_JWT_SECRET: '{"type": "RS512", "jwk_url": "http://localhost:9011/.well-known/jwks"}'
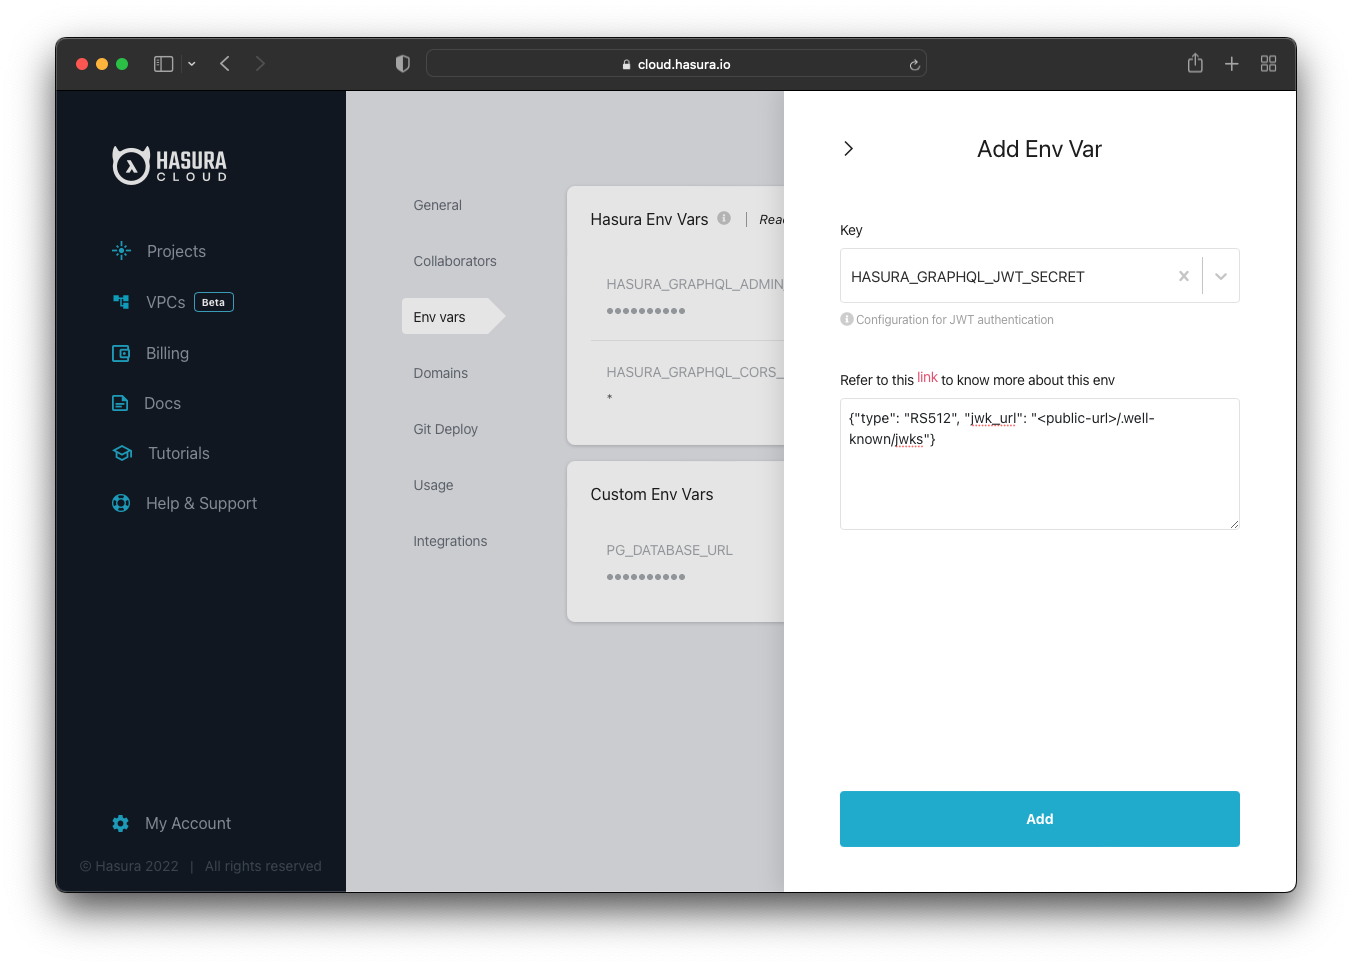
If you use Hasura Cloud, the FusionAuth instance needs to be deployed & publicly accessible. You cannot use the localhost URL. In case your FusionAuth instance is public, you can add the JWKS URL to Hasura Cloud as follows:
{"type": "RS512","jwk_url": "<public-url>/.well-known/jwks"}
The last step is to configure the permissions in your Hasura application. Consider there is a user table with the following columns:
idof type Text (Primary key)emailof type Text
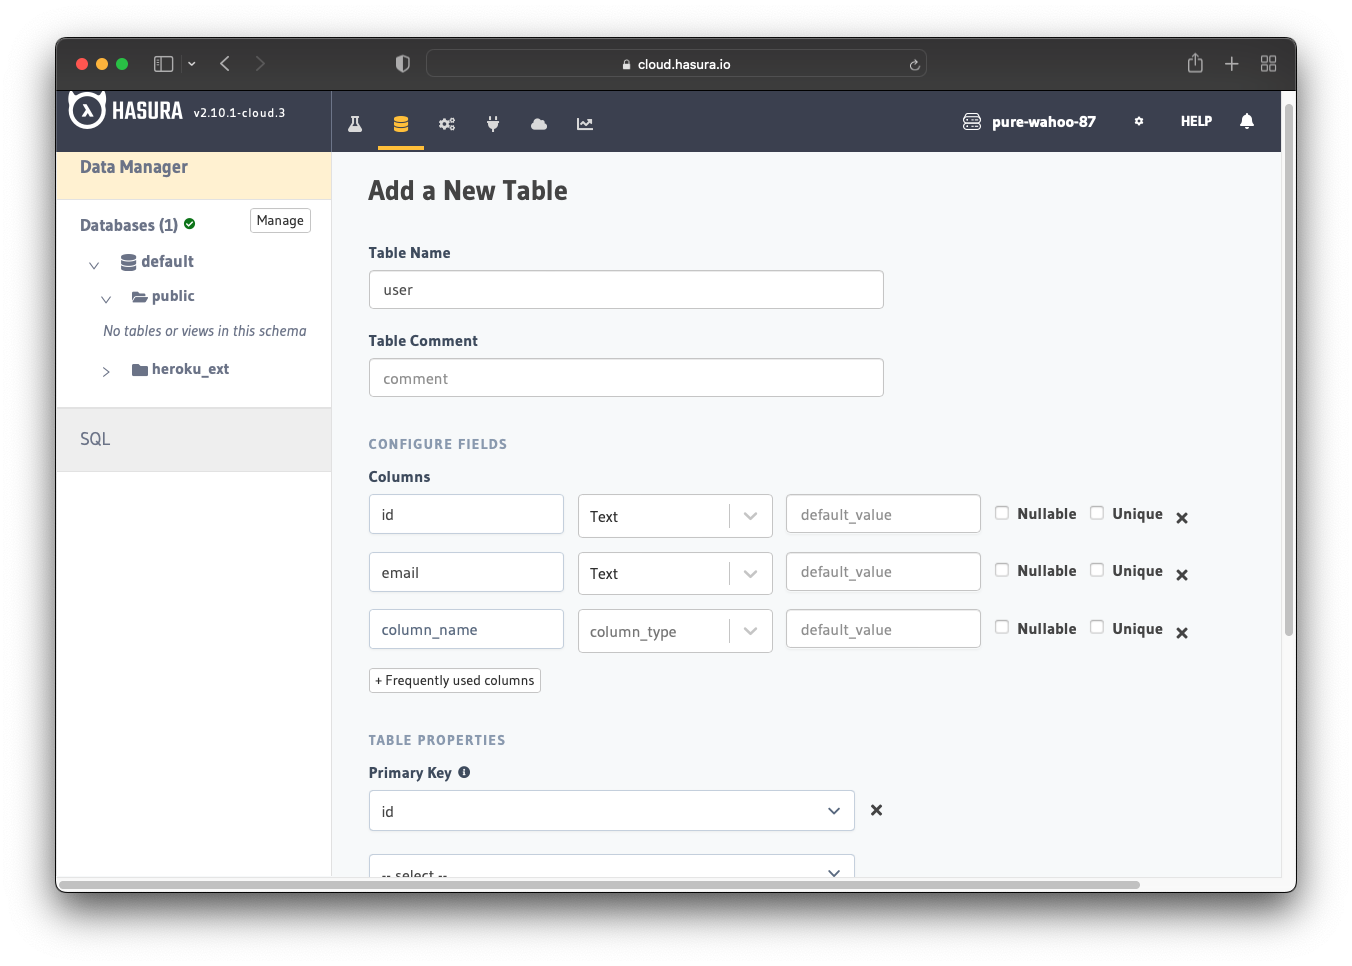
To configure the permissions, go to the "Permissions" tab in the user table.
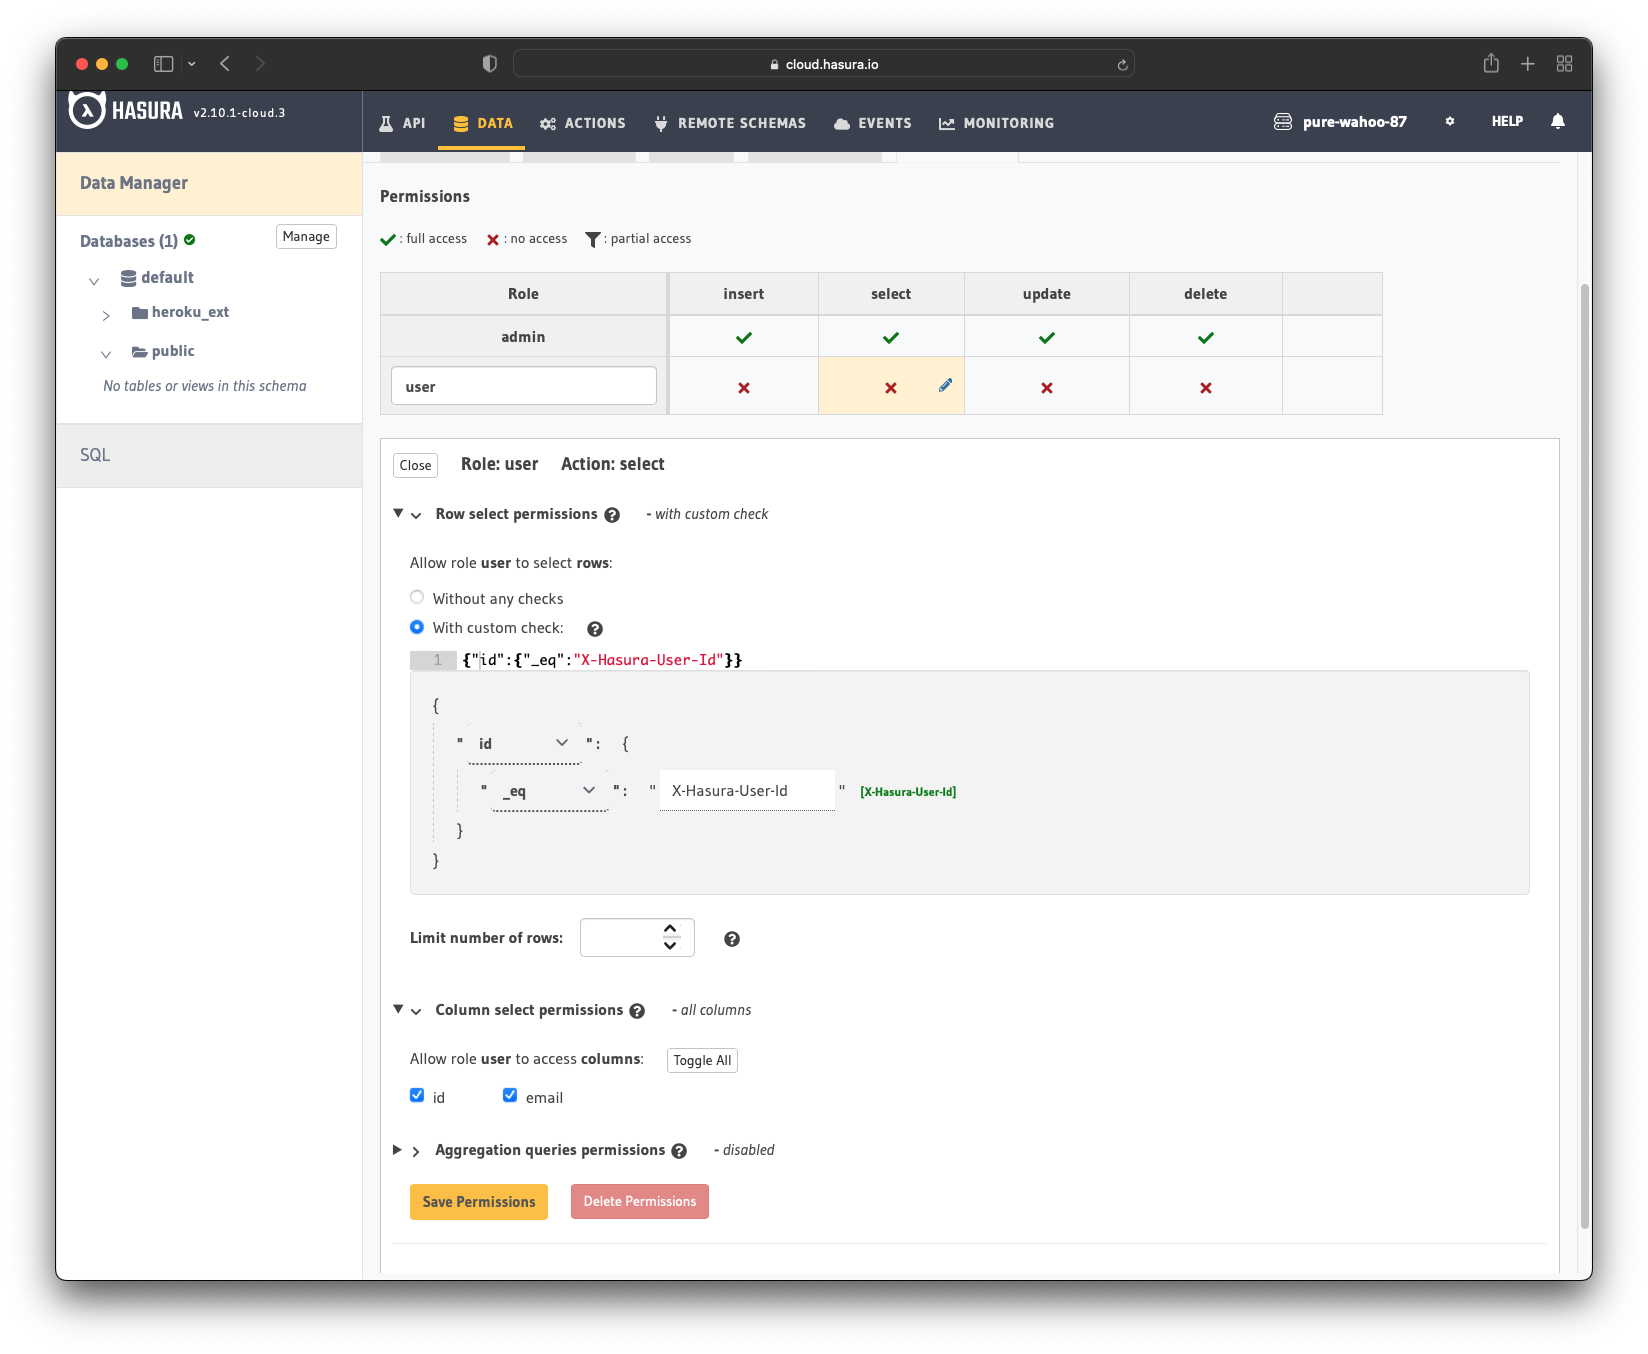
Users should be able to see only their records, but not other people’s records. Add the user role with the following custom check:
{"id": {"eq": "X-Hasura-User-Id"}}
Then allow the user role to access all the fields:
idemail
Save the permissions, and you are done! You can now use the FusionAuth + Hasura integration.
Thanks to Atakan for creating the previous guide.
 Build apps and APIs 10x faster
- Built-in authorization and caching
- 8x more performant than hand-rolled APIs