Edit on GitHub
Keycloak
What is Keycloak?
Keycloak is an open-source service that enables you to secure your applications and implement authentication.
It supports standard protocols such as SAML 2.0, OAuth 2.0, and OpenID Connect.
Keycloak comes with features such as:
- Single-Sign On
- Social Login
- Admin Console
- Account Management Console
In this section, you will learn how to integrate Keycloak with Hasura.
Setting up Keycloak
There are multiple ways to run Keycloak, but you will use Docker in this case.
Start Keycloak by running the following command in your terminal:
docker run -p 8080:8080 -e KEYCLOAK_ADMIN=admin -e KEYCLOAK_ADMIN_PASSWORD=admin quay.io/keycloak/keycloak:18.0.0 start-dev
Once Keycloak starts, visit localhost:8080/admin in your browser to log into the admin console.
You can log in with these credentials:
User: adminPass: admin
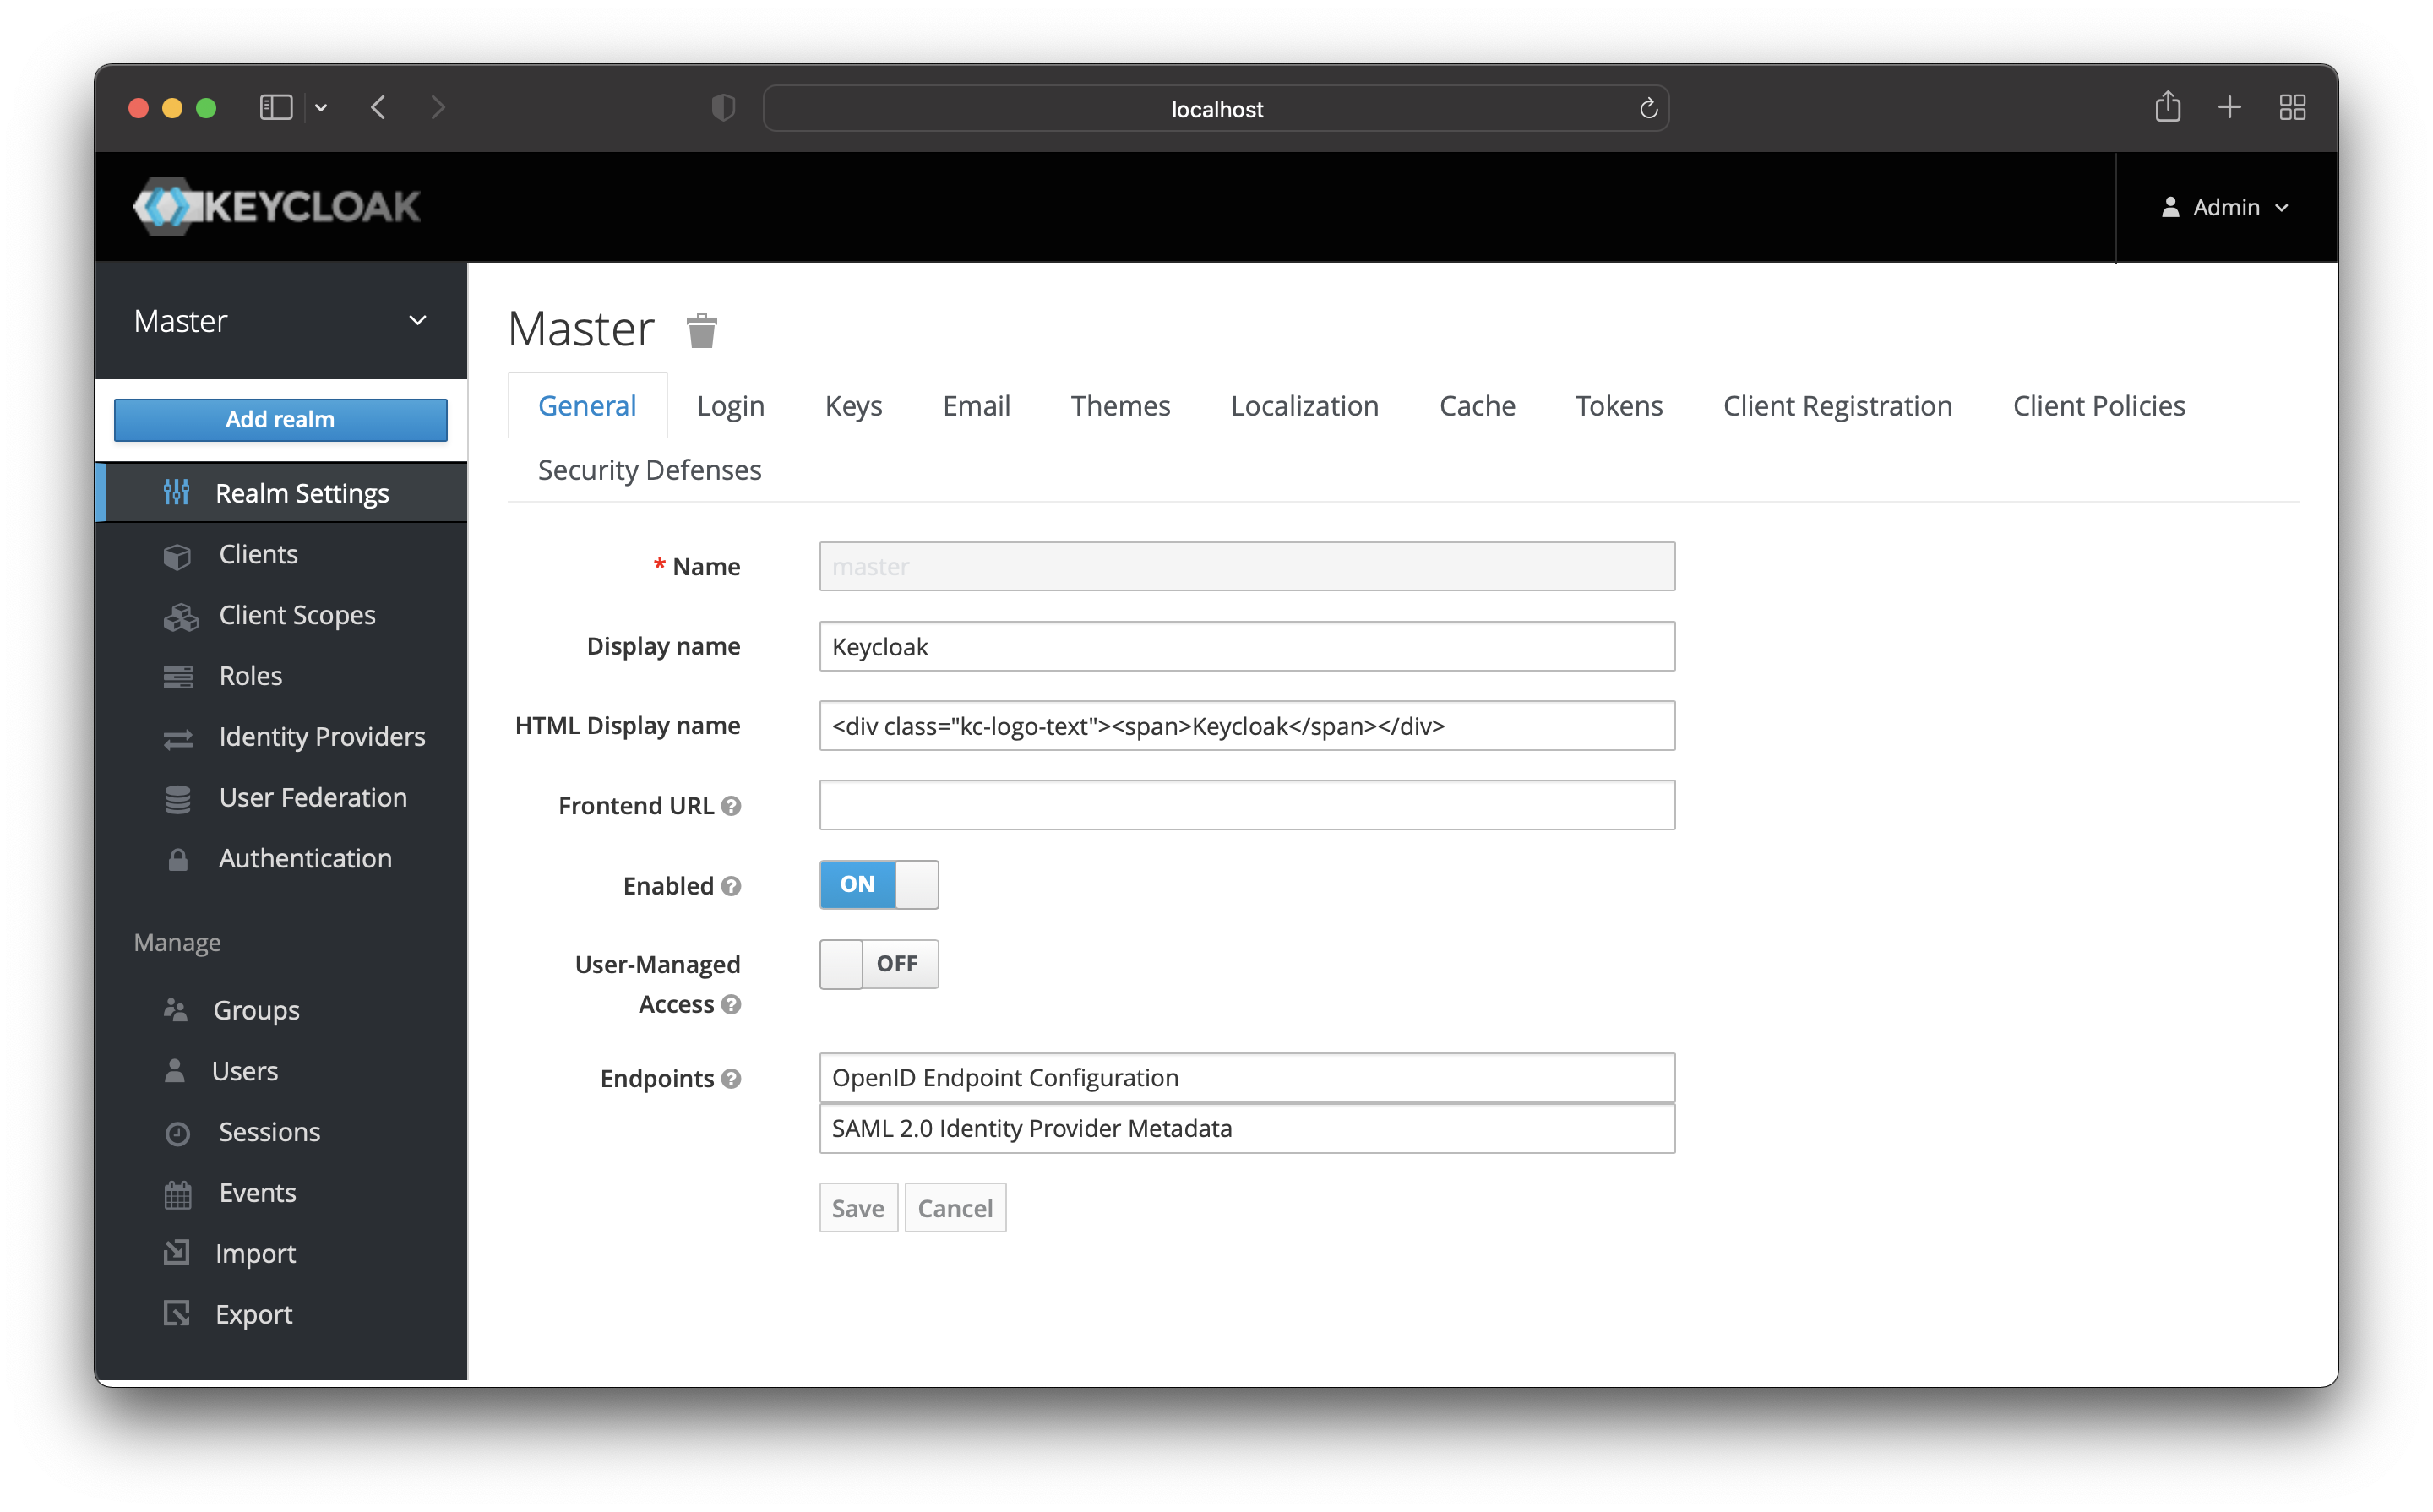
After successfully logging in, you will be redirected to the dashboard. The default realm in Keycloak is “Master”, so you will need to create a new one for your Hasura application.
You can think of a realm as a workspace that manages users, roles, and groups specific only to that realm.
Create New Realm
Hover over “Master”, and a button “Add Realm” should appear.
Choose a name for your new realm and create it.
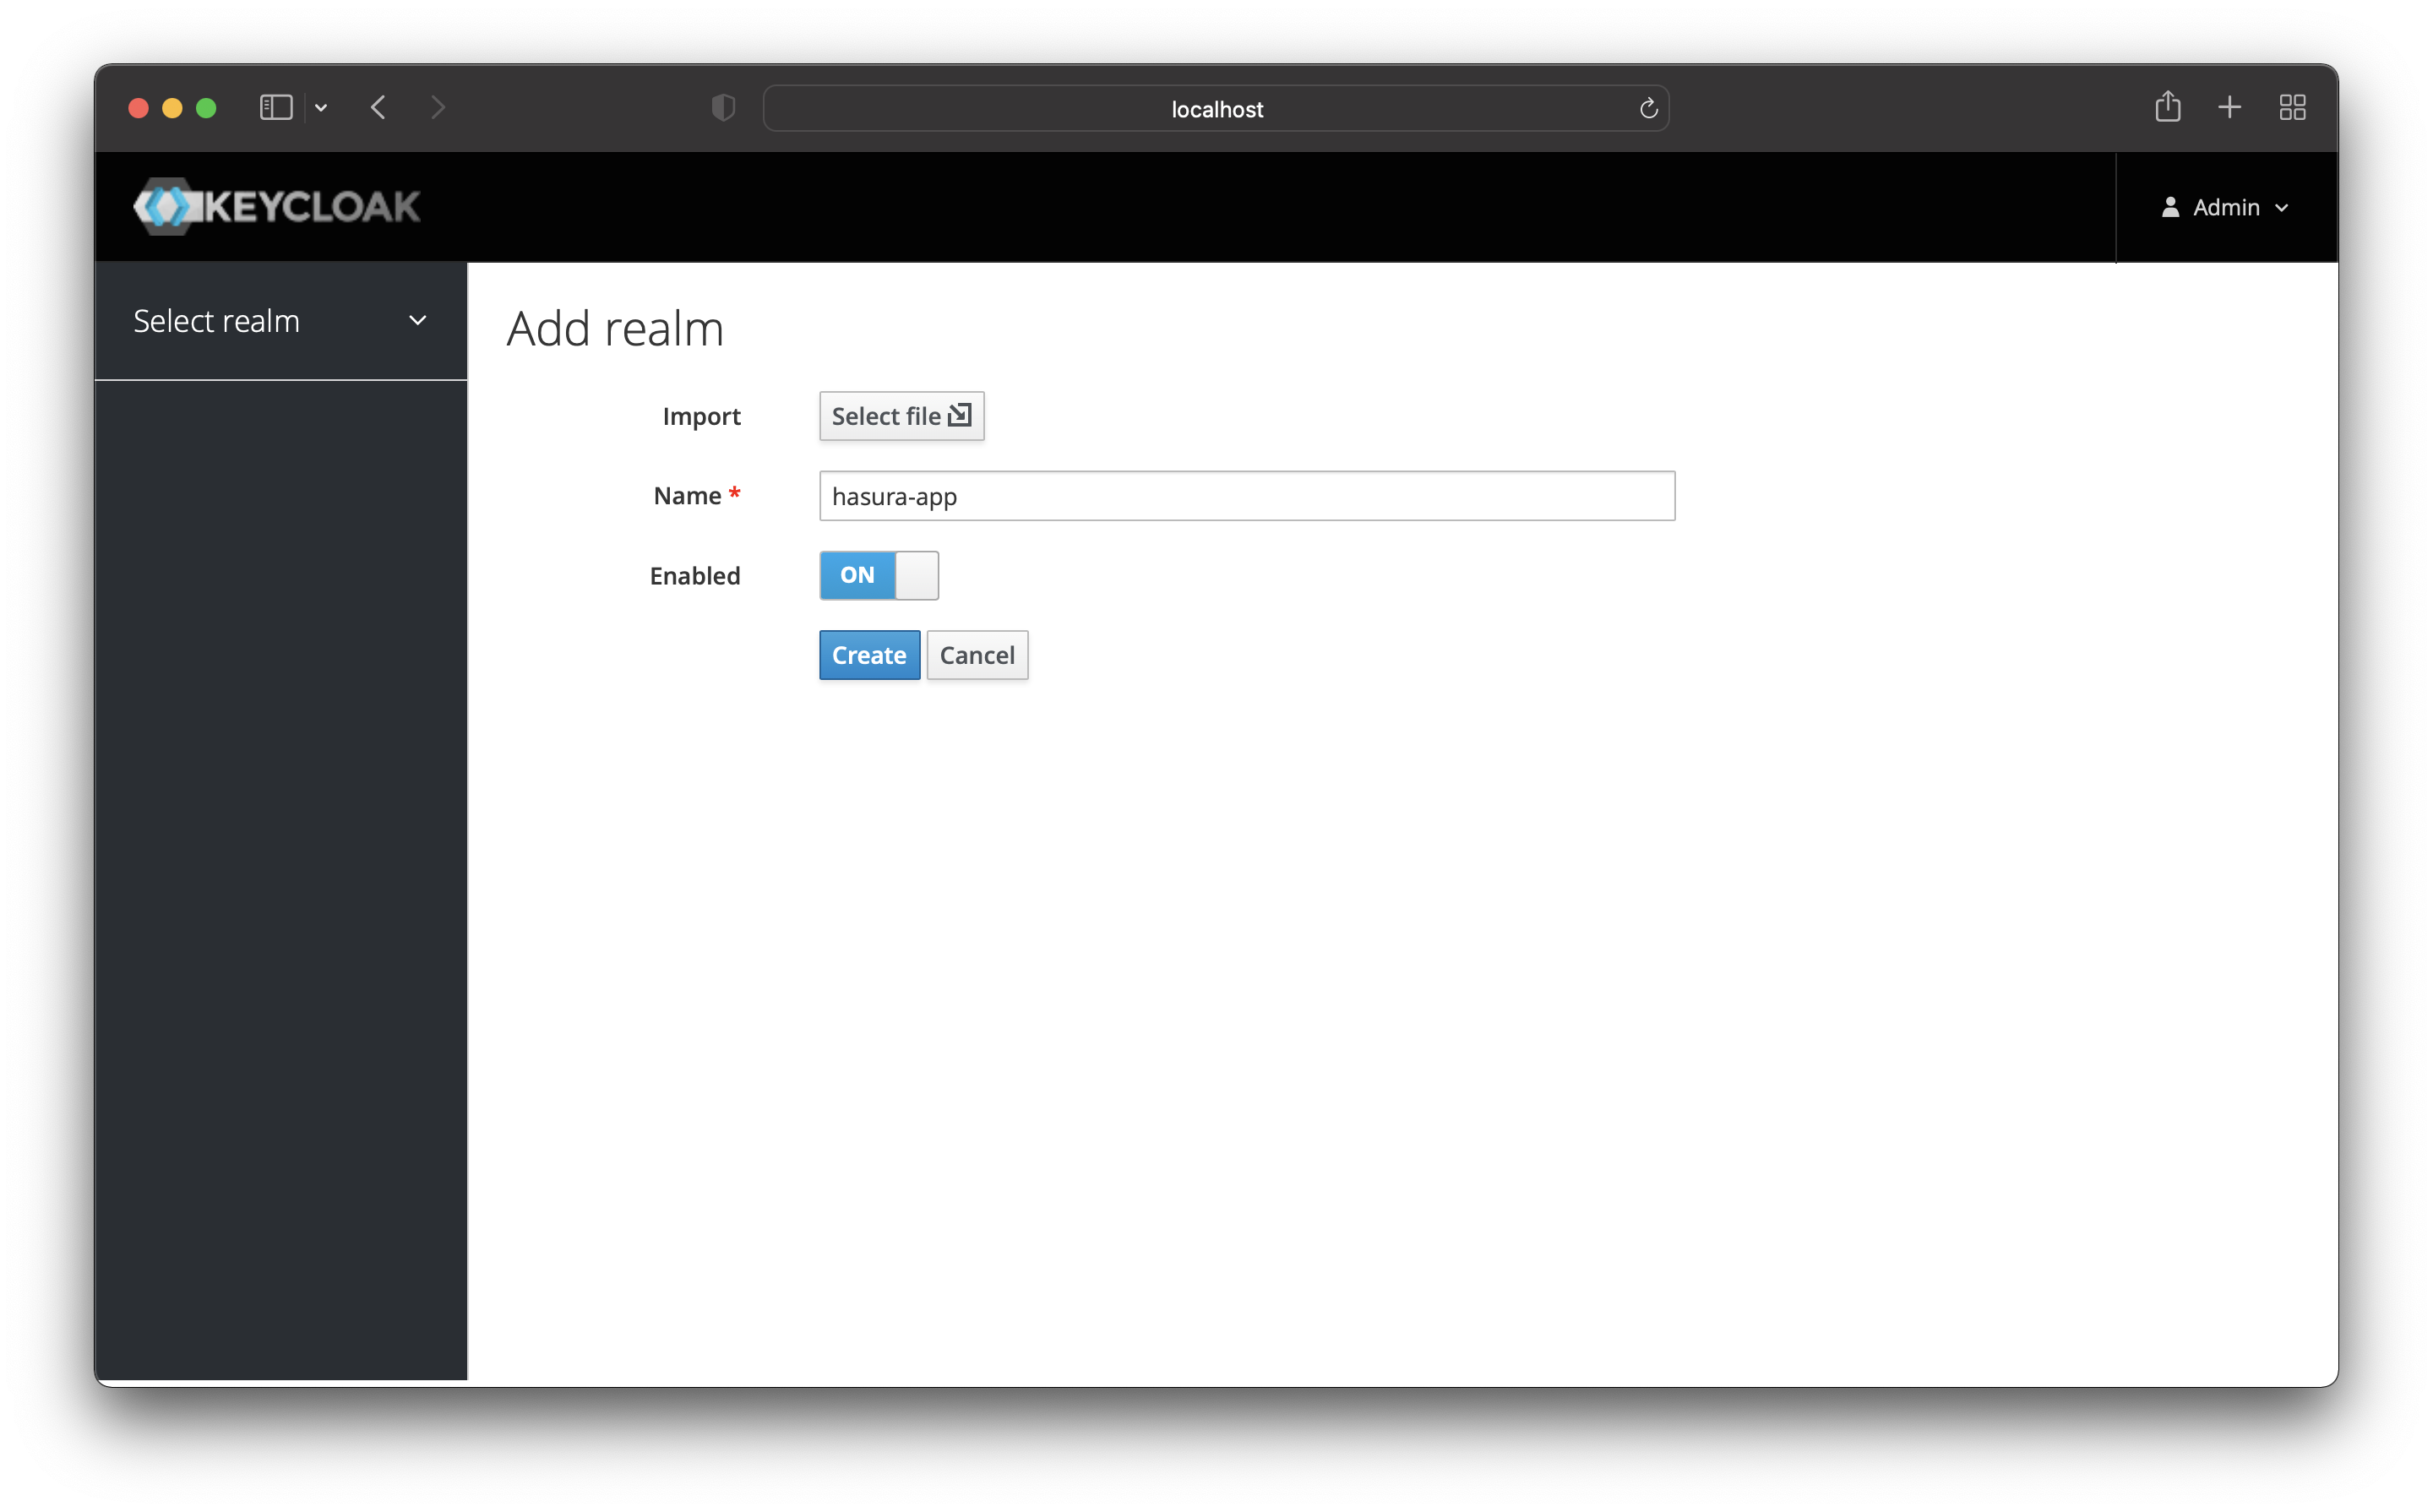
After that, you will be redirected to the newly created realm. From now onwards, all the work will happen in the new realm.
Setup Hasura Client in Keycloak
The next step is to set up a client in Keycloak for the Hasura application.
Navigate to the “Clients” page and click on the “Create” button from the top right corner.
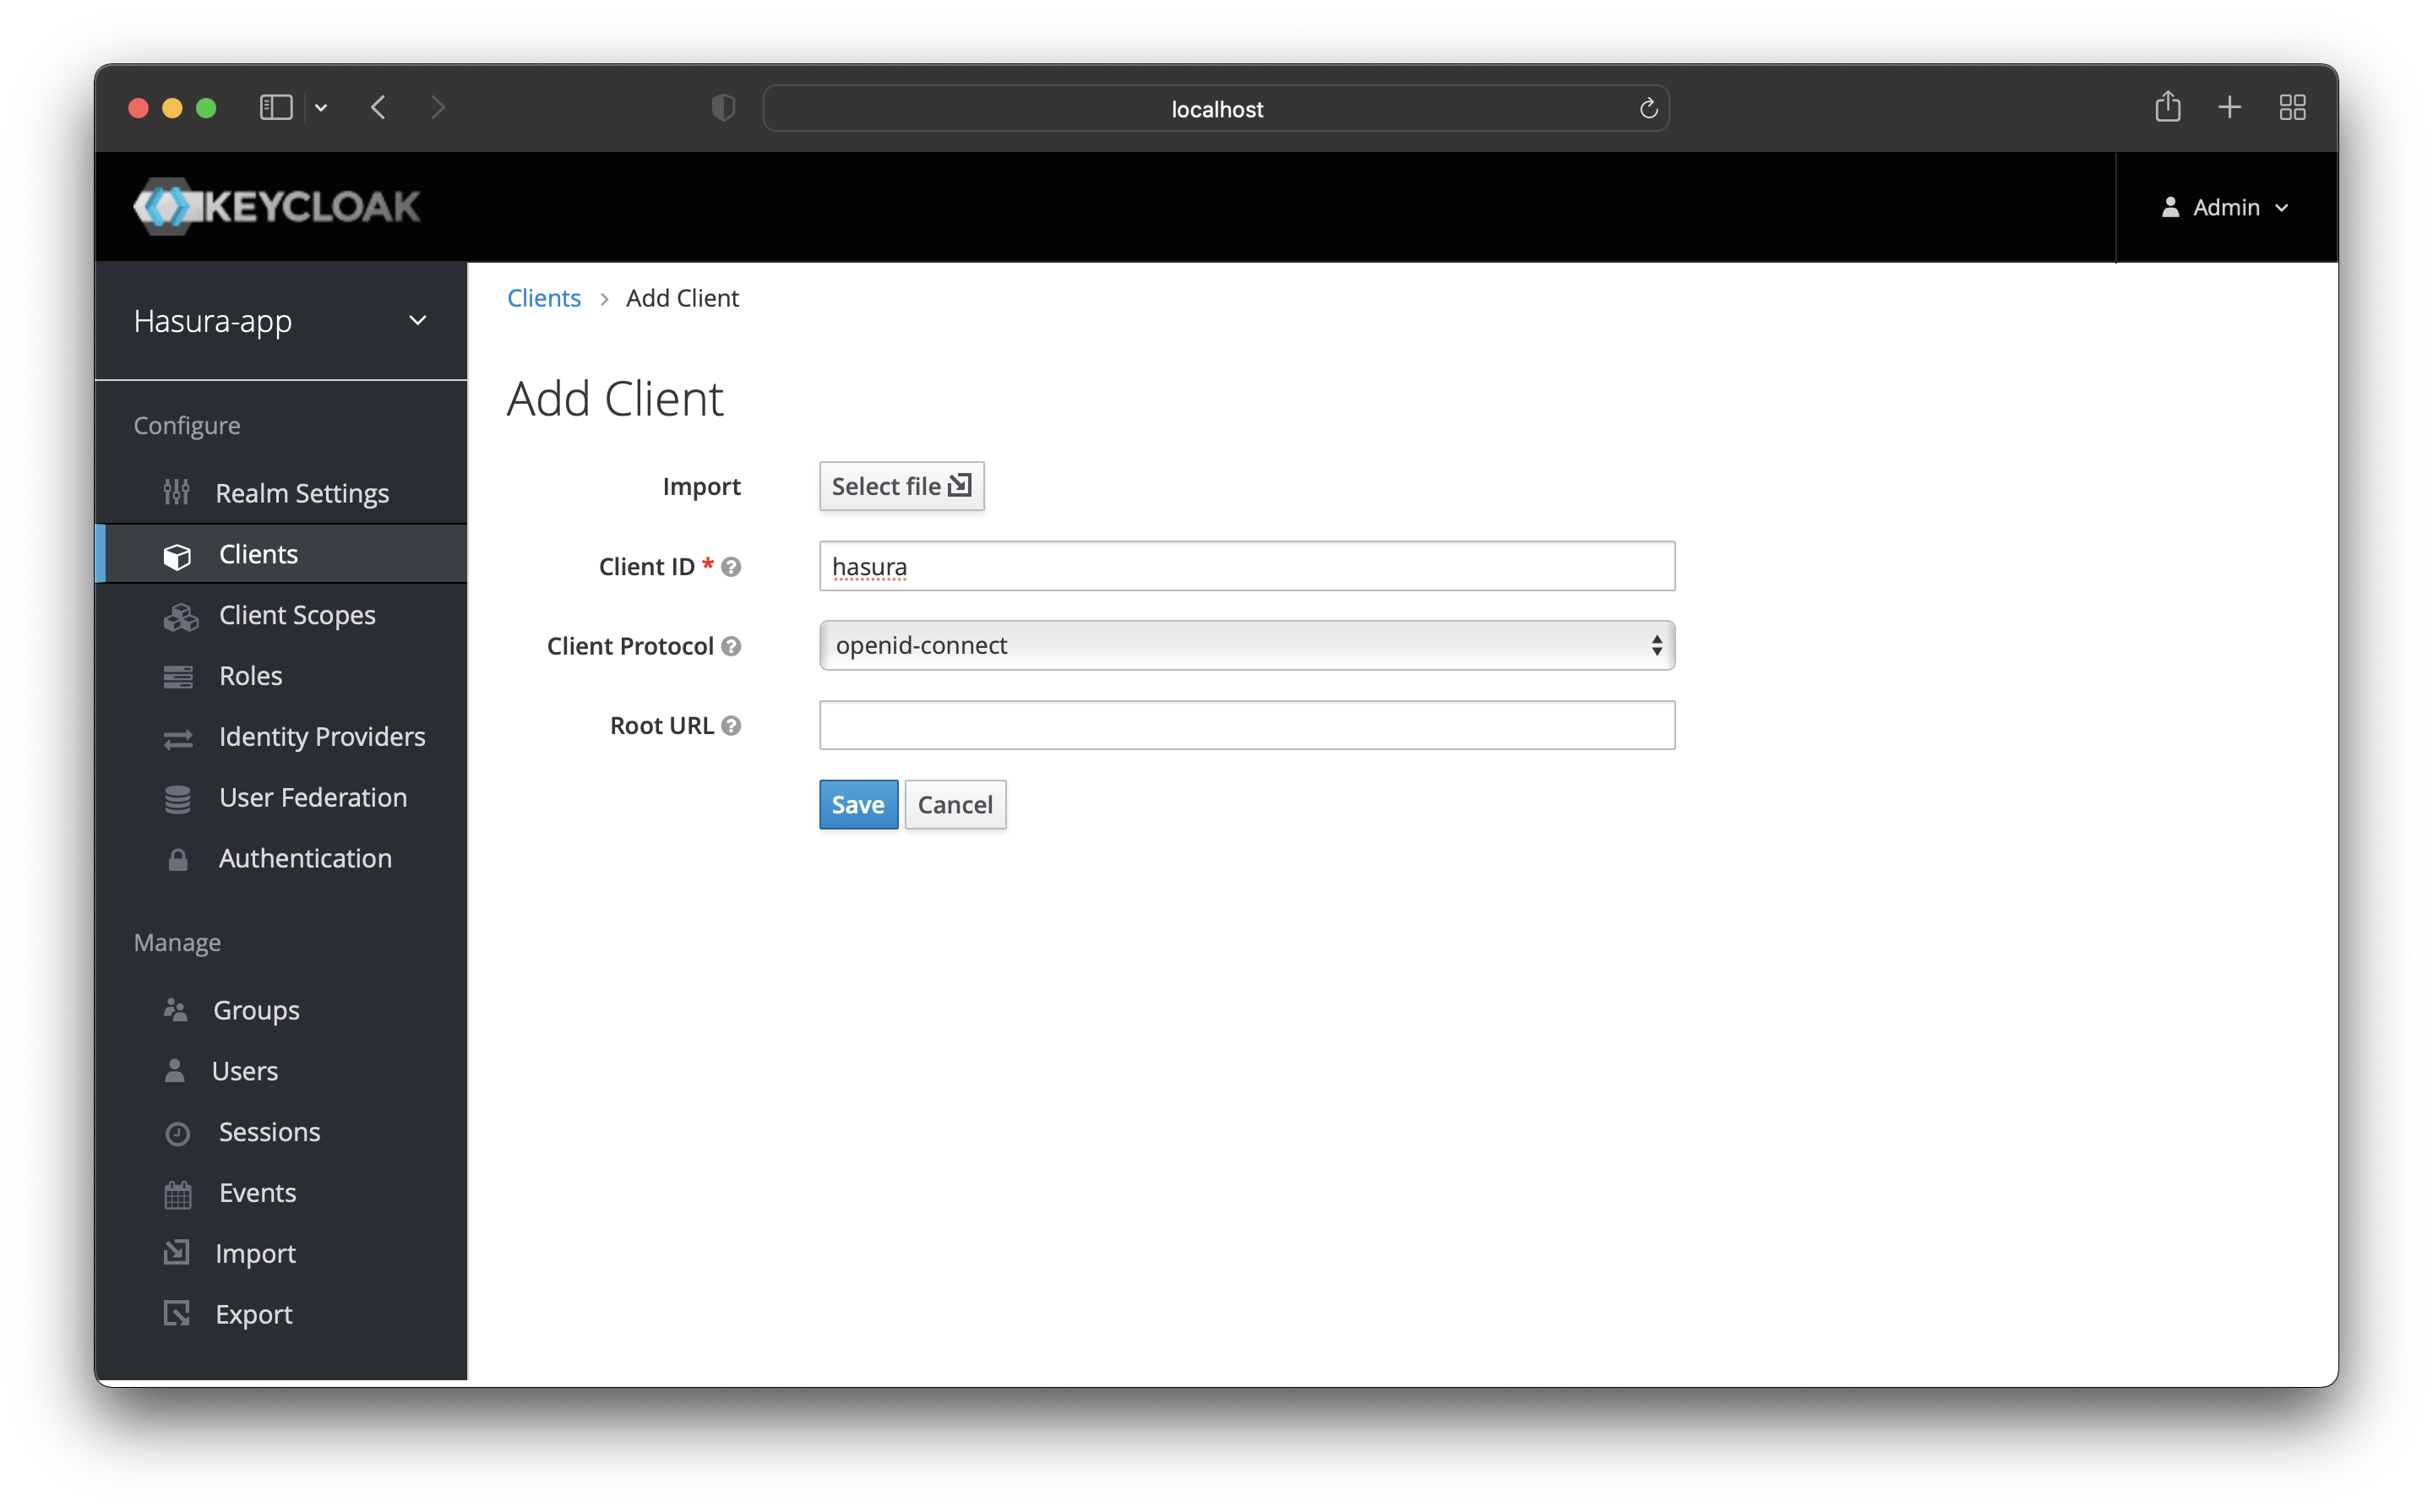
Enter the name of the client and save it.
Keycloak User Roles
In Keycloak, you can create two types of roles:
- Realm roles - all the clients share them
- Client roles - they are available only to that client for which it was created
In this case, you will create a “Client role”, so it’s only available to your Hasura application.
Navigate to the “Clients” page and click on your “Hasura” client. After that, go to the “Roles” page, as shown in the image below.
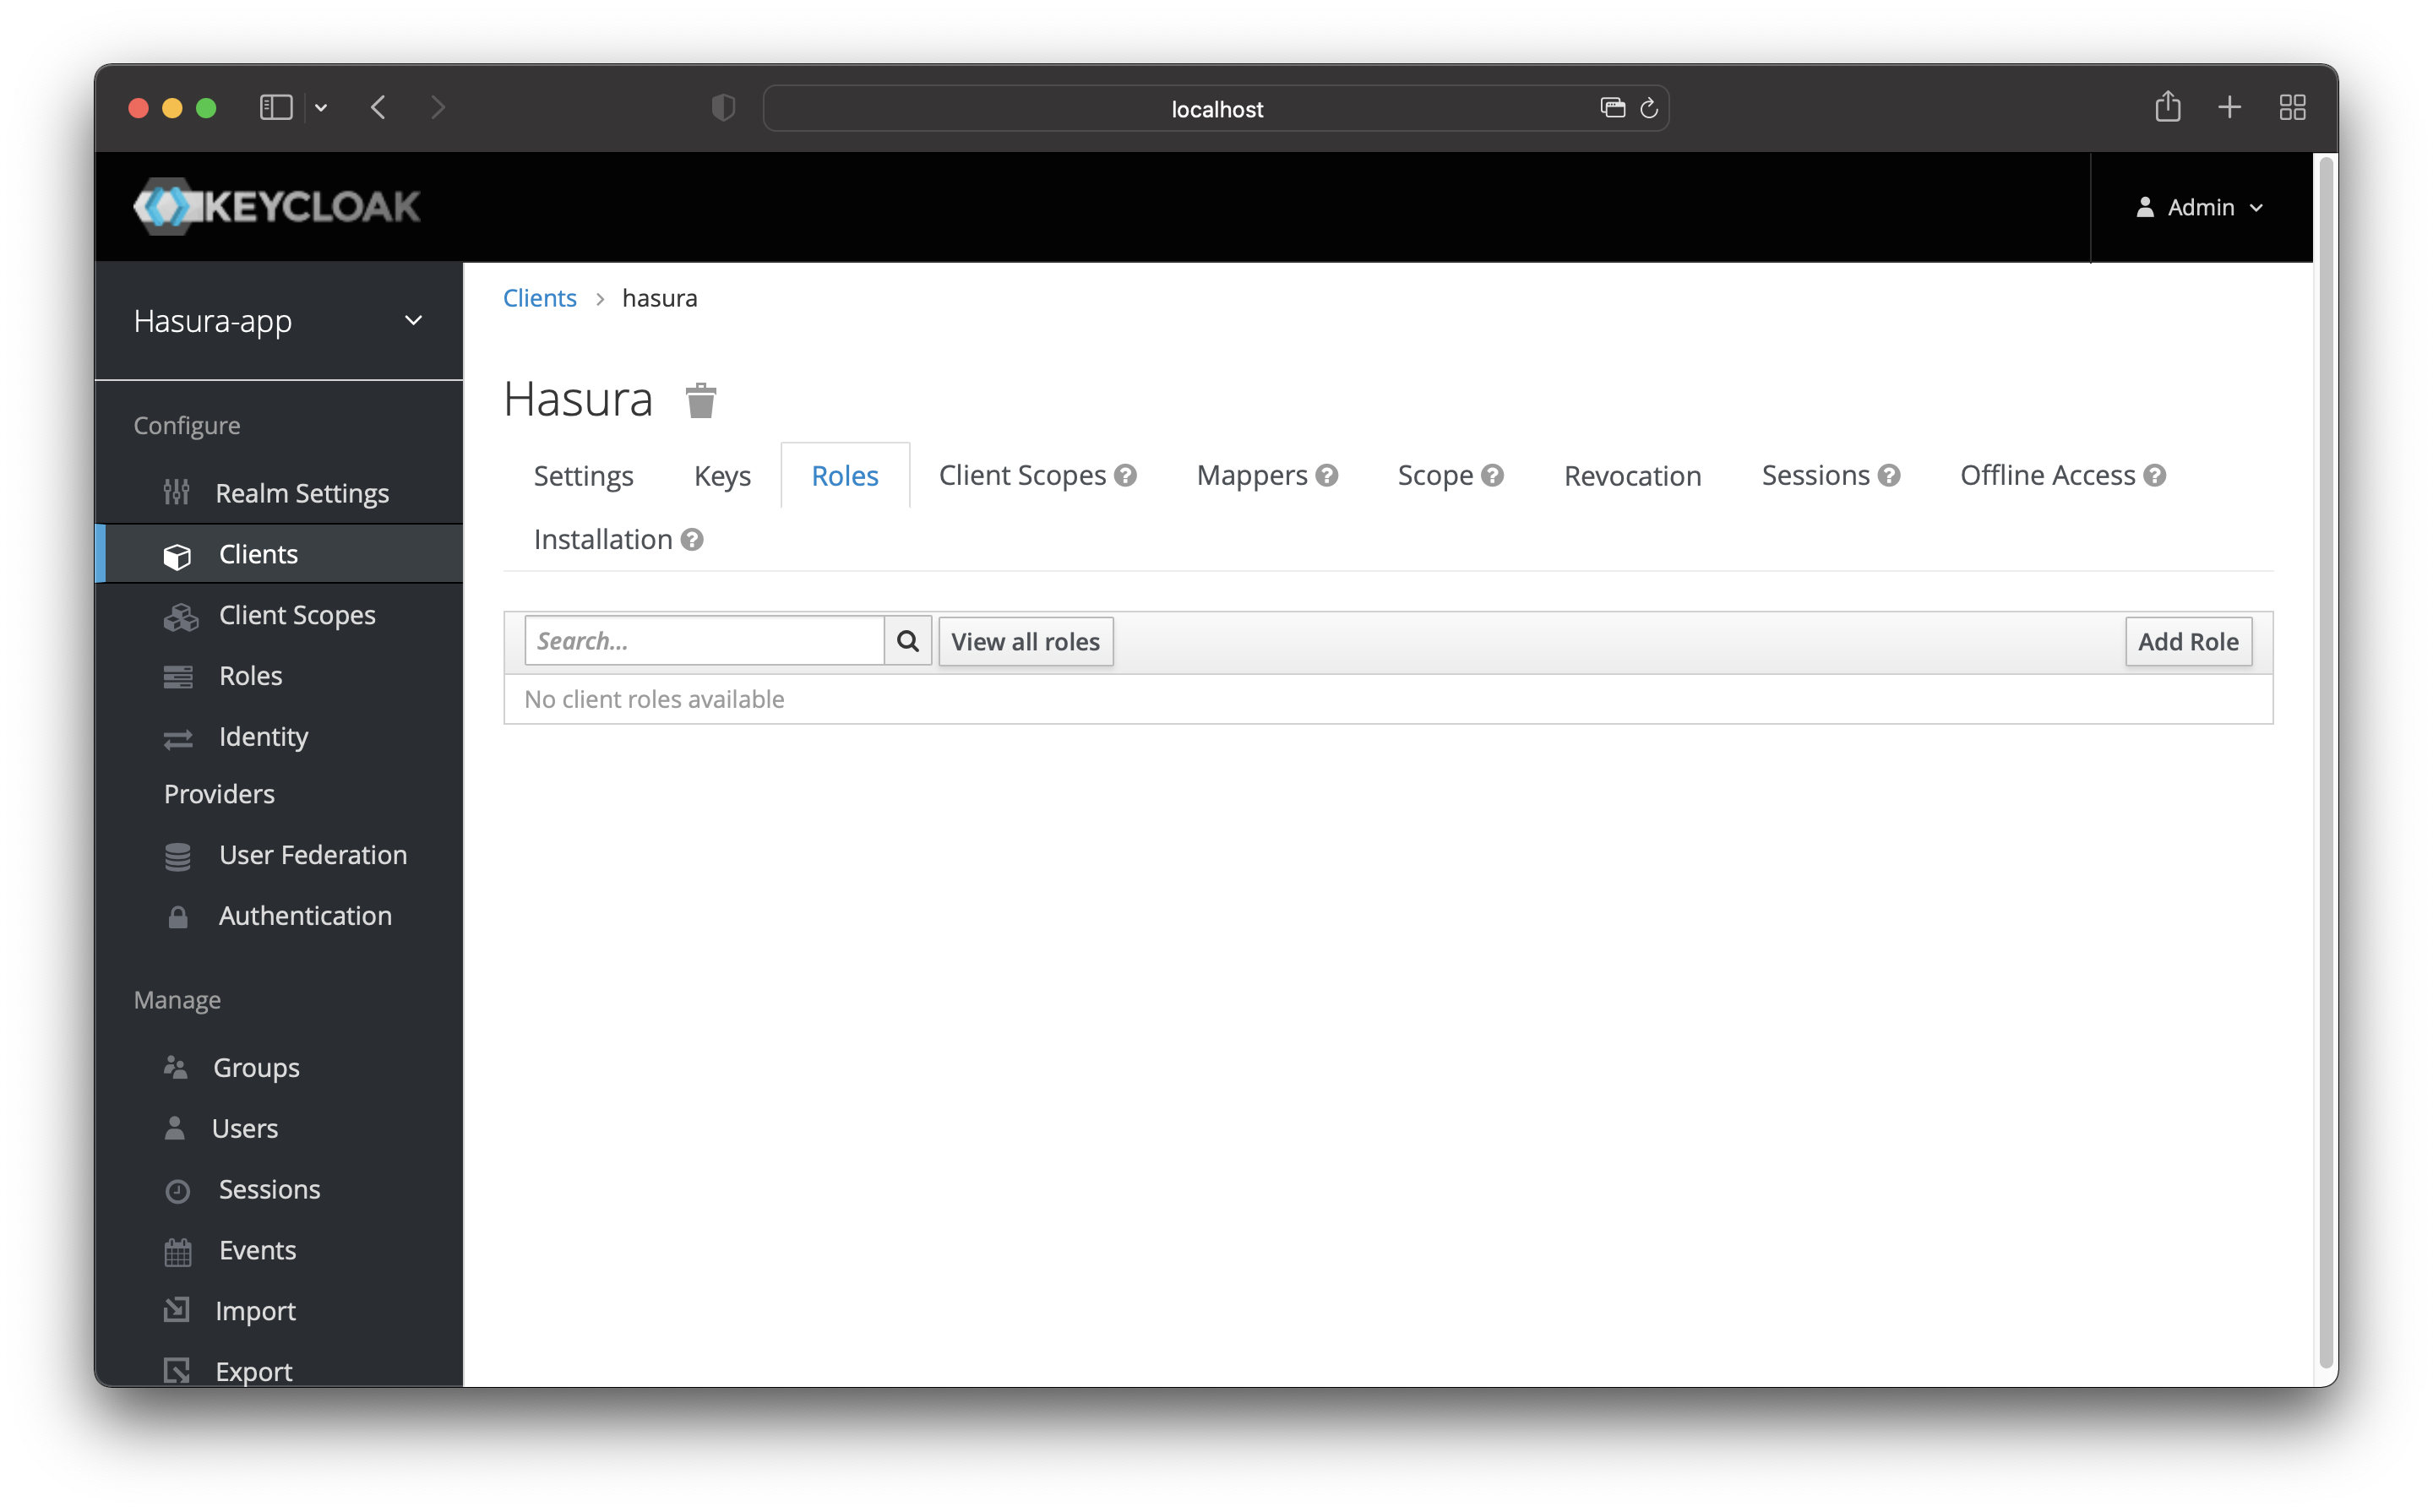
Click the “Add Role” button.
On the next page, choose user as the role name. Regarding the role description, you can leave it empty or add
something.
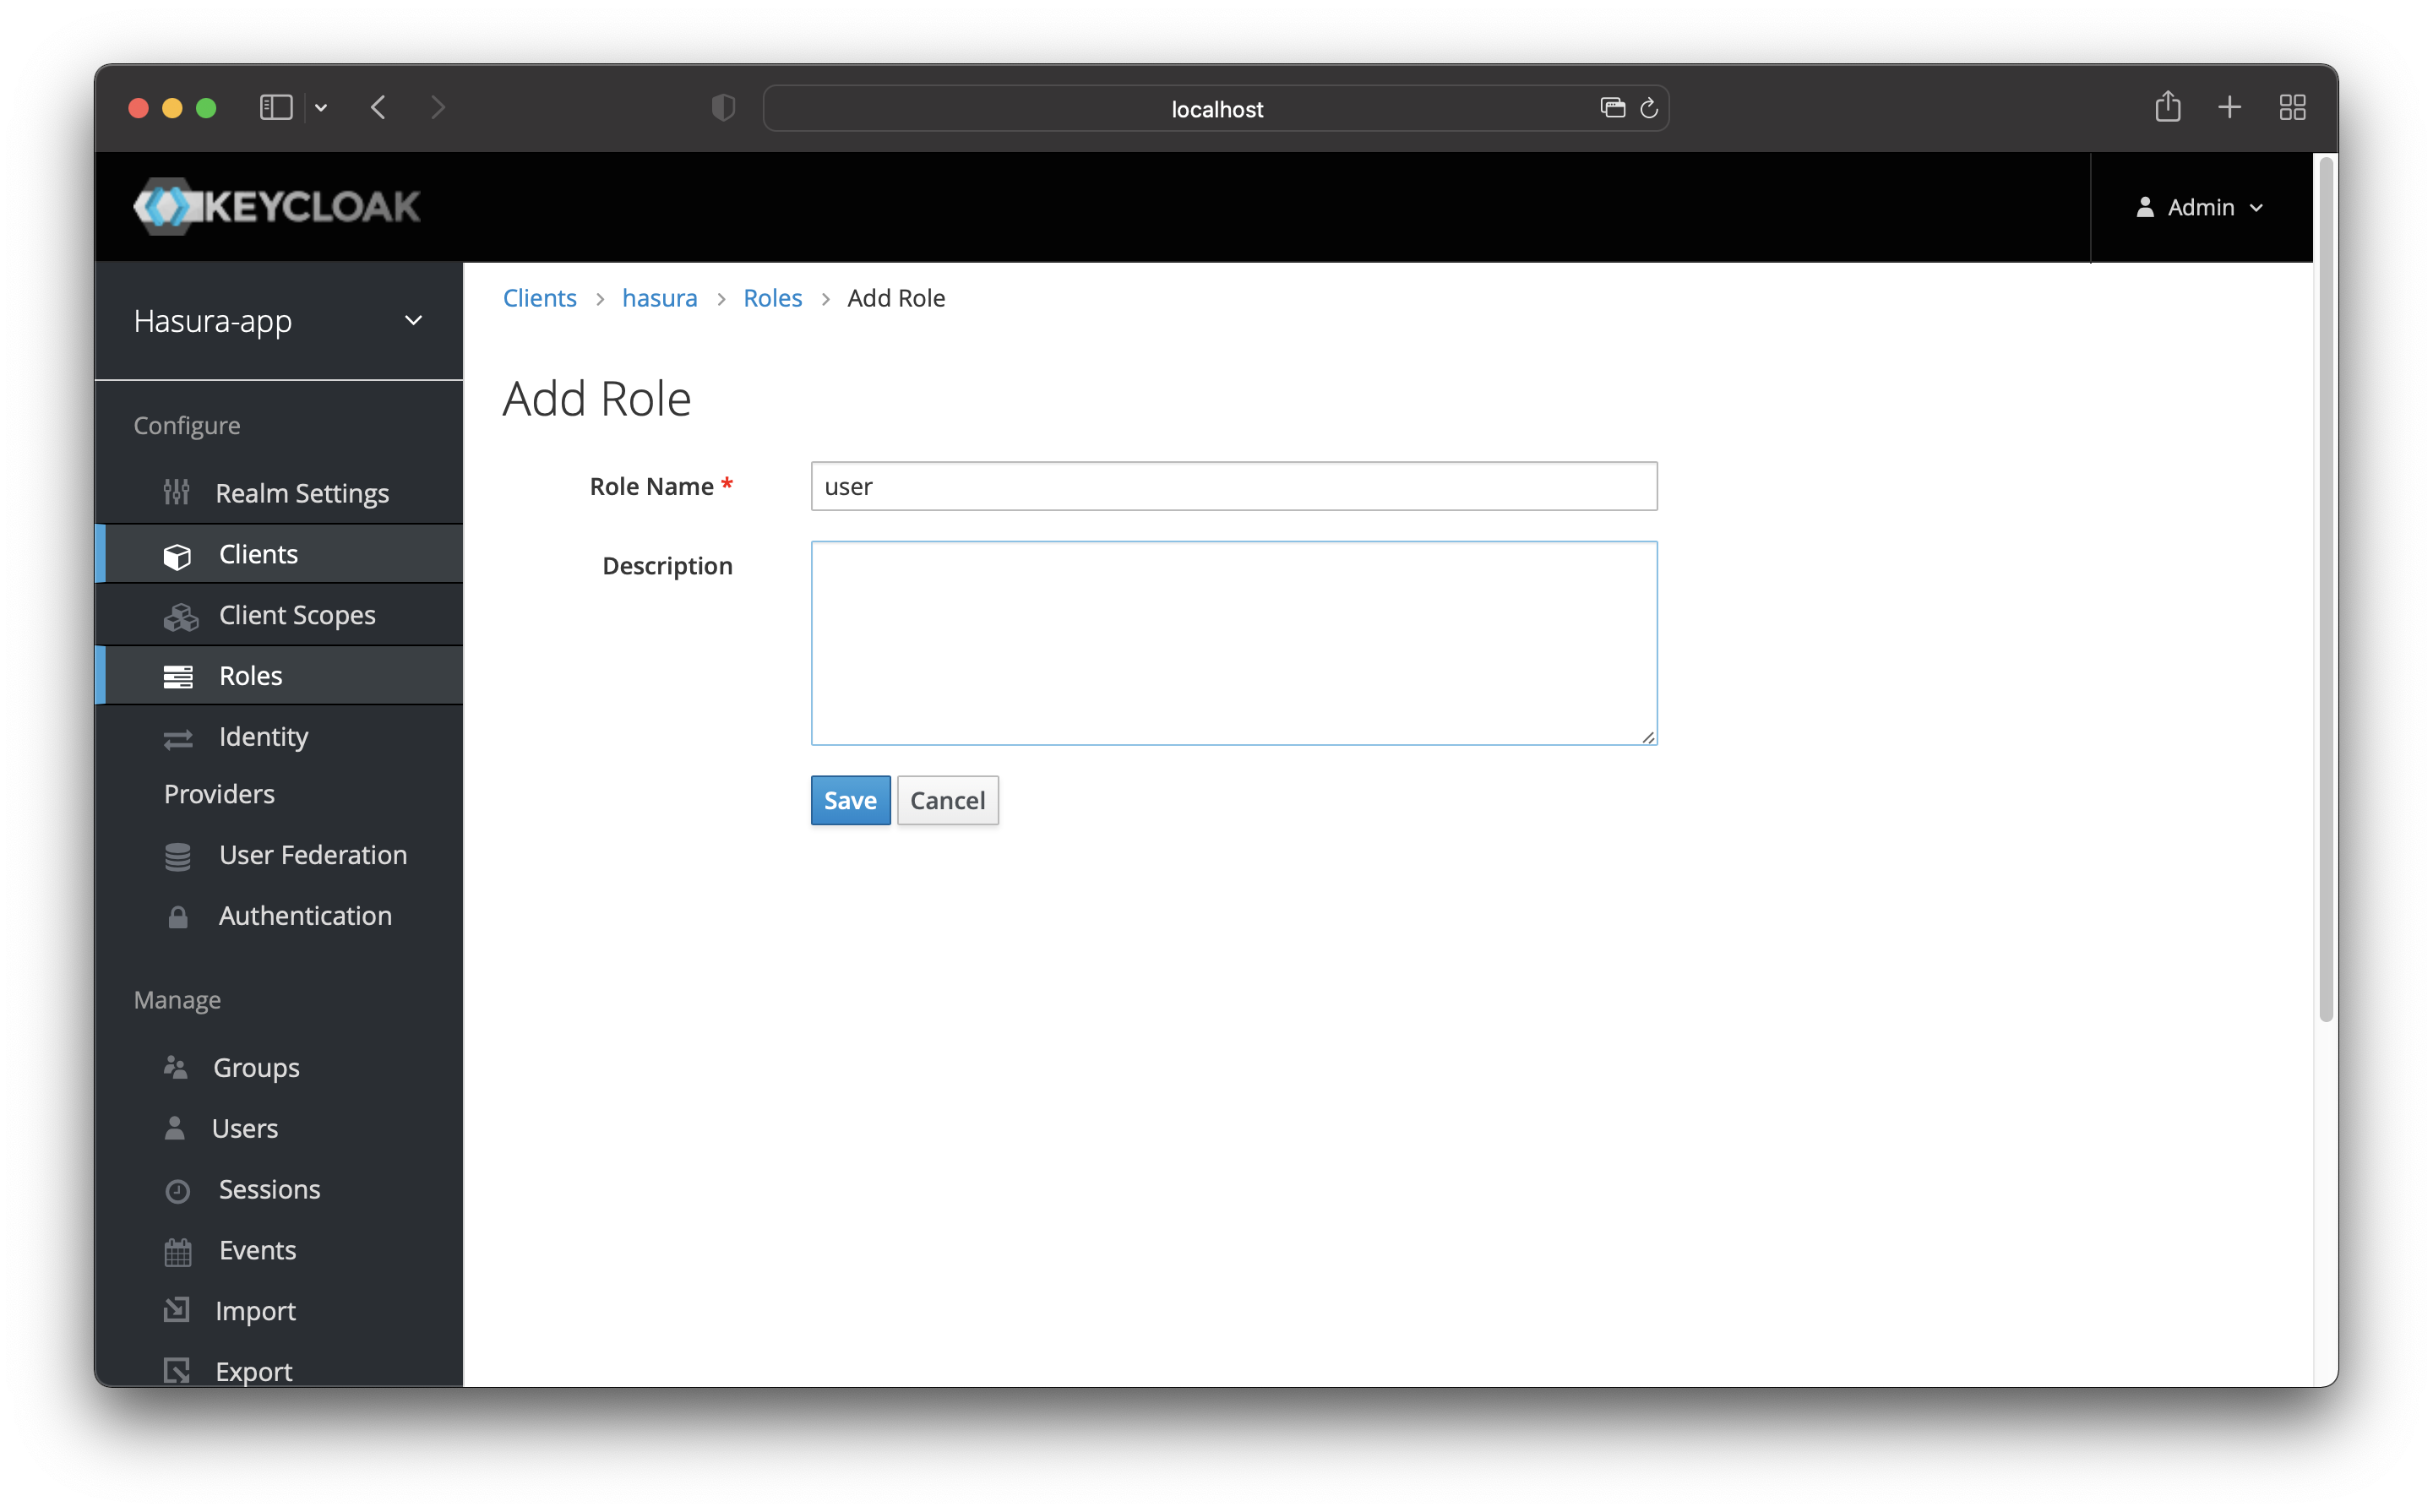
Save the role.
Add User in Keycloak
Now you have the role, but not a user. That means you need to create a user and assign the role.
Go to the “Users” page and click on “Add user” in the top right corner. That opens a new page where you can add the new user.
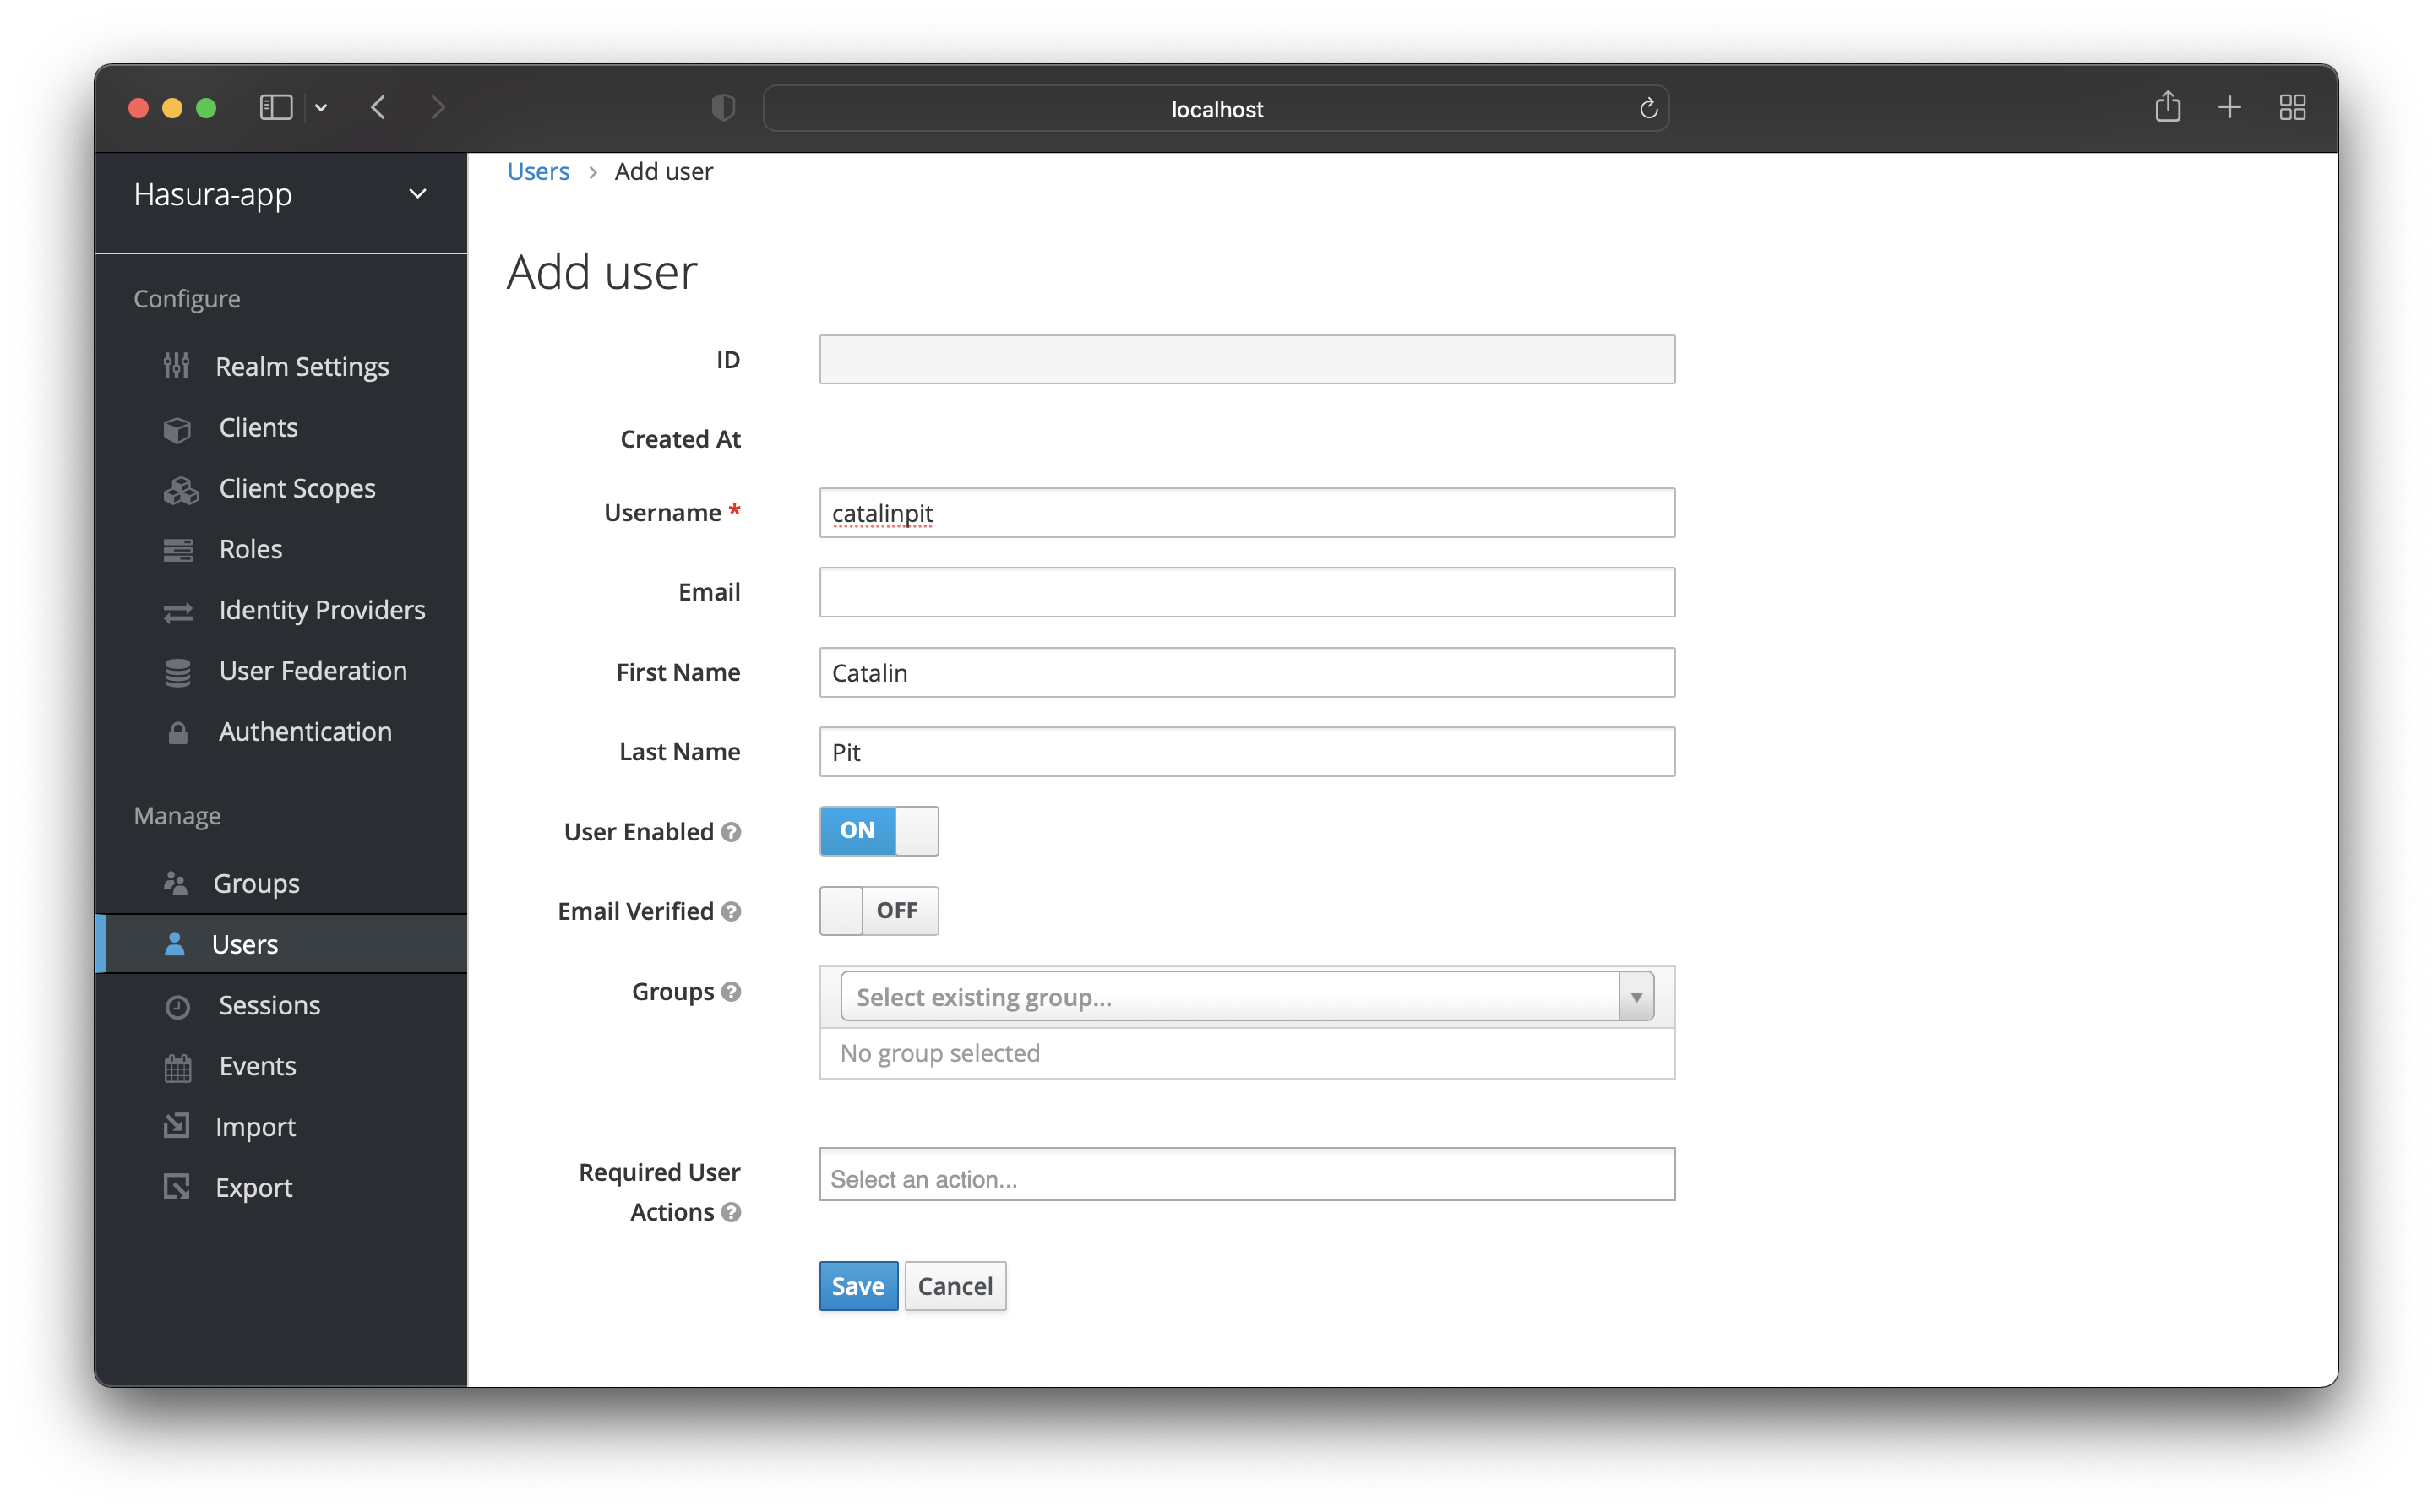
Save the user after adding a username (other details are optional).
Now you need to set up a password for your user, which you can do on the credentials page. You can see the “Credentials” tab at the top of the page.
Choose a password for your user and confirm it.
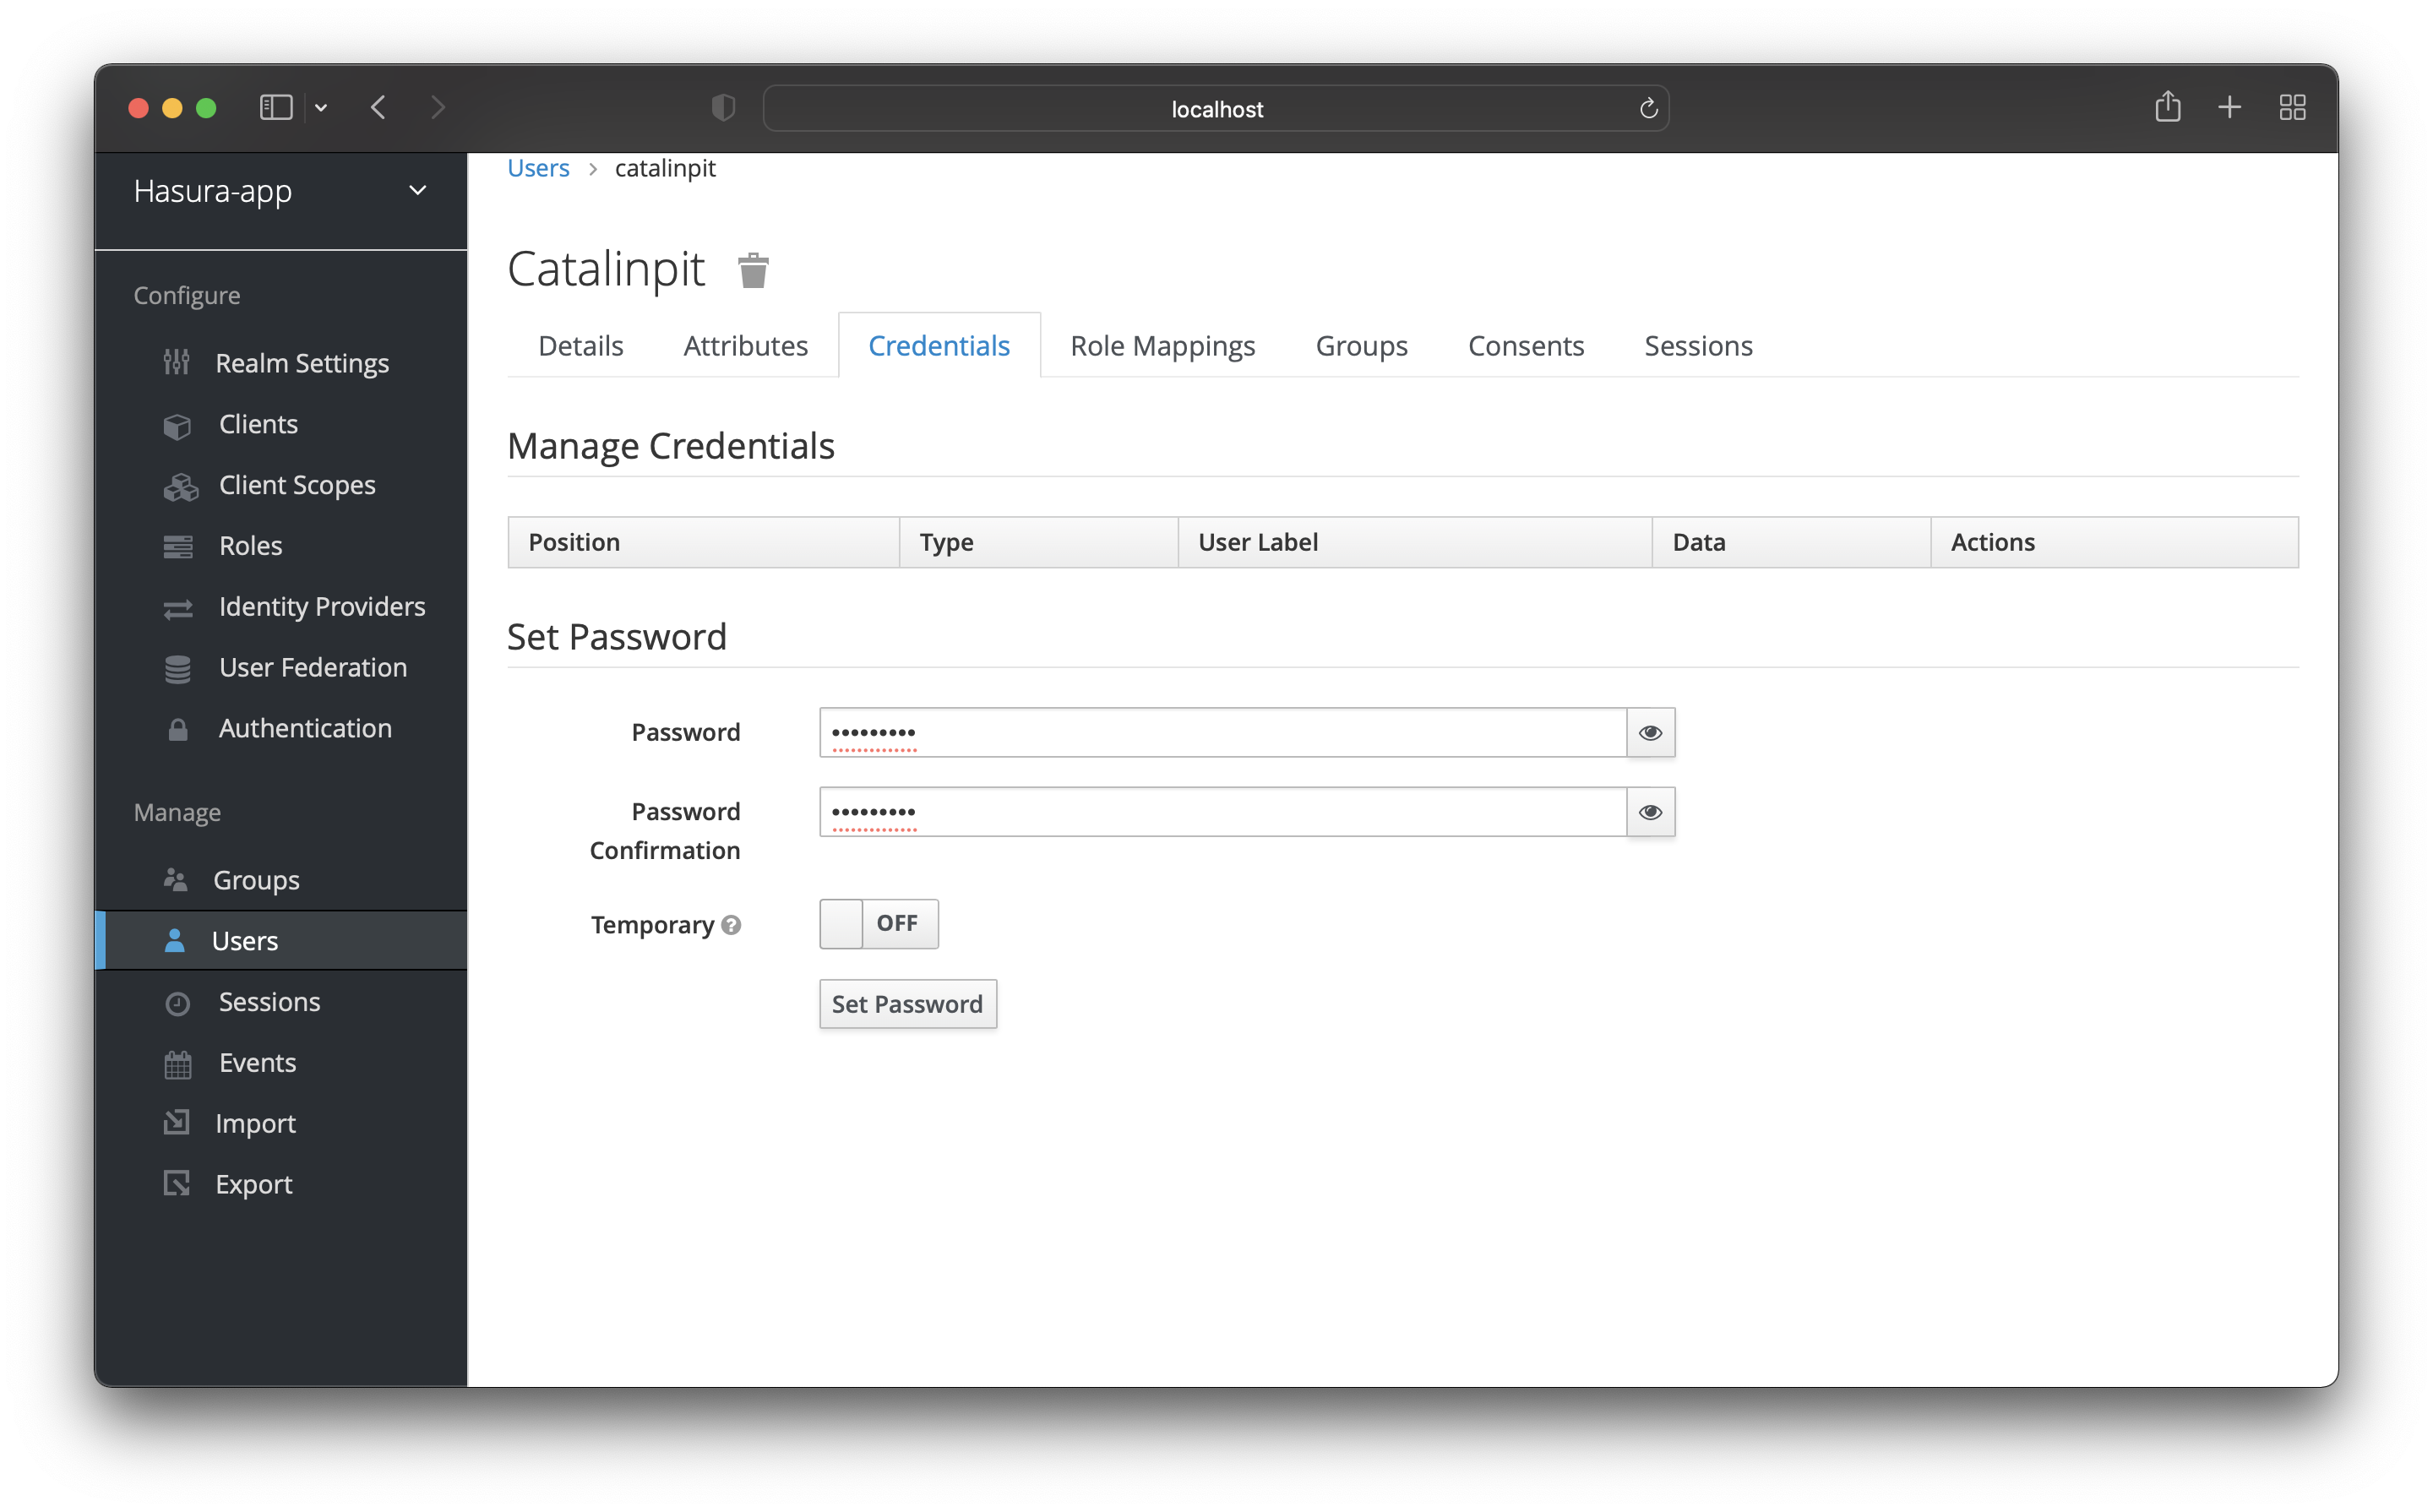
Note: Disable the “Temporary” option so you do not have to change the password on your first log in.
Save it by clicking the “Set Password” button.
Assign the Role
Navigate back to the “Users” page and open your user profile page by clicking on the user’s id.
Go to the “Role Mappings” page and select your client in the “Client Roles” field. Then choose the user role from the
“Available Roles” and add it by clicking “Add Selected”.
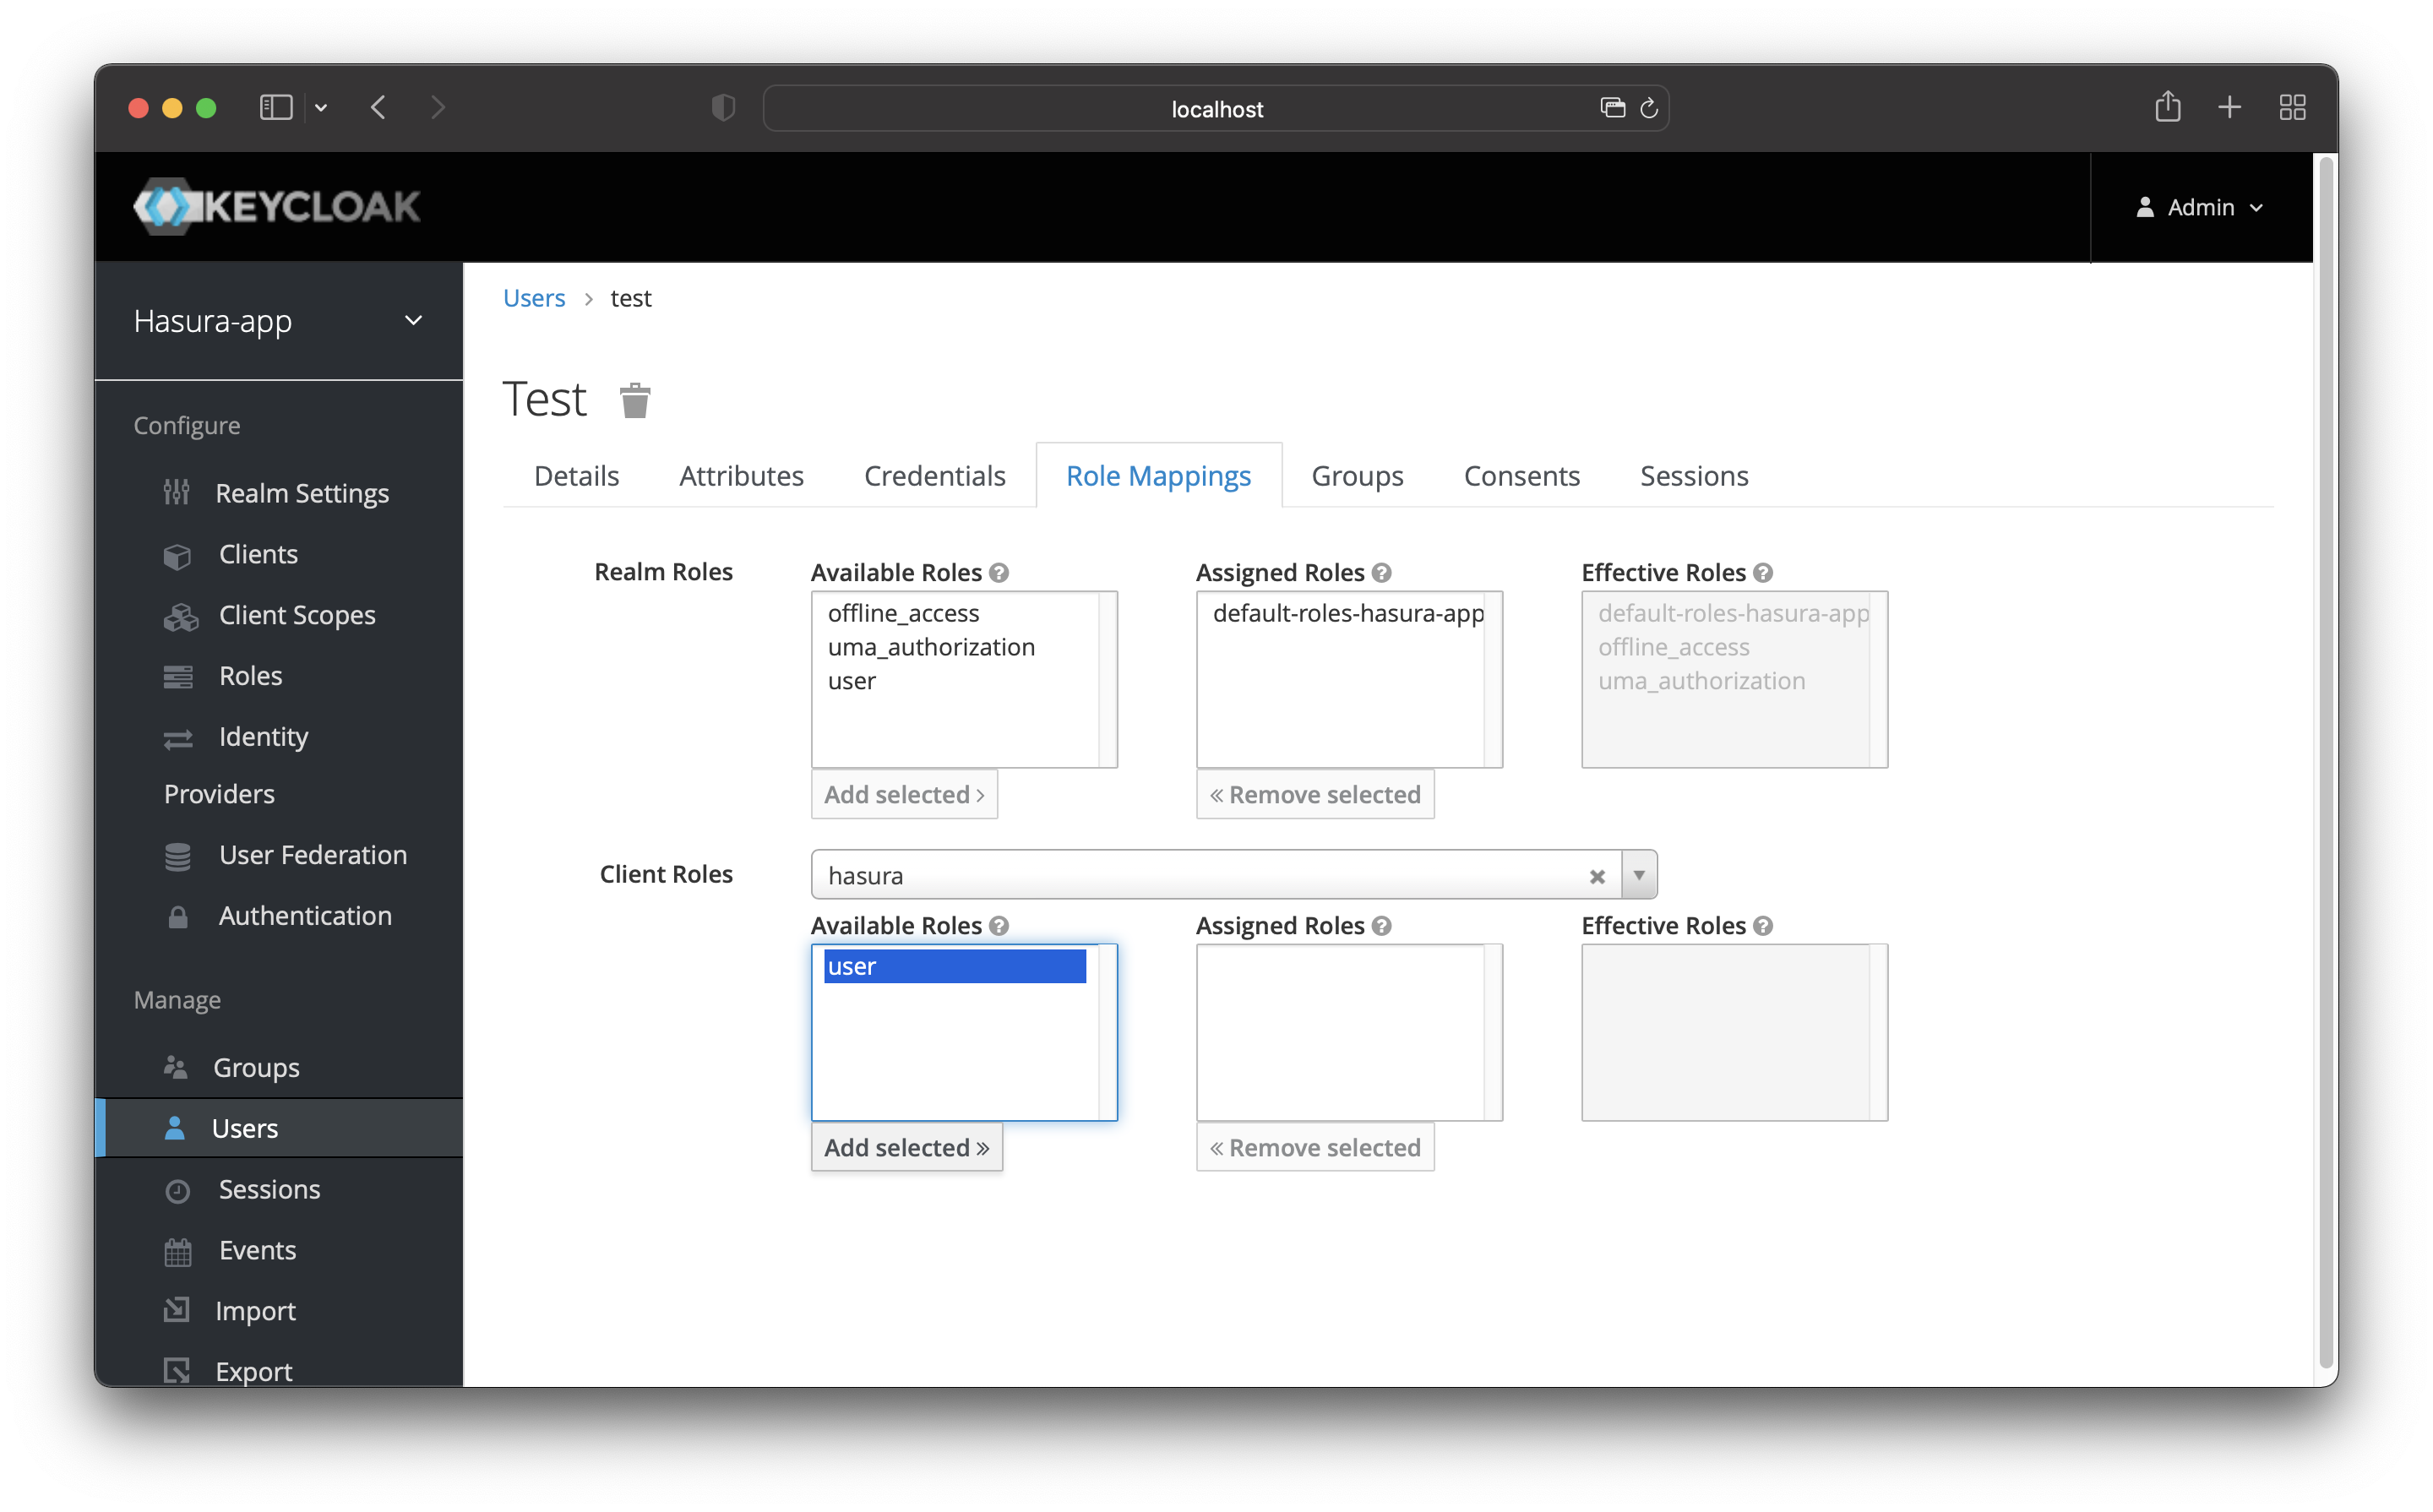
Your user has the user role now.
Create Mappers for Custom JWT Claims
Hasura decodes and verifies the JWT token returned by the auth server - Keycloak in this case.
Each token will contain some data about the request, such as:
- the roles that are allowed to make the request
- the user id
and so on. This way, Hasura can enforce the necessary authorization rules.
These are the x-hasura-* values you need to pass in the token:
x-hasura-allowed-rolesx-hasura-default-rolex-hasura-user-id
Keycloak enables you to do that with the “Mappers” feature.
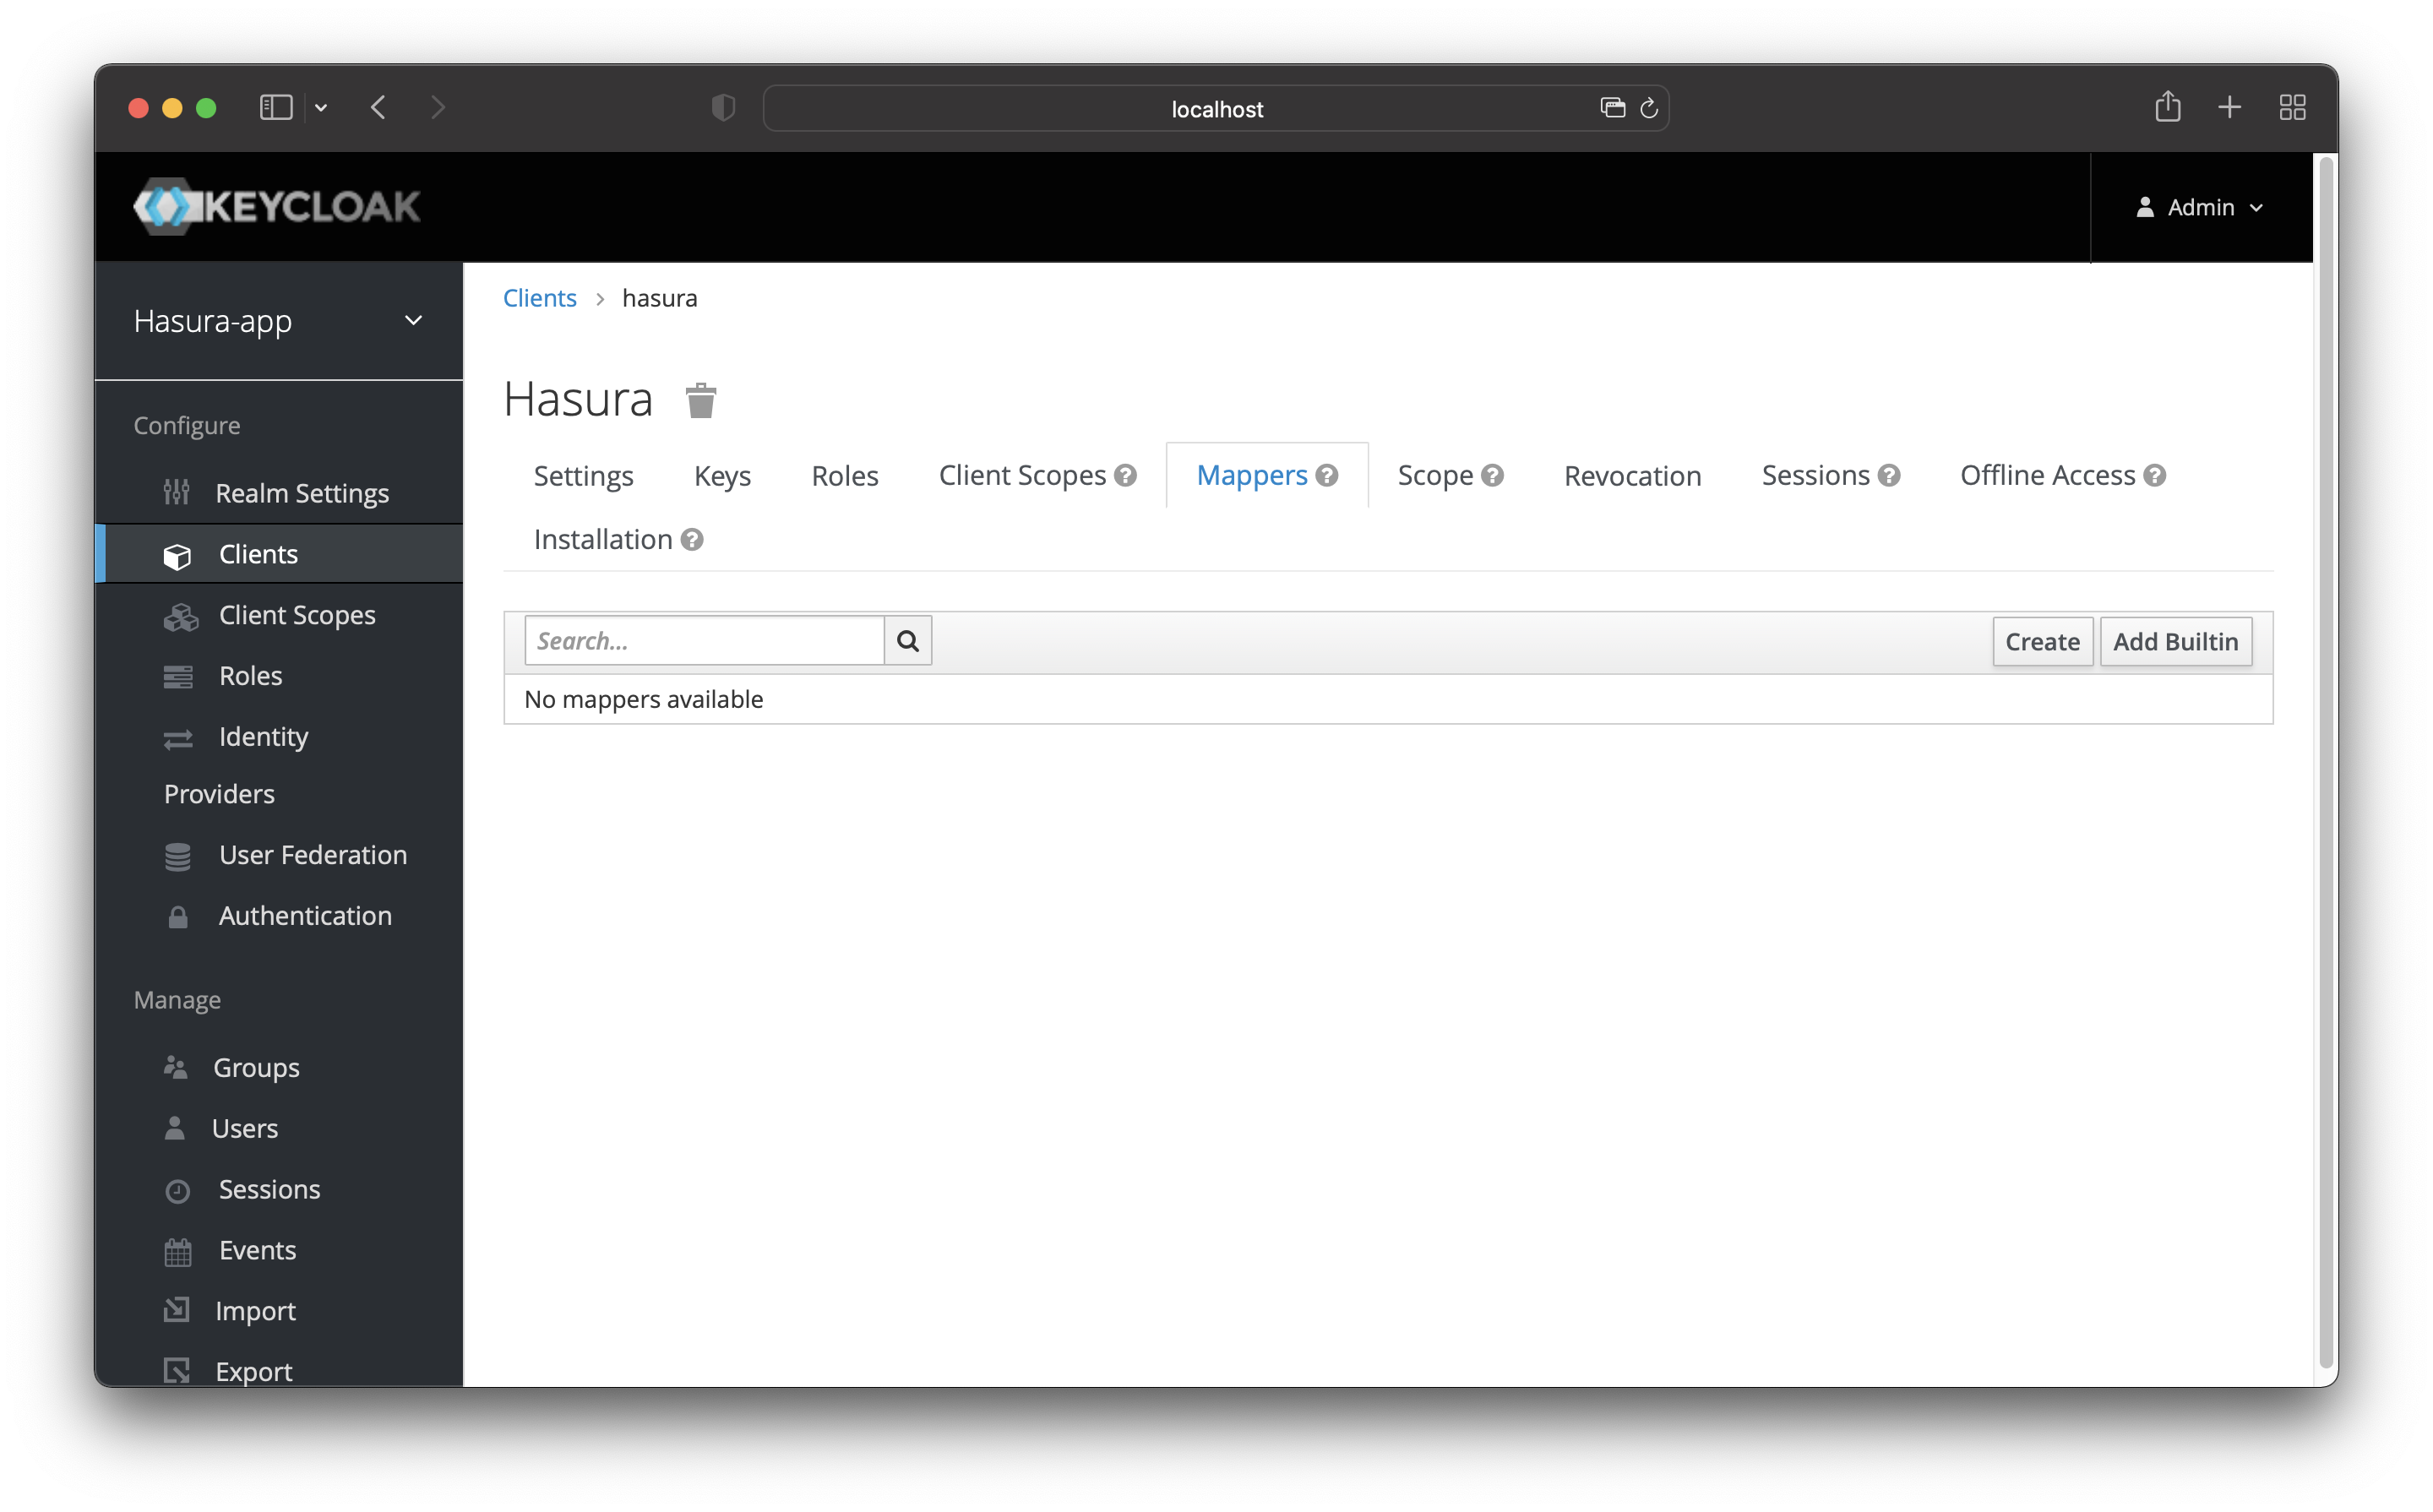
Navigate to your client and then click on the “Mappers” tab. Once there, click on the “Create” button.
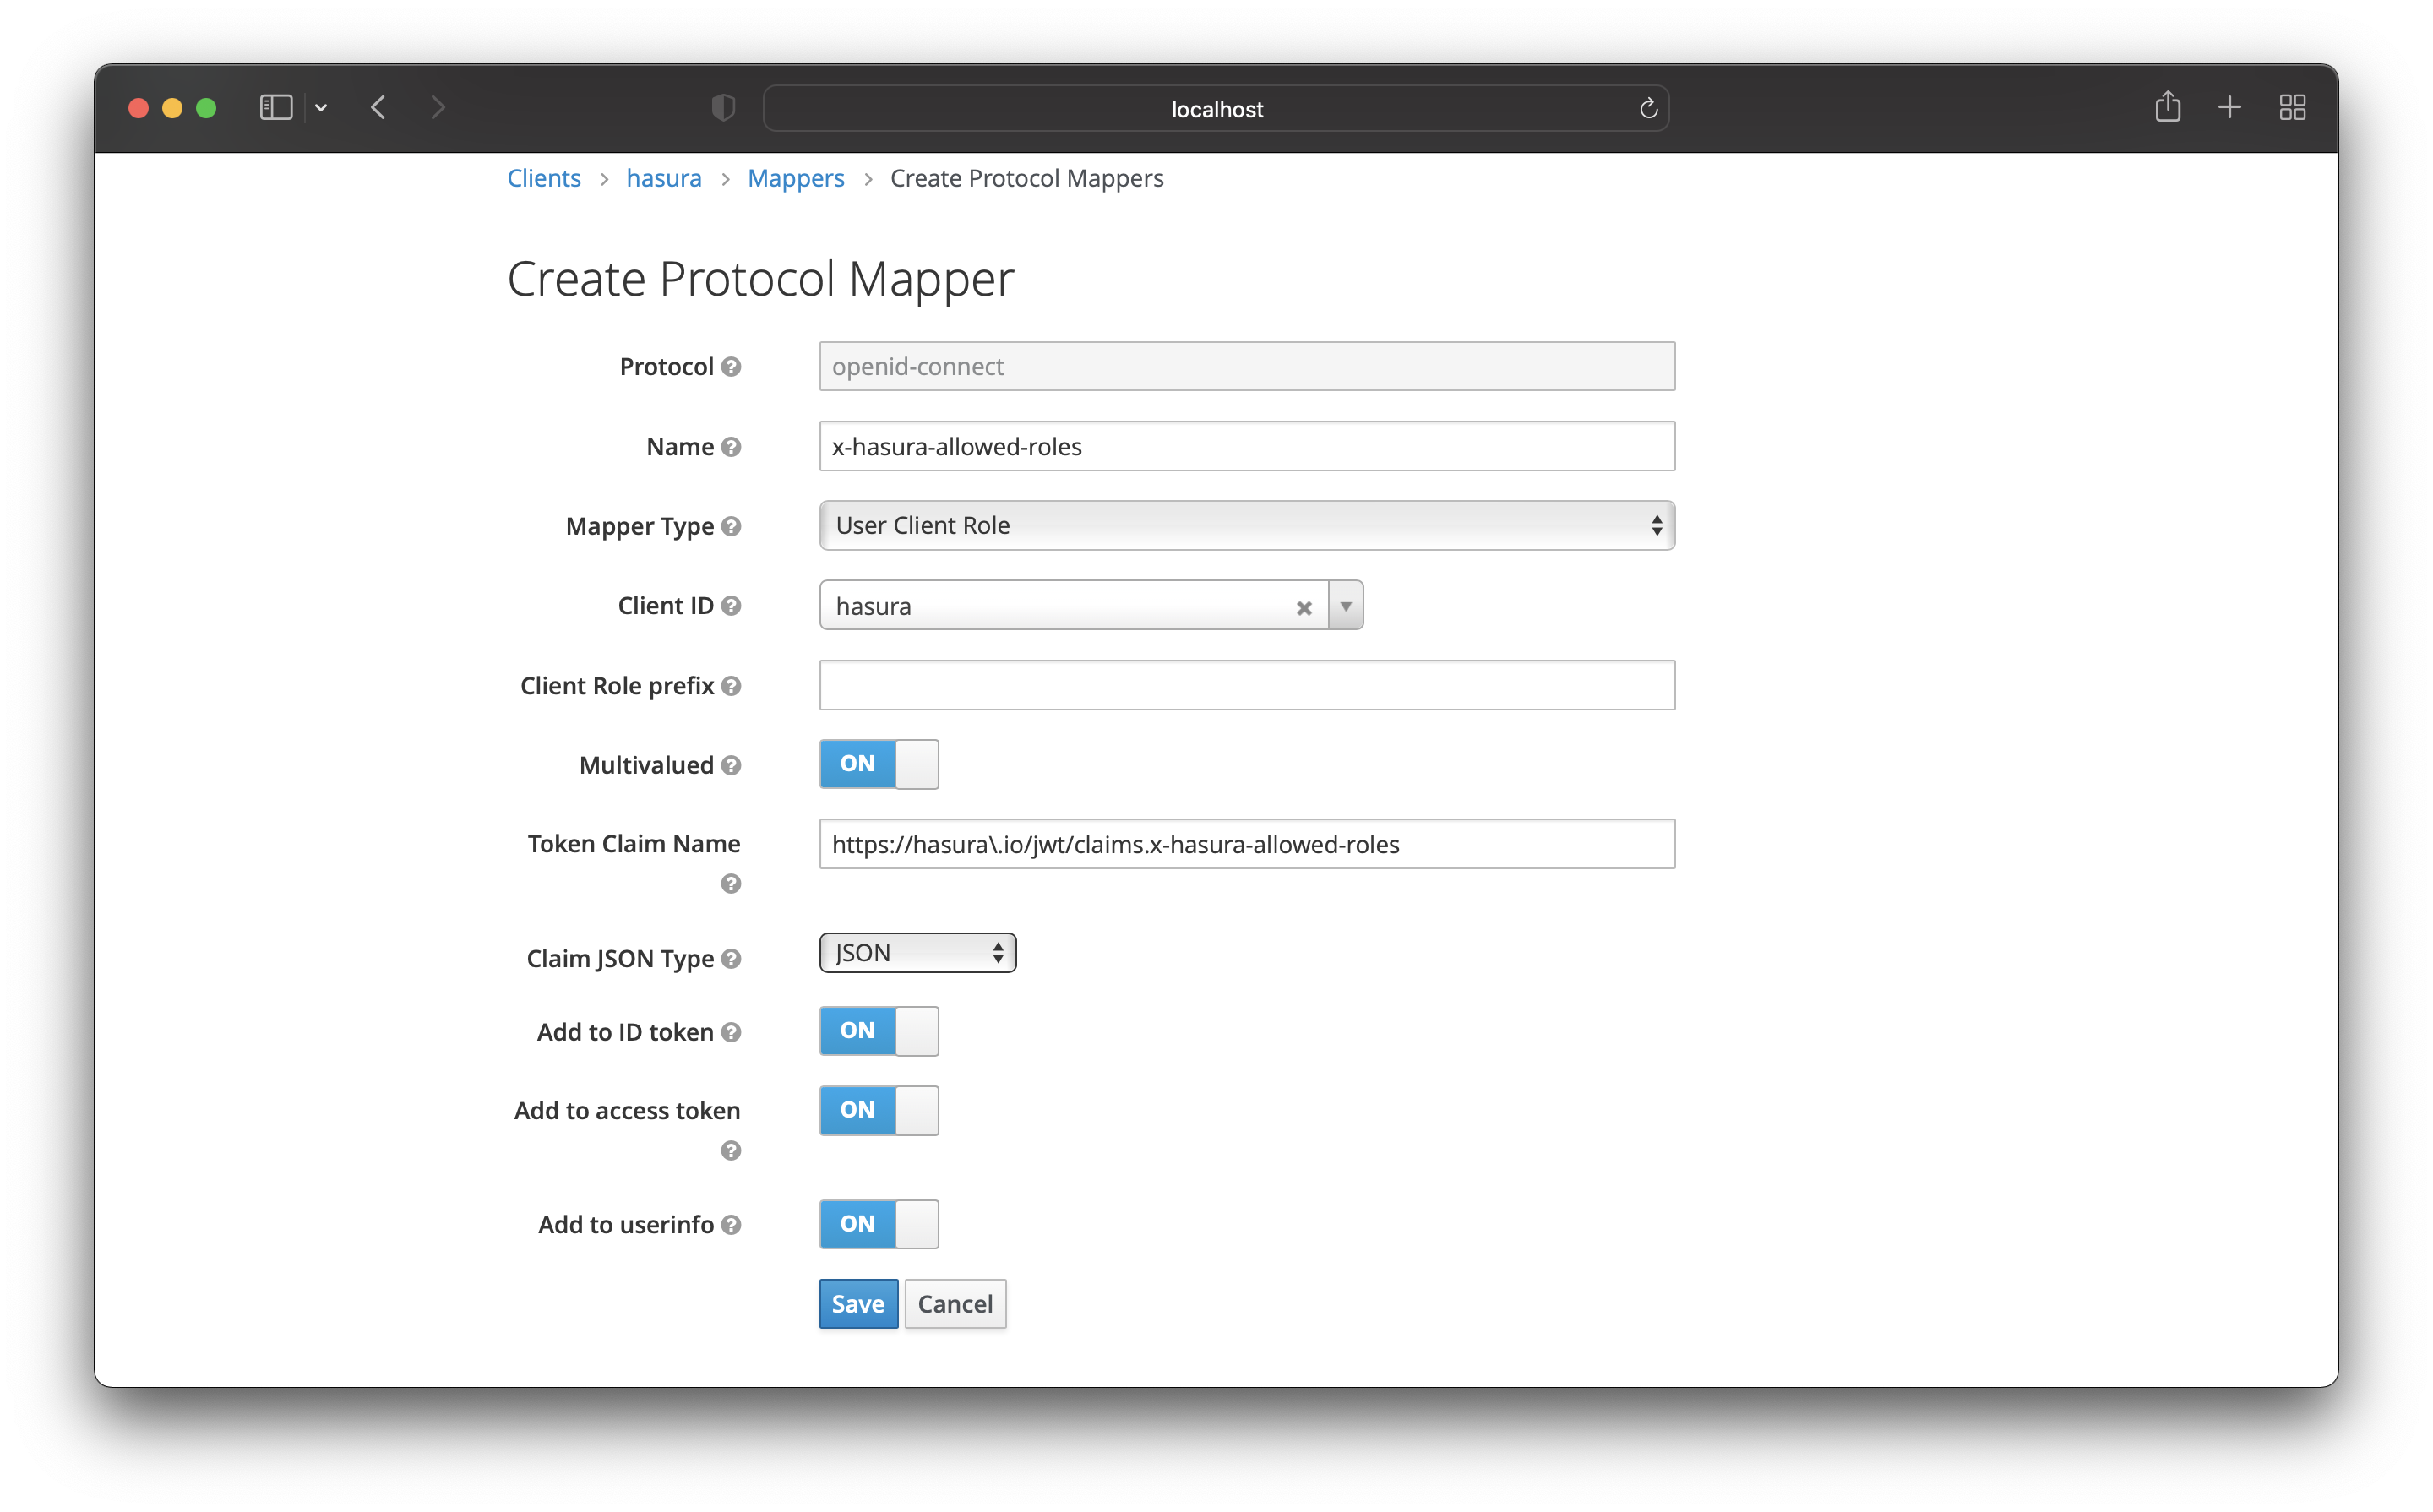
The first Protocol Mapper is for the allowed roles. Add the following values:
- Name -
x-hasura-allowed-roles - Mapper Type - User Client Role
- Client ID - your client
- Multivalued - ON
- Token Claim Name -
https://hasura\.io/jwt/claims.x-hasura-allowed-roles - Claim JSON Type: String
Then save it!
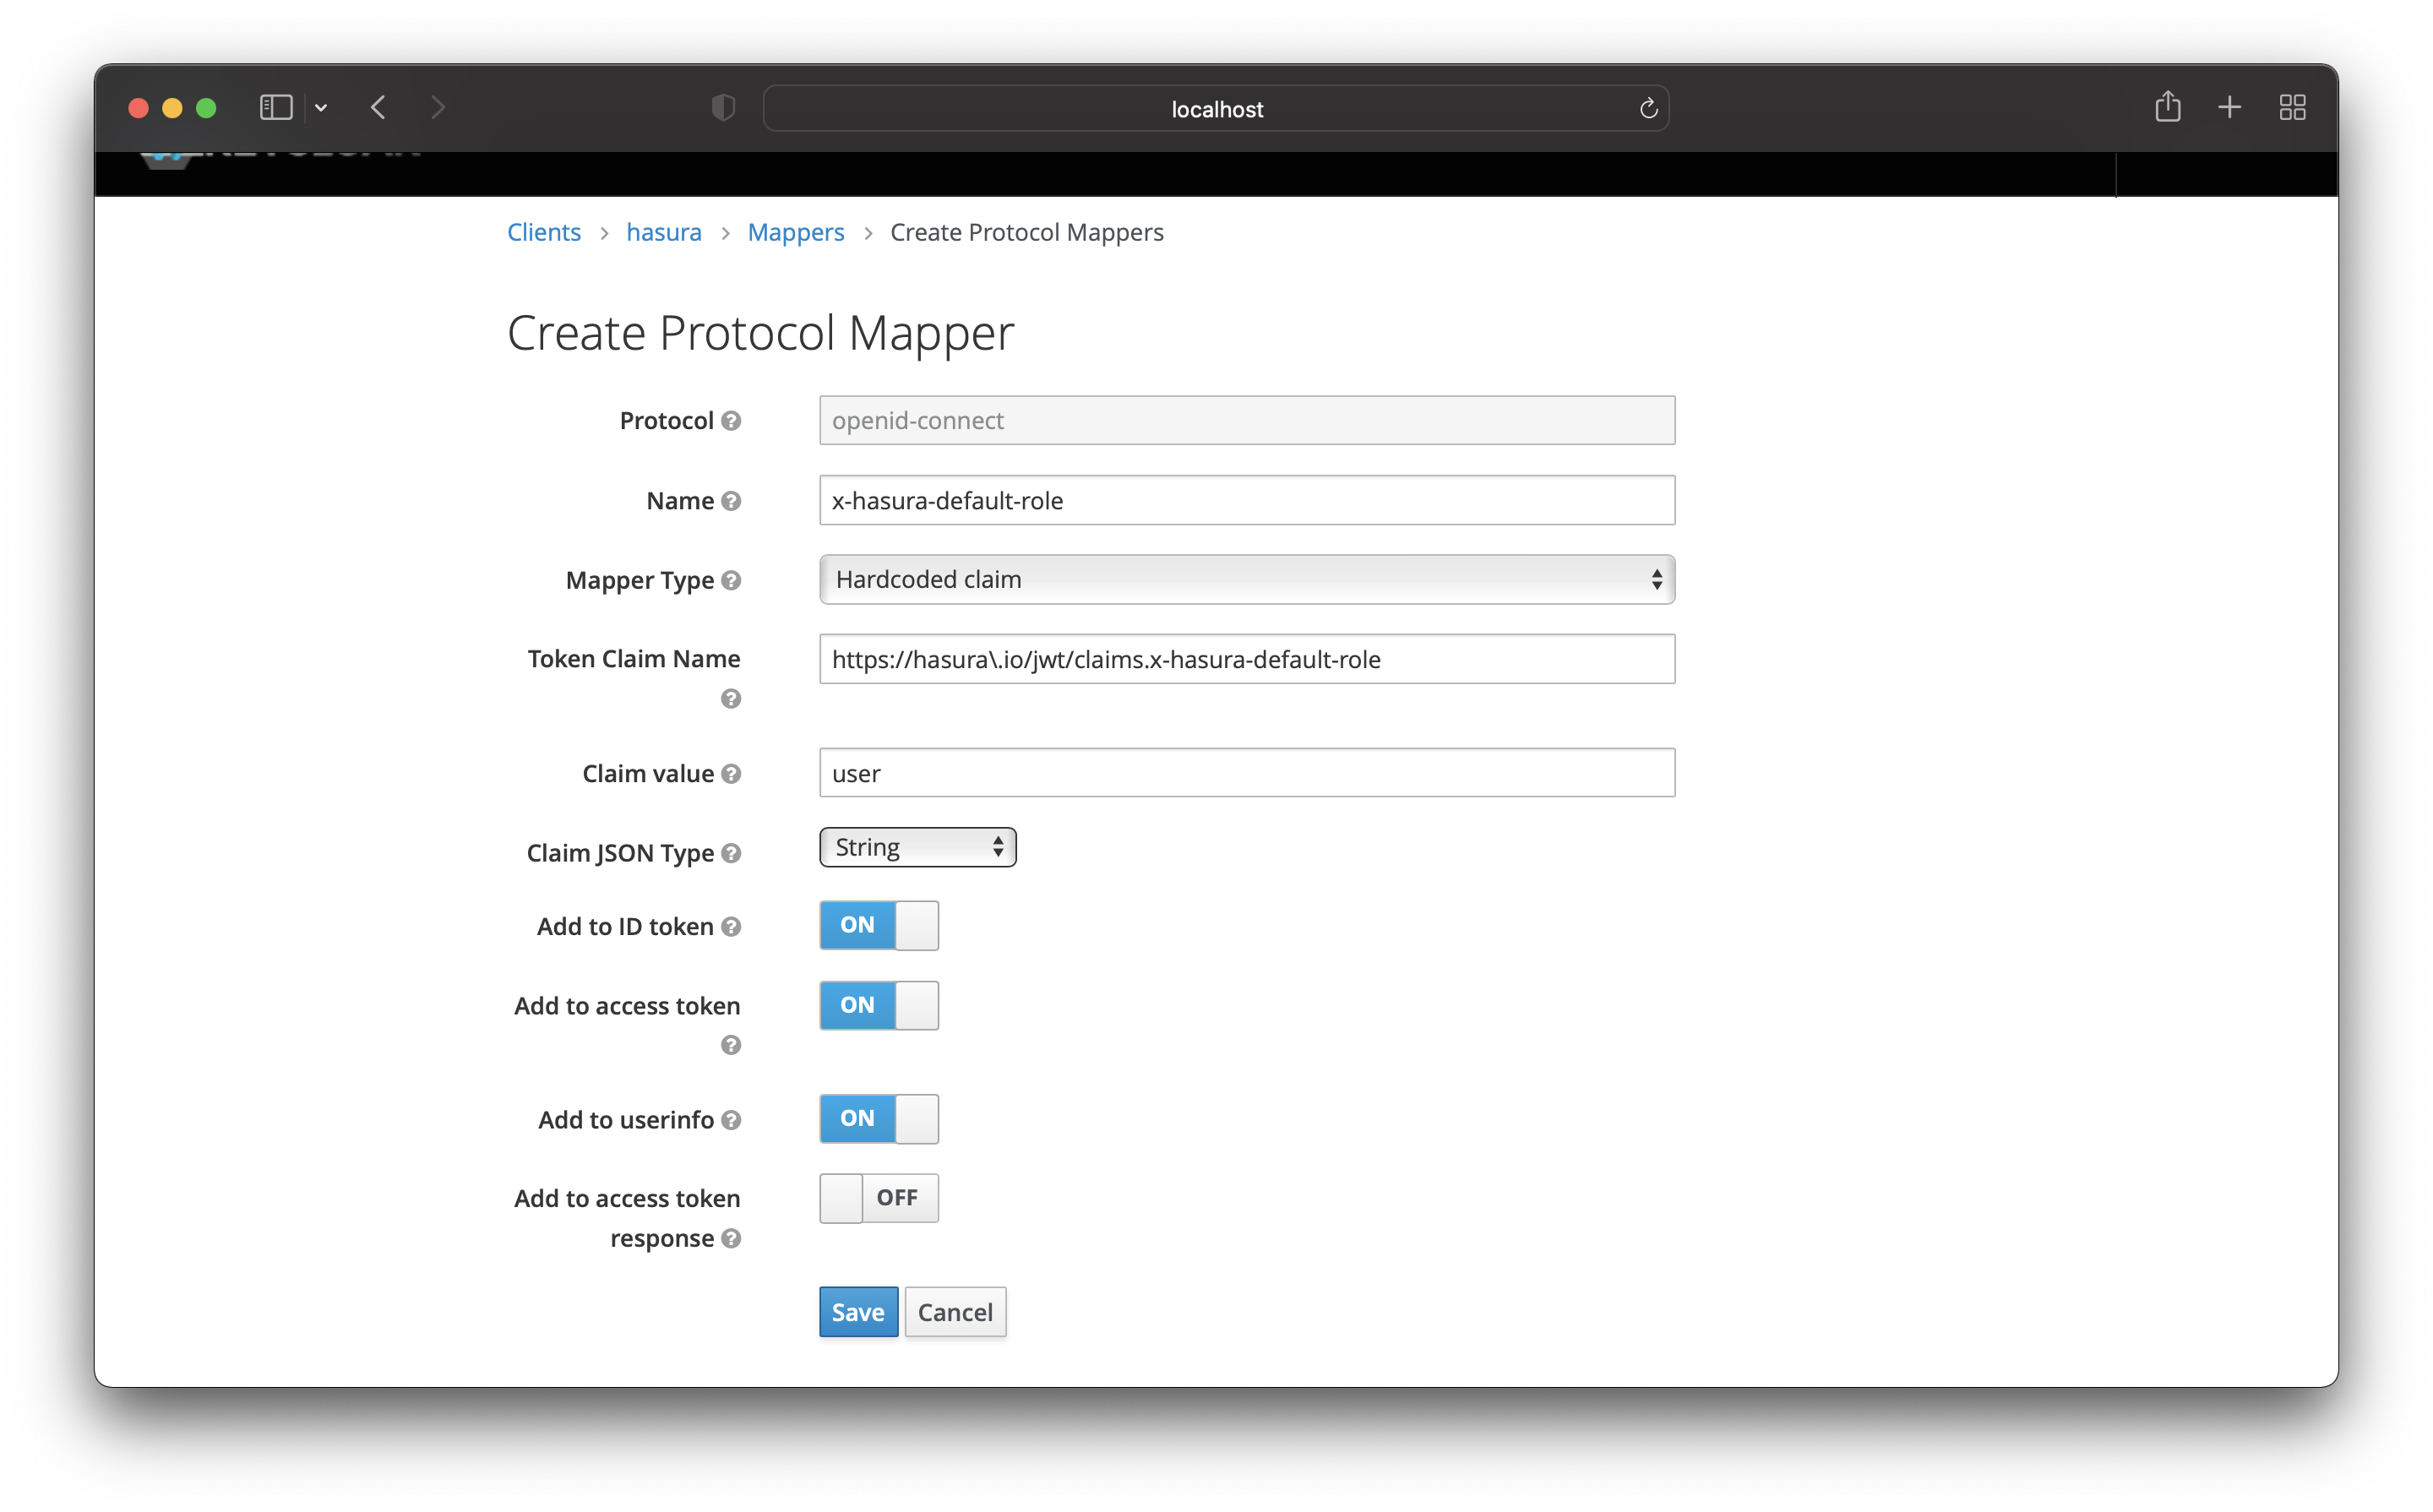
The next Protocol Mapper is for the default role. Add the following values:
- Name -
x-hasura-default-role - Mapper Type - Hardcoded claim
- Claim value - user
- Token Claim Name -
https://hasura\.io/jwt/claims.x-hasura-default-role - Claim JSON Type: String
Then save it!
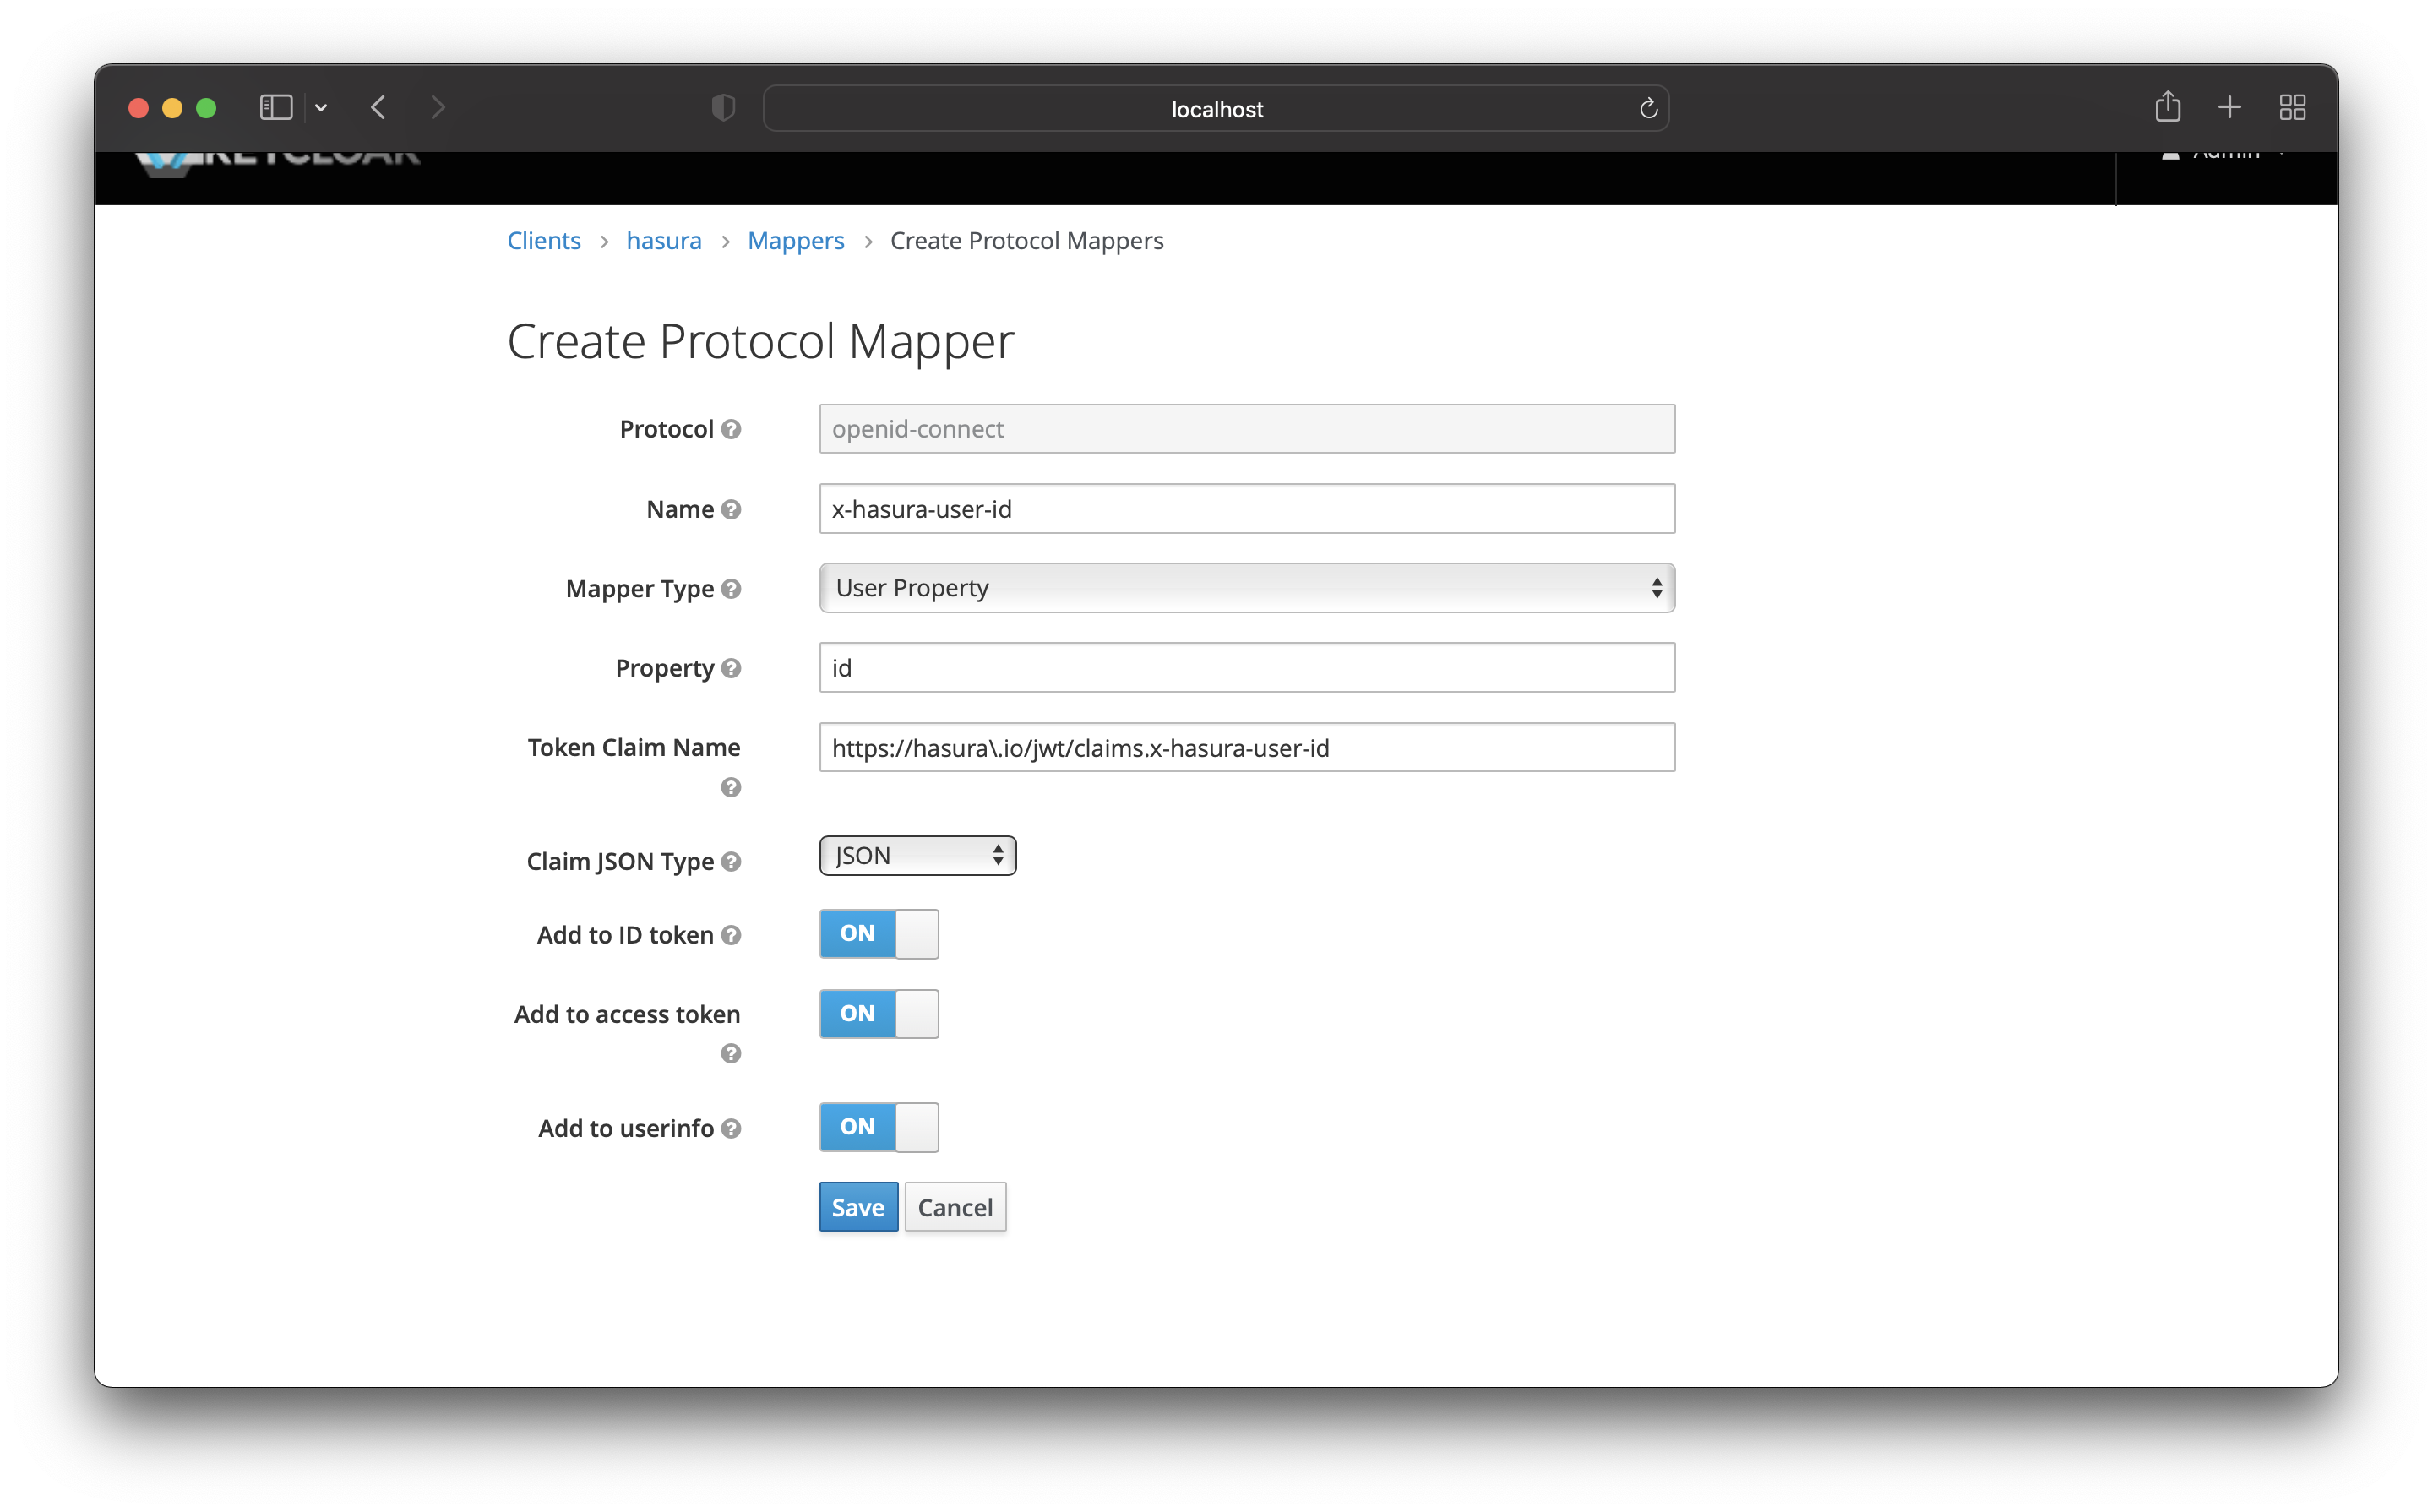
The last Protocol Mapper is for the user id. Add the following values:
- Name -
x-hasura-user-id - Mapper Type - User Property
- Property - id
- Token Claim Name -
https://hasura\.io/jwt/claims.x-hasura-user-id - Claim JSON Type: String
Then save it!
Now that you have everything in place, you can start making authenticated requests.
Build Hasura App
The first step is to go to the Hasura Cloud dashboard and create a new project. Create a new project and add a database.
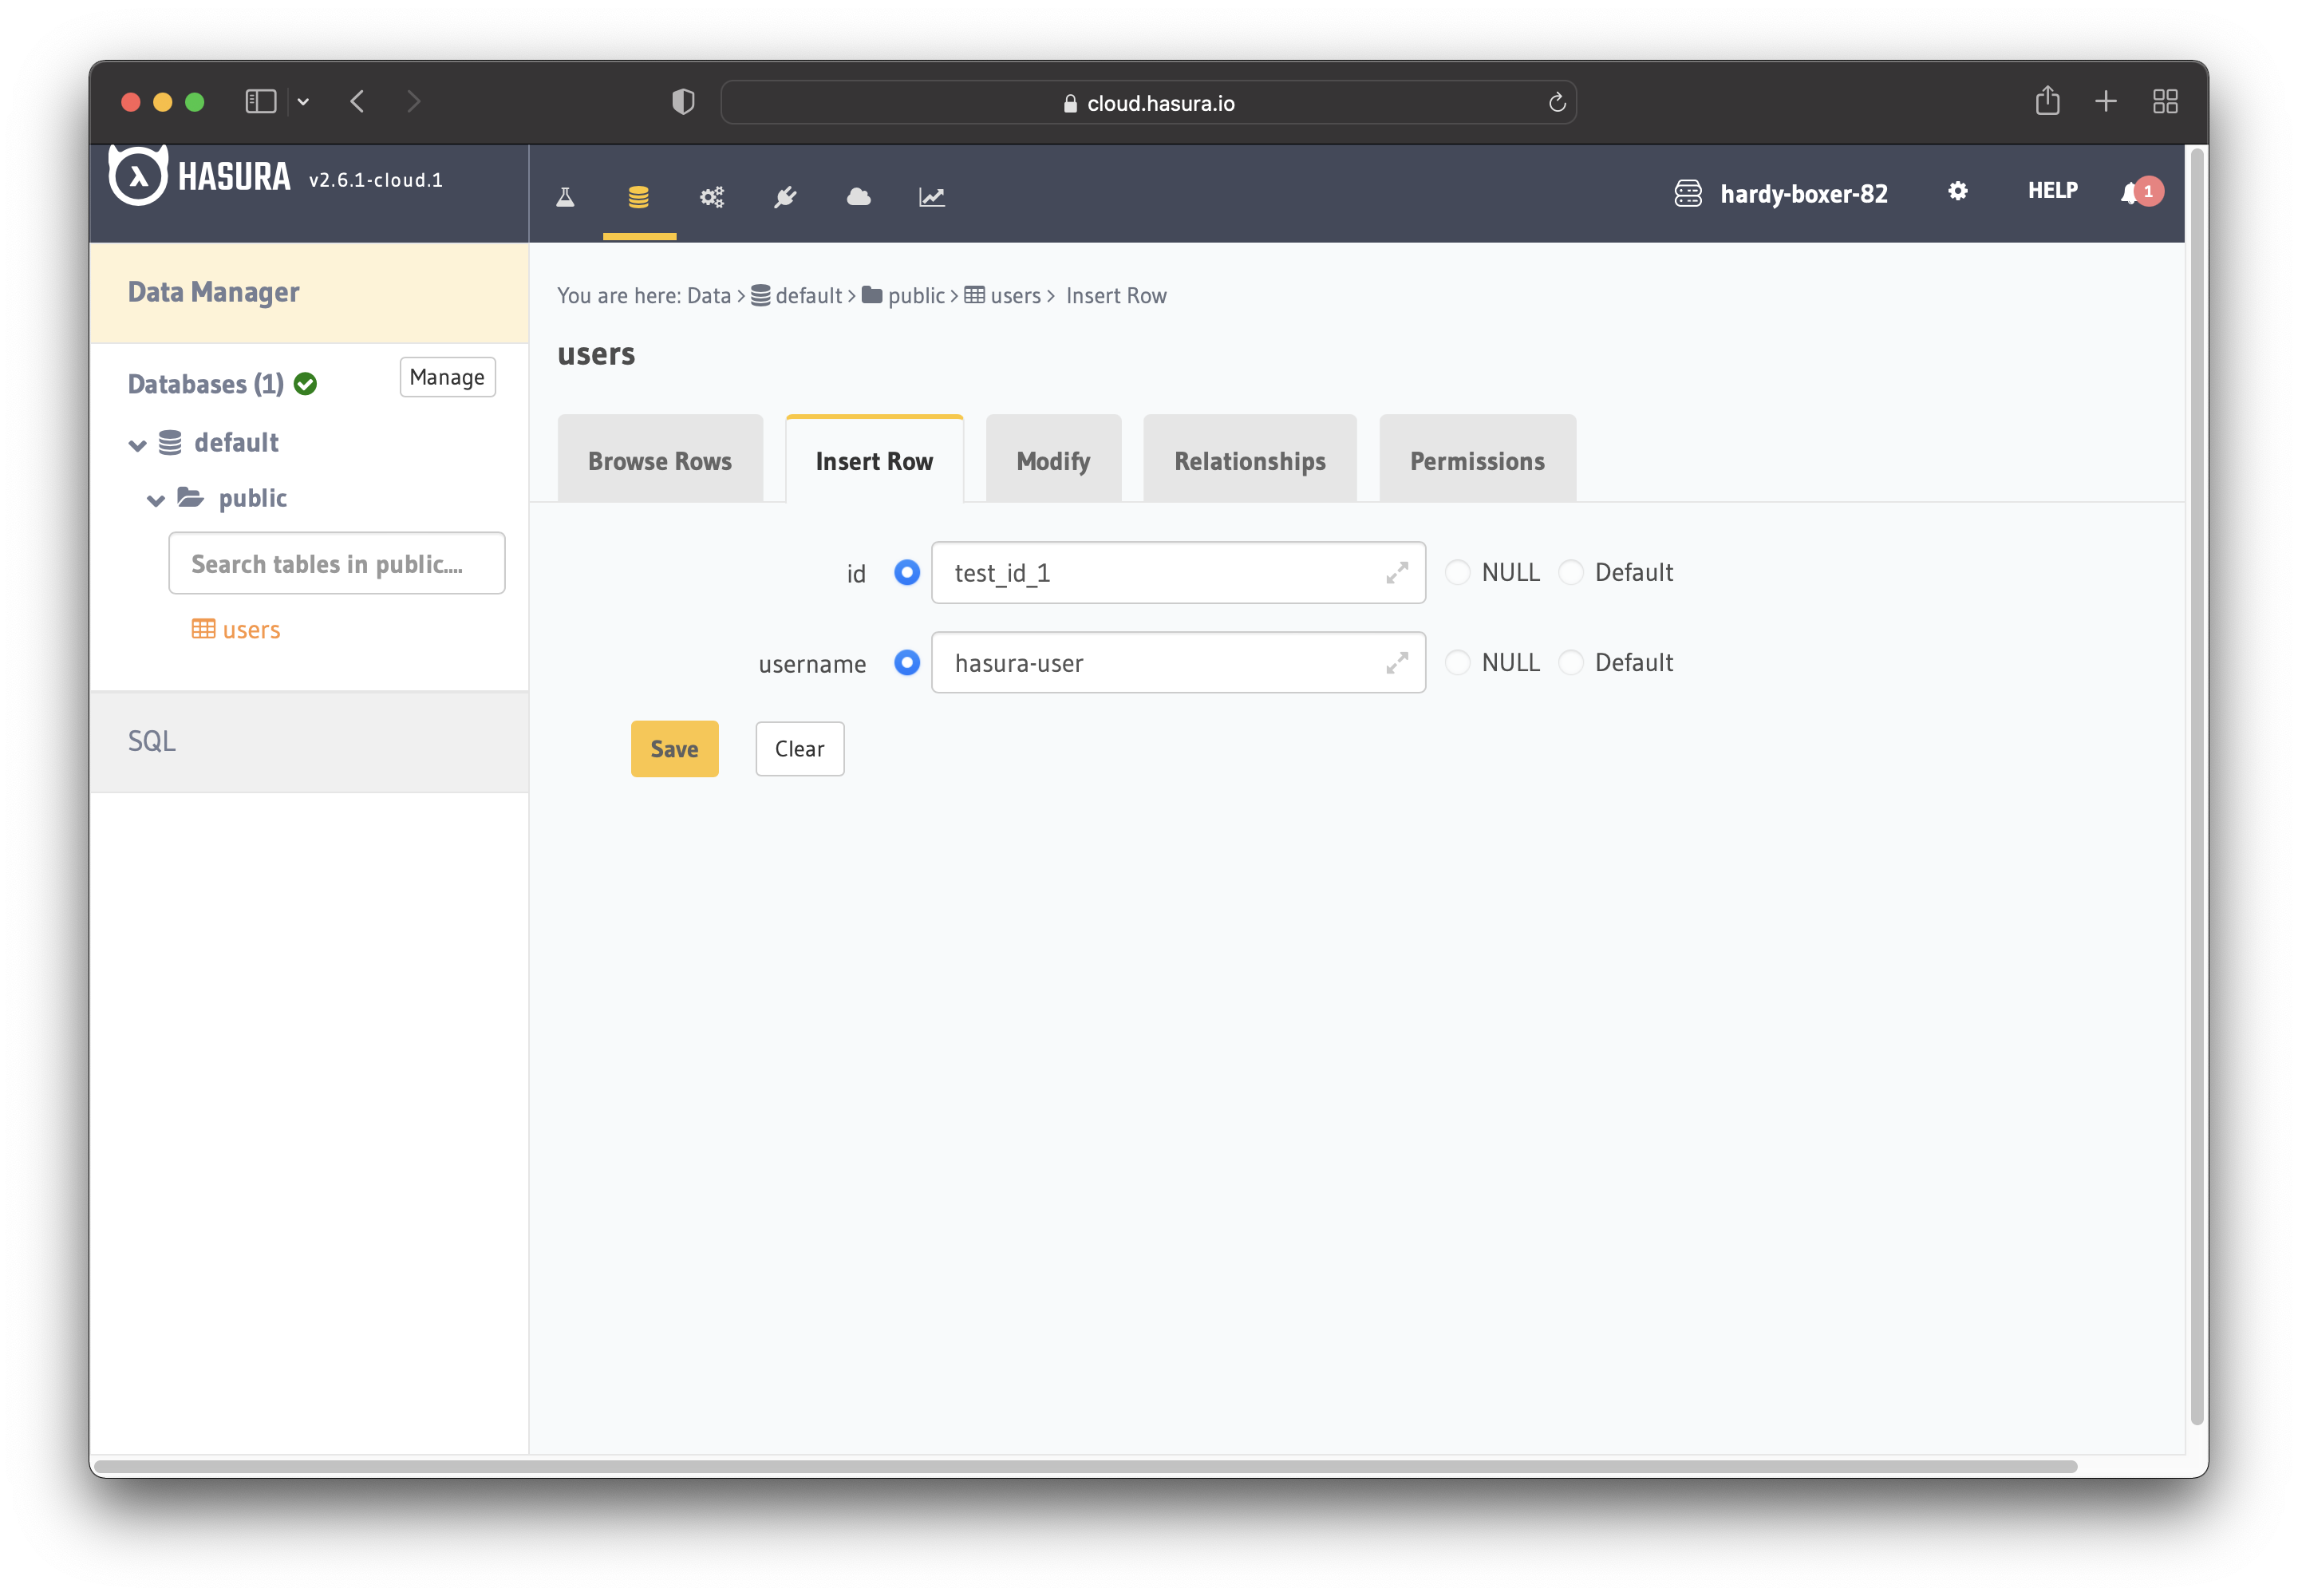
Now create a users table with the following columns:
idof type Text (Primary Key)usernameof type Text
See the image below for reference.

The next step is to create a user role for the app. Users should be able to see only their records, but not the other
people’s records.
Configure the user role as shown in the image below. For more information, read about
configuring permission rules in Hasura.
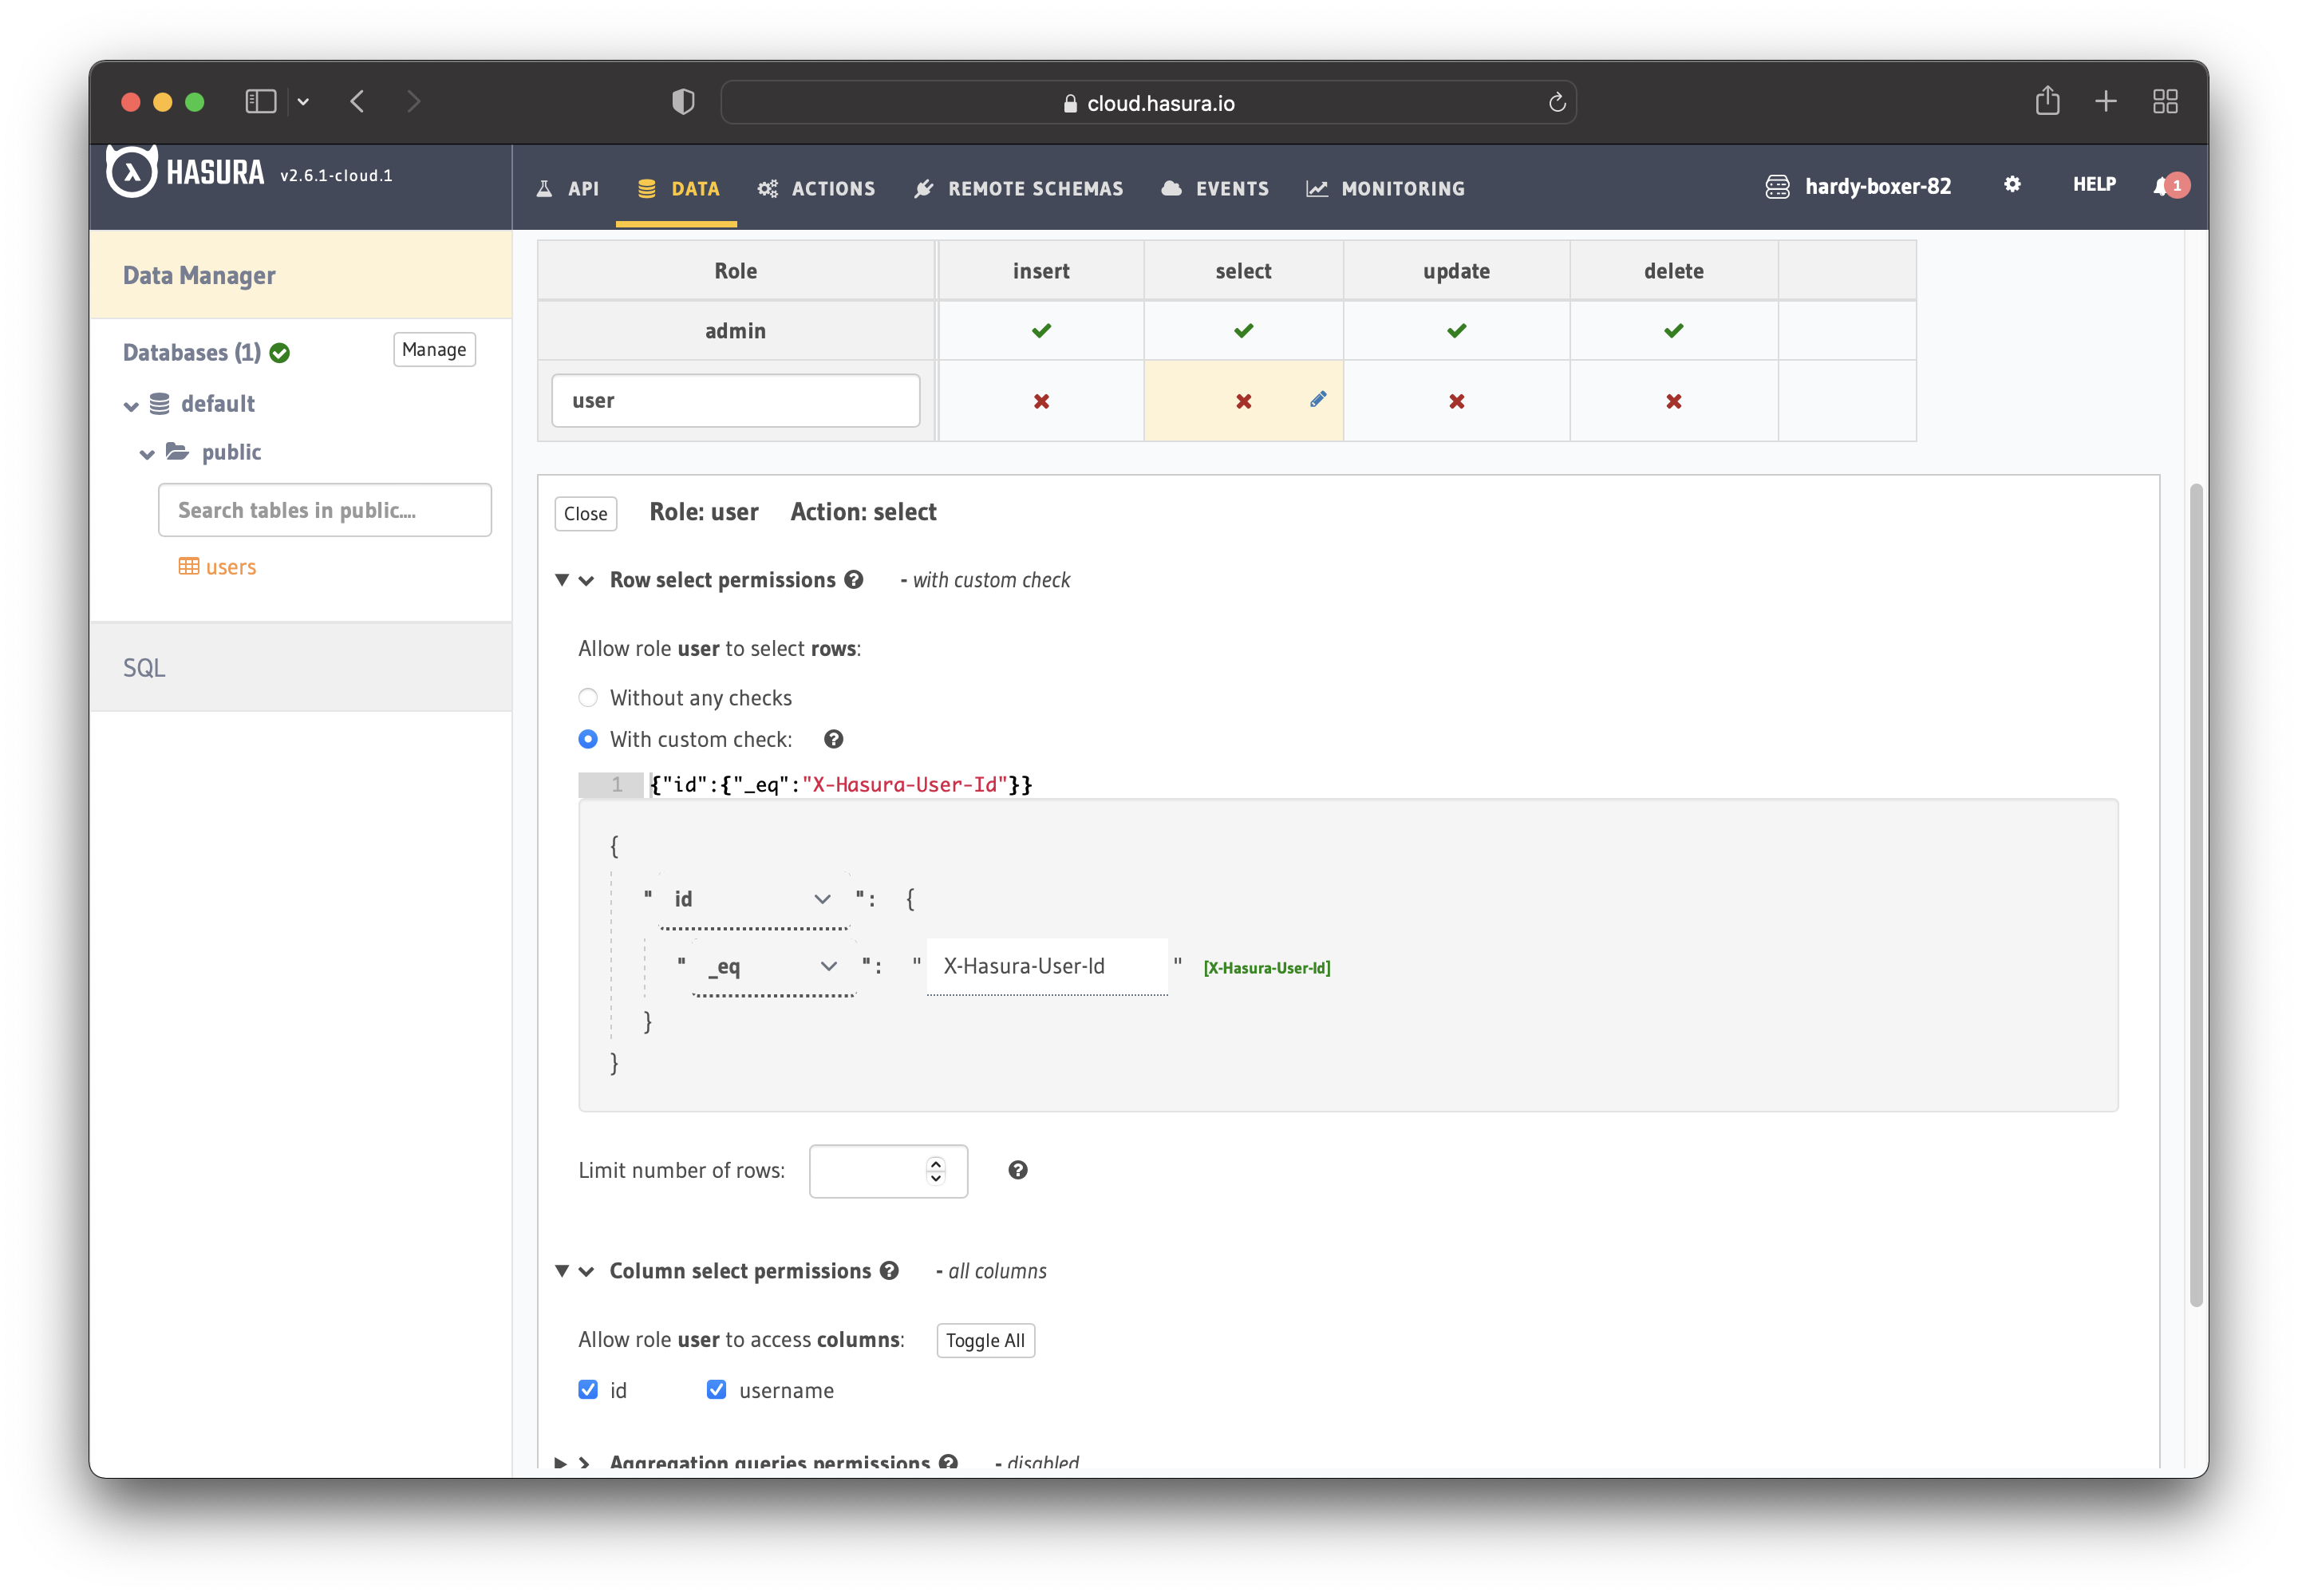
This way, users cannot read other people’s records. They can only access theirs.
For testing purposes, add a dummy user. This is to ensure that when you use the JWT token, you only see your user’s details and not other users’ details.
Warning: The users between Keycloak and Hasura do not synchronize automatically. For this example, you will do it manually. That means copying the details from Keyloack in Hasura. However, you can do that programmatically, but it’s beyond the tutorial’s scope.
Remember that you added a user earlier in Keycloak? Navigate back to the “Users” page. In case you do not see any use (like in the image), click on “View all users” and you should see your user.
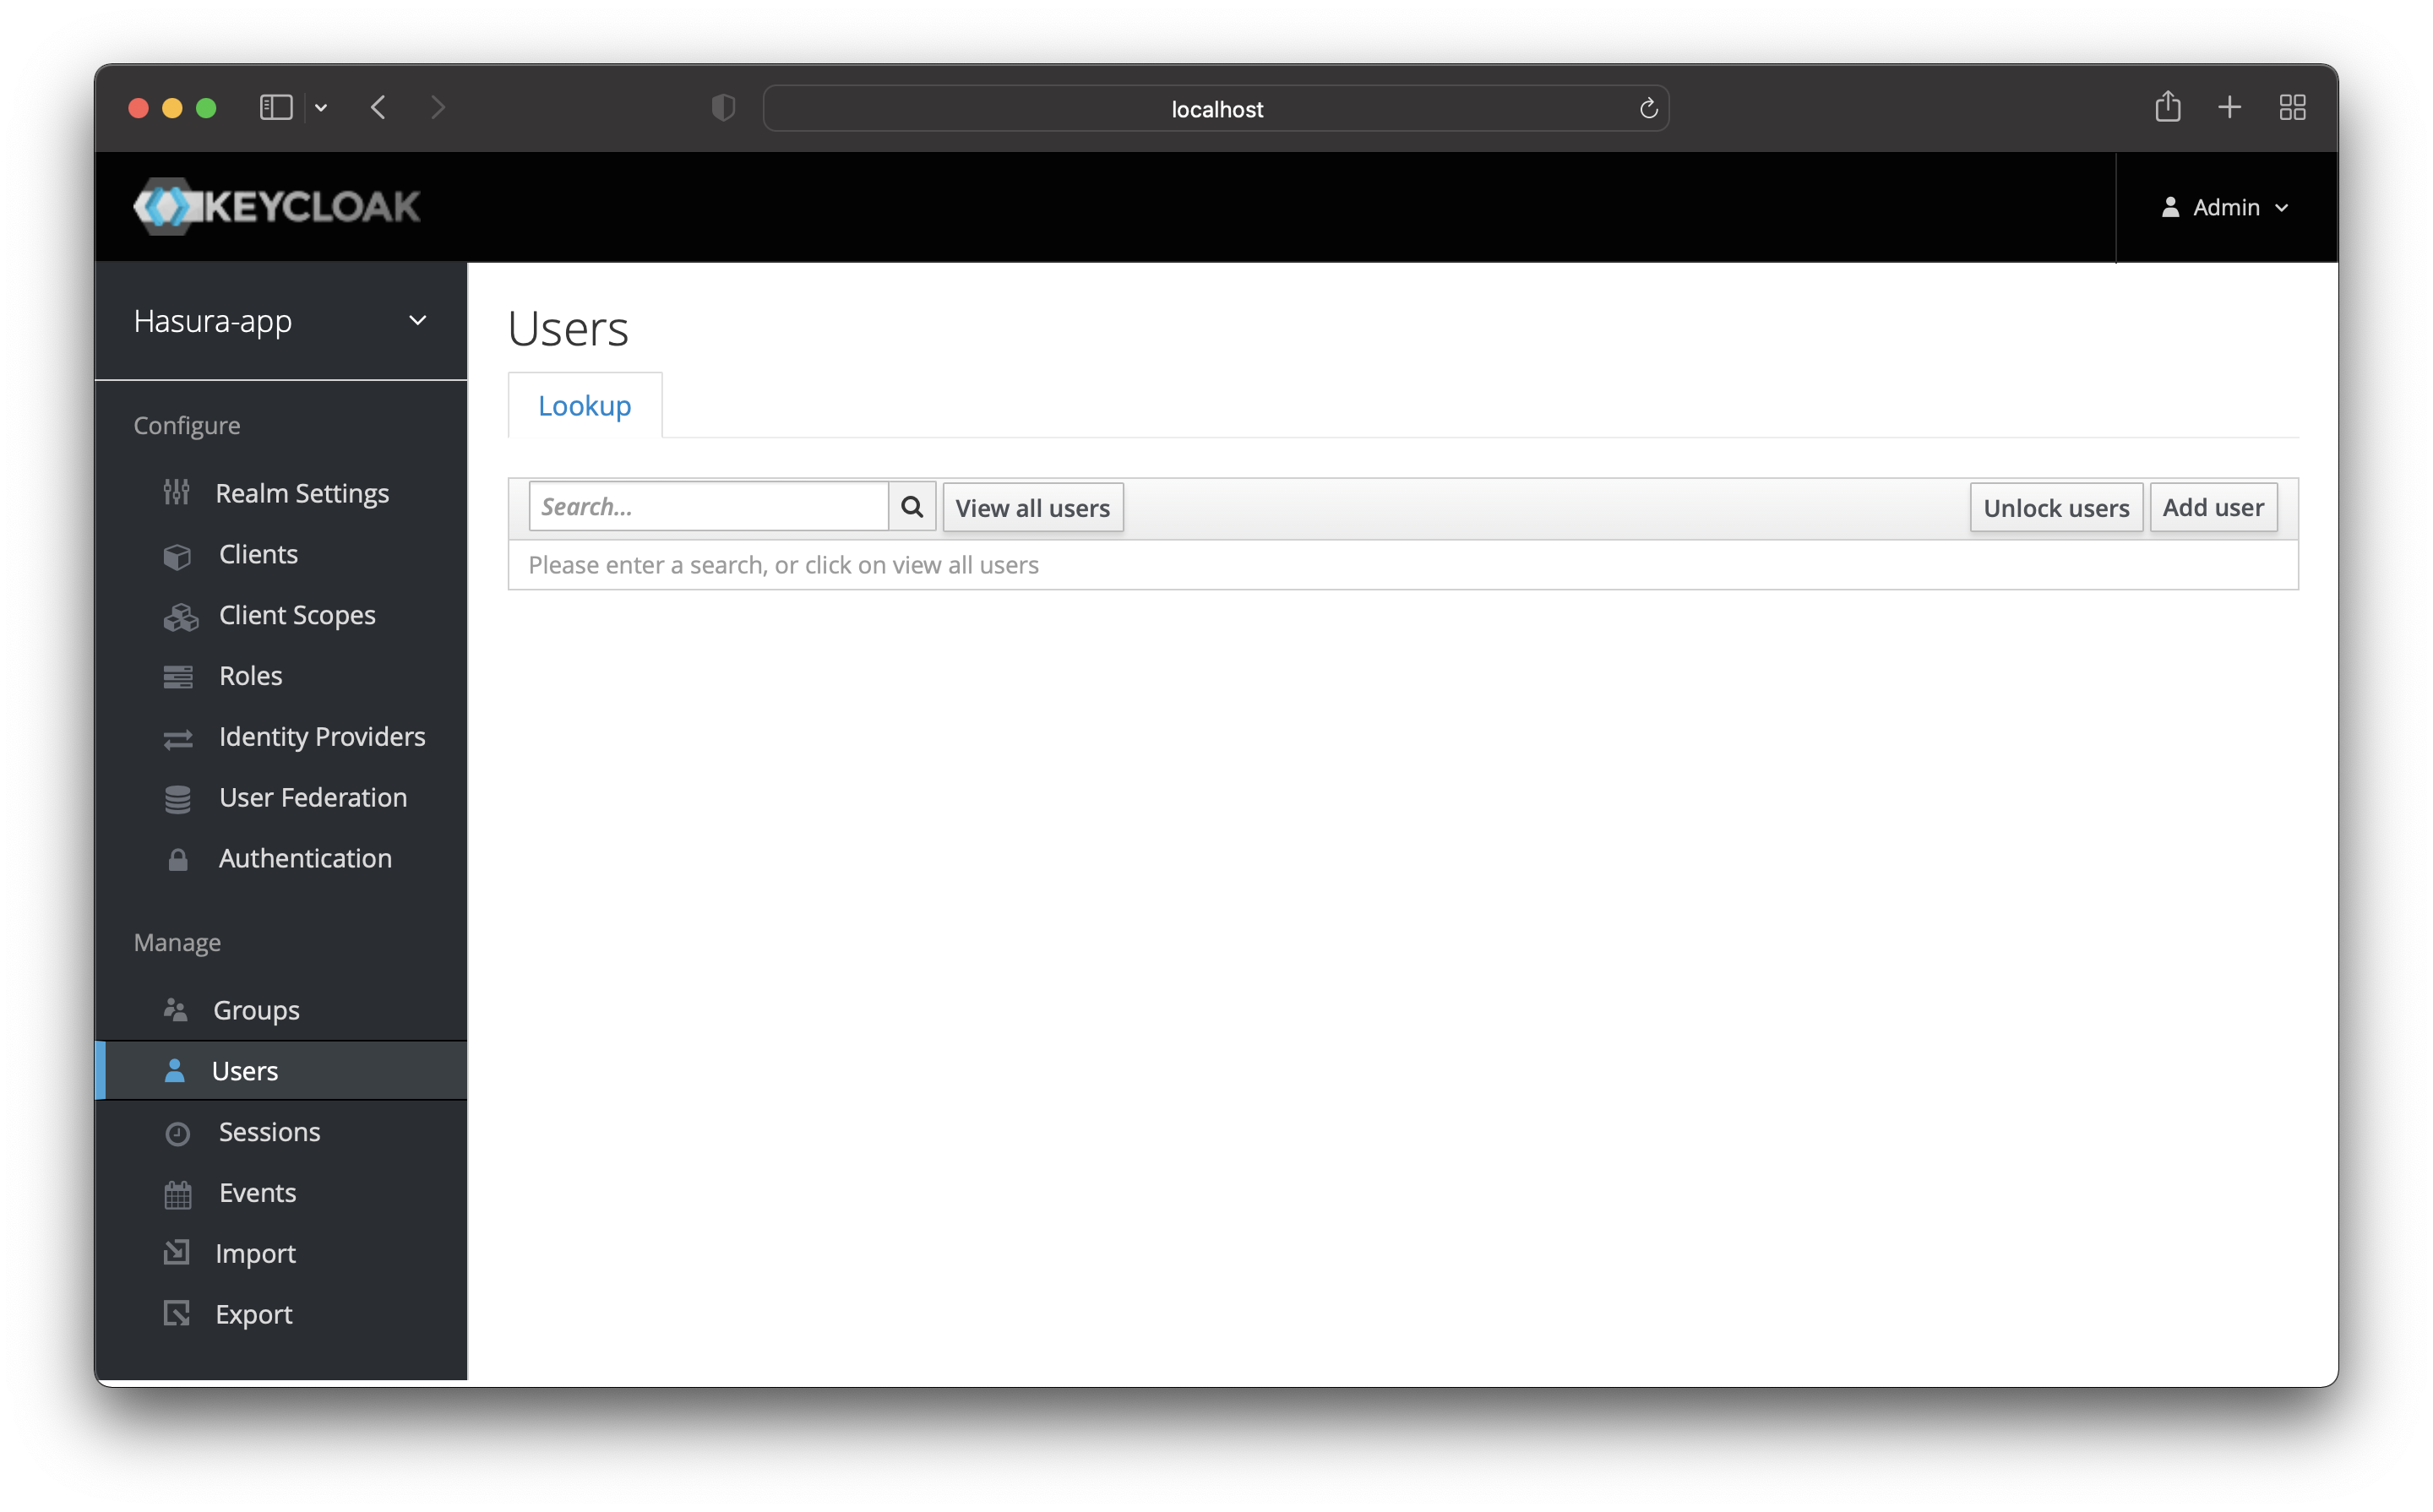
Once you see it, click on the “ID” to go to that user’s profile page.
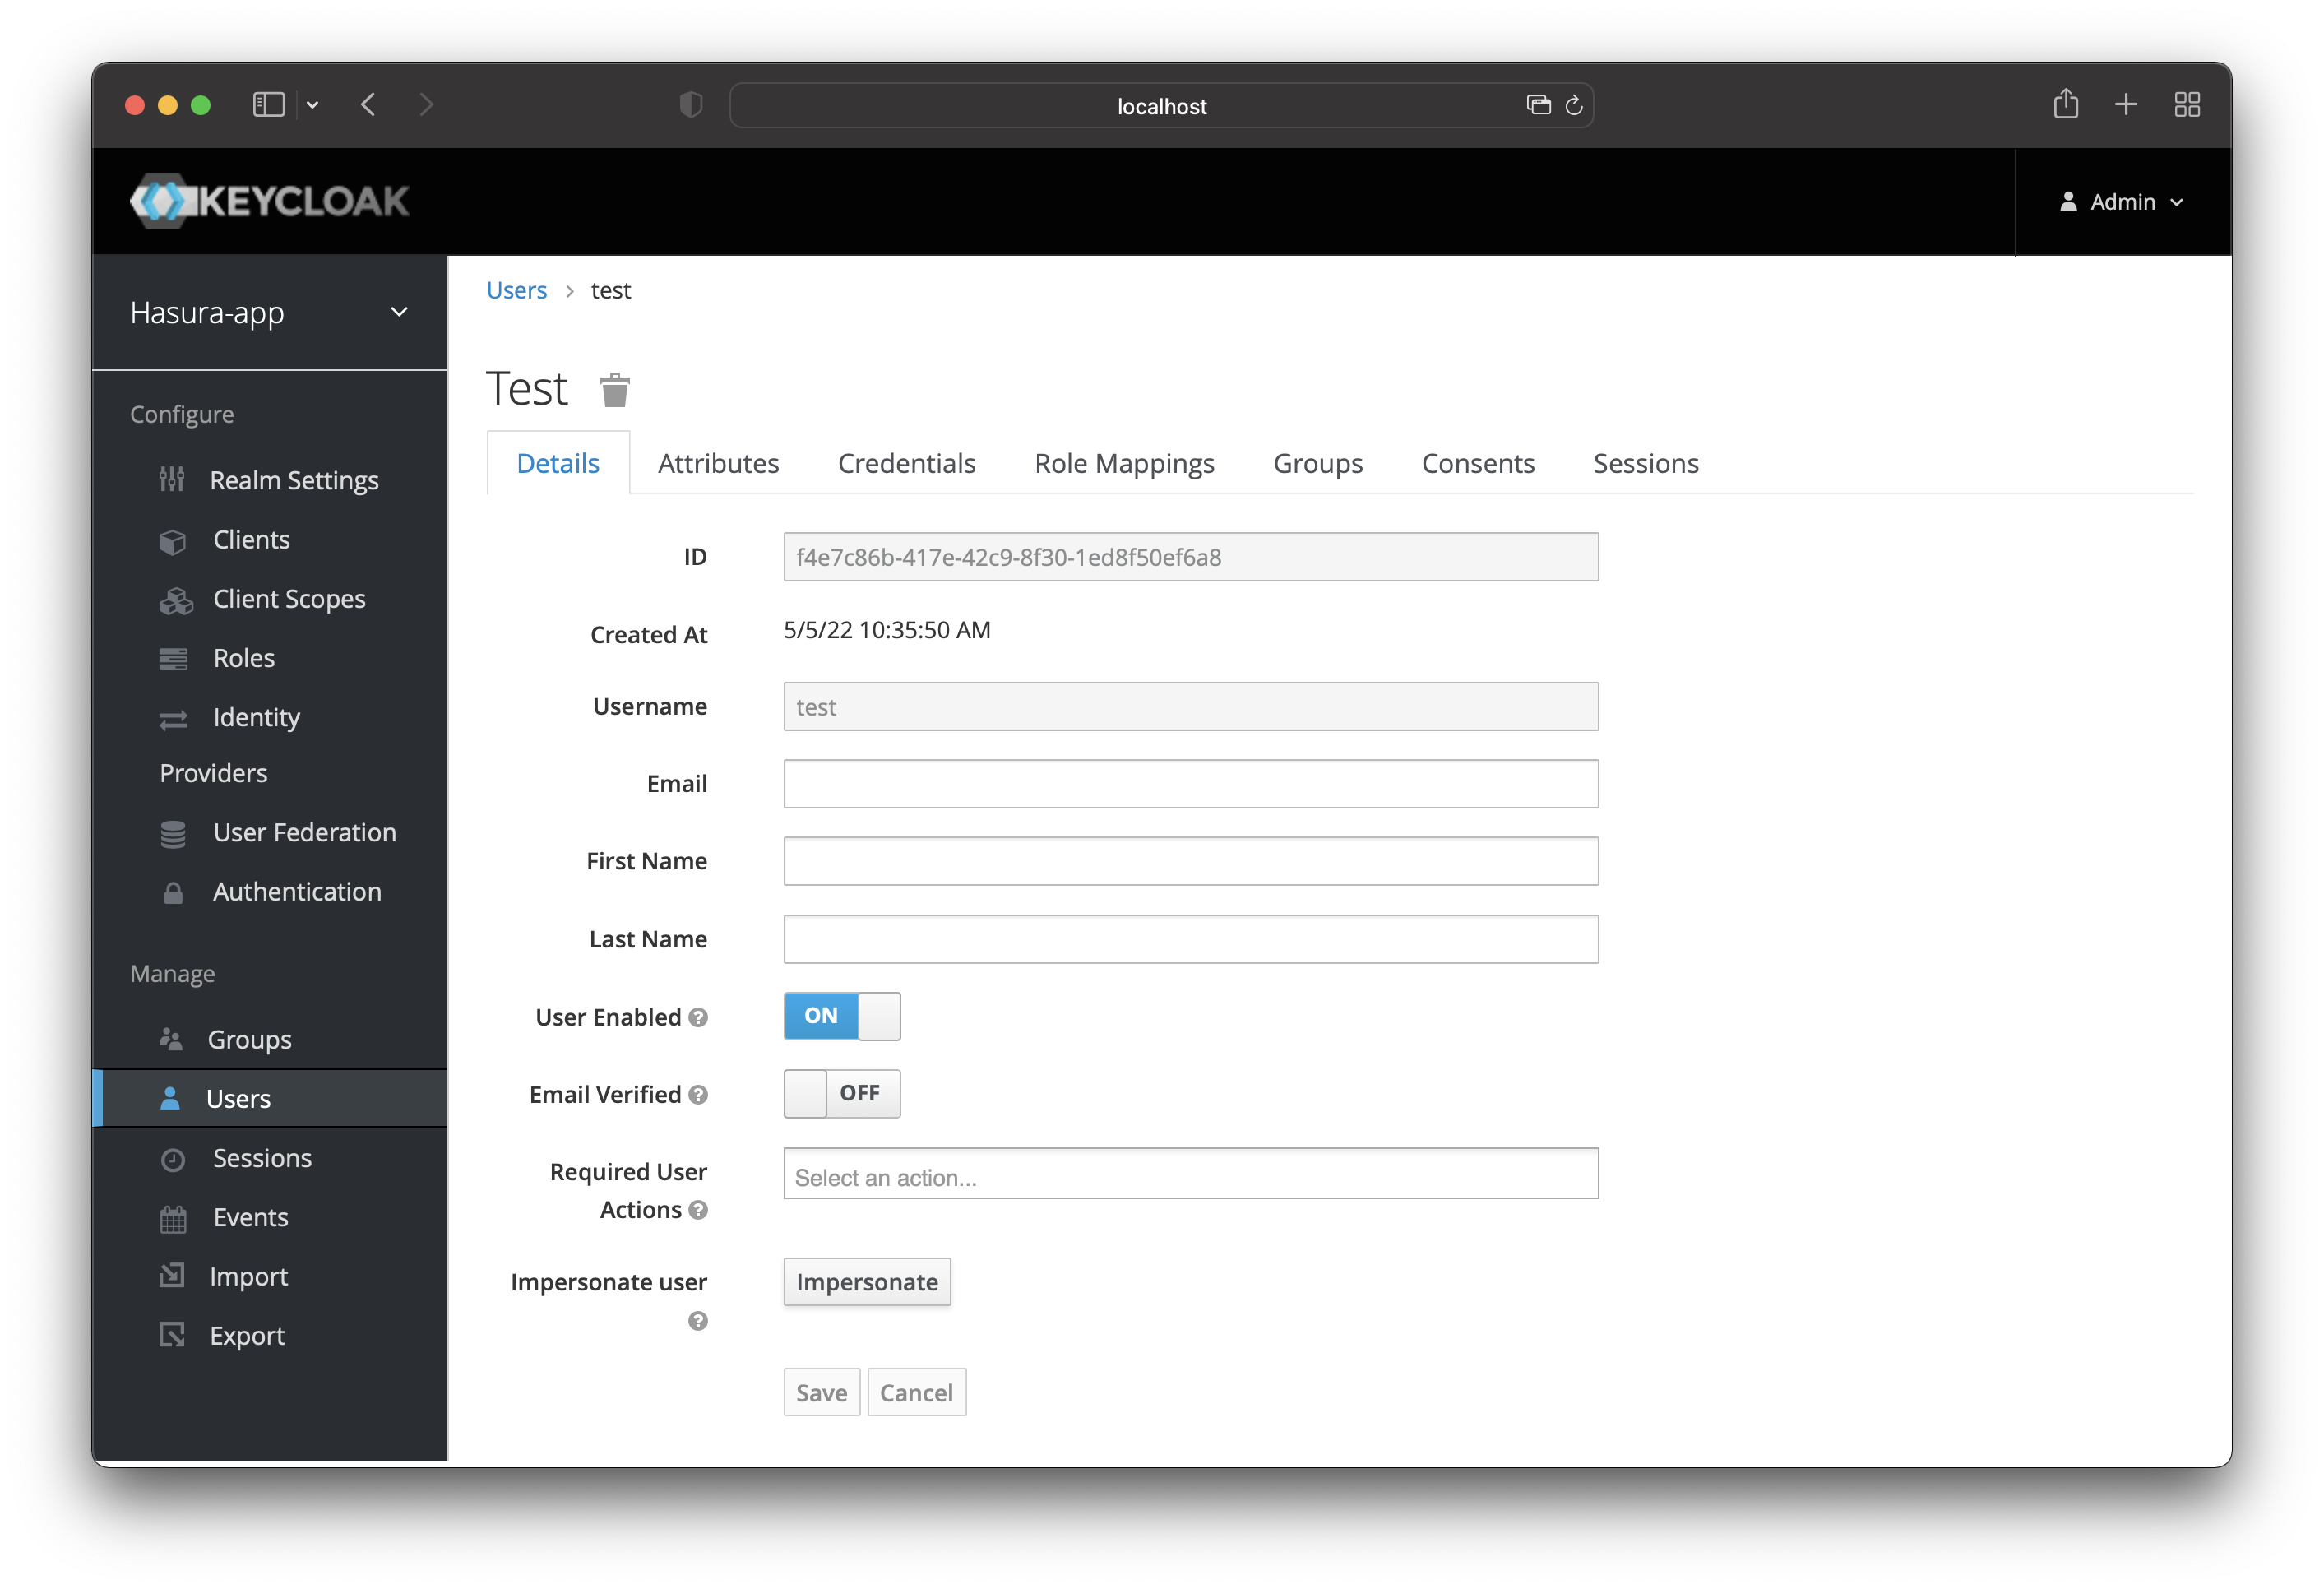
Port the “ID” and “Username” to Hasura by adding a new user in Hasura with the details from Keycloak.
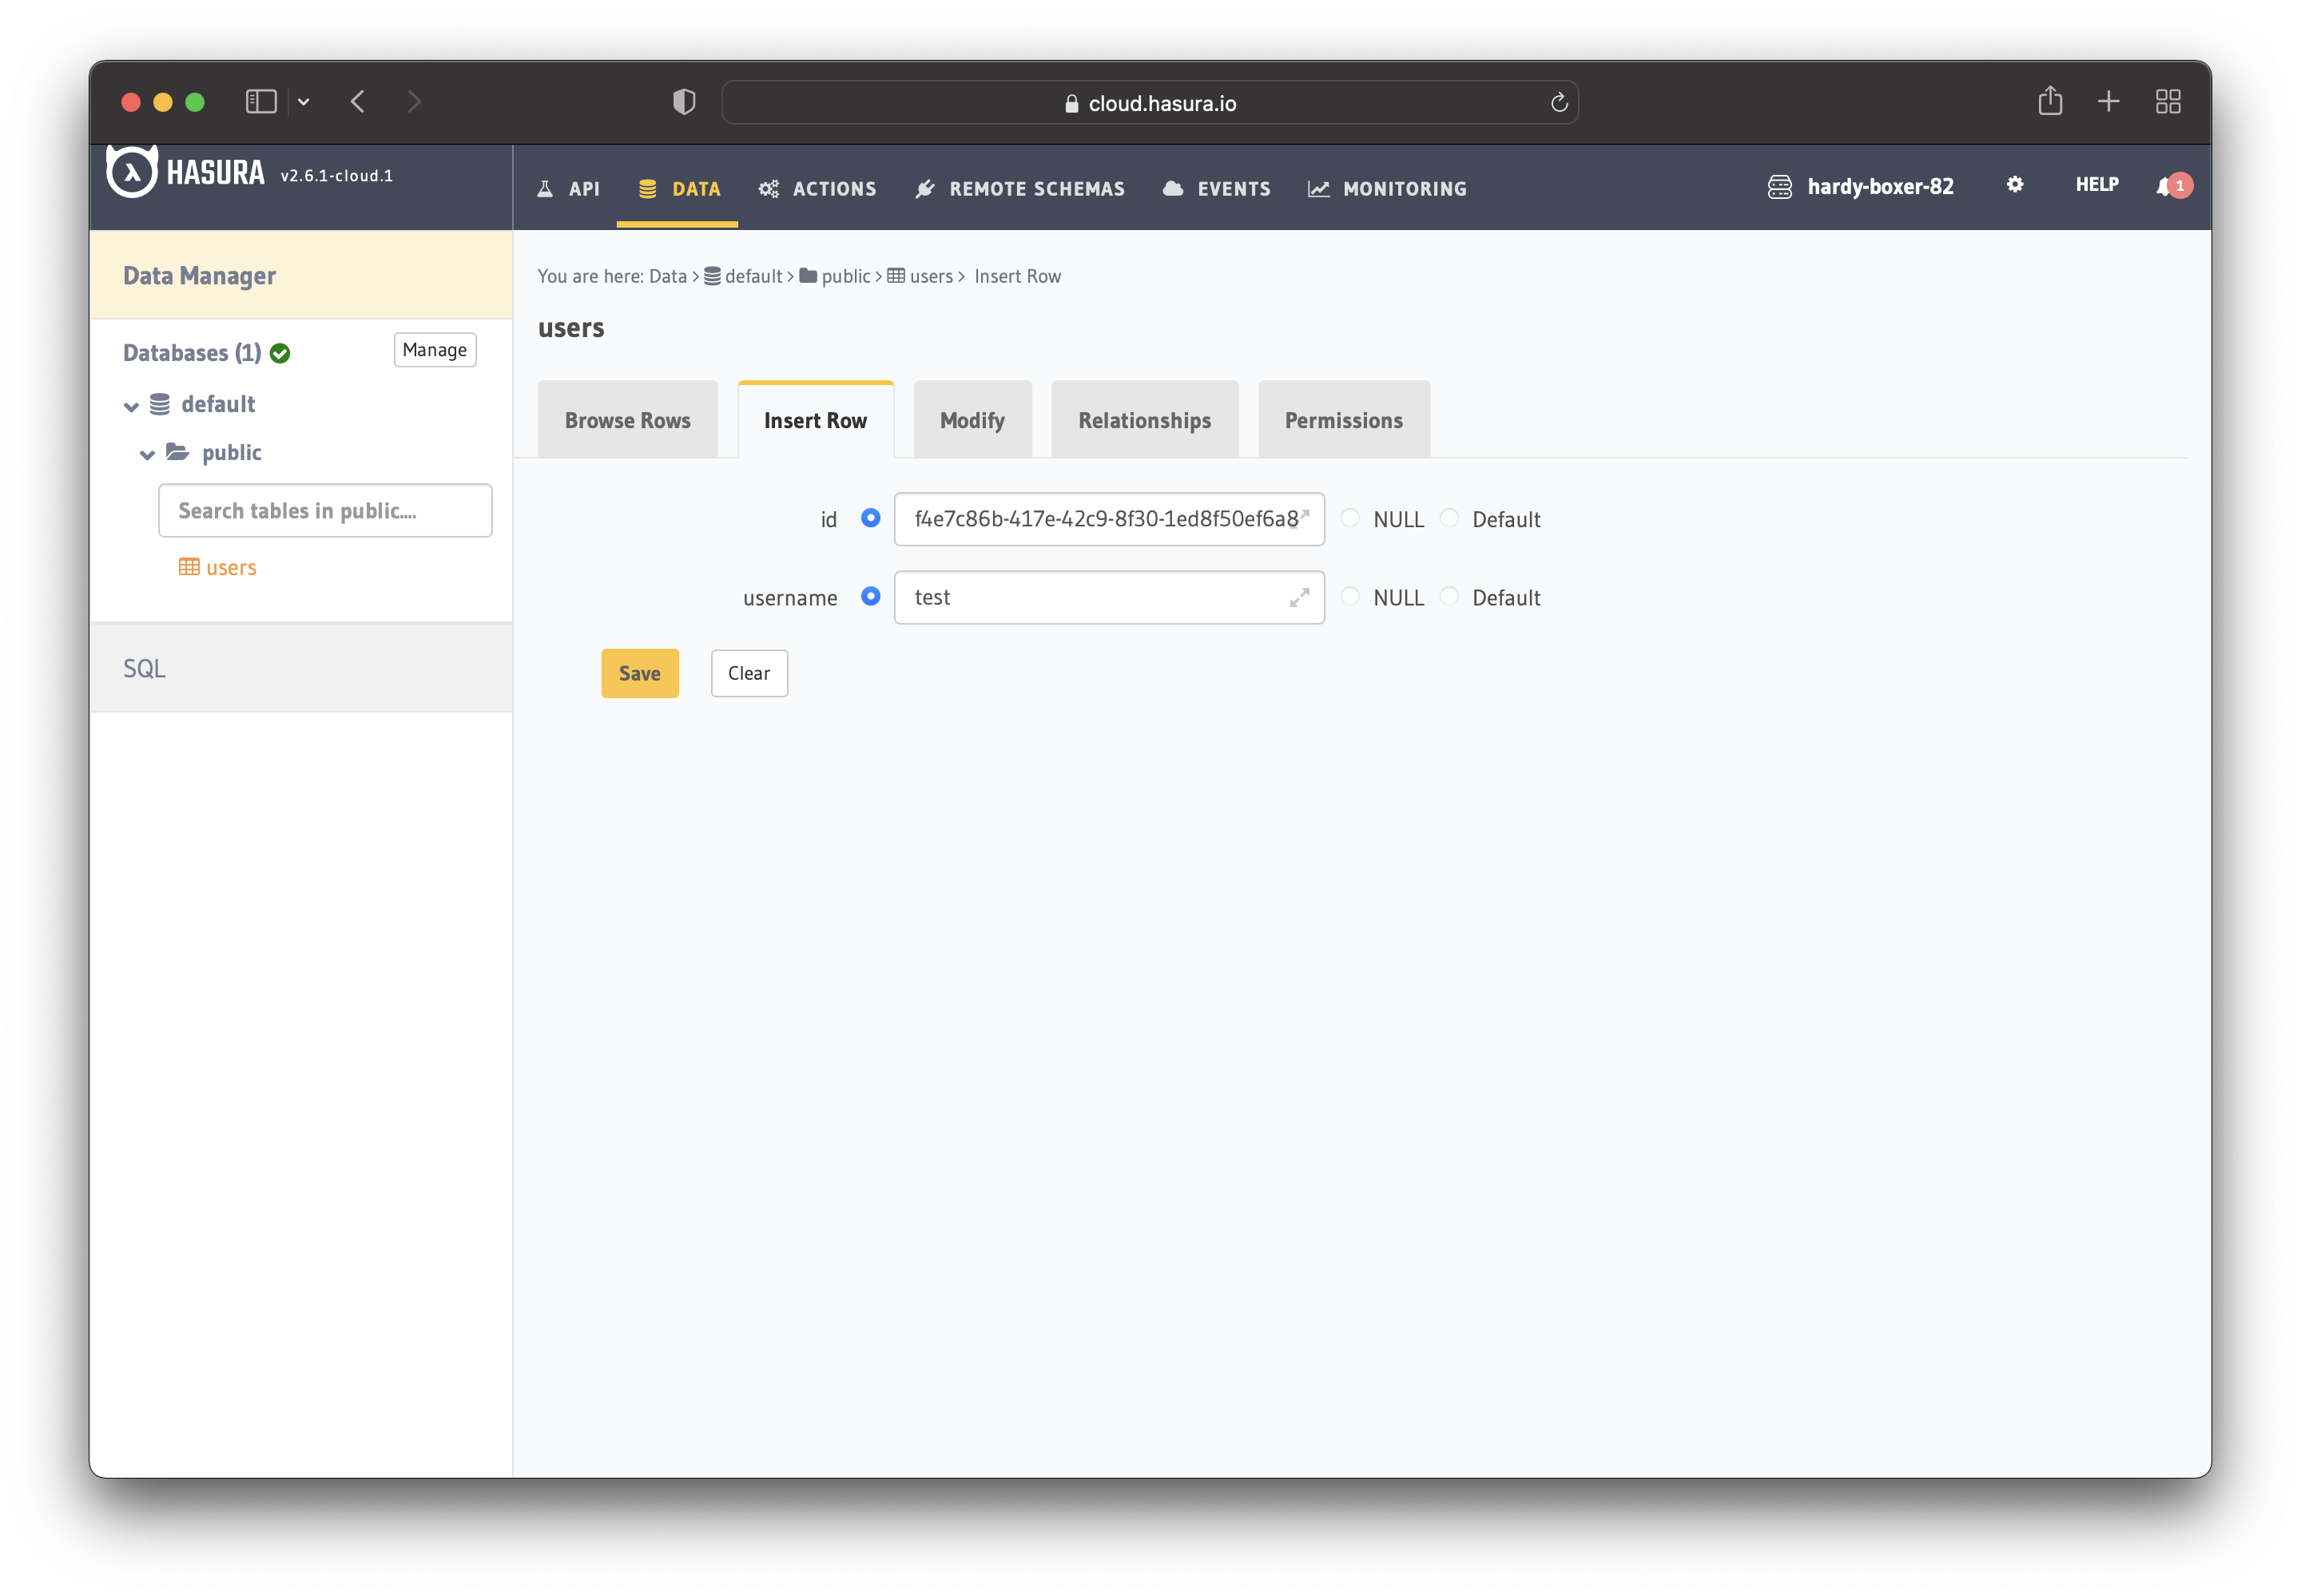
Save the user, and you are done! Now you need to set the JWT_SECRET in Hasura.
Set JWT Secret in Hasura
When integrating Keycloak with Hasura, you need to add the JWKS URI as a JWT secret. It contains the required keys.
Open your Hasura project dashboard and go to the “Env Vars” section. Once there, click the “+ New Env Var” option.
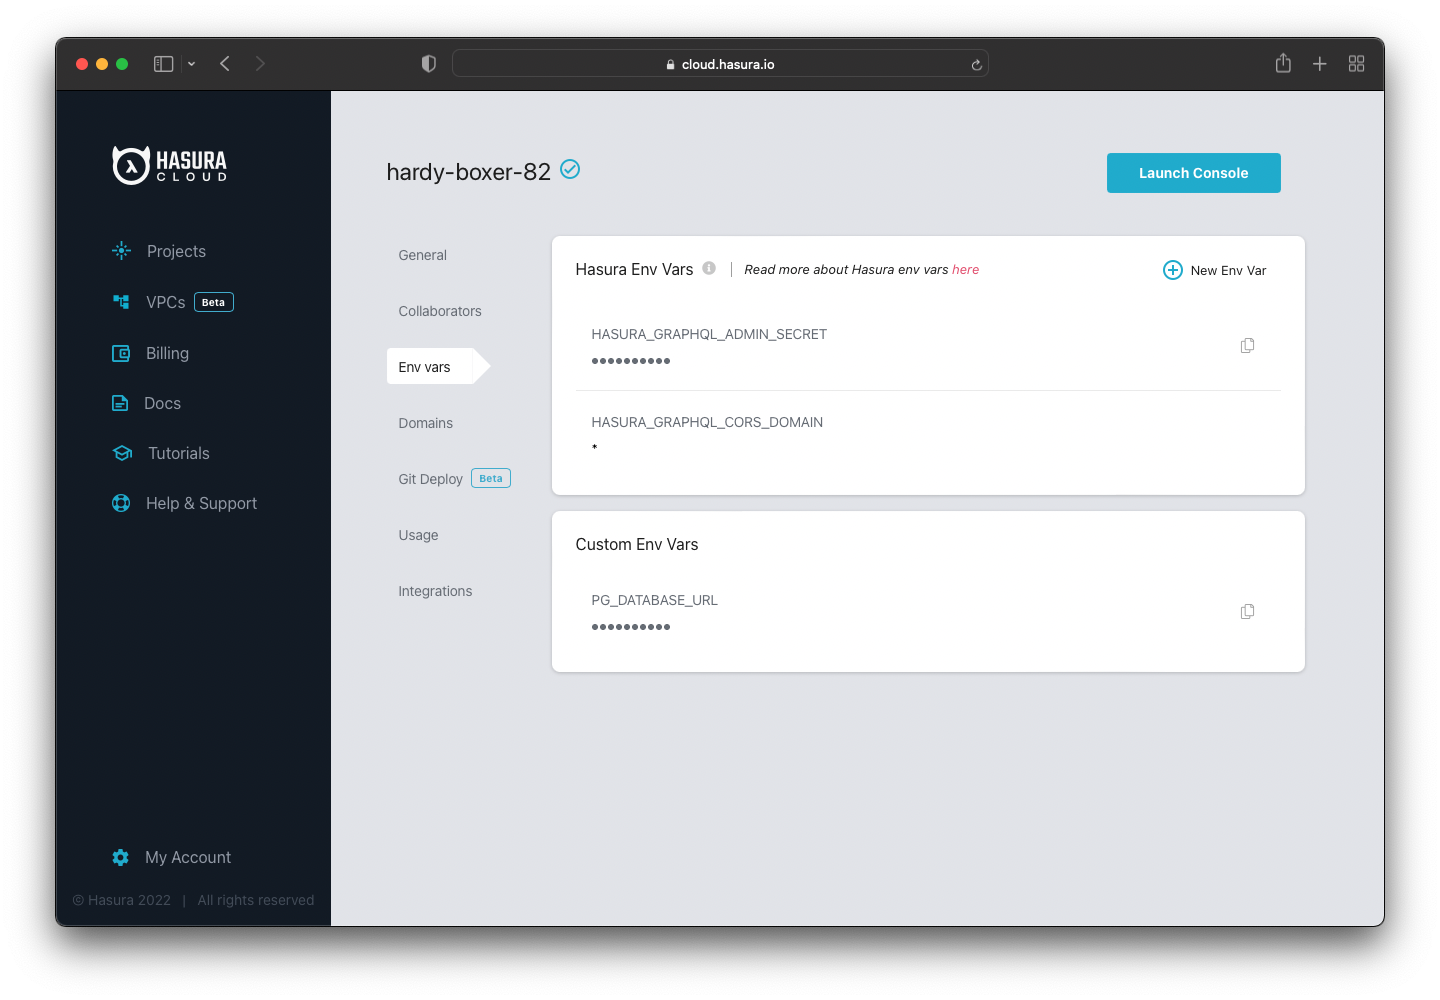
Select HASURA_GRAPHQL_JWT_SECRET for the “Key” and then paste the JWKS Endpoint. The endpoint should be in the
following format:
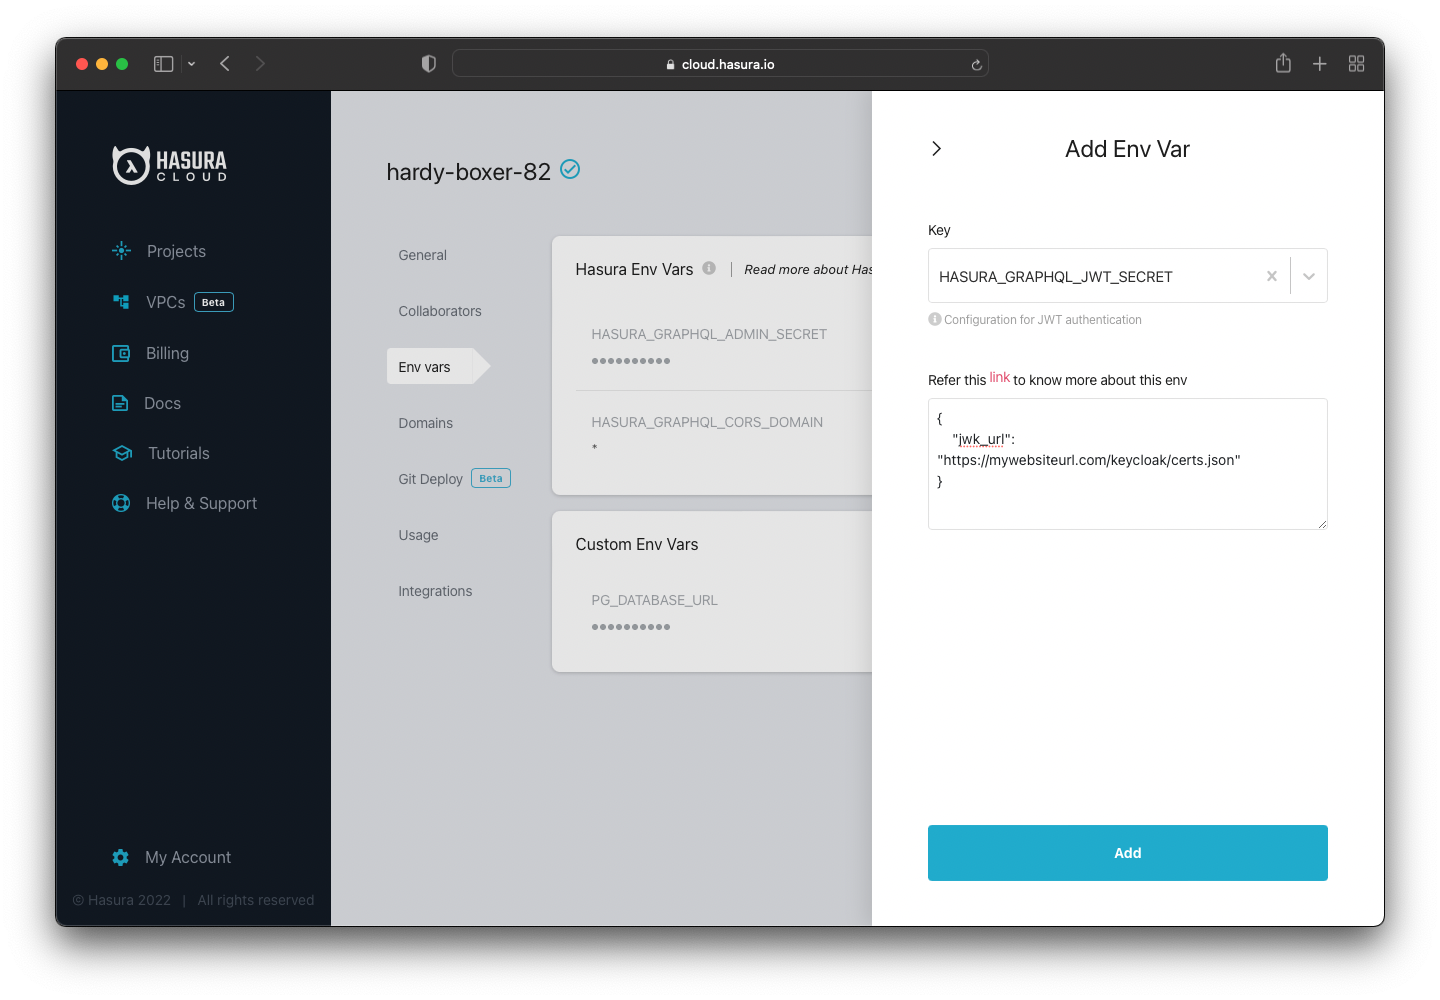
Note: If you run Keycloak locally, it won’t work if you add the localhost URL to Hasura Cloud. You need to upload the
certs.jsonfile somewhere so Hasura Cloud can access it. If you deployed Keycloak online, you could find your JWKS URI at this URL<your-url>/realms/<your-realm>/.well-known/openid-configuration.
Apply the environment variable by pressing the “Add” button.
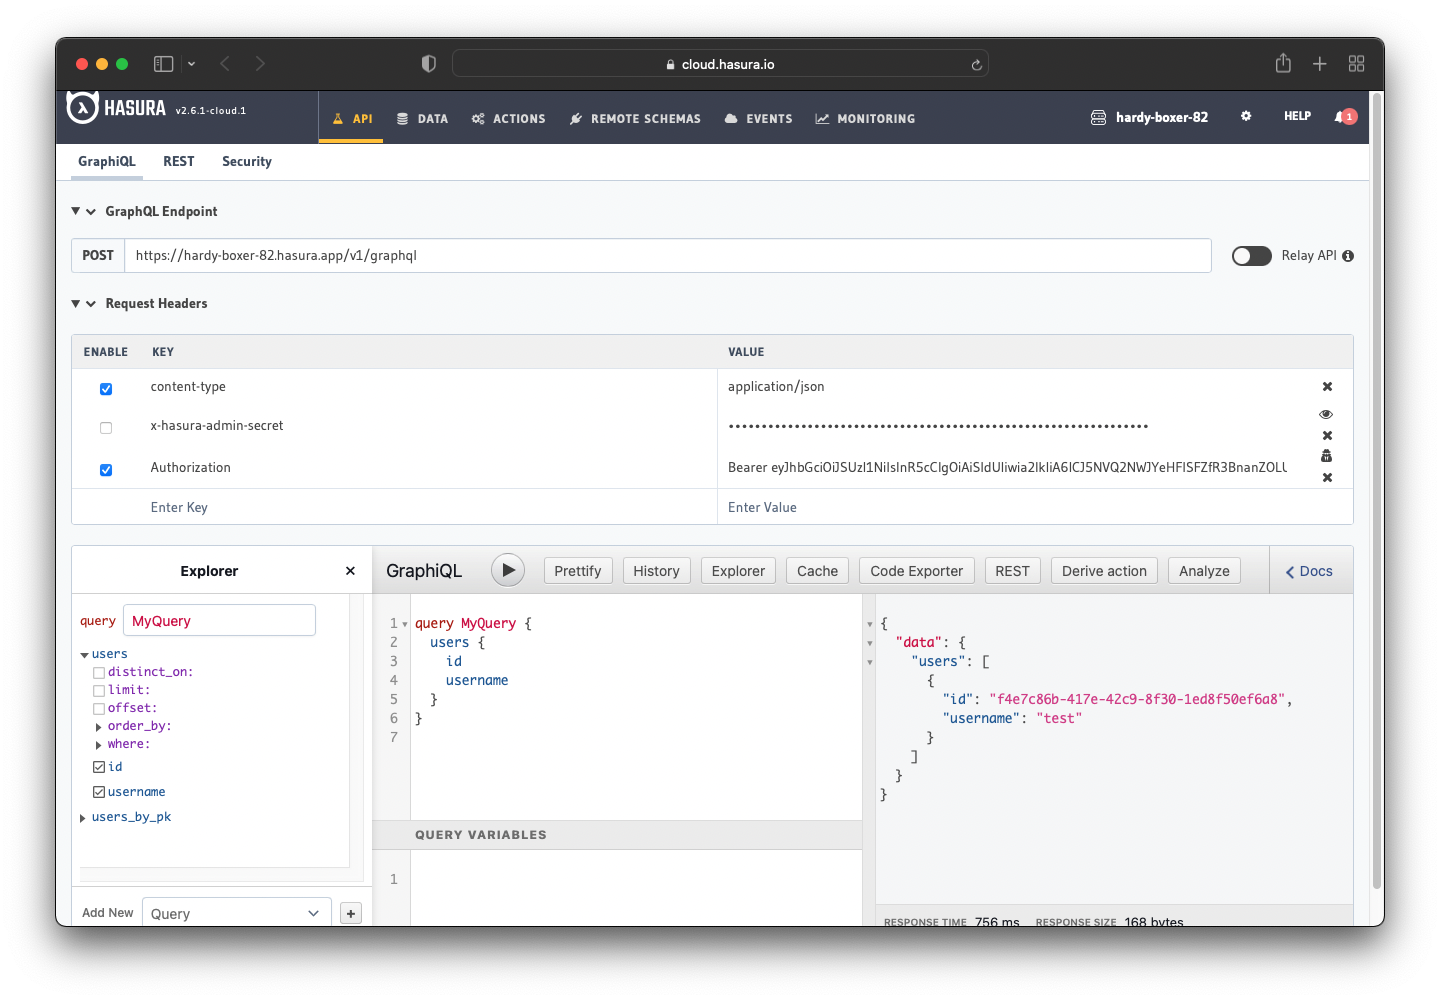
Retrieve JWT Token
Since there is no client implementation, you can get your access token by making a POST request to:
<your-url>/realms/<your-realm>/protocol/openid-connect/token
Below, you can see an example of a request used for this tutorial:
curl --request POST \--url http://localhost:8080/realms/hasura-app/protocol/openid-connect/token \--header 'Content-Type: application/x-www-form-urlencoded' \--data username=test \--data password=test \--data grant_type=password \--data client_id=hasura
Running the above command returns the access token you need. The highlighted part is what you need for your Hasura application.

Now you can use the access token to make the authenticated request. Hasura returned the appropriate user rather than returning all the users from the database.
You are done! You integrated Keycloak with Hasura.
Here is a useful Github repository on how to integrate Hasura with Keycloak.
 Build apps and APIs 10x faster
- Built-in authorization and caching
- 8x more performant than hand-rolled APIs