Edit on GitHub
Amazon Cognito
What is Amazon Cognito?
Cognito is Amazon’s product that enables you to implement authentication, authorization, and user management into your applications.
The “User Pool” component of Amazon Cognito allows you to add sign-in and sign-up capabilities to your applications.
Set Up User Pools and Hosted Web UI
Navigate to Cognito and click “Create user pool” to start the process of setting up a user pool and enabling the hosted web UI.
Note: The tutorial uses the new AWS console, which might look different from your console. Switch to the new console before starting the tutorial.
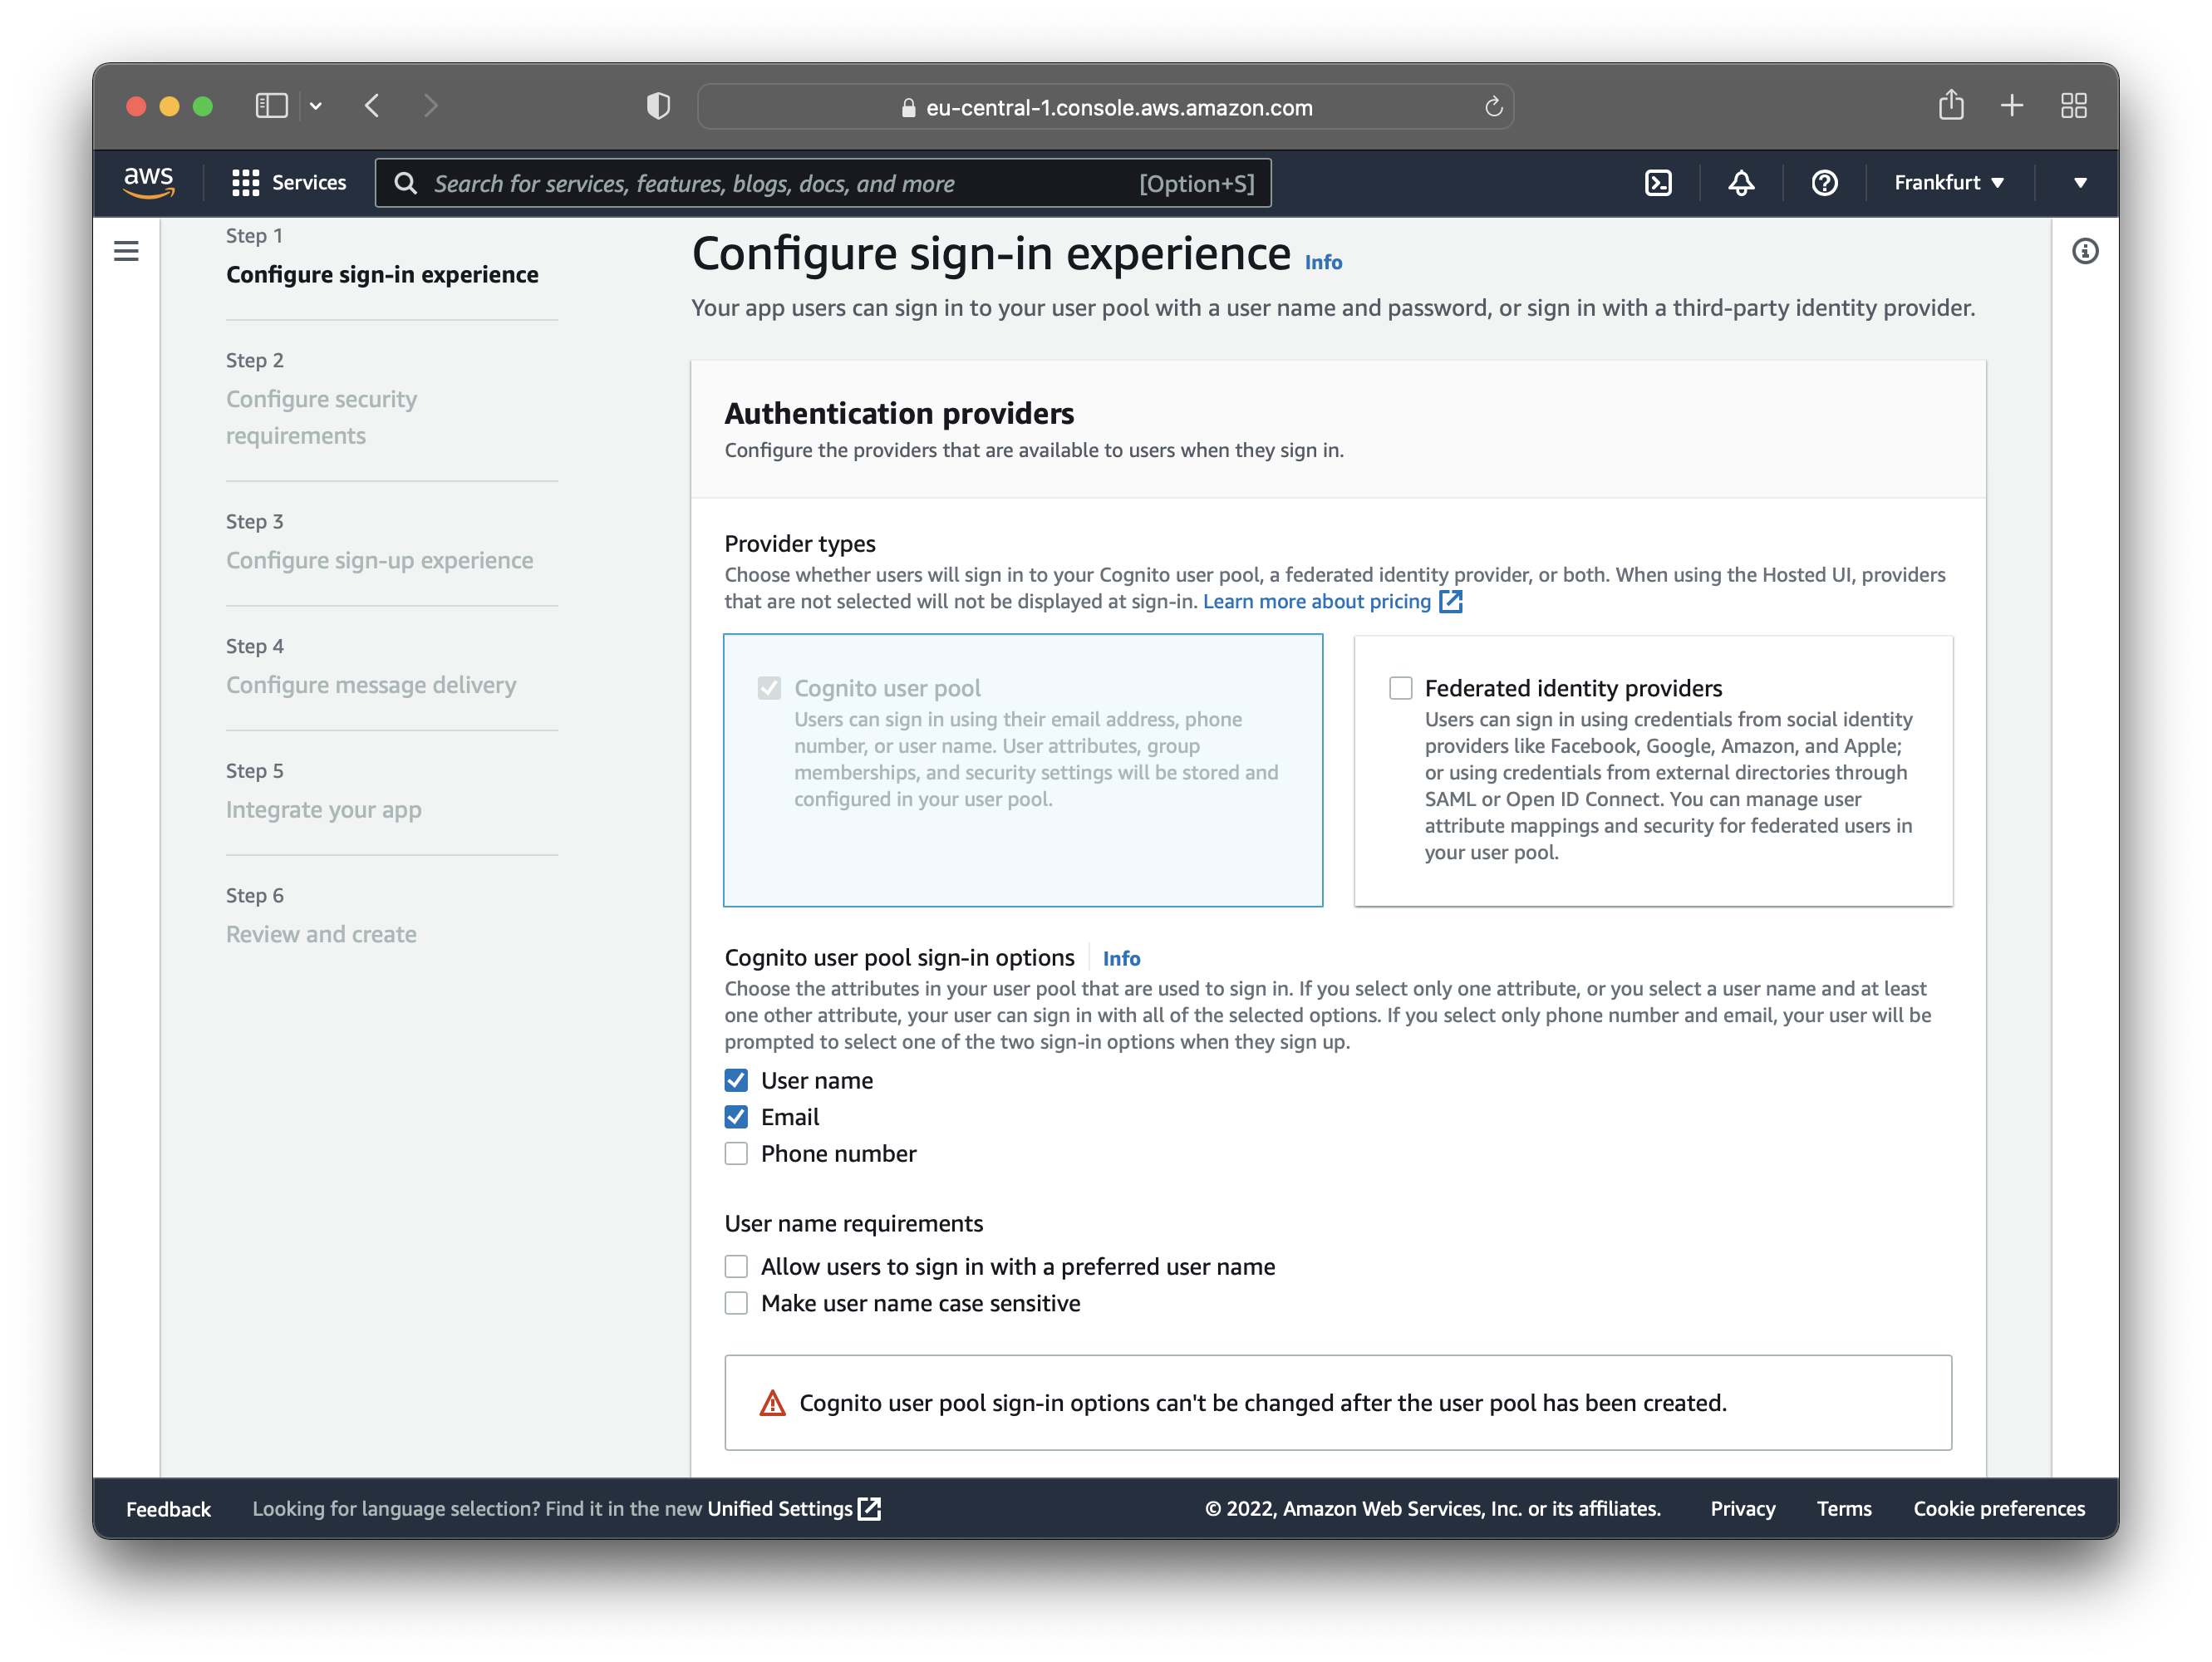
The first step is to configure the sign-in experience. That means configuring how the users can log into your application.
In this case, the users can only sign in using a username and password. Also, the options under “User name requirements”
are turned off. The username should not be case sensitive because username would differ from Username.
Additionally, you can enable “Federated identity providers”, which would allow users to log in with their existing Facebook, Apple, Google, and Amazon accounts. For this tutorial, that is out of the scope.
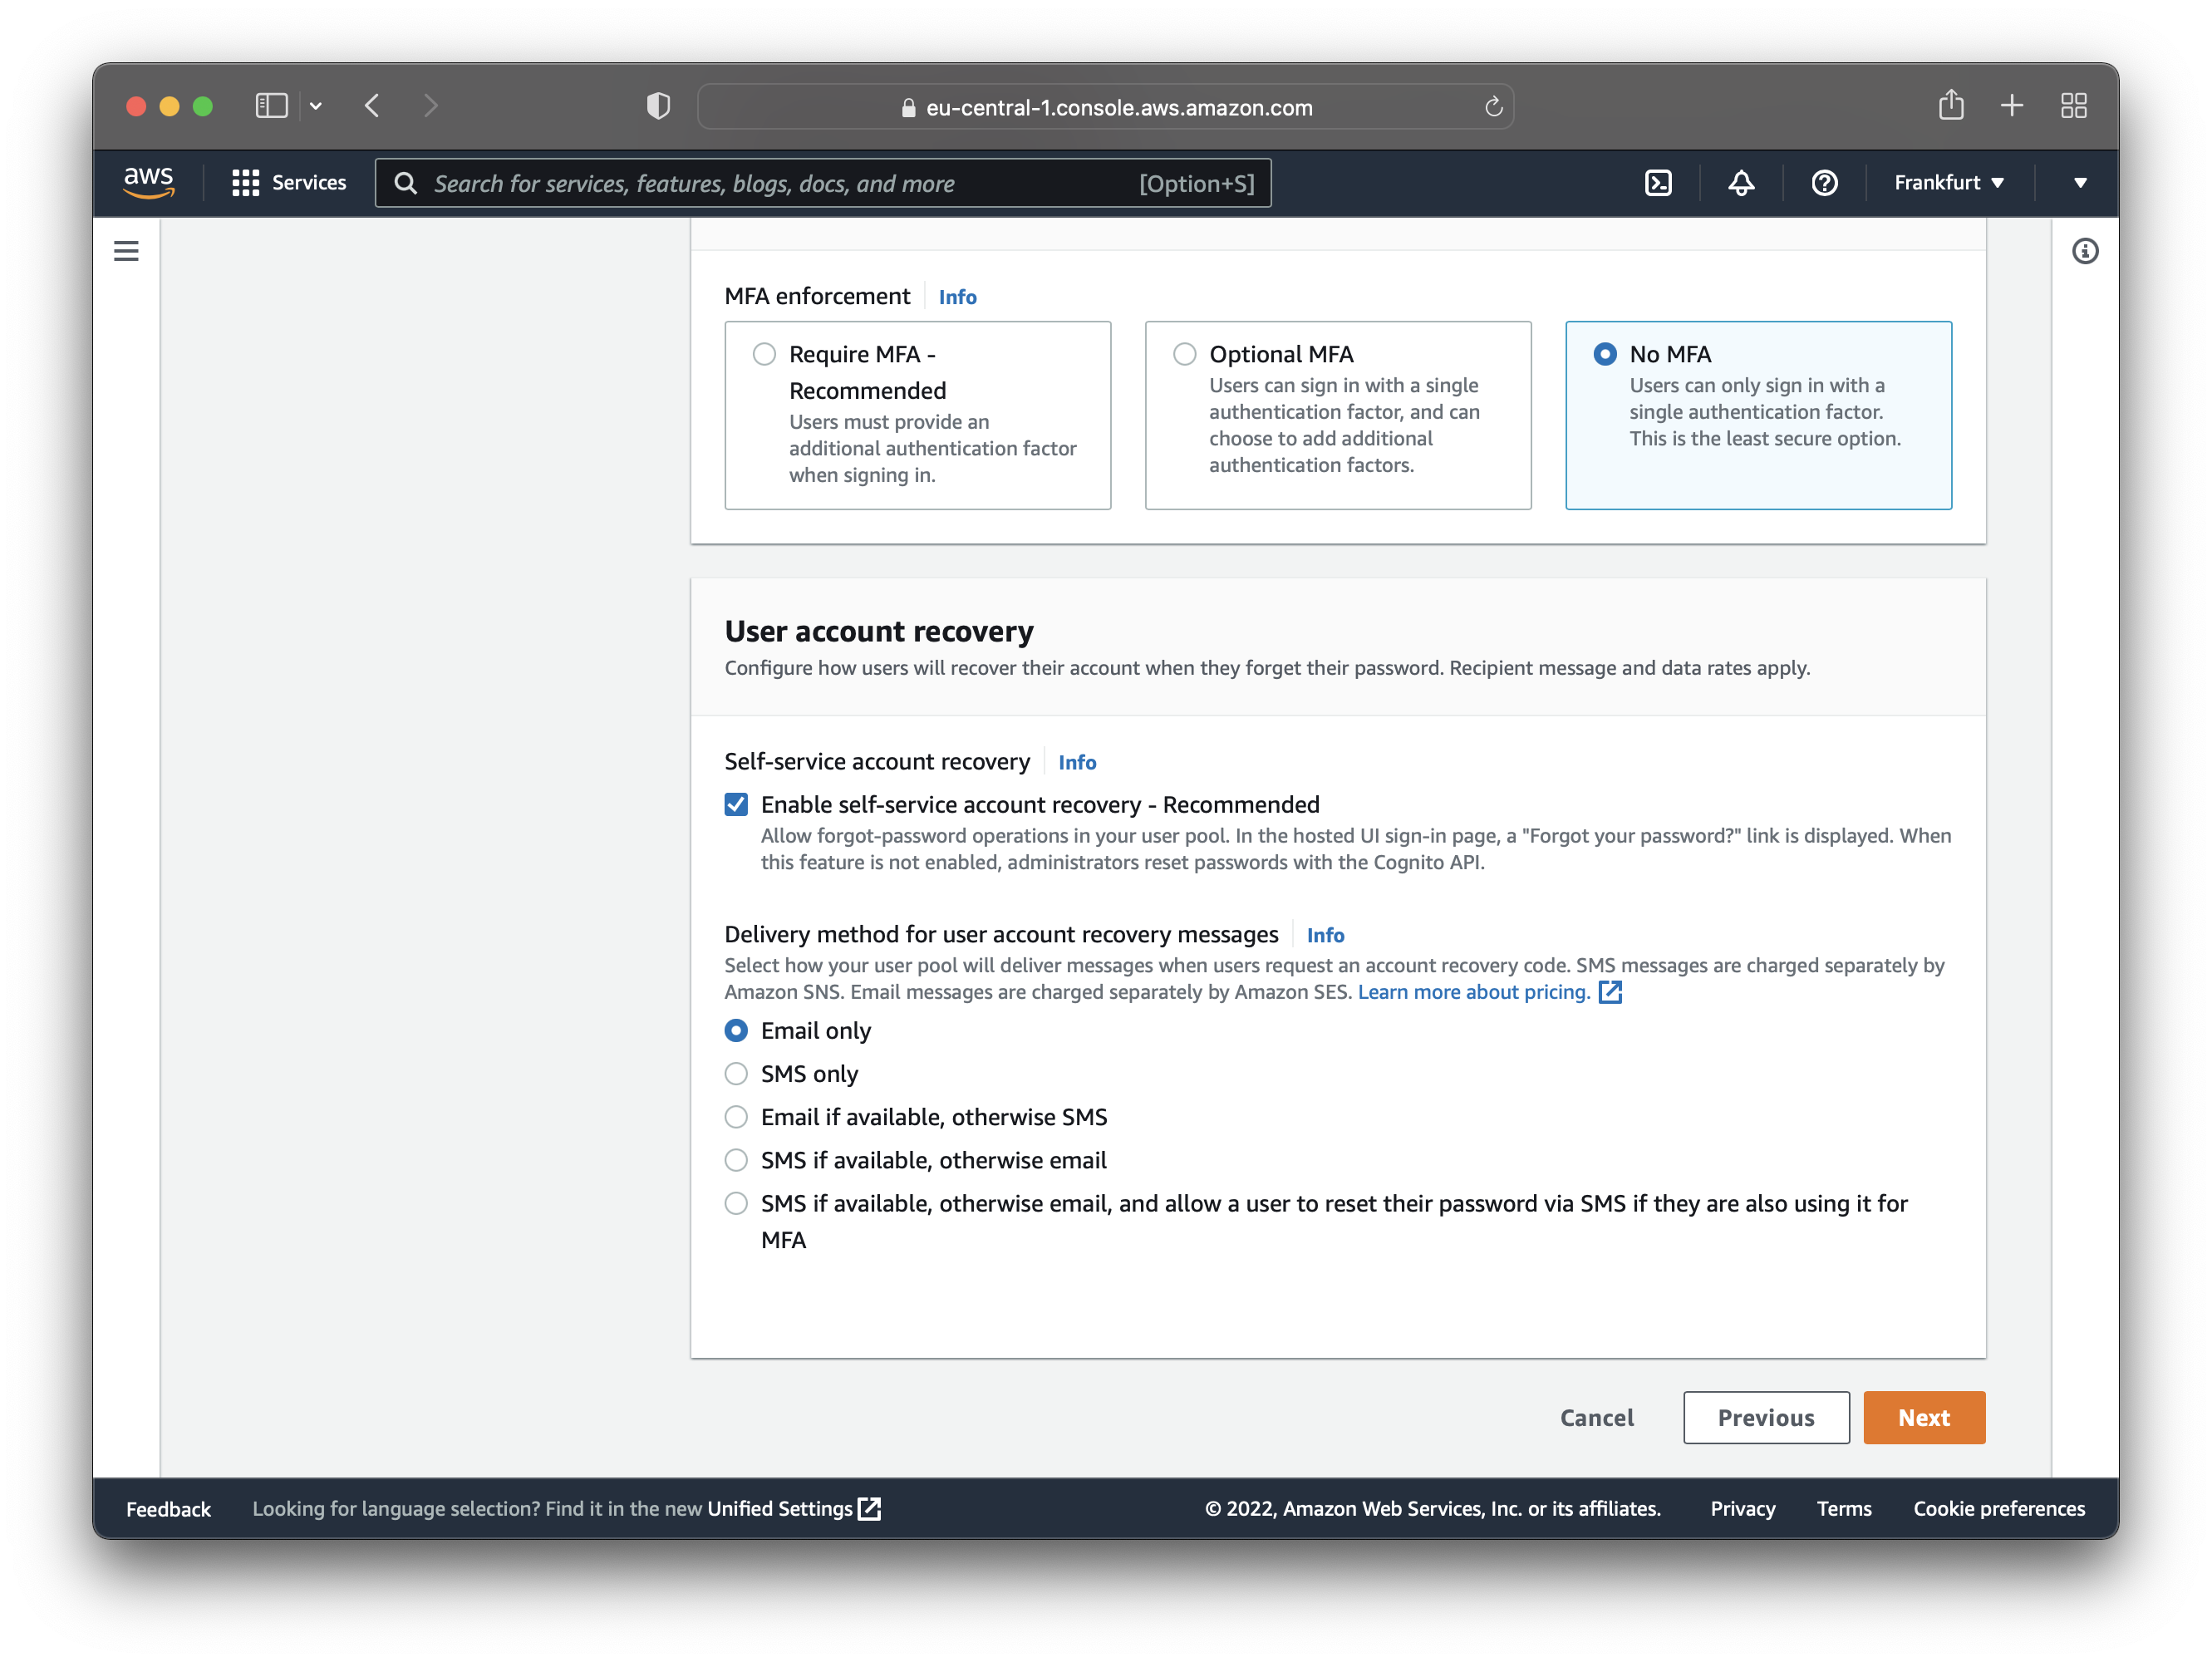
Click “Next” to go to the next step. On the second step, you are prompted to:
- choose a password policy
- enable/disable/configure multi-factor authentication
- configure user account recovery options
The tutorial uses the “Cognito defaults” for the password policy and no multi-factor authentication. The default values are enabled for the user account recovery options.
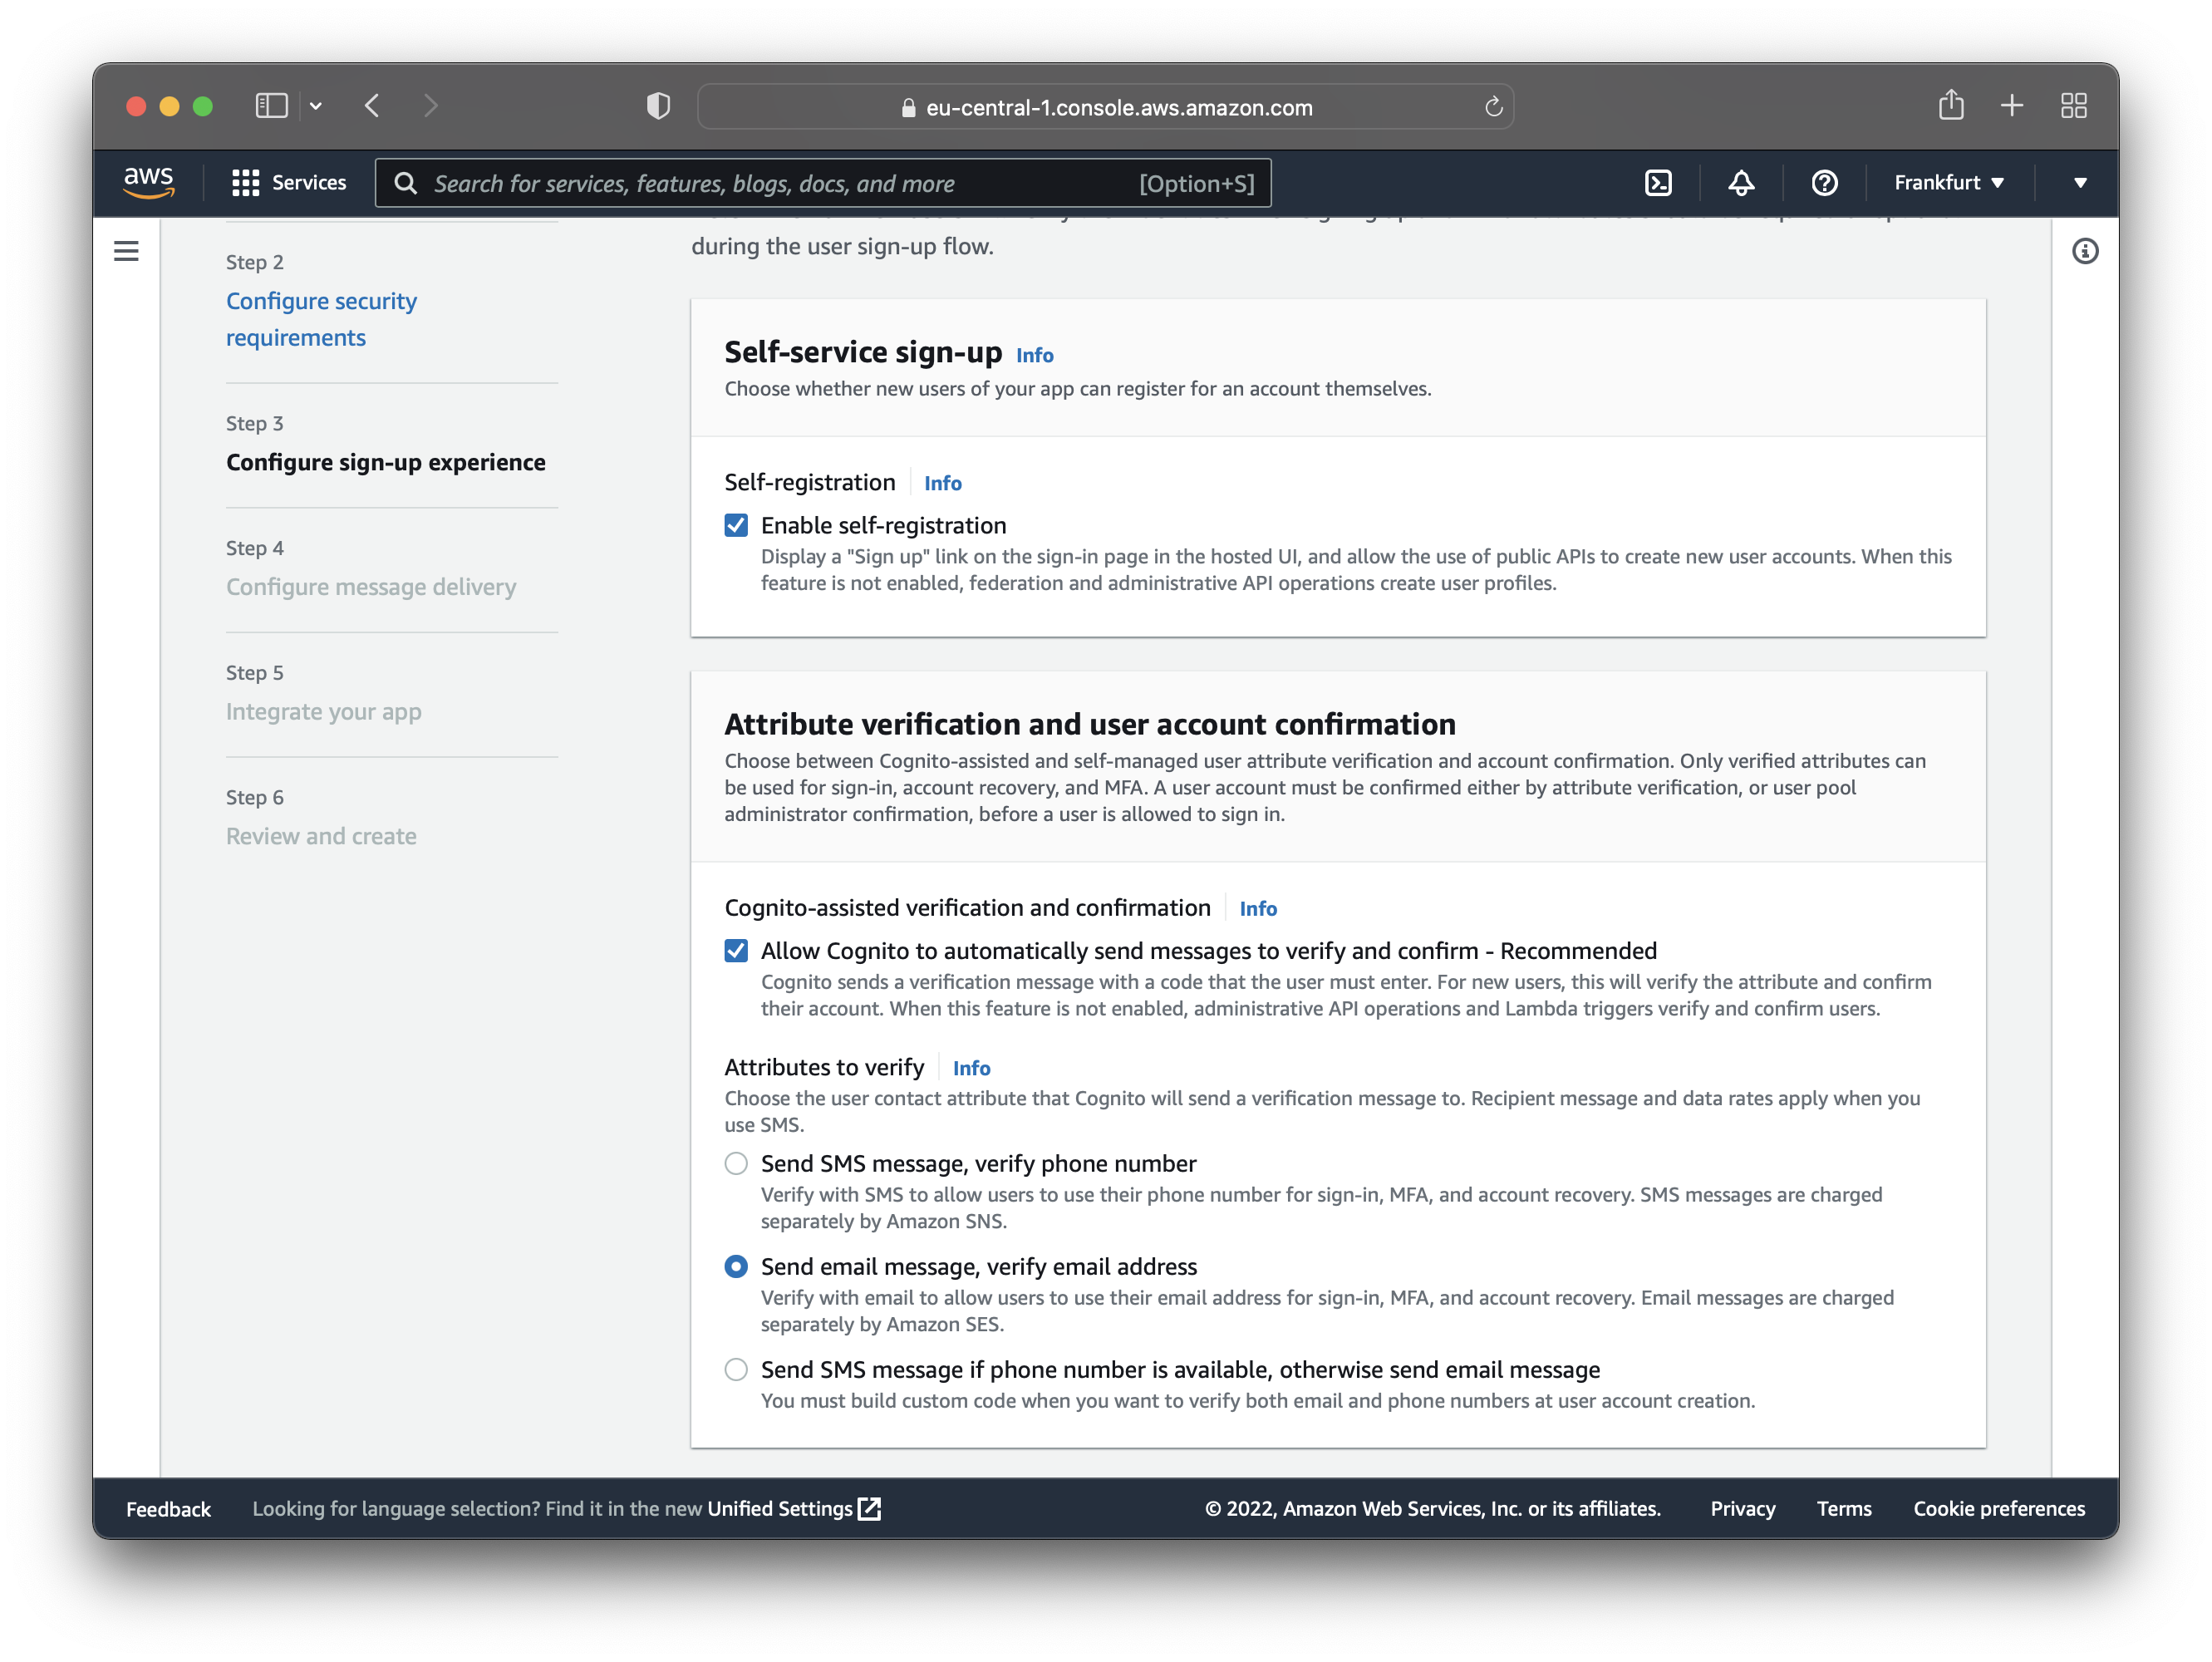
The next step is to configure the sign-up experience, where you can leave the default values. The default values allow users to register and send verification/confirmation emails.
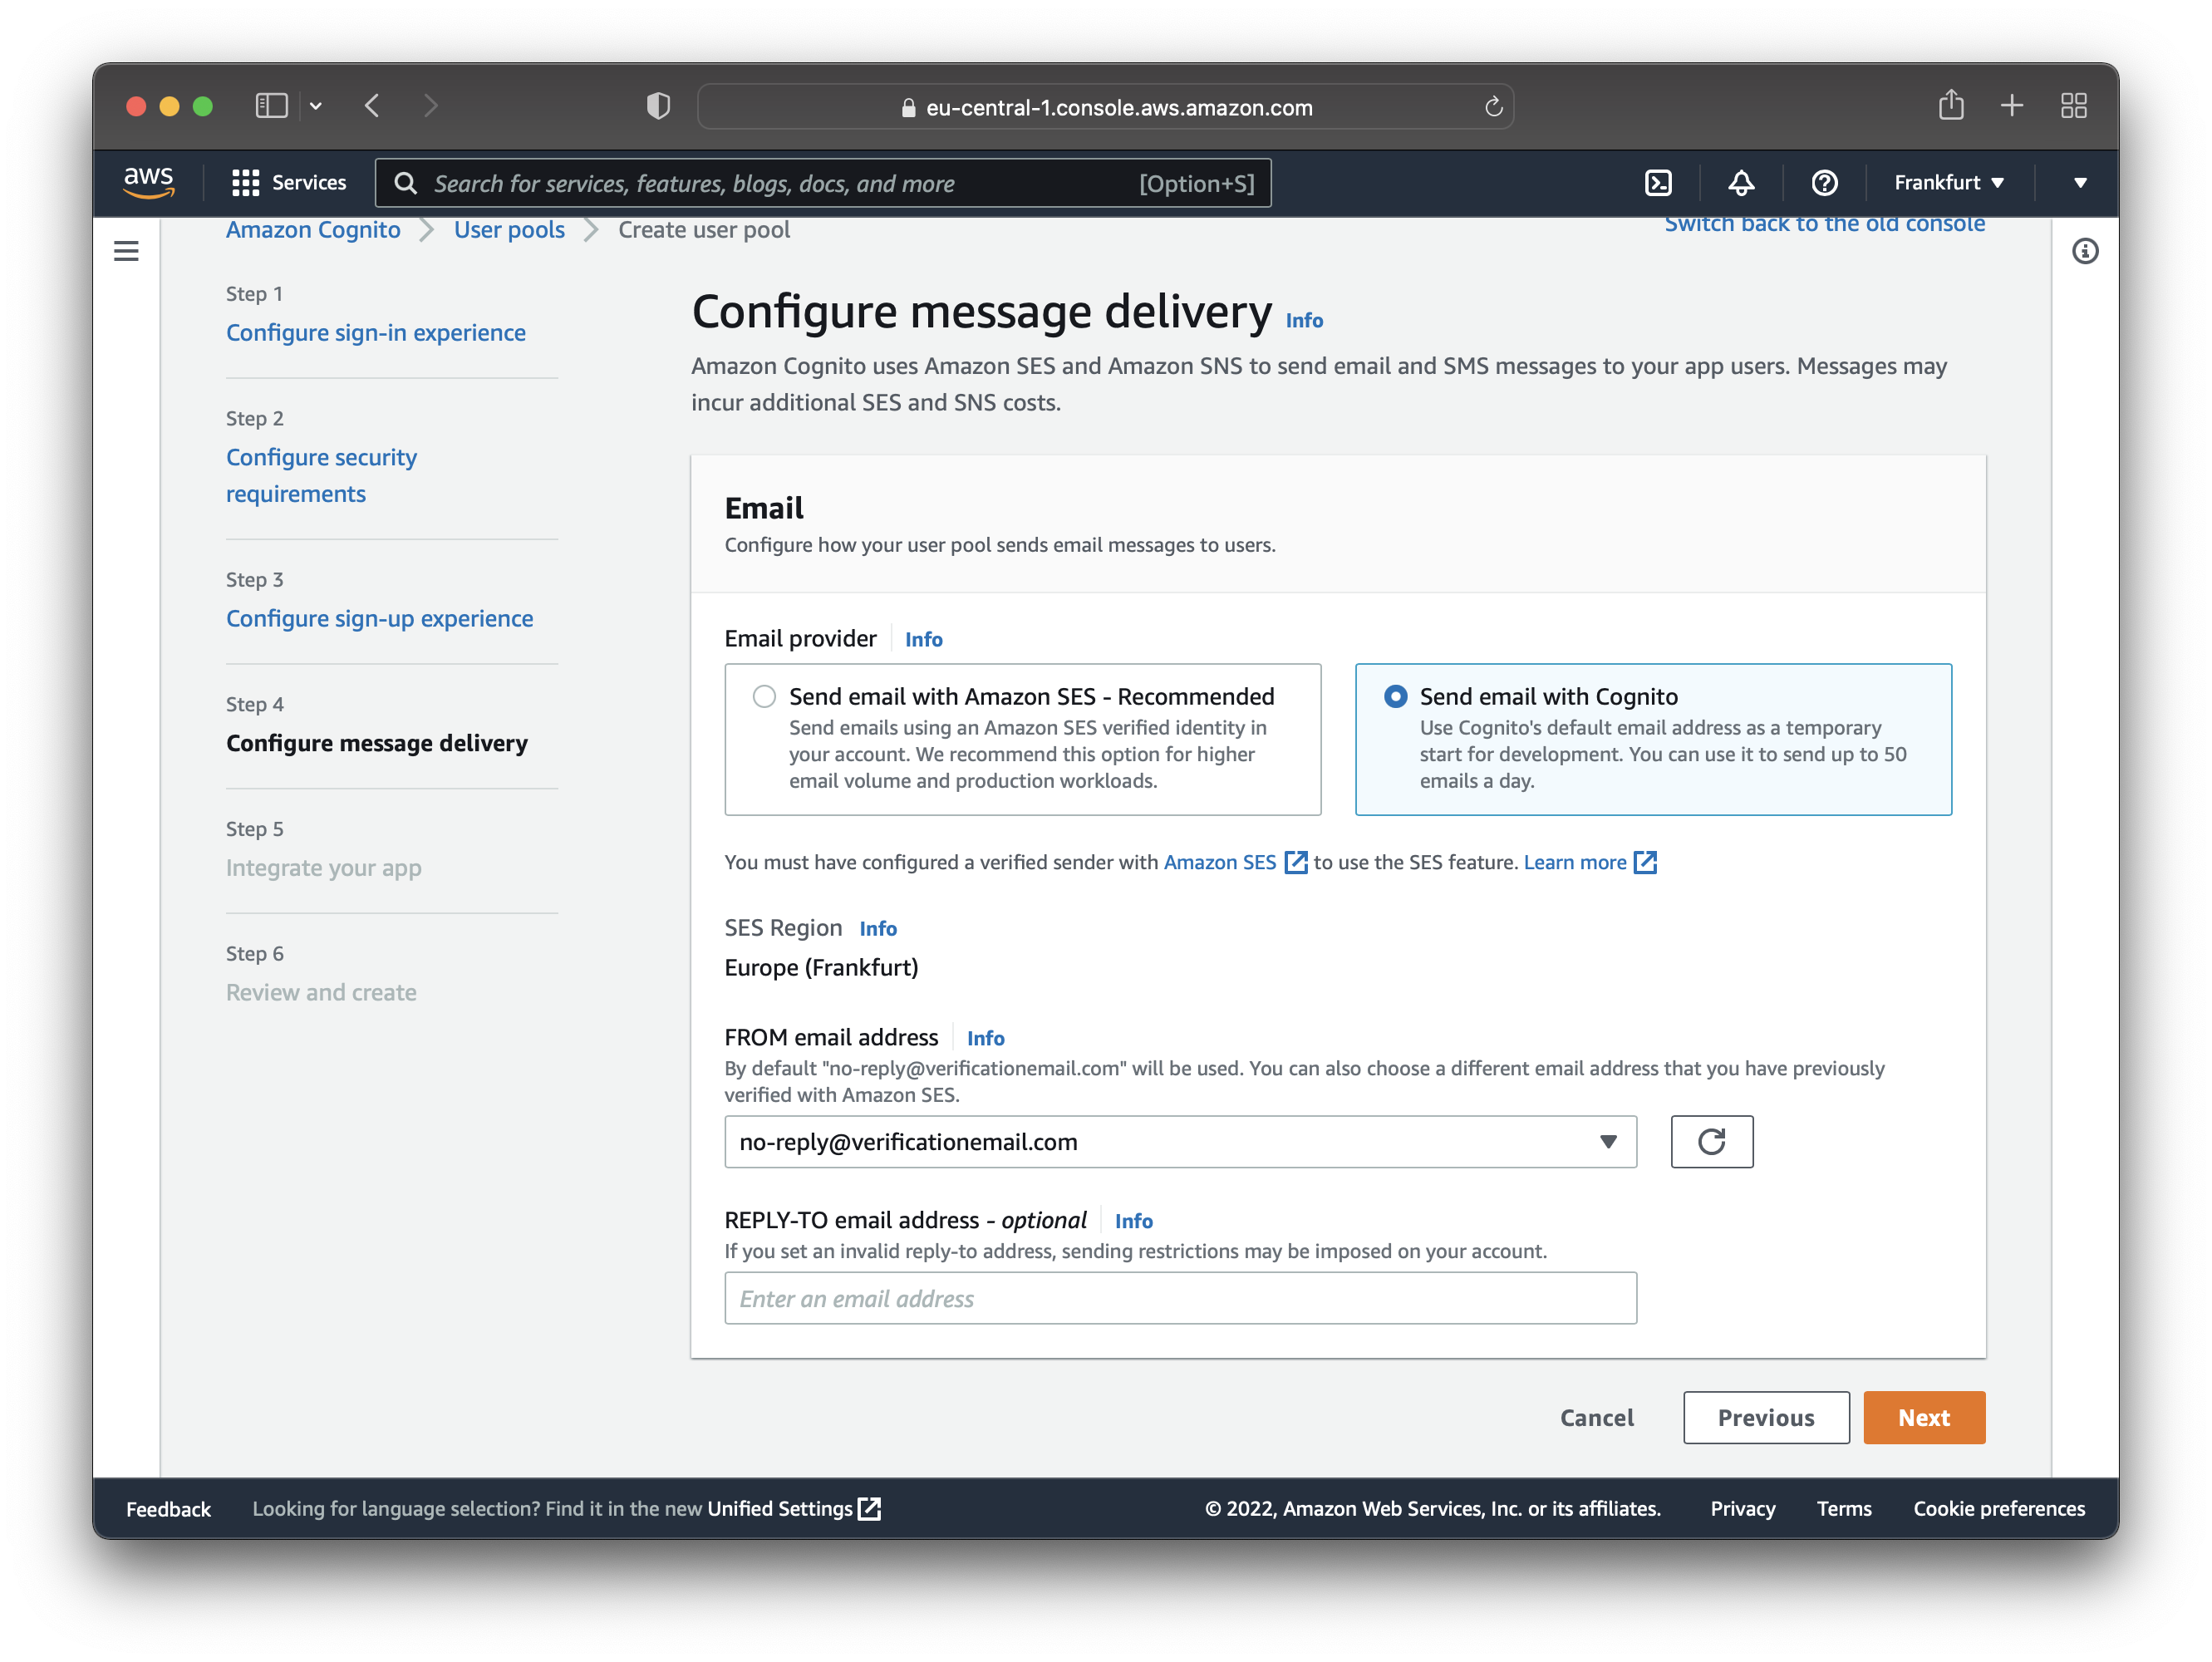
You configure how the user pool sends email/SMS messages to users on the next page. You can either send messages with Amazon SES or Cognito. Since this is a demo application, choose the option “Send email with Cognito”. You can send up to 50 free emails per day with this option.
For production applications, you might want to use Amazon SES.
Navigate to the next step, where you set up the app integration for the newly created user pool. Start by giving it a name and enabling the Cognito Hosted UI option.
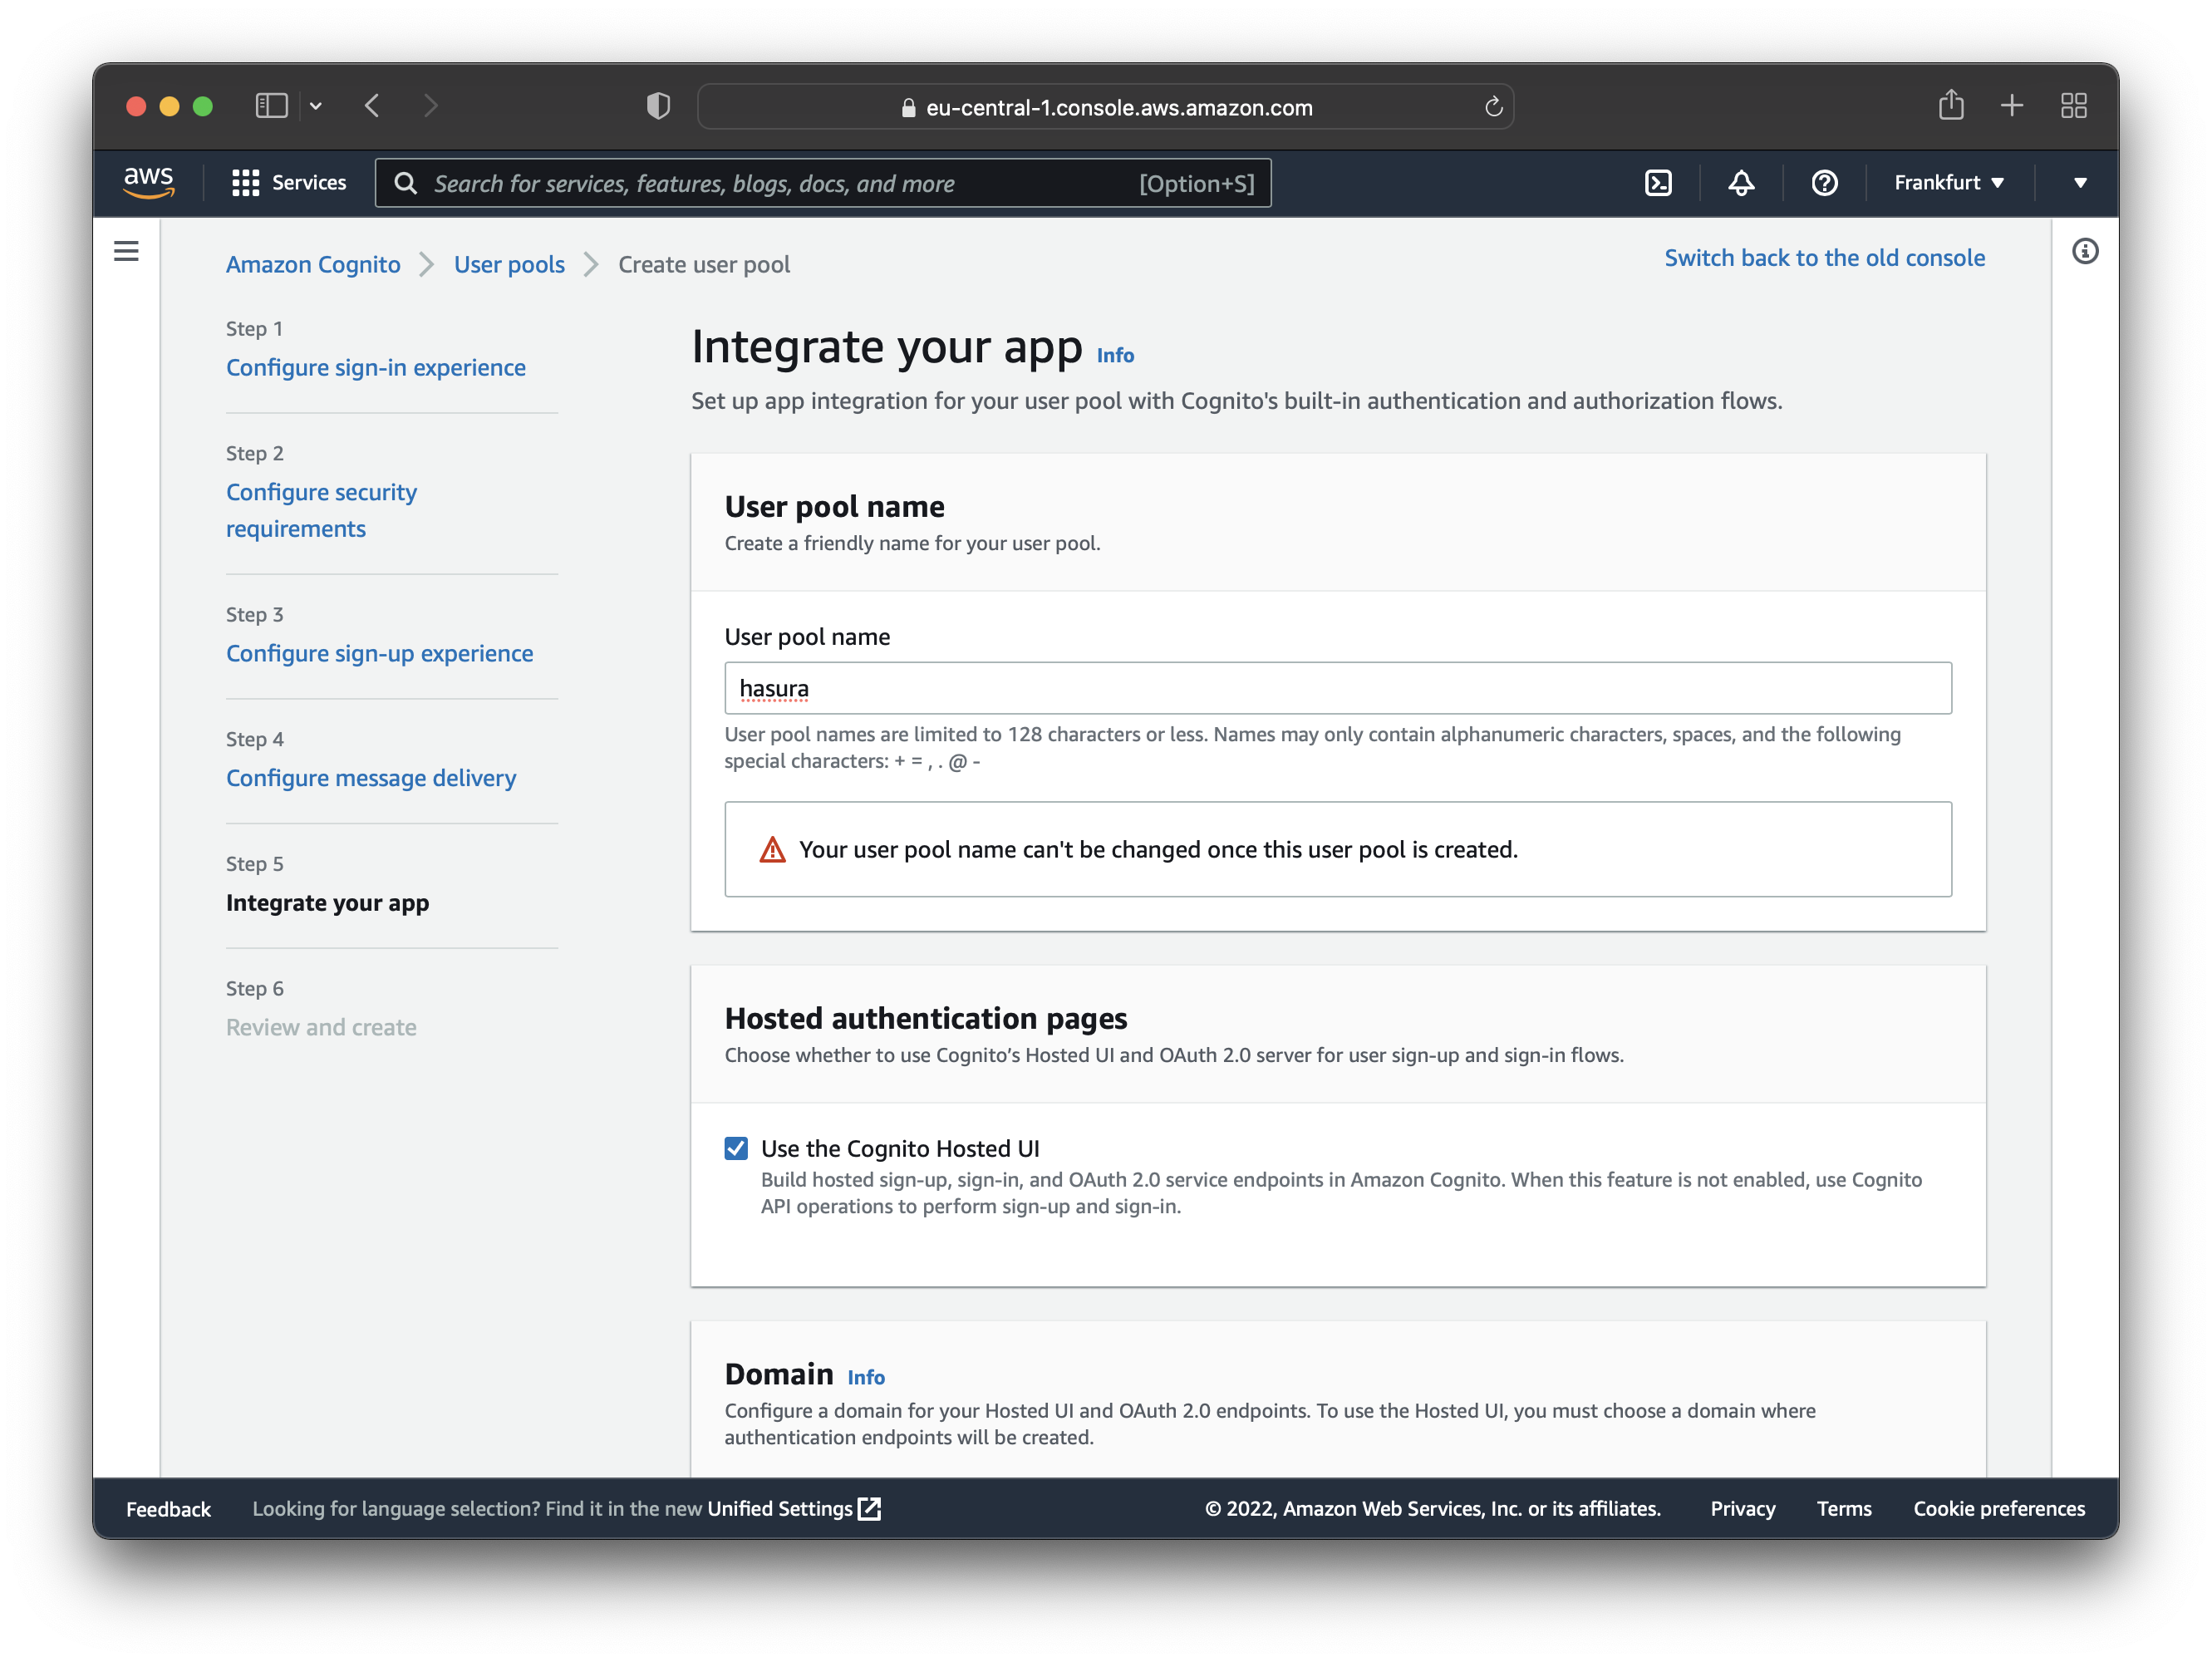
After that, you need to set up a domain to use the Hosted UI. For this tutorial, you can use a Cognito domain which is free.
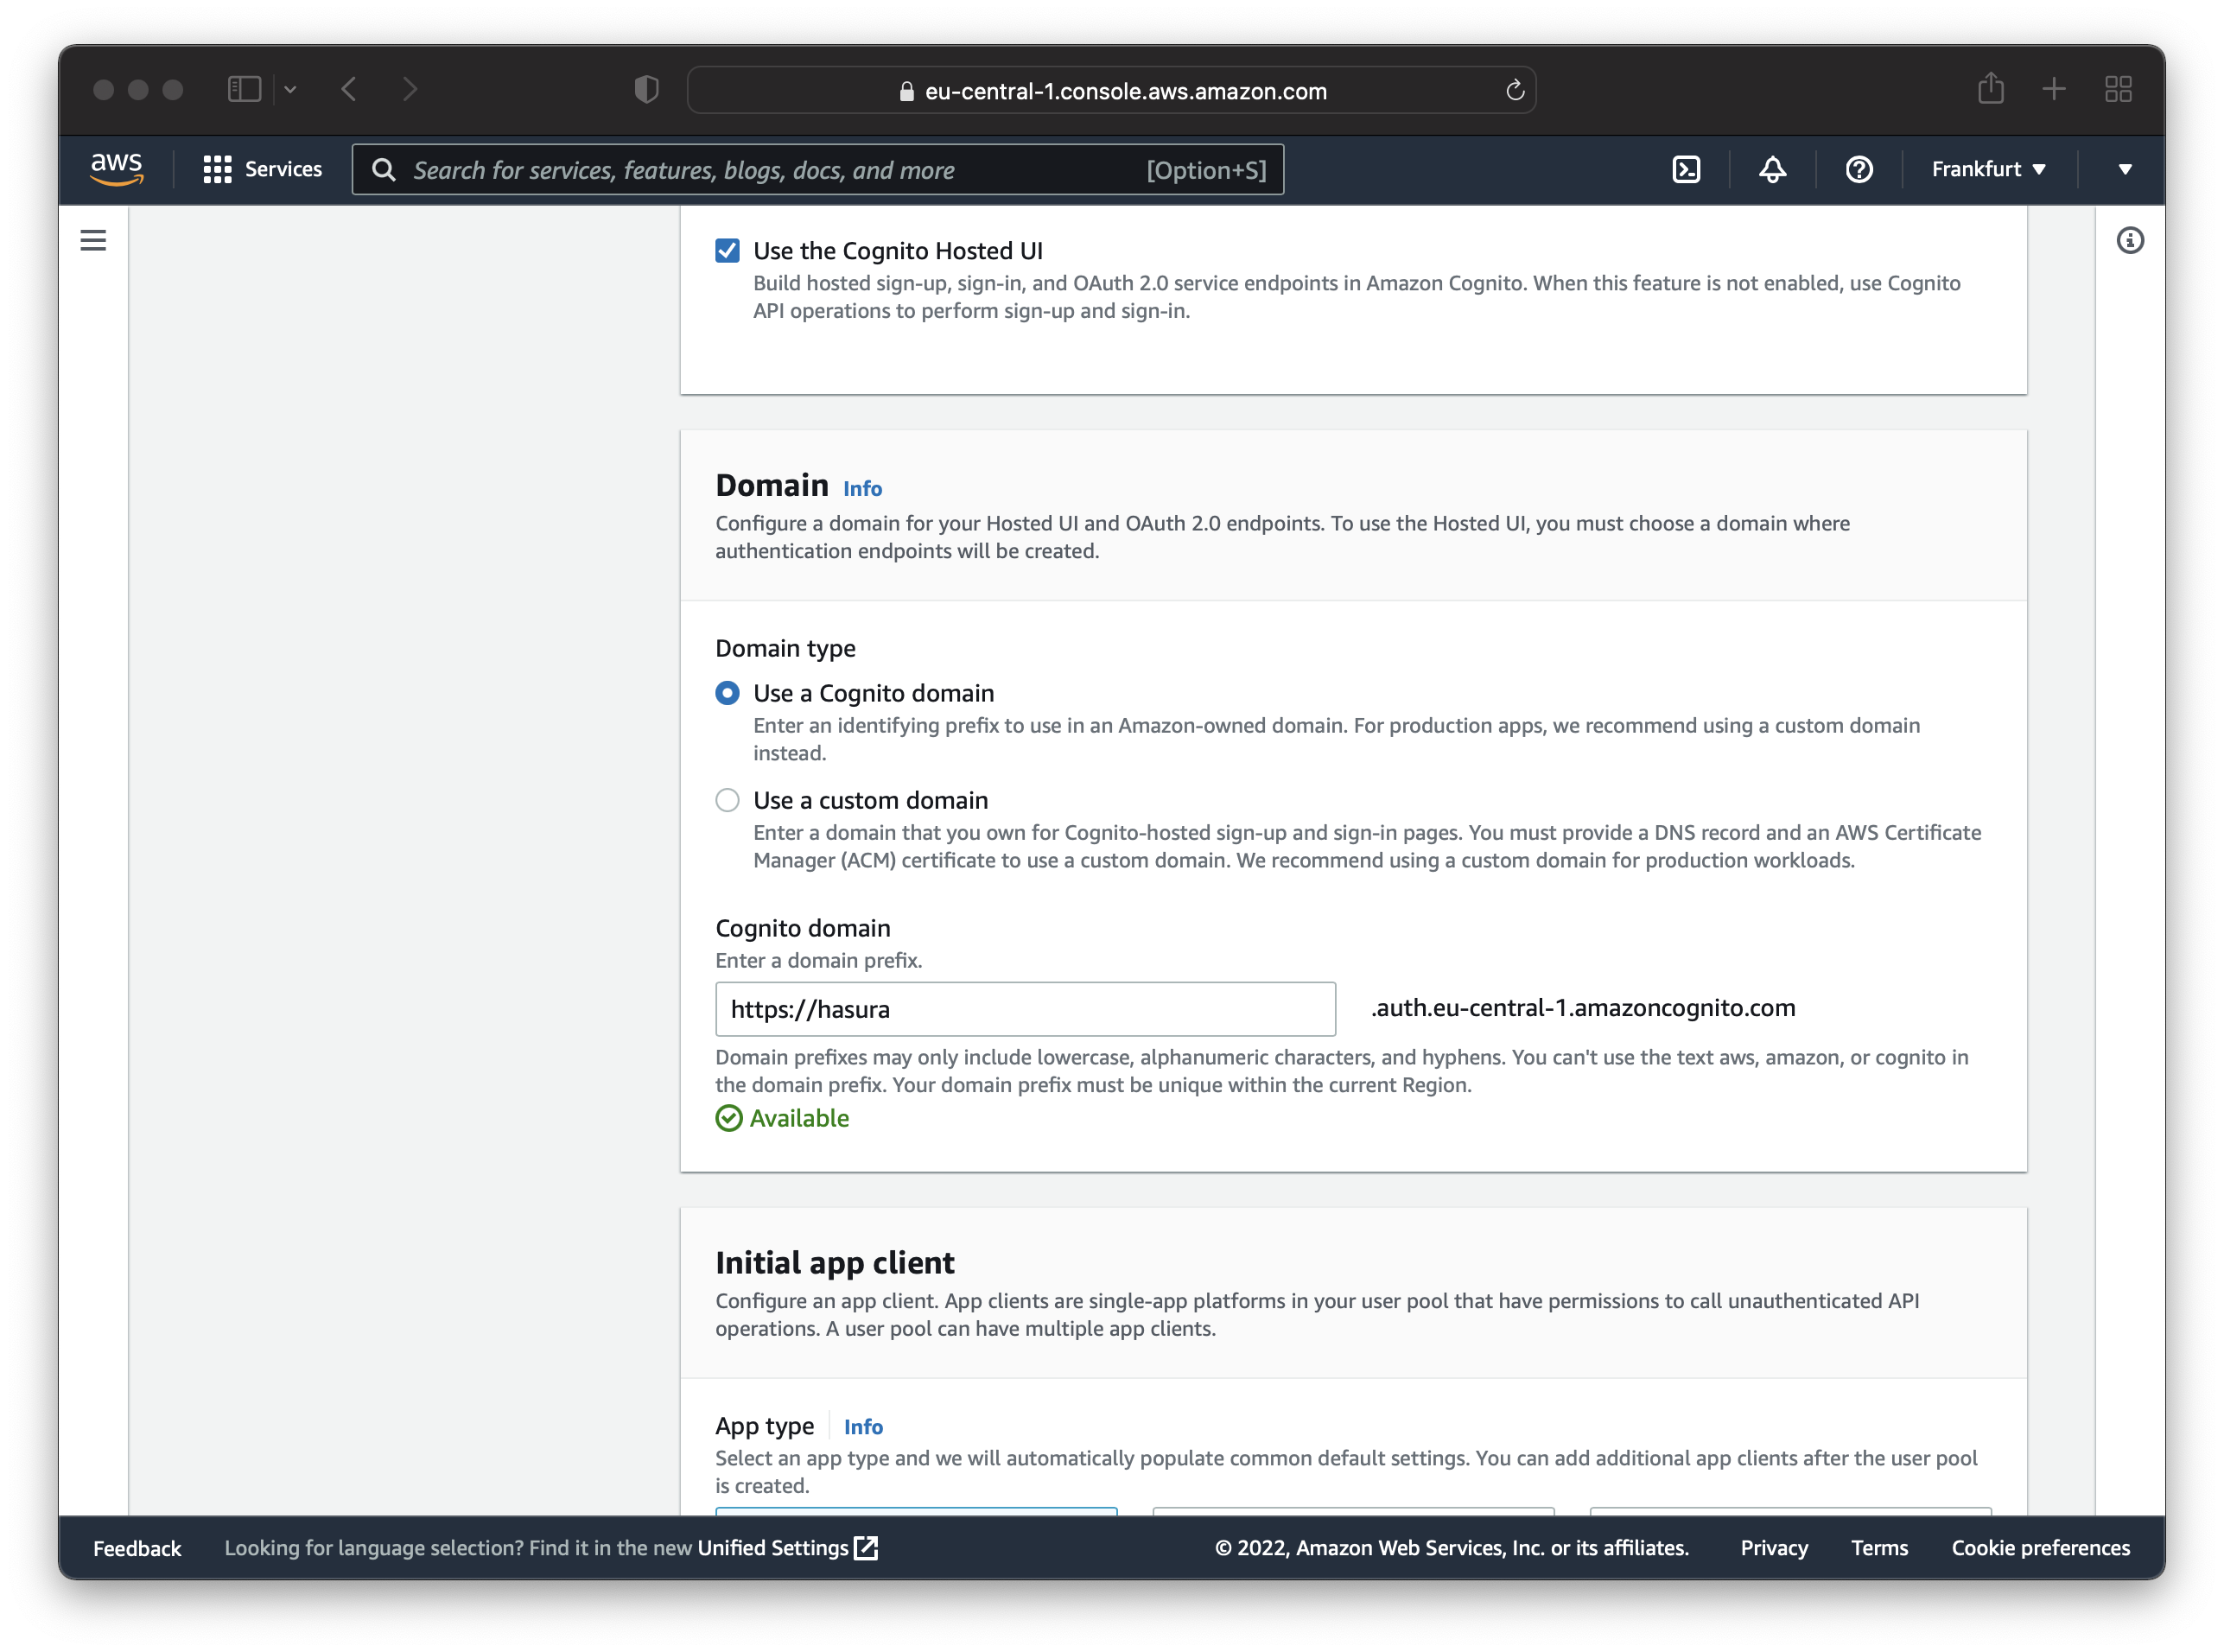
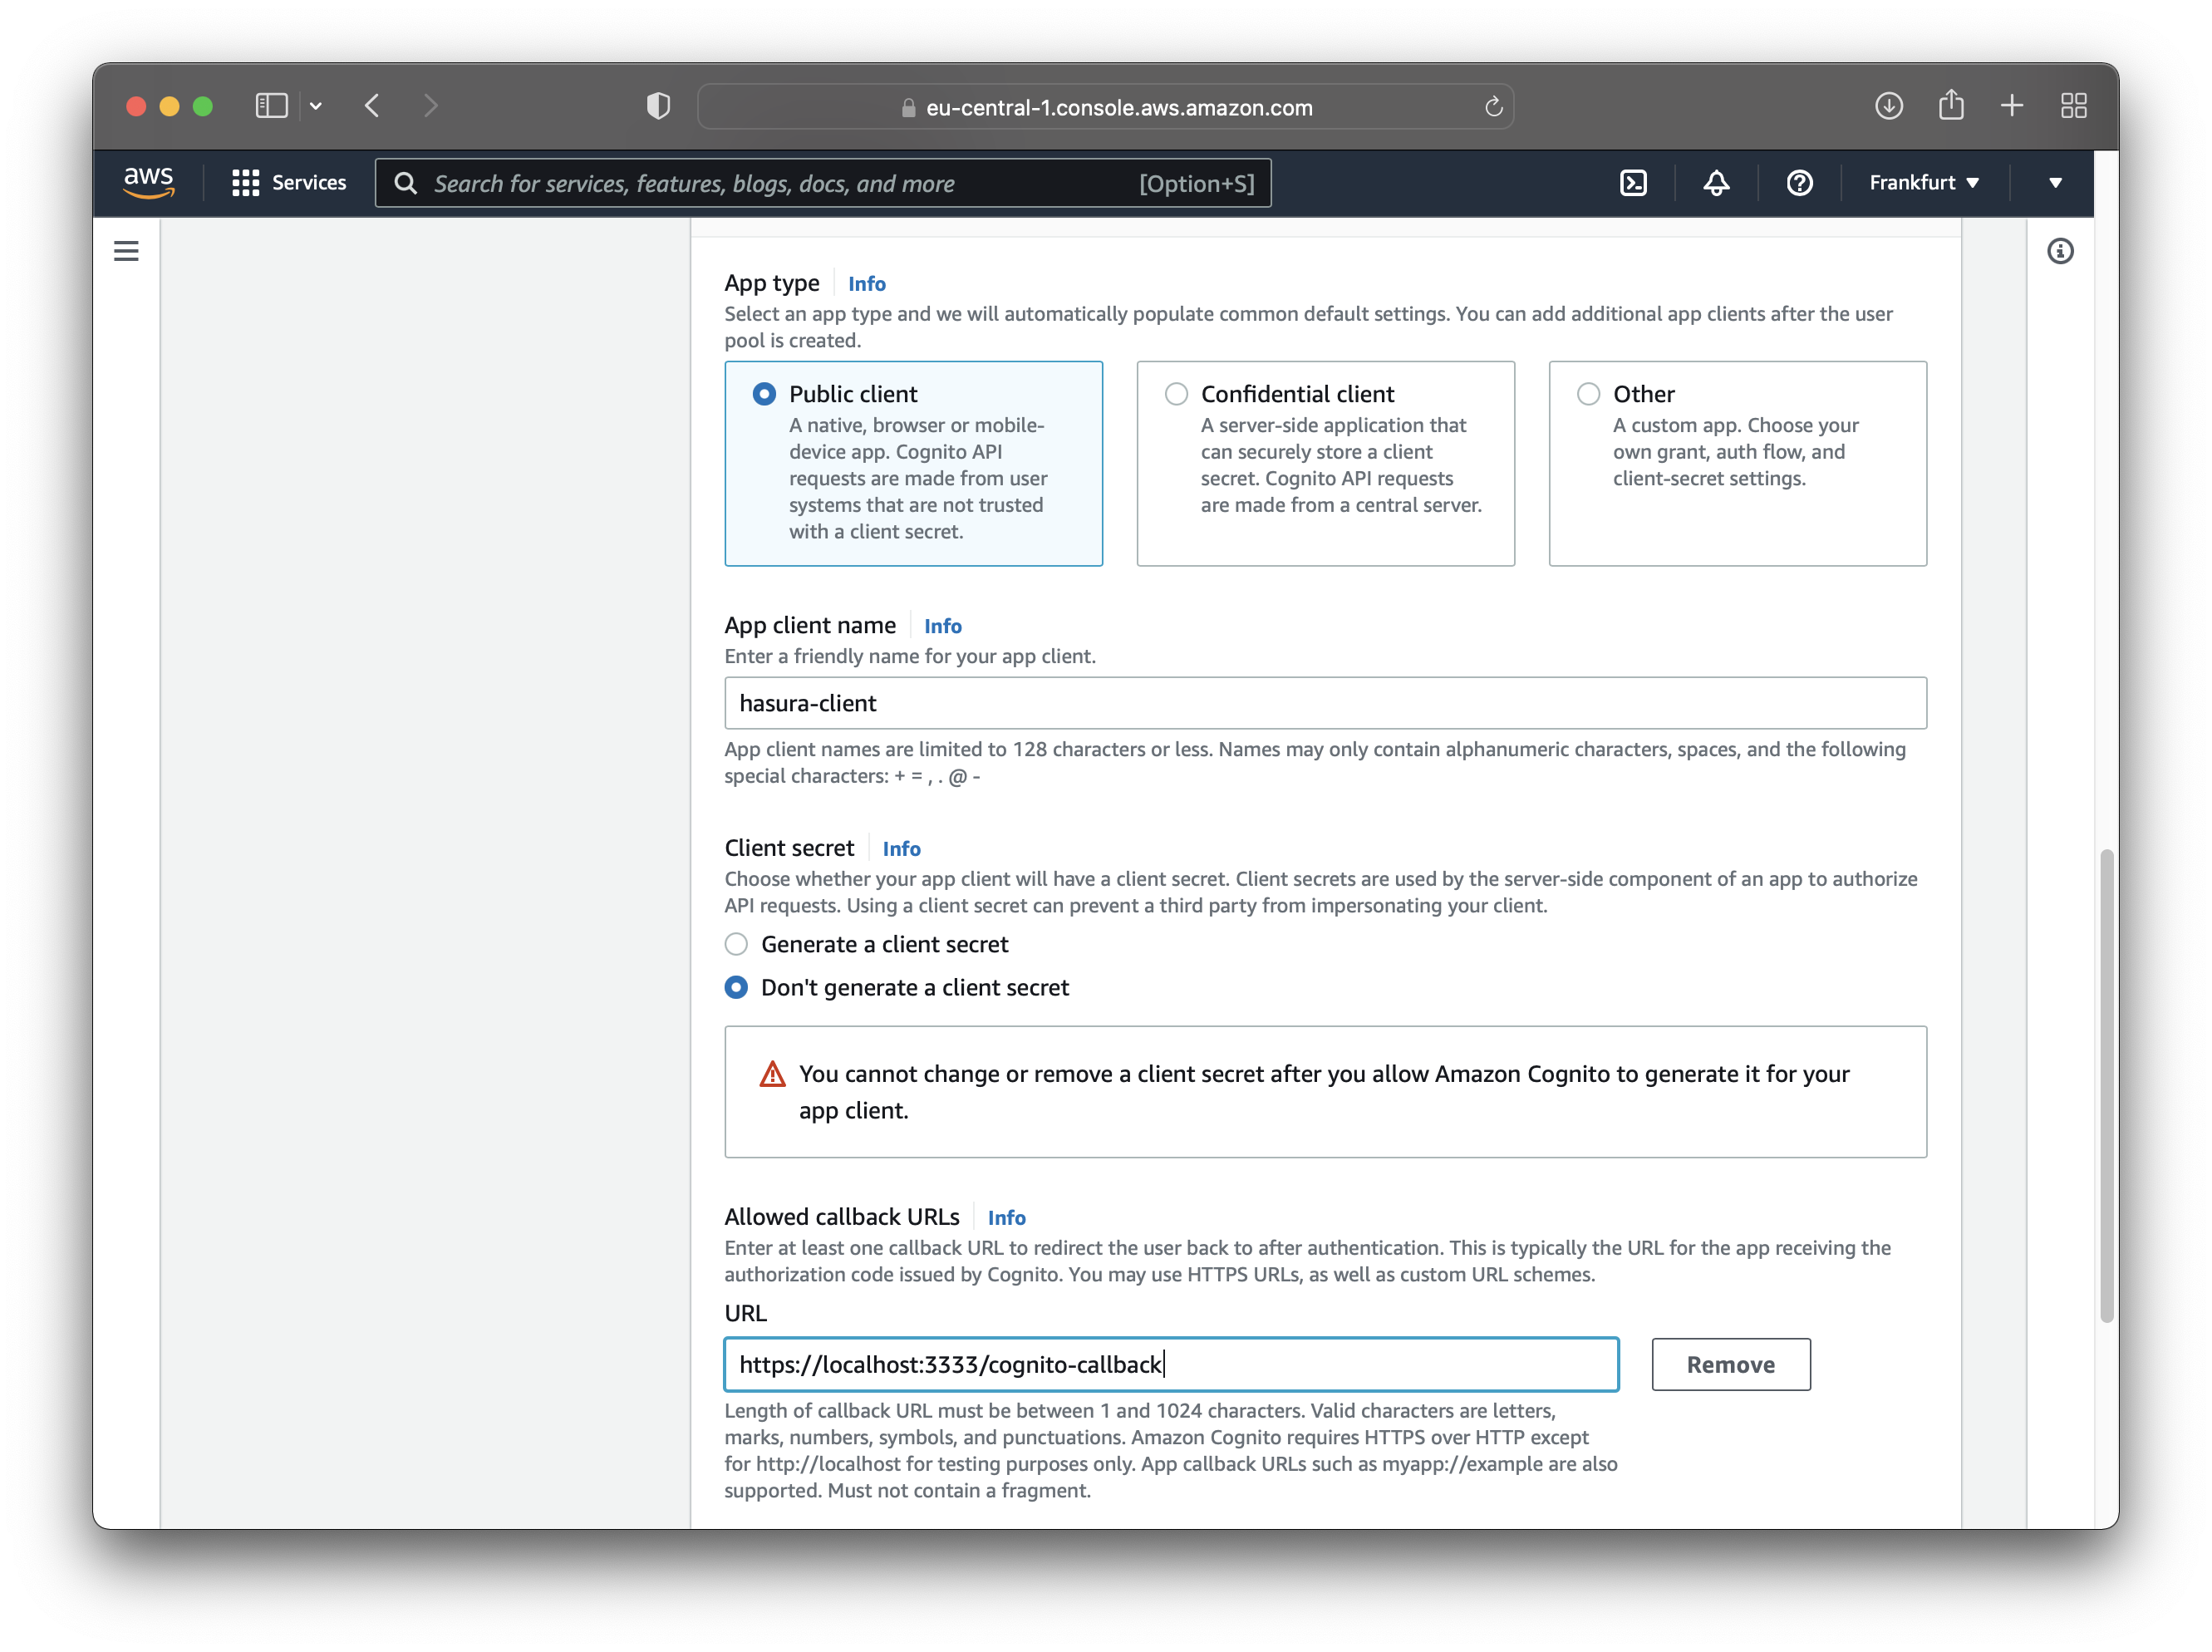
Now it’s time to configure the initial app client. Choose the following options:
- Public client for the App type
- Don’t generate a client secret for the Client secret
Also, name your client and add the allowed callback URL. Use the figure below as a reference.
Once you configure the client, scroll until you see “Advanced app client settings” and click on it. A new section will appear, where you should see “OAuth 2.0 Grant Types”.
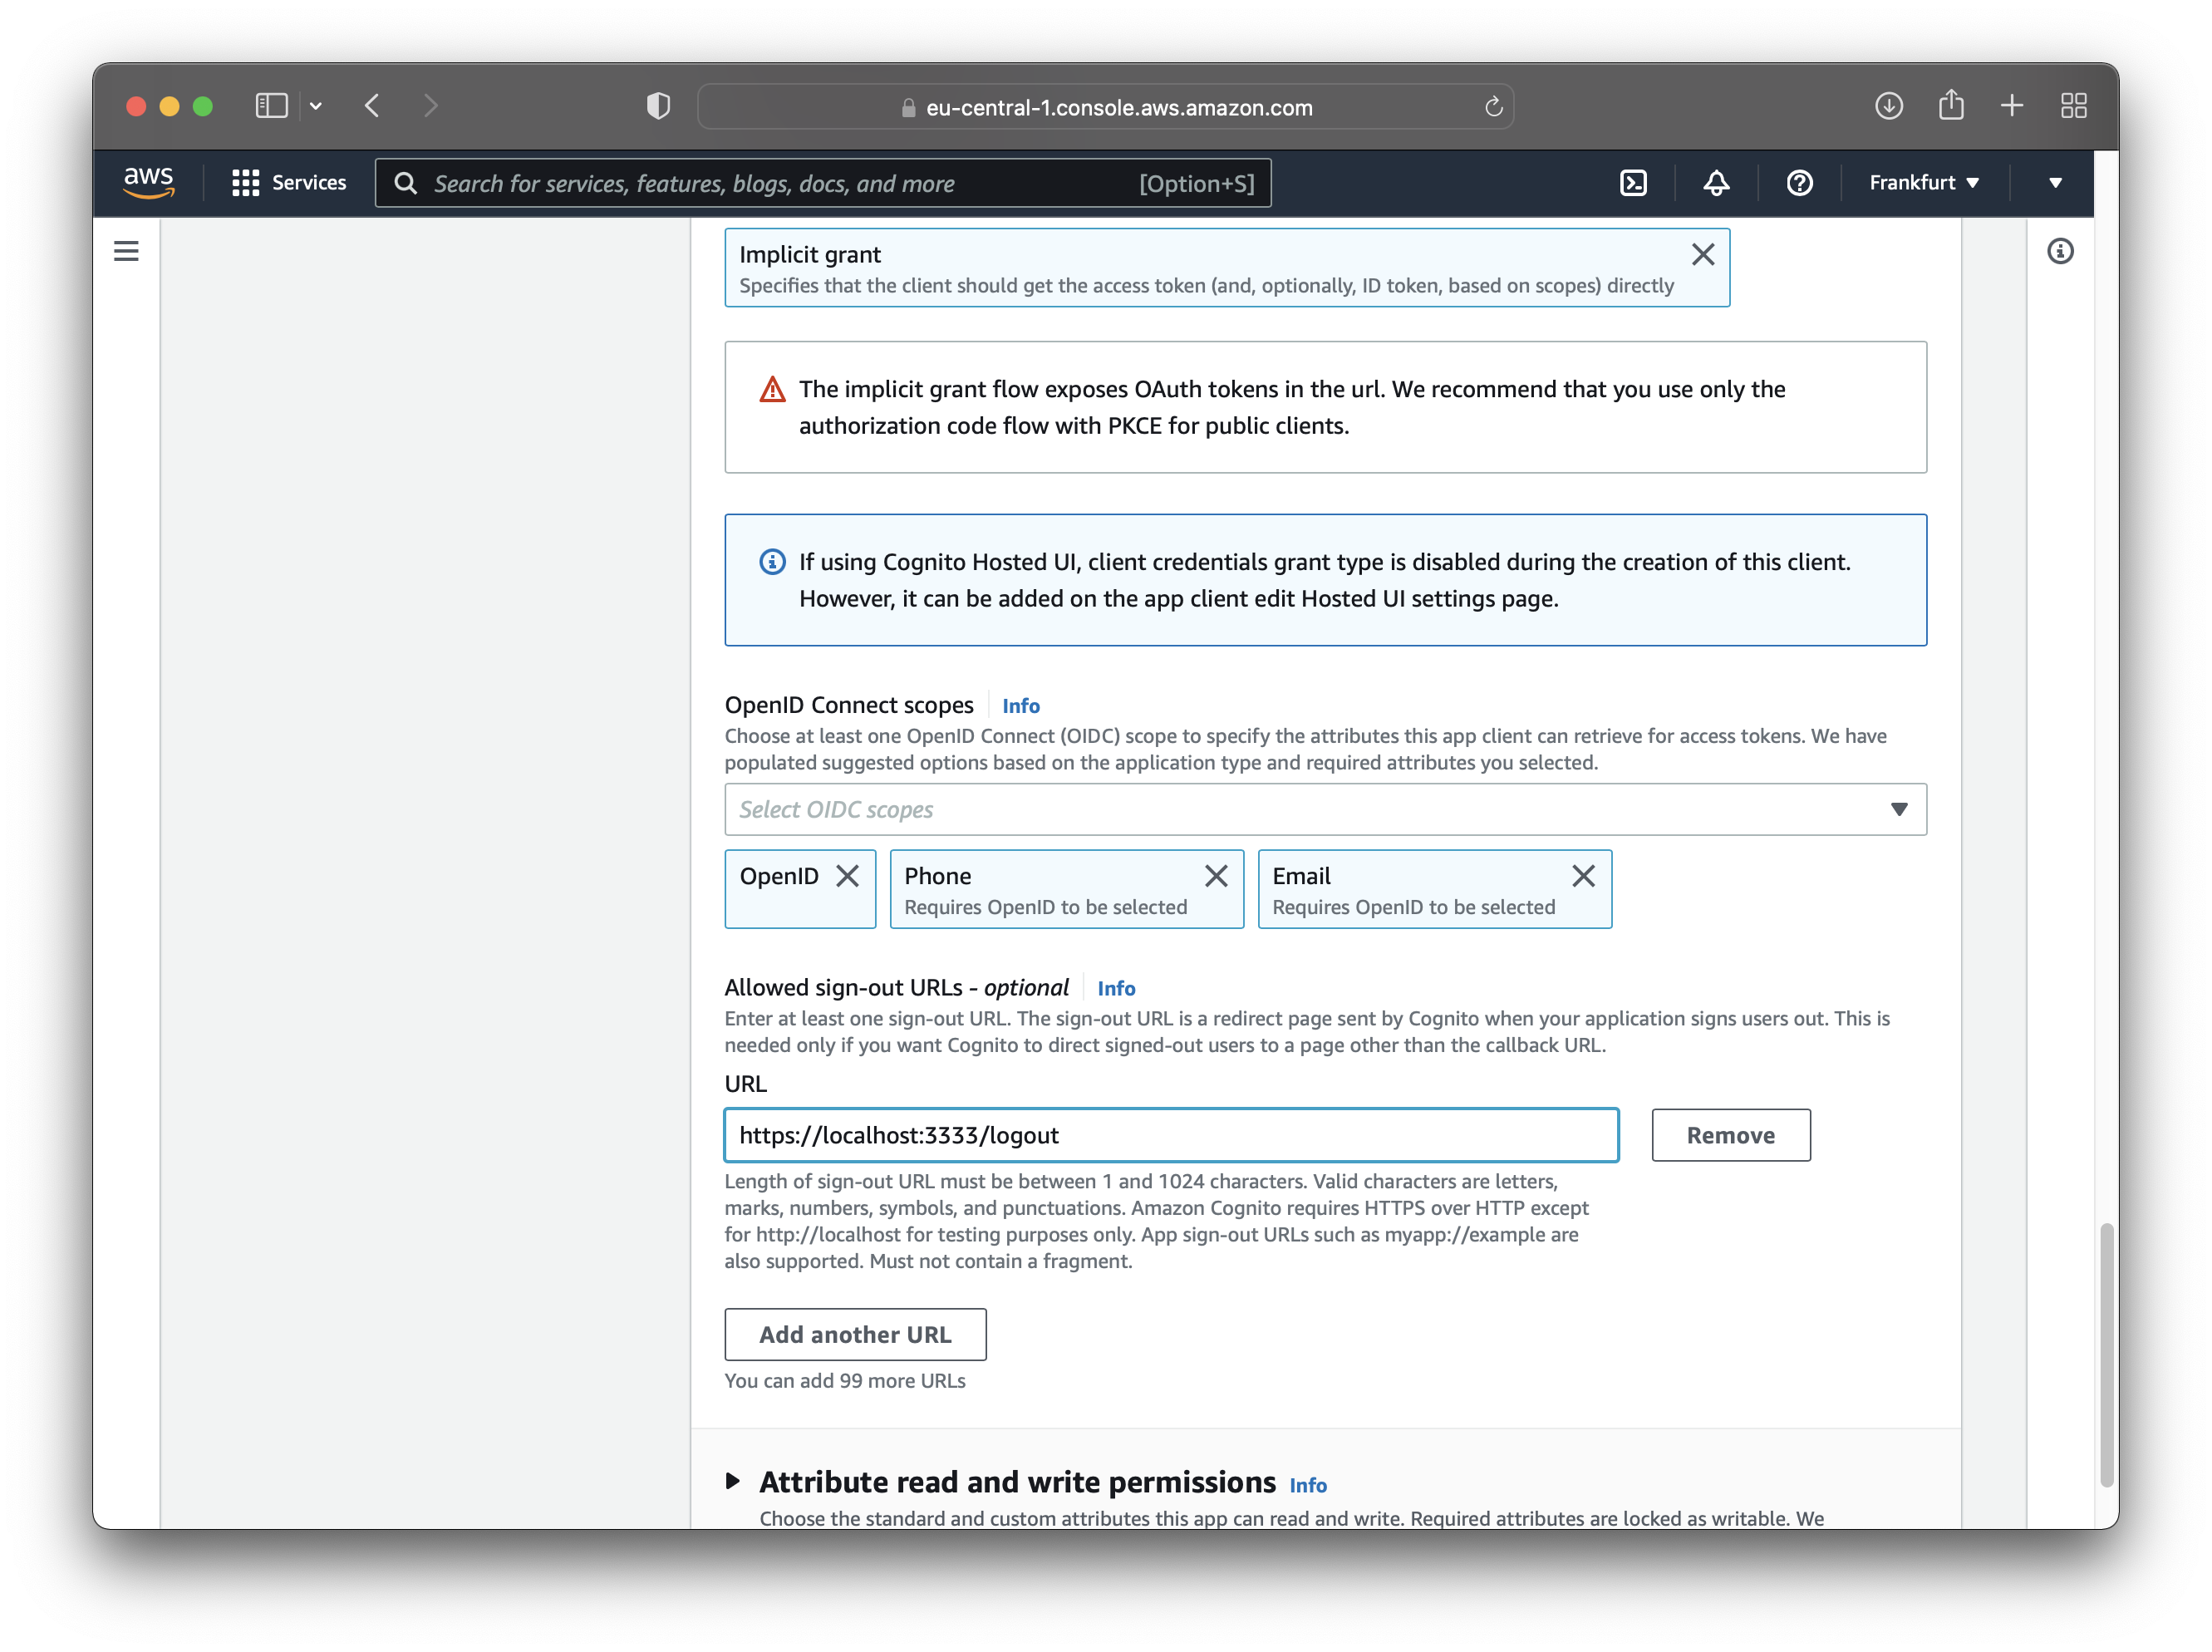
Enable the “Implicit grant” option so Cognito returns the user pool JWTs to your application.
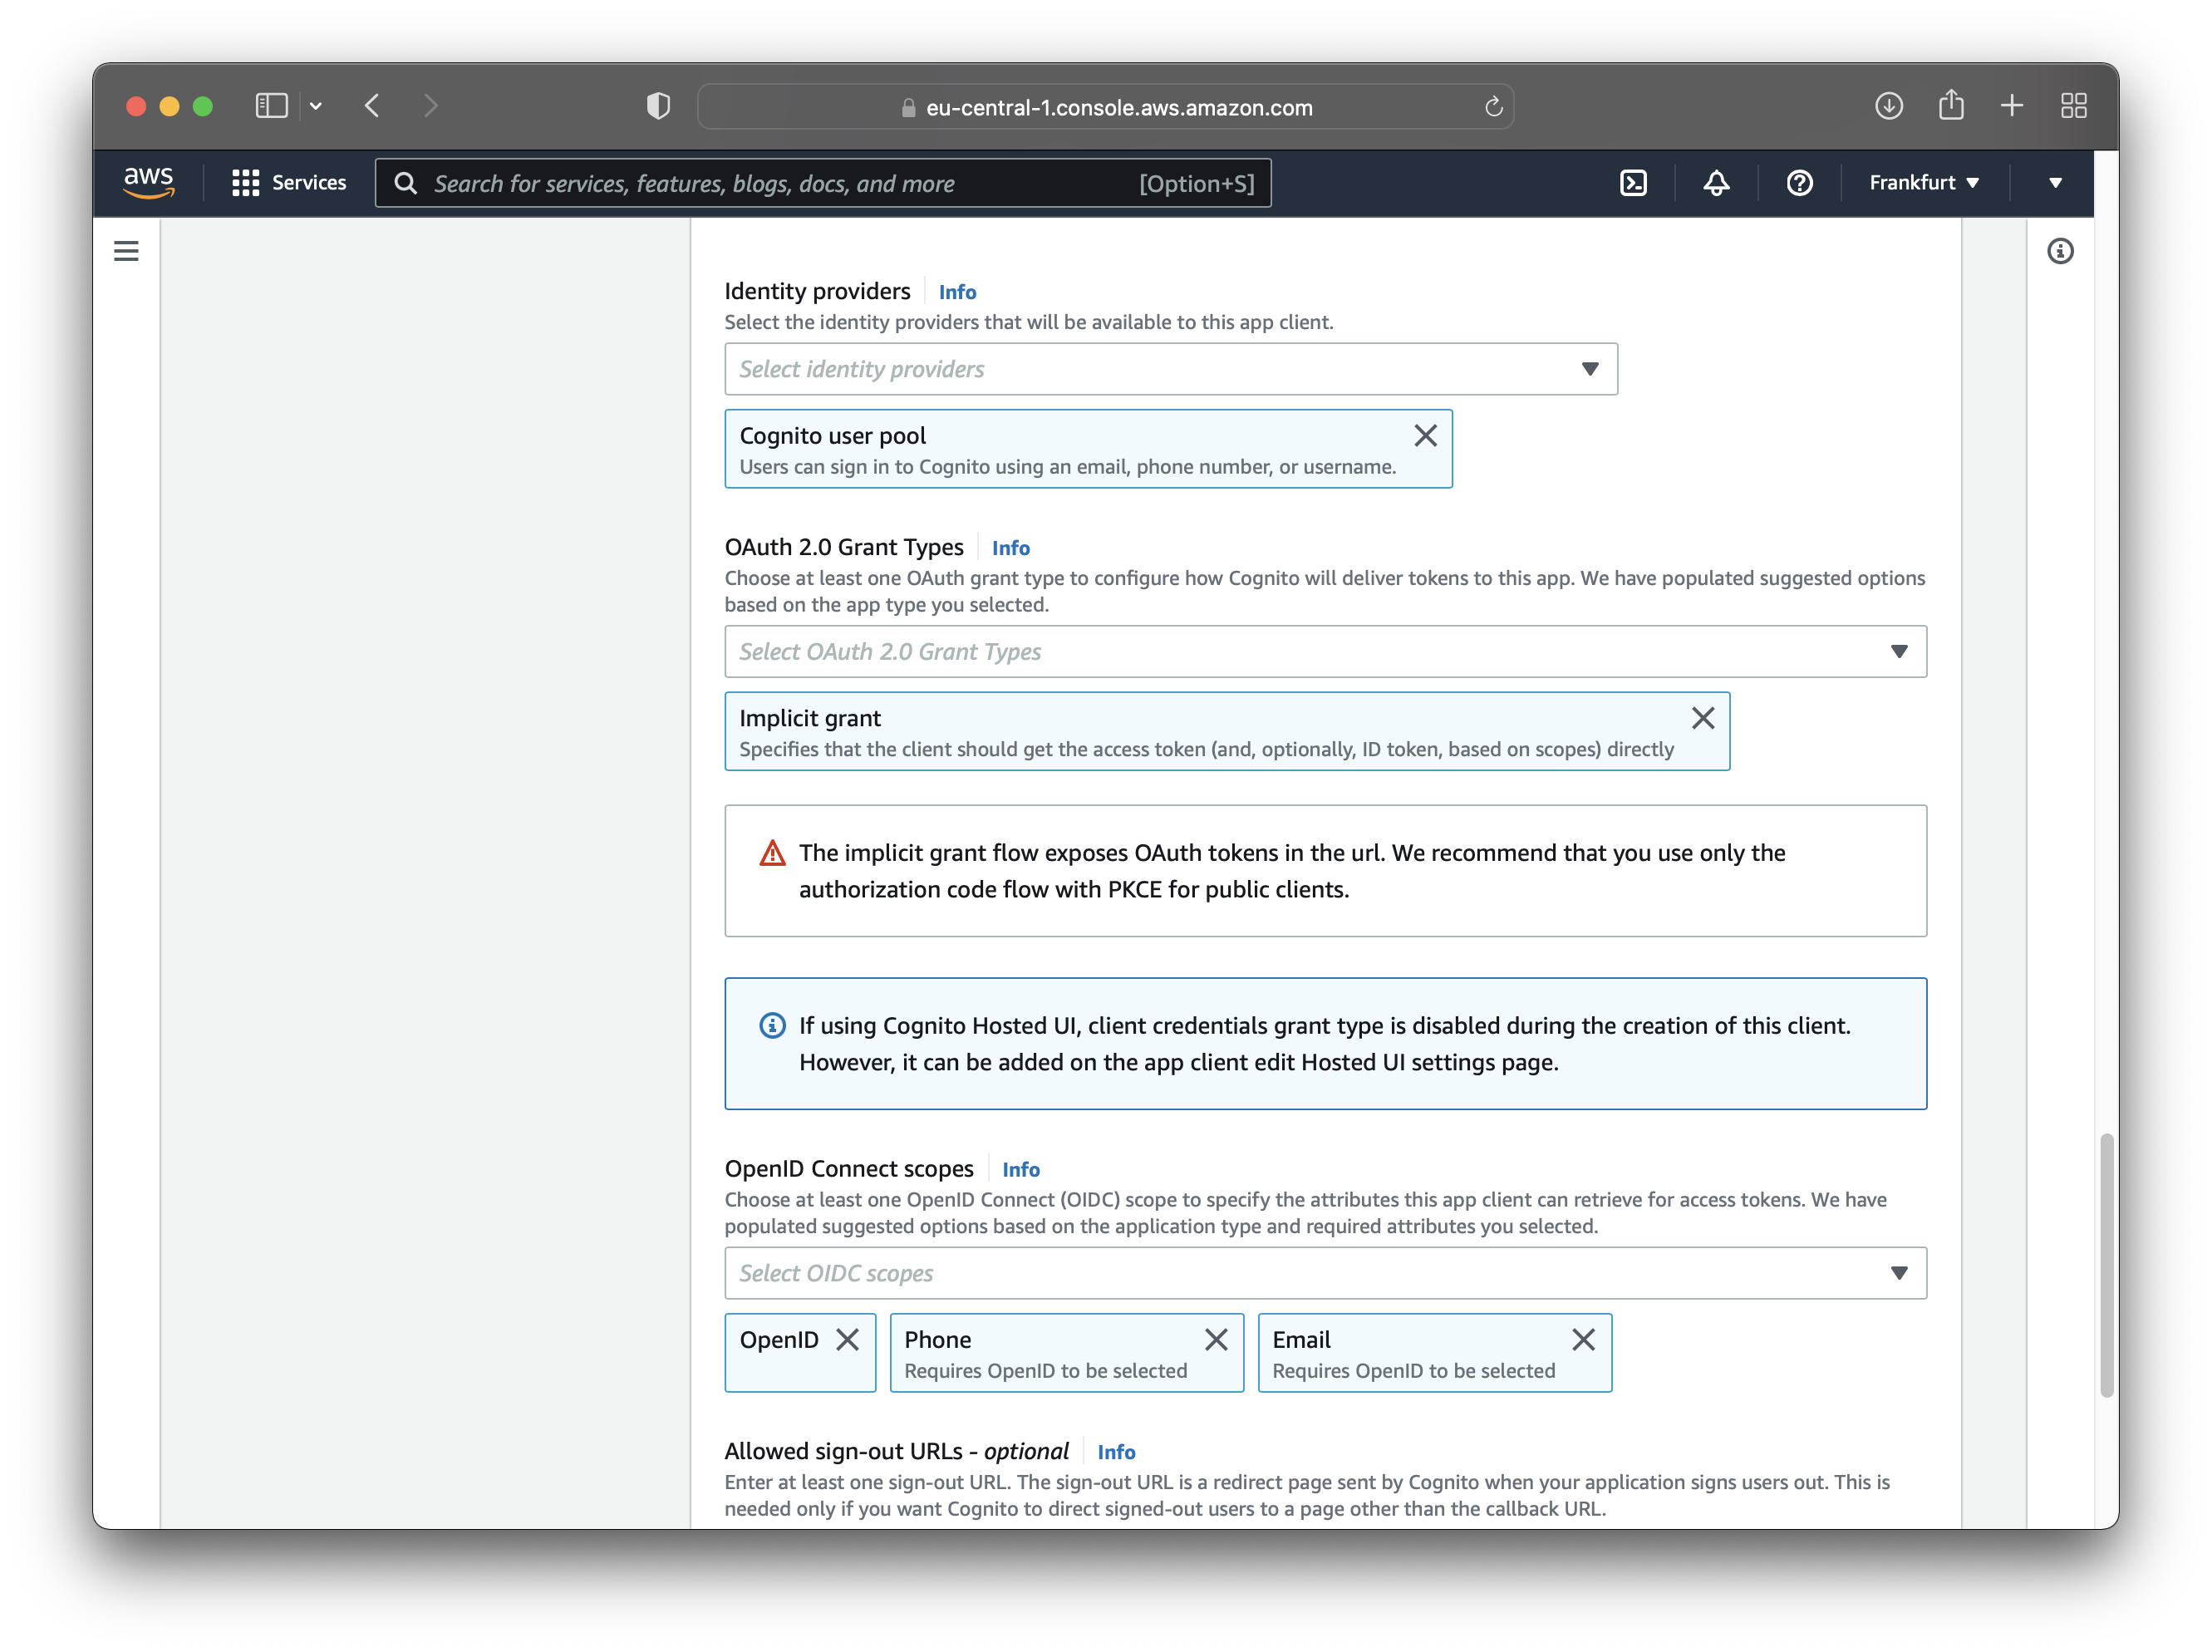
The app client should also have a sign-out URL. Enter a sign-out URL as shown in the image below.
That’s all you need to initialize the app client. Click “Next” to go to the last step, which is reviewing the user pool. Review the configuration and create it.
The AWS documentation has an extensive section on setting up user pools and enabling a hosted web UI. Follow these steps for in-depth information about getting started with Cognito User Pools.
Add Custom Claims to the JWT With a Lambda Function
You need to configure custom JWT claims, which you can do with a Lambda function. Cognito will trigger the Lambda function before generating the token.
The custom JWT claims tell Hasura about the role of the user making the request. This way, Hasura can enforce the appropriate authorization rules. The rules define what the user making the request is allowed to do.
Find "AWS Lambda" in your dashboard and create a new function. Choose the following options:
- Author from scratch
- Function name - custom-jwt-claims
- Runtime - Node.js 16.x
- Architecture - x86_64
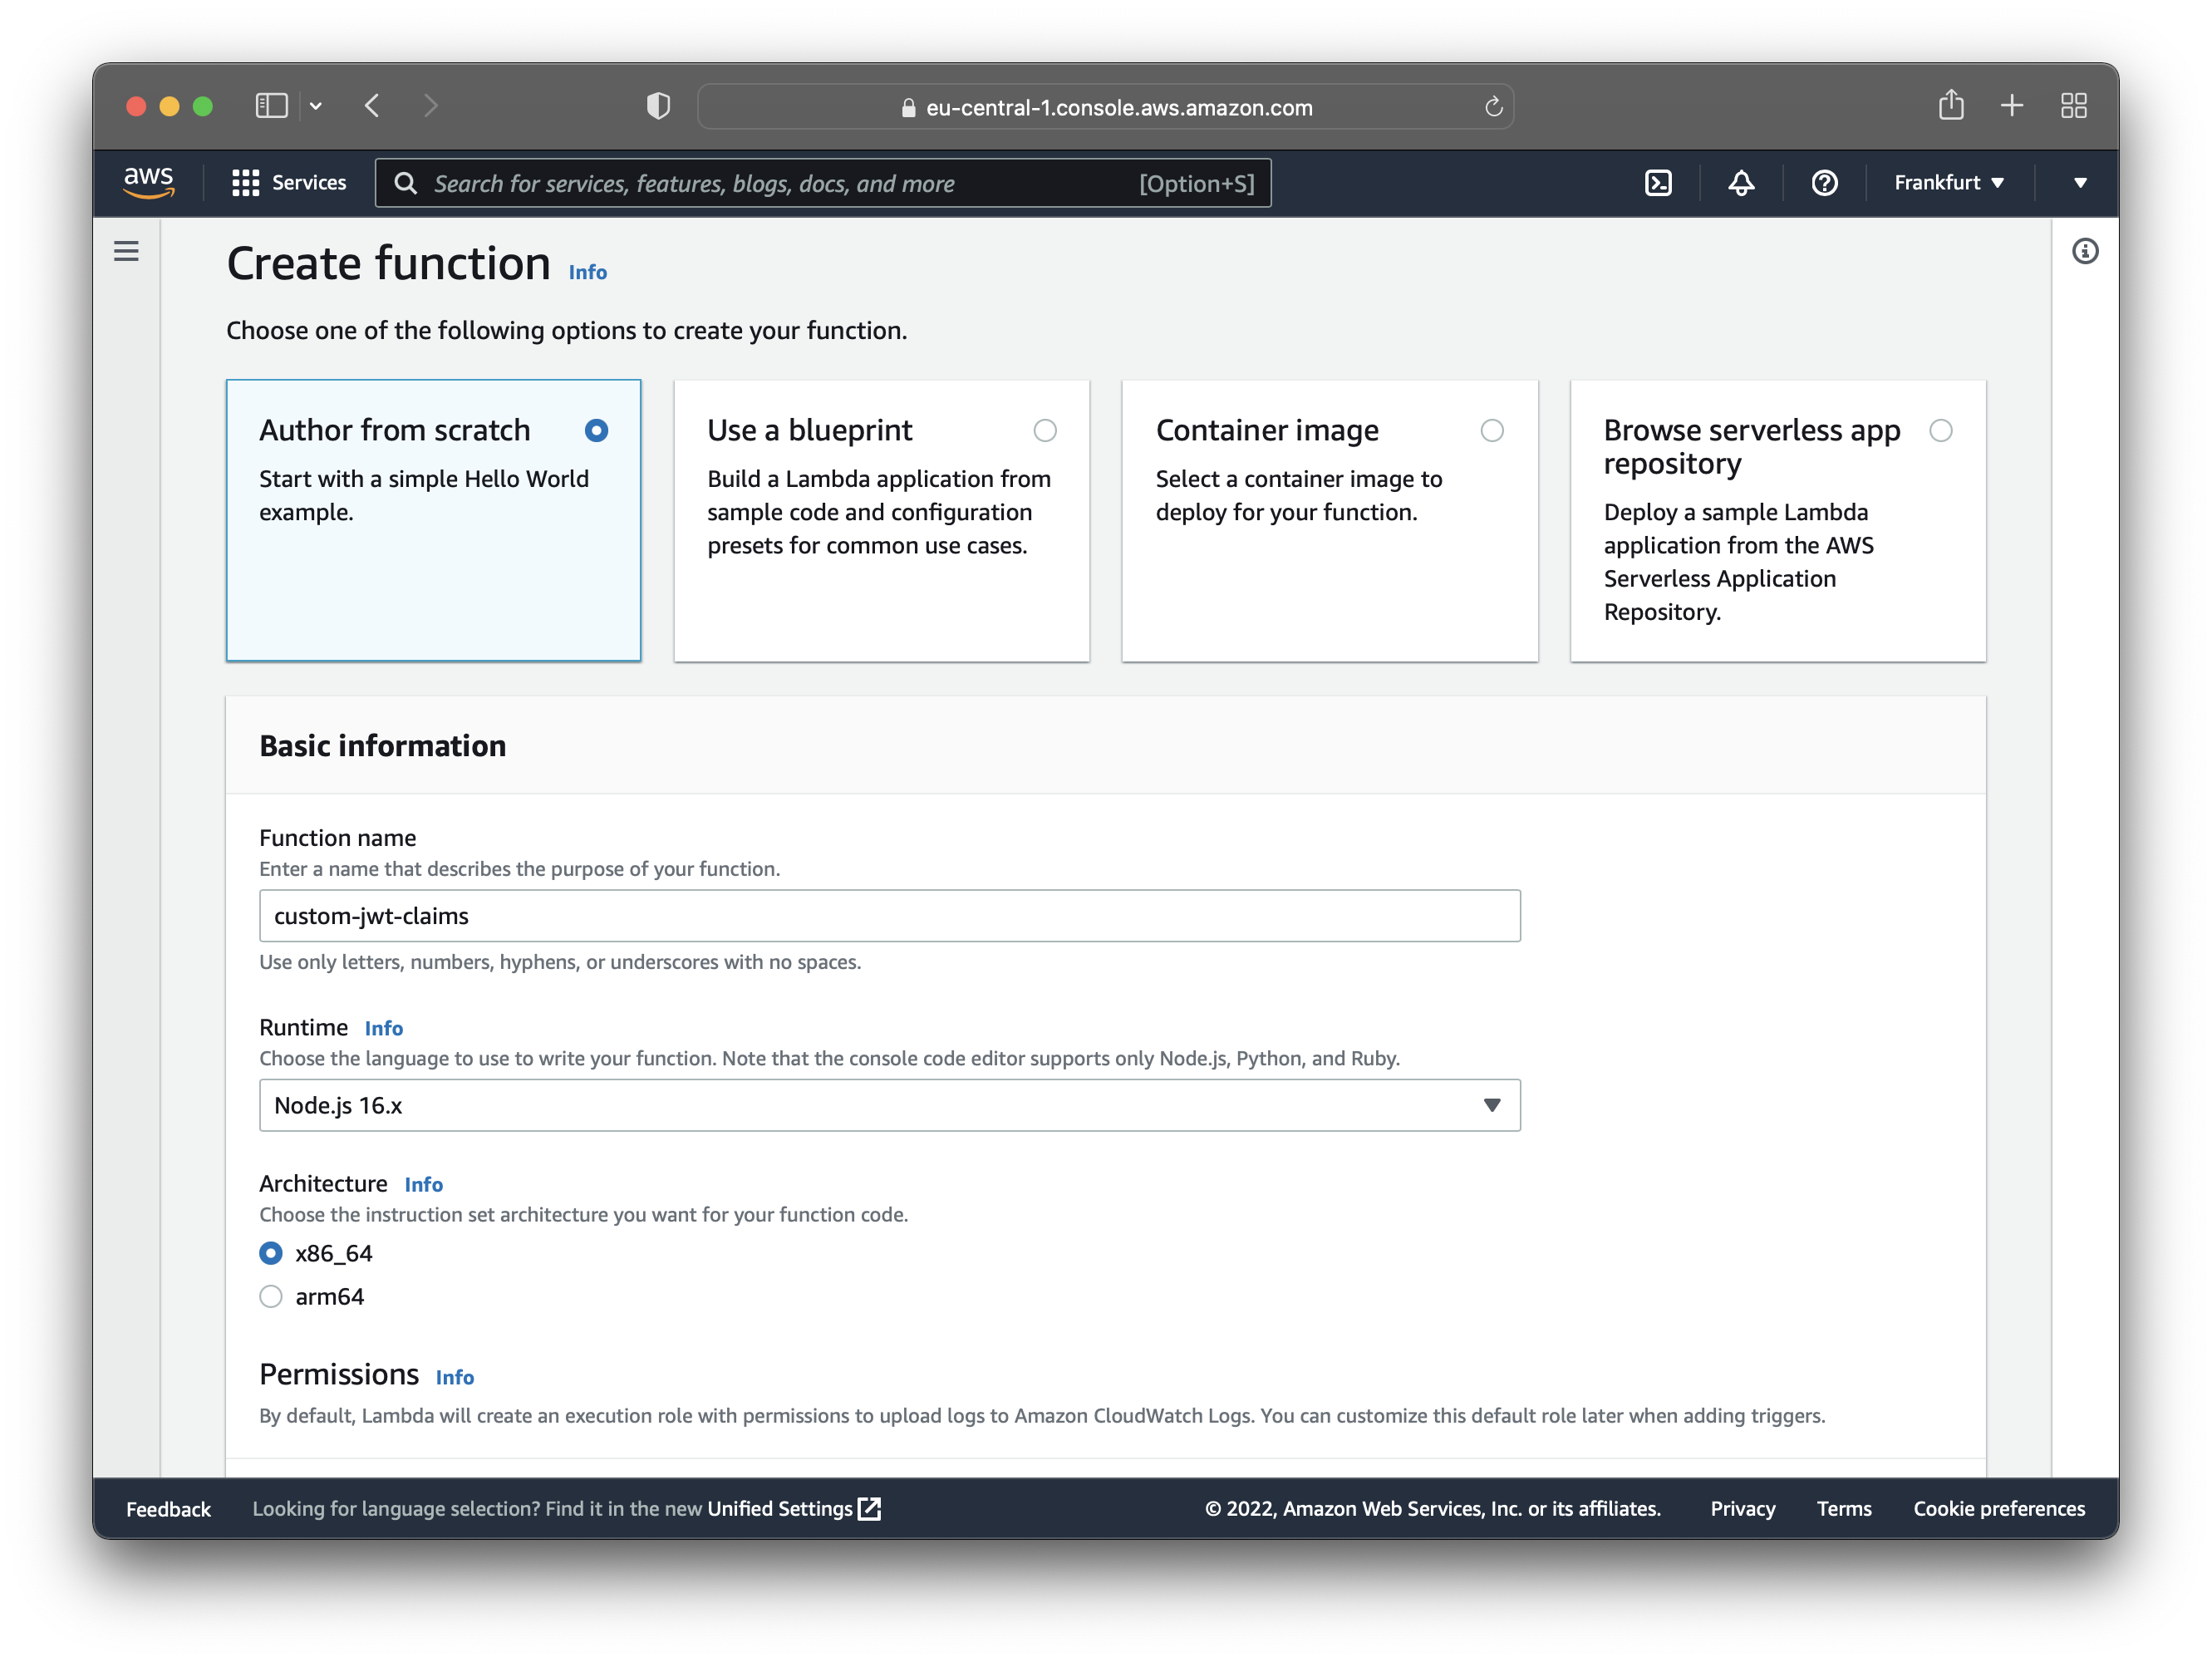
After configuring the Lambda function, click “Create function”.
Creating the function takes a few seconds, and then it redirects you to the function dashboard. You should see a section called “Code source” in the dashboard. Replace the content with the following code:
exports.handler = (event, context, callback) => {event.response = {claimsOverrideDetails: {claimsToAddOrOverride: {"https://hasura.io/jwt/claims": JSON.stringify({"x-hasura-user-id": event.request.userAttributes.sub,"x-hasura-default-role": "user","x-hasura-allowed-roles": ["user"],}),},},};callback(null, event);};
After adding the new code, click “Deploy” to update the Lambda function.
Configure Cognito To Trigger the Lambda Function
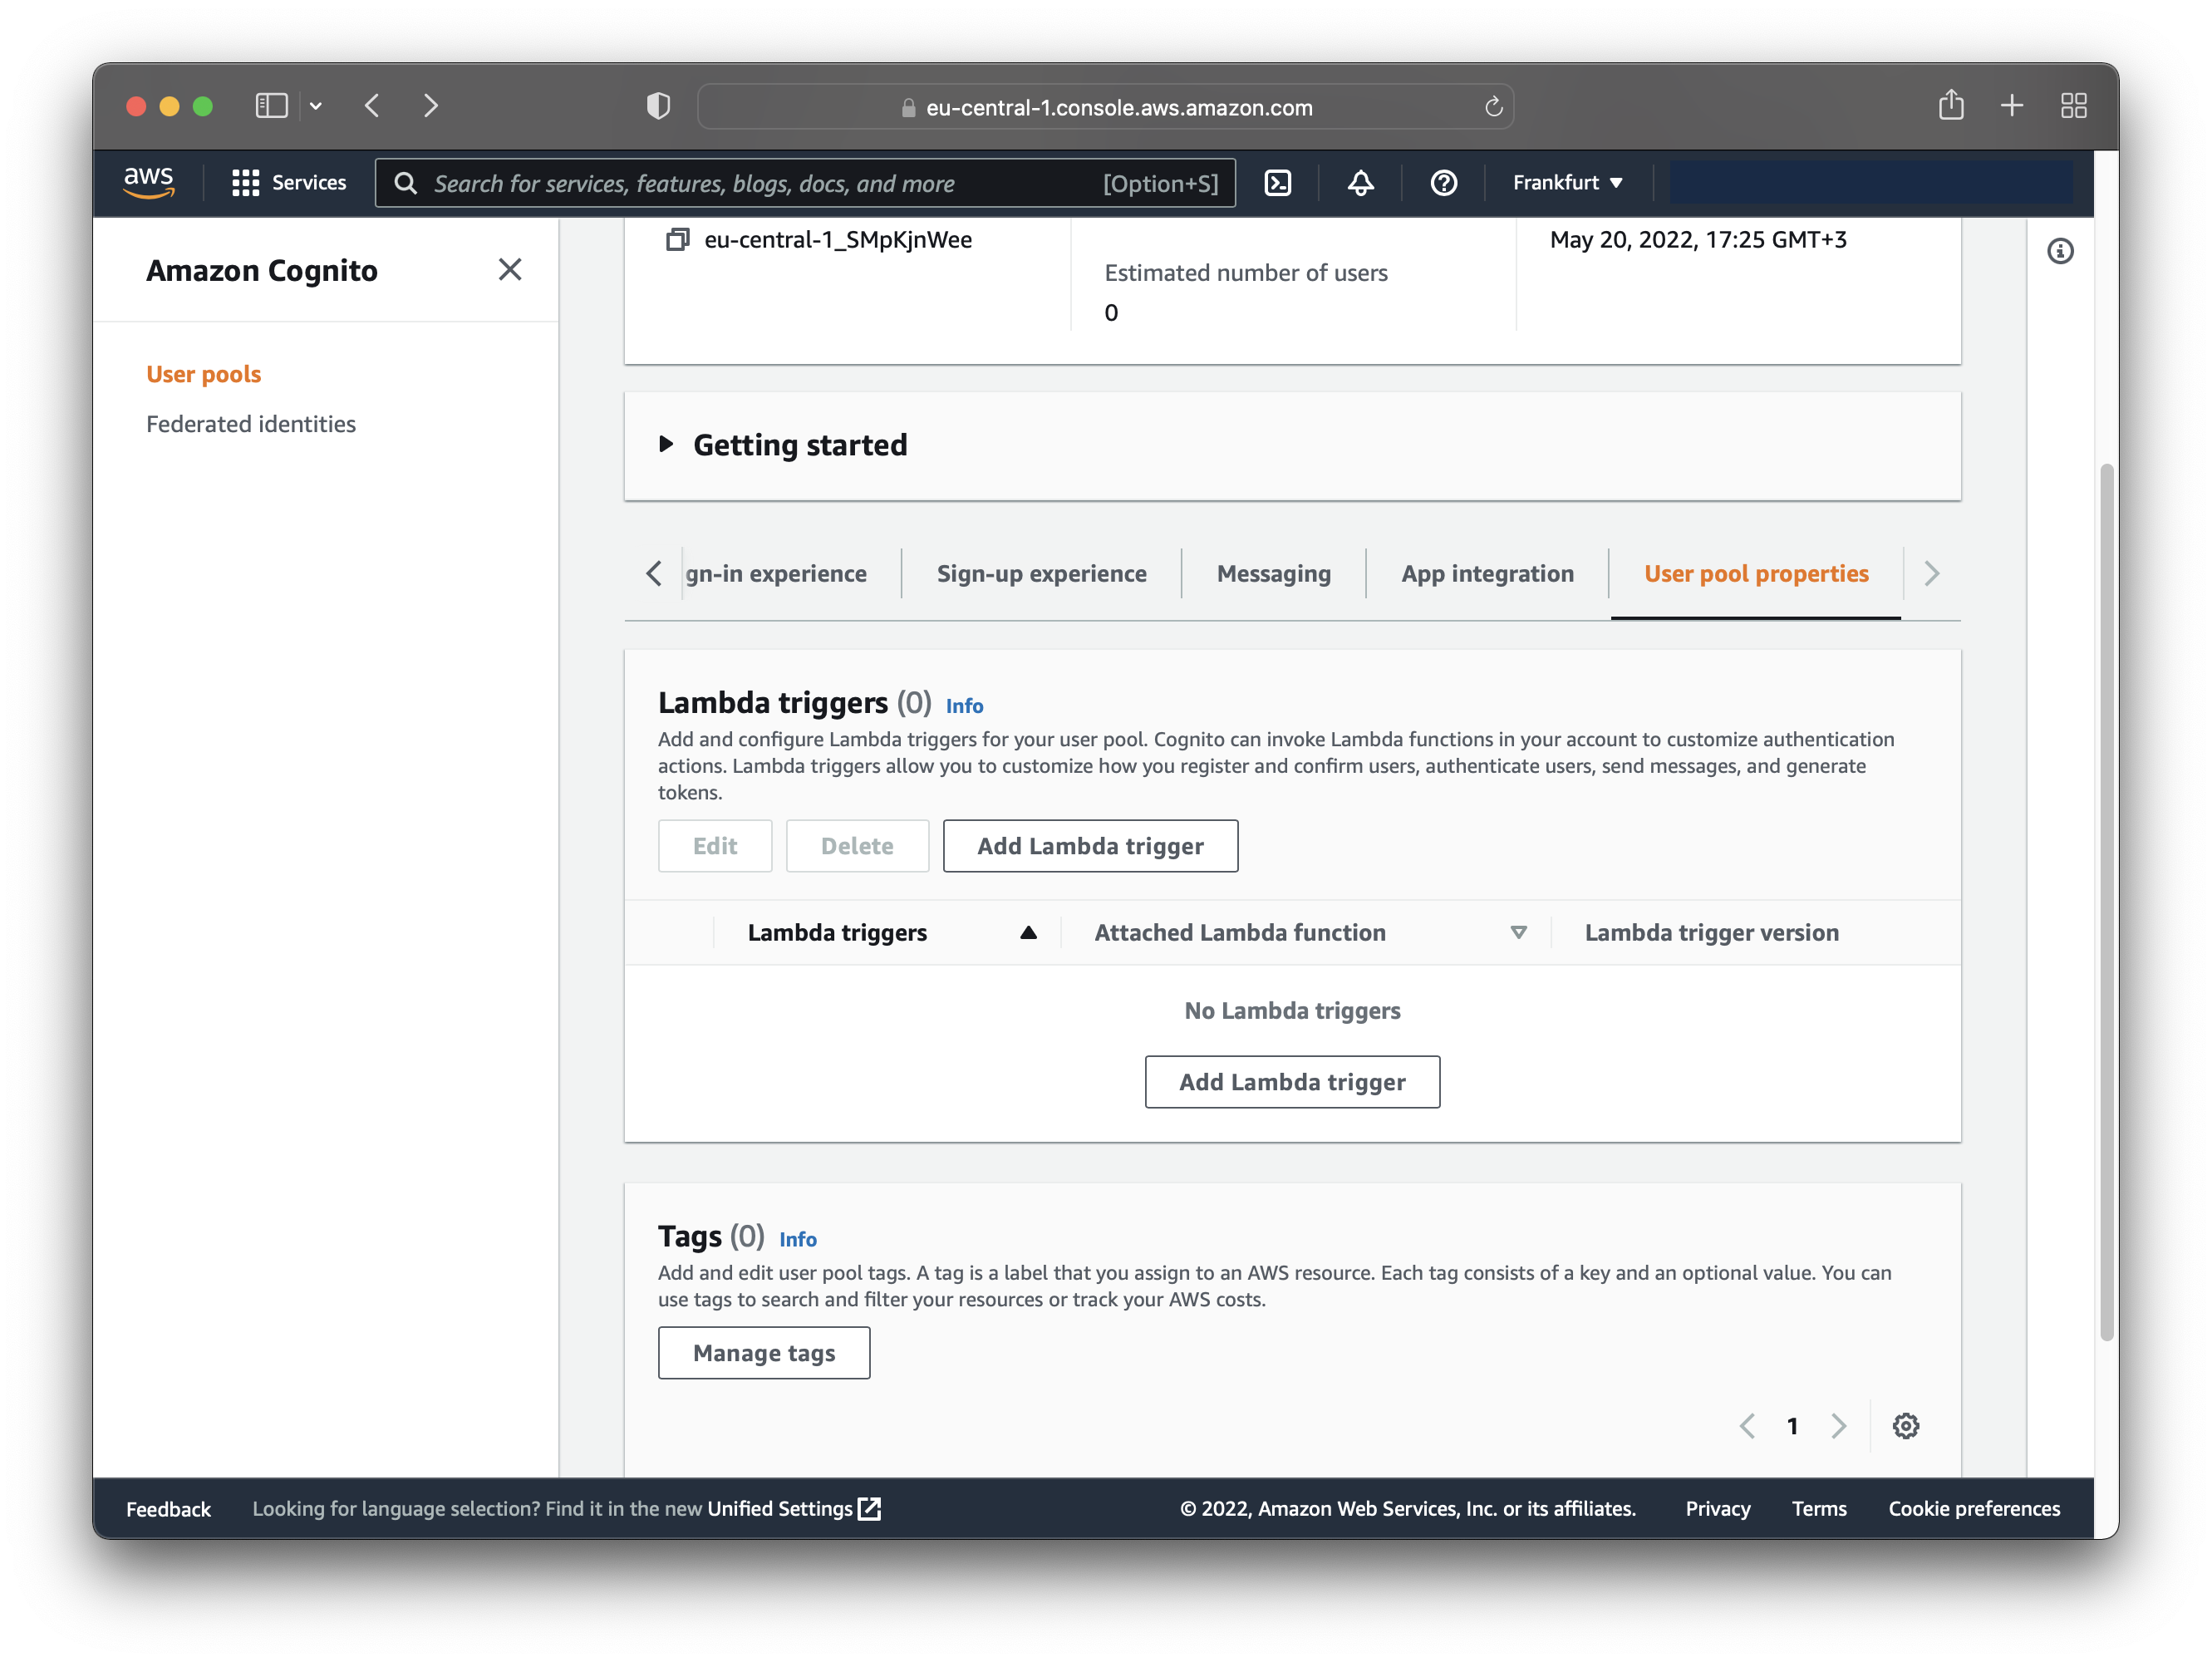
Go to the user pool created in the first step (Amazon Cognito > User pools > your-user-pool), and find the “User pool properties” tab.
Now you should see the “Lambda triggers” section. Click “Add Lambda trigger”.
That takes you to another page, where you can configure the Lambda function to respond to an authentication event. Choose the following options:
- Trigger type - Authentication
- Authentication - Pre token generation trigger
- Lambda function - Choose the lambda function created earlier
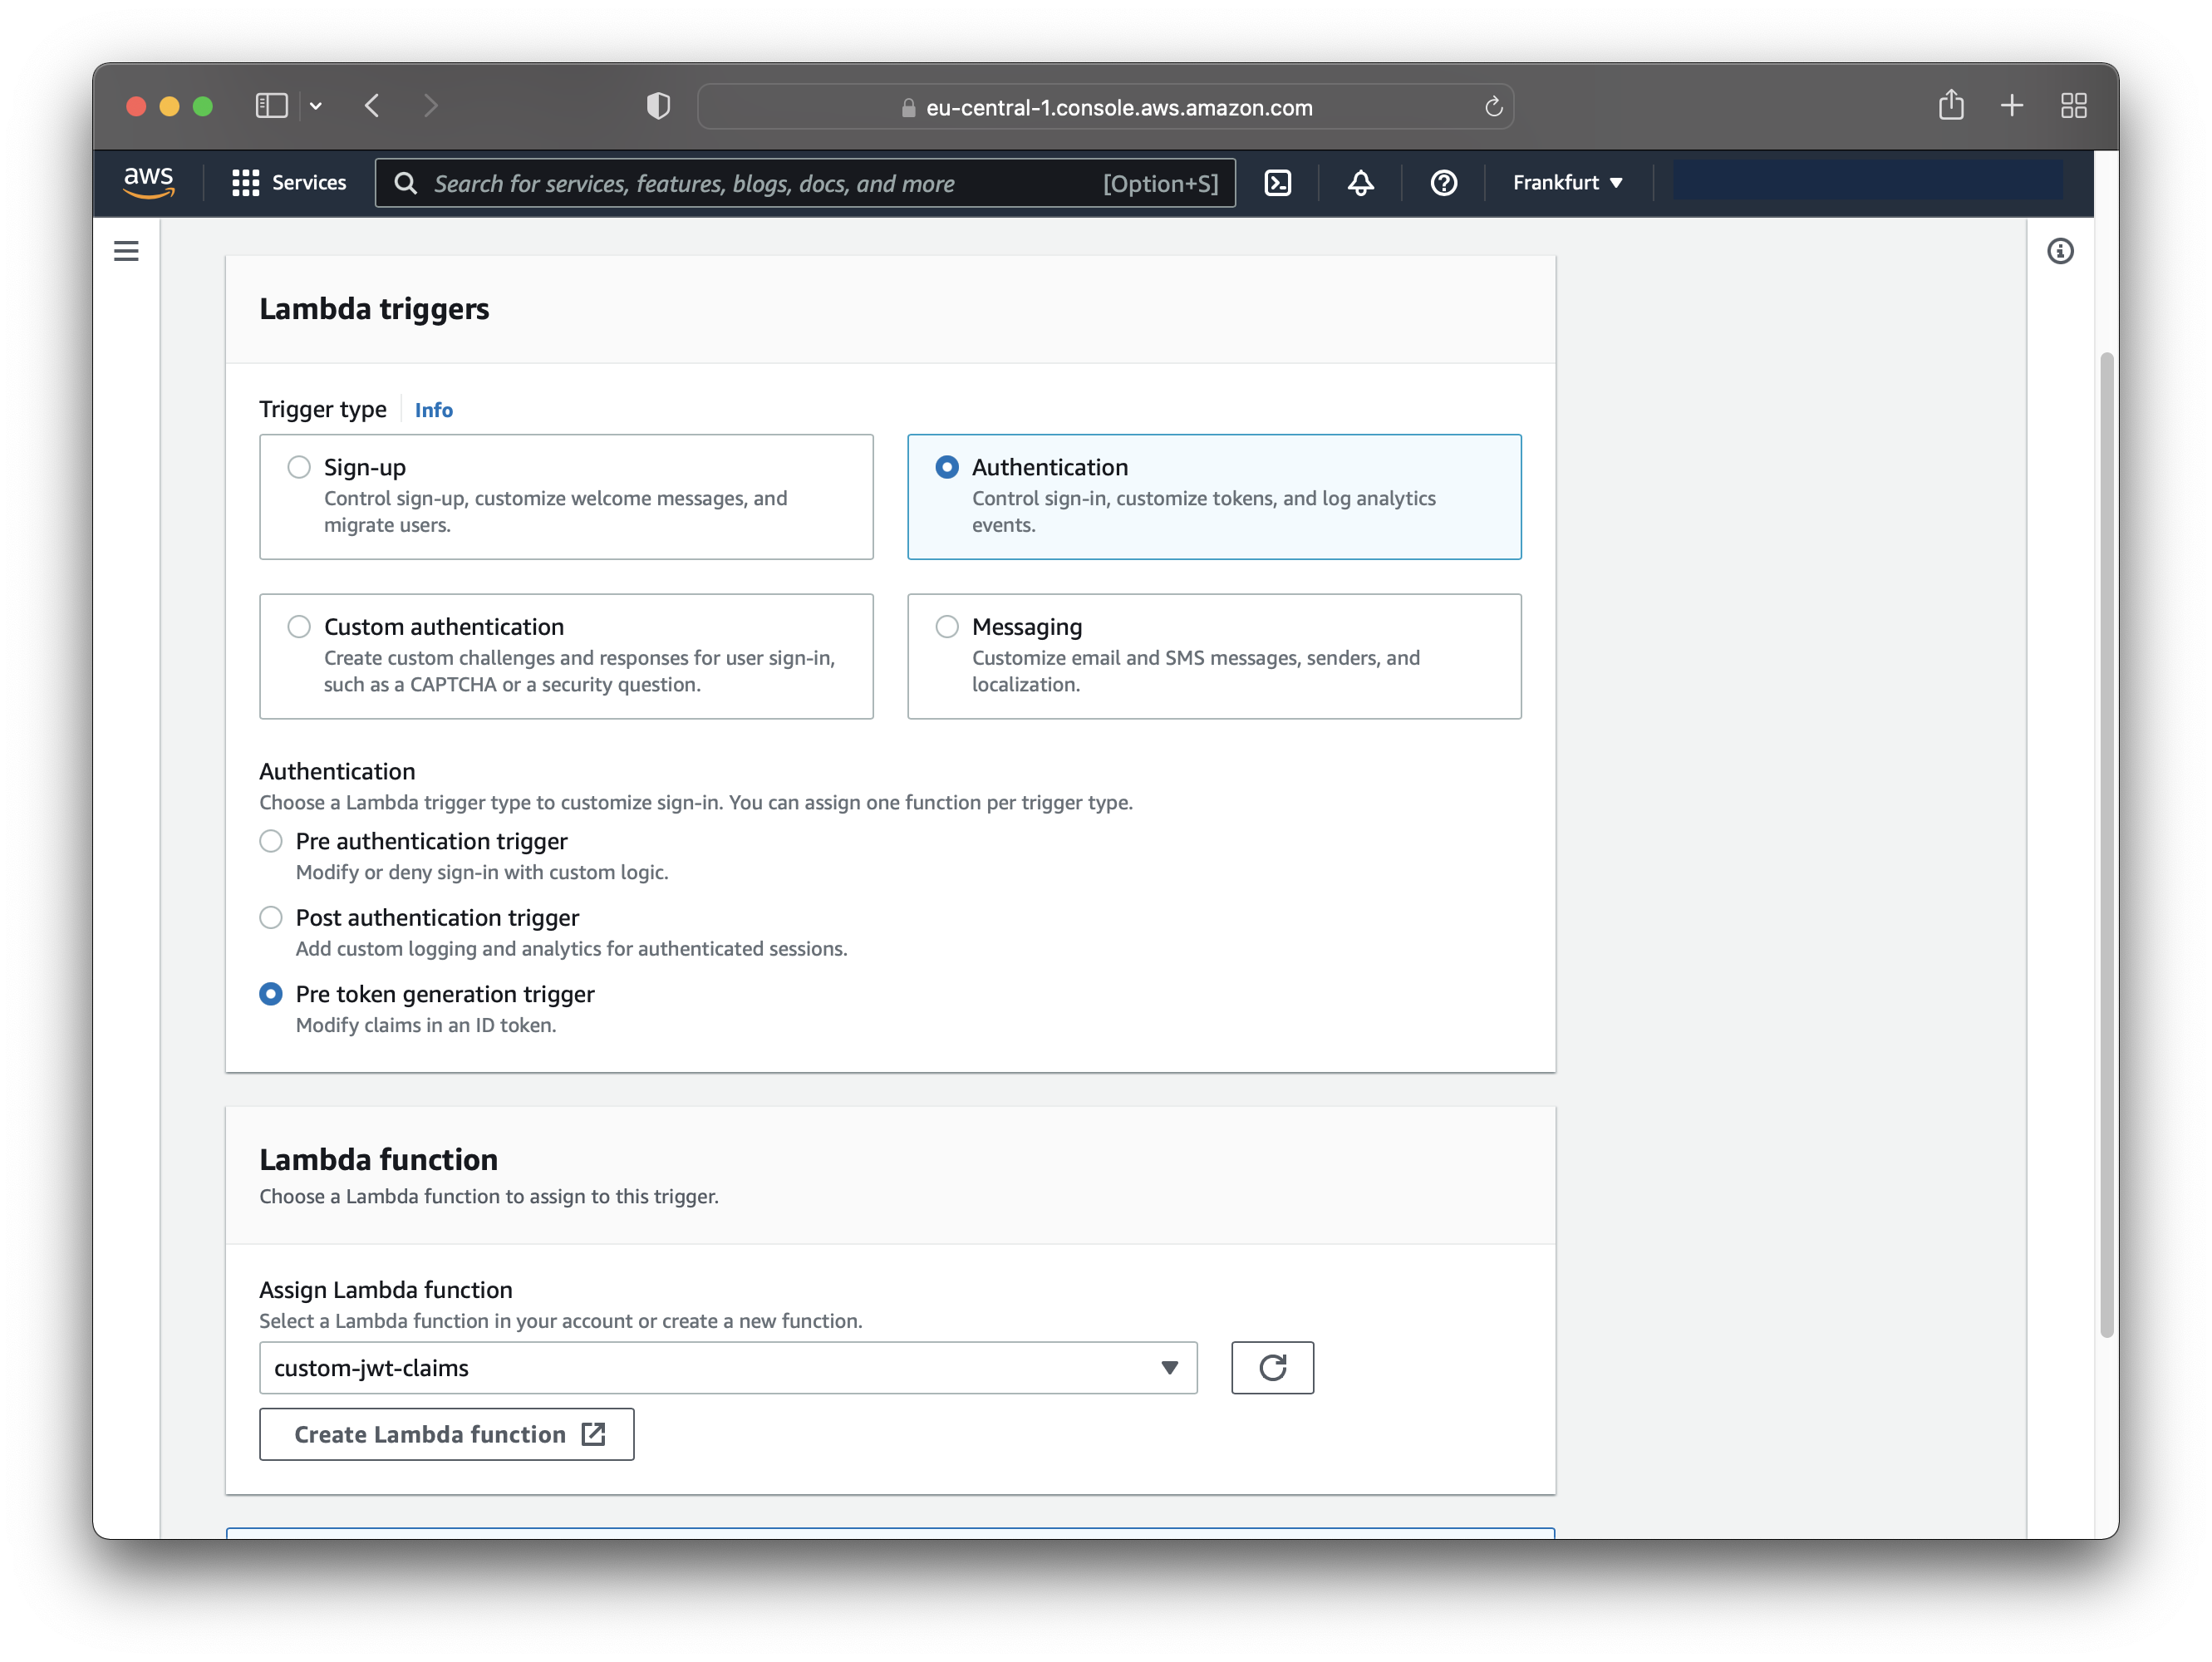
Save the Lambda trigger.
Create Hasura App
Navigate to the Hasura Cloud dashboard and create a new project.
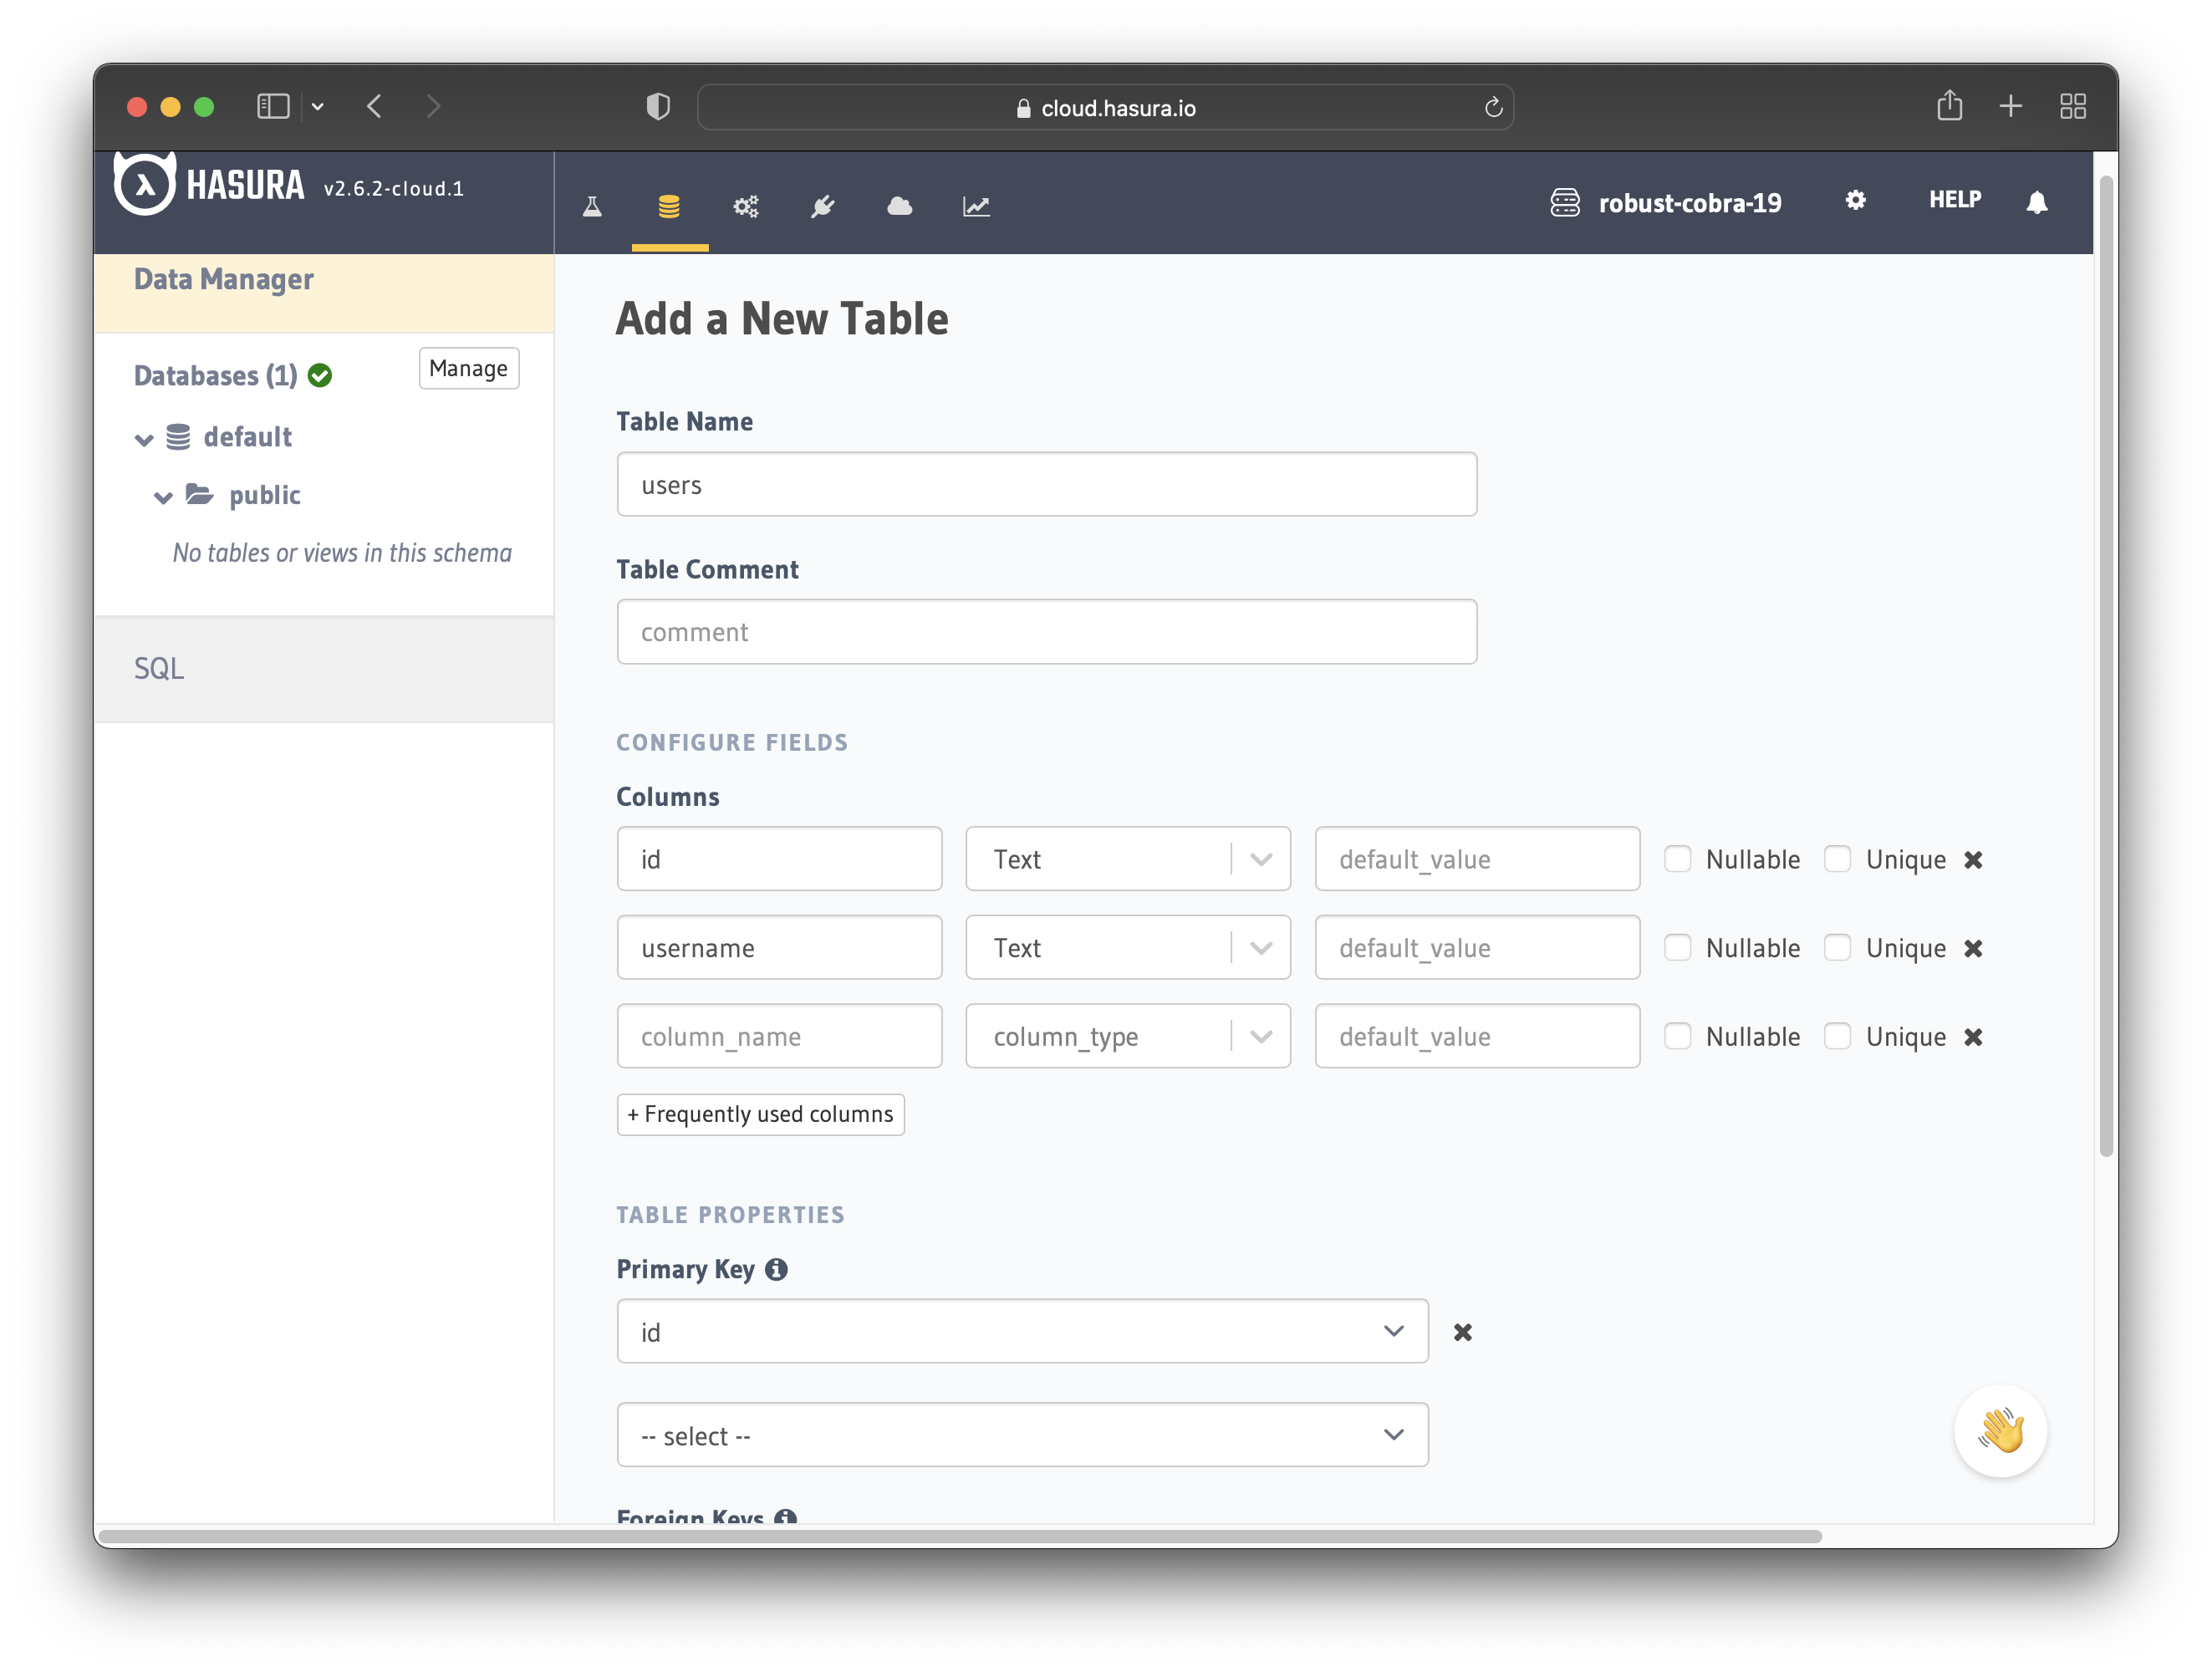
Add a database to the project and then create a users table with the following columns:
idof type Text (Primary Key)usernameof type Text
See the image below for reference.
The next step is to create a user role for the app. Users should be able to see only their records, but not the other
people’s records.
Configure the user role as shown in the image below. For more information, read about
configuring permission rules in Hasura.
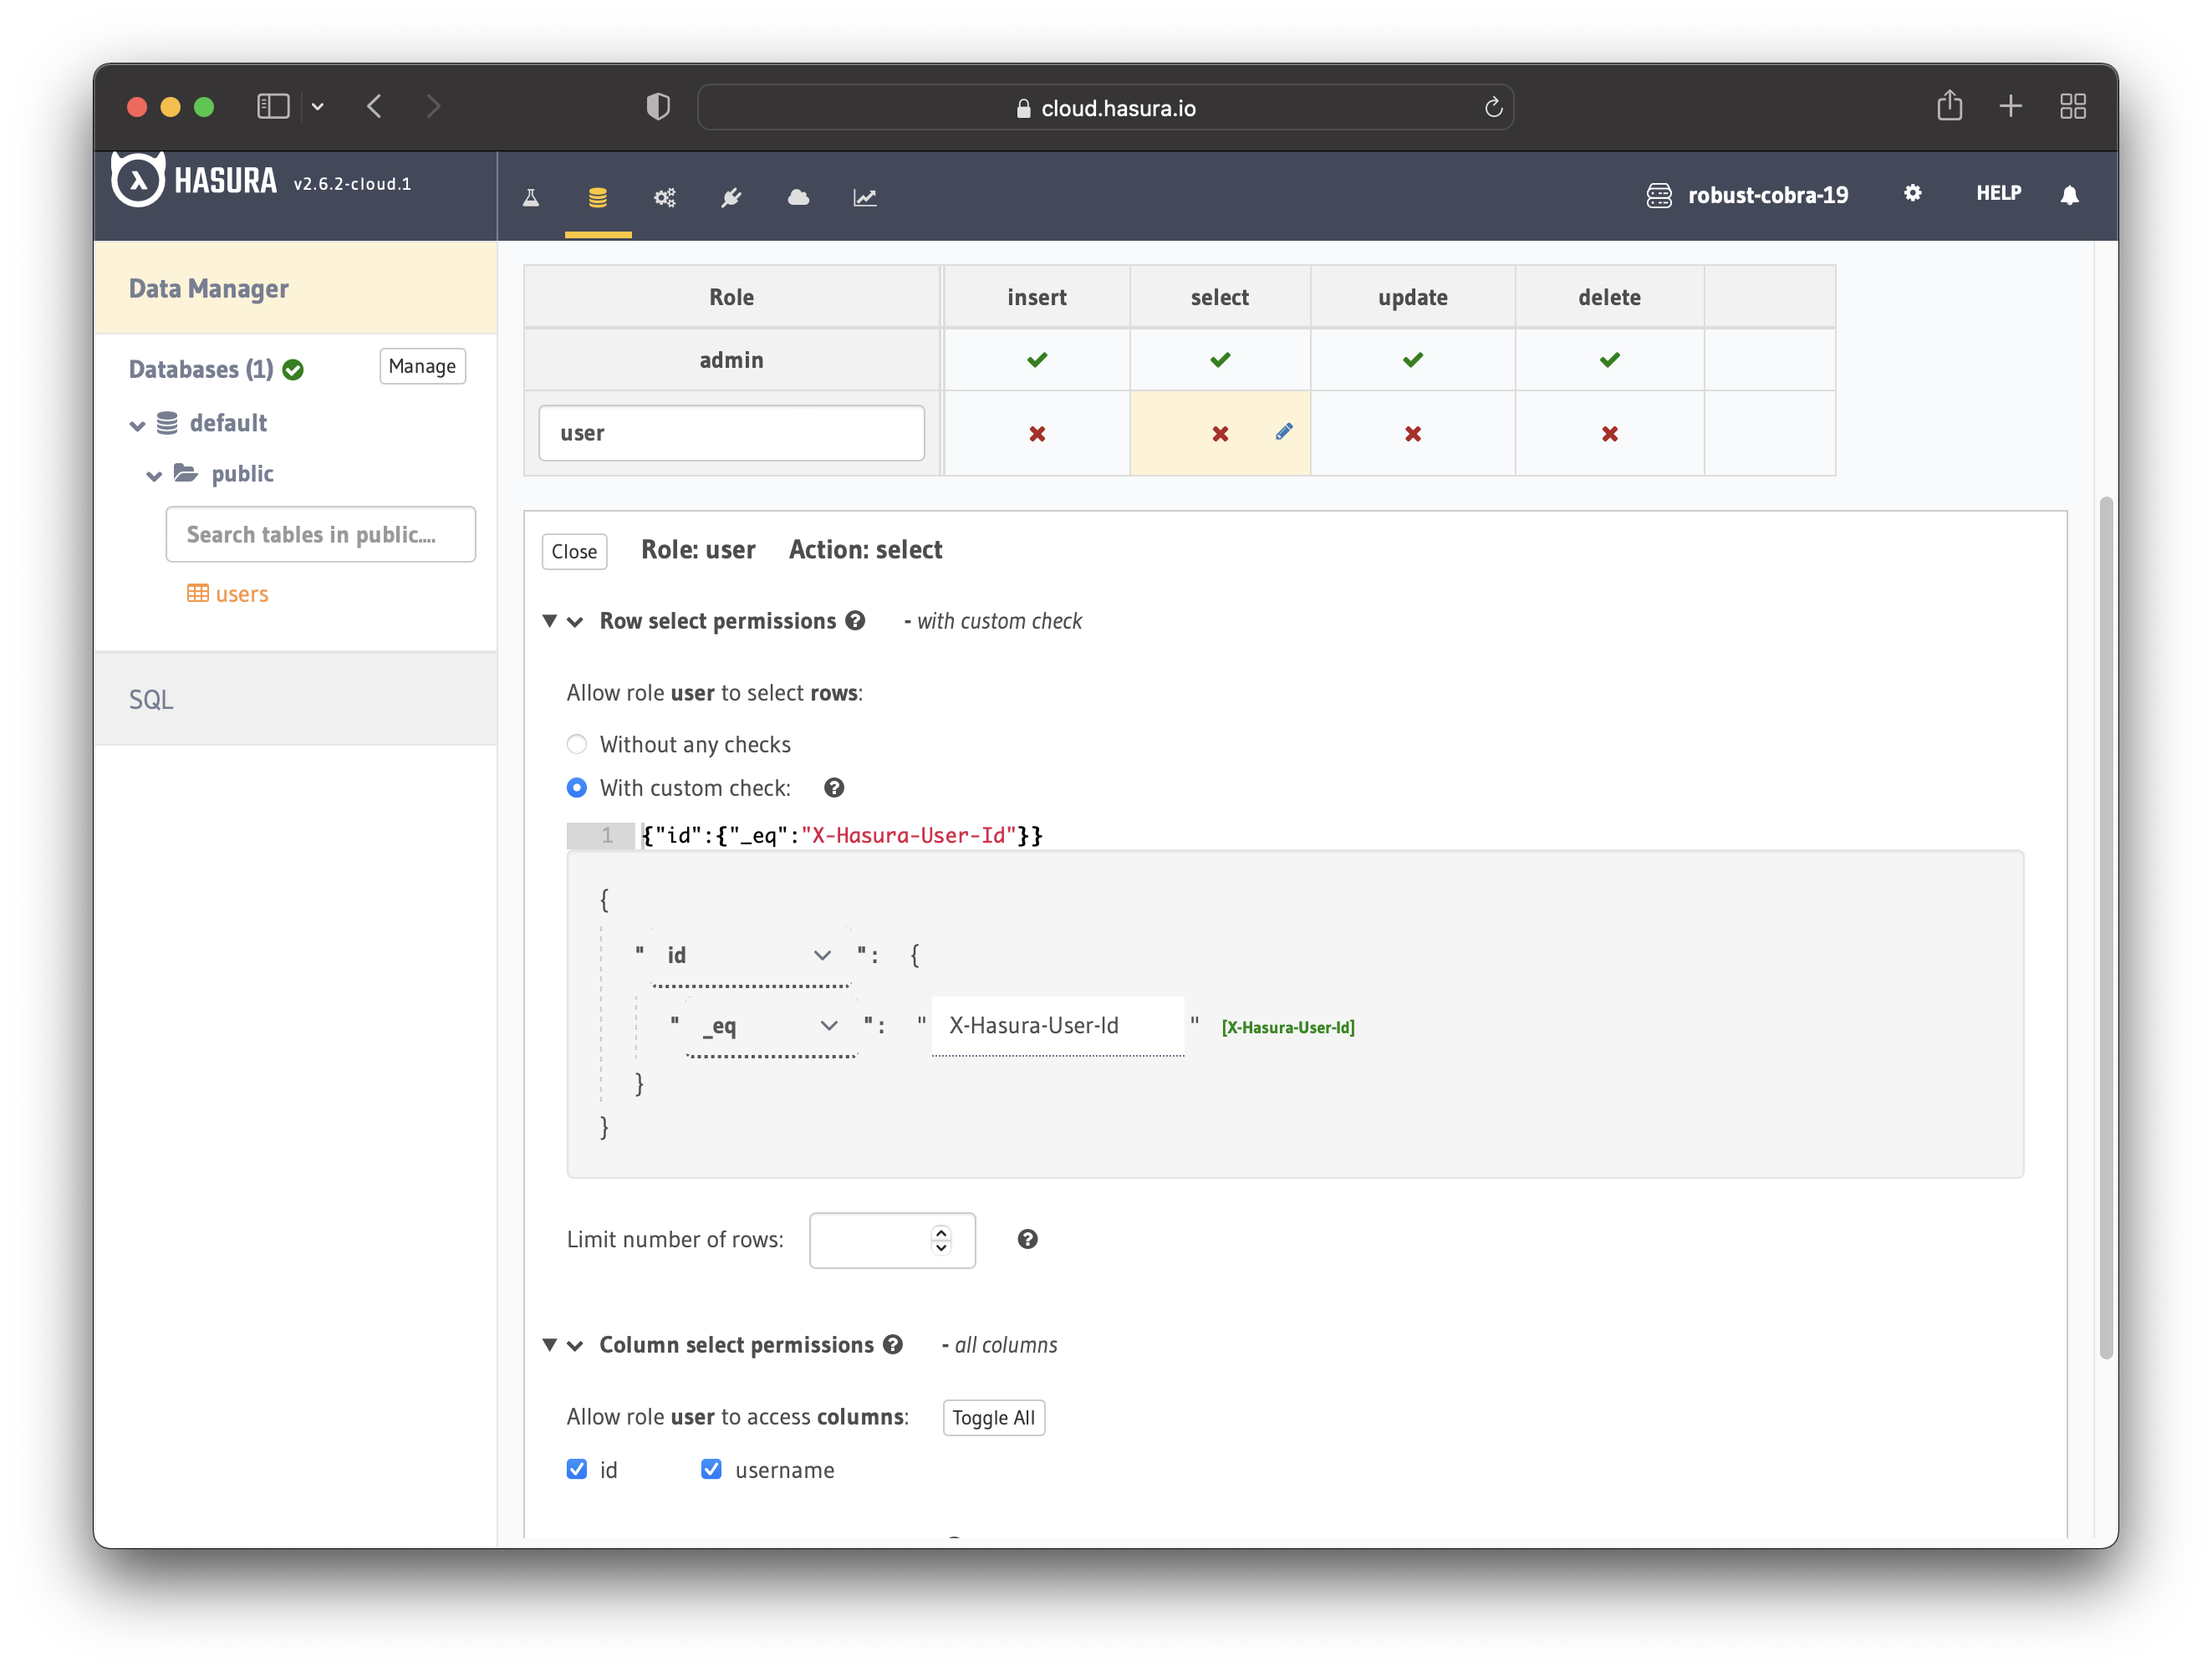
This way, users cannot read other people’s records. They can only access theirs.
Configure Hasura to Use Cognito Keys
When integrating Cognito with Hasura, you need to add the JWKS as a JWT secret. JWKS stands for JSON Web Key Set, and it represents the public keys used to verify the JWT issued by Cognito.
You can construct the JWKS URL as follows:
https://cognito-idp.<aws-region>.amazonaws.com/<user-pool-id>/.well-known/jwks.json// Example URL// https://cognito-idp.eu-north-1.amazonaws.com/eu-north-1_APcJswRty/.well-known/jwks.json
Now navigate to your Hasura project’s settings and go to the “Env vars” page. Then click "+ New Env Var".
Select HASURA_GRAPHQL_JWT_SECRET for the “Key” and then add the JWK URL:
{"type":"RS256","jwk_url": "https://cognito-idp.<aws-region>.amazonaws.com/<user-pool-id>/.well-known/jwks.json","claims_format": "stringified_json"}
See the image for reference.
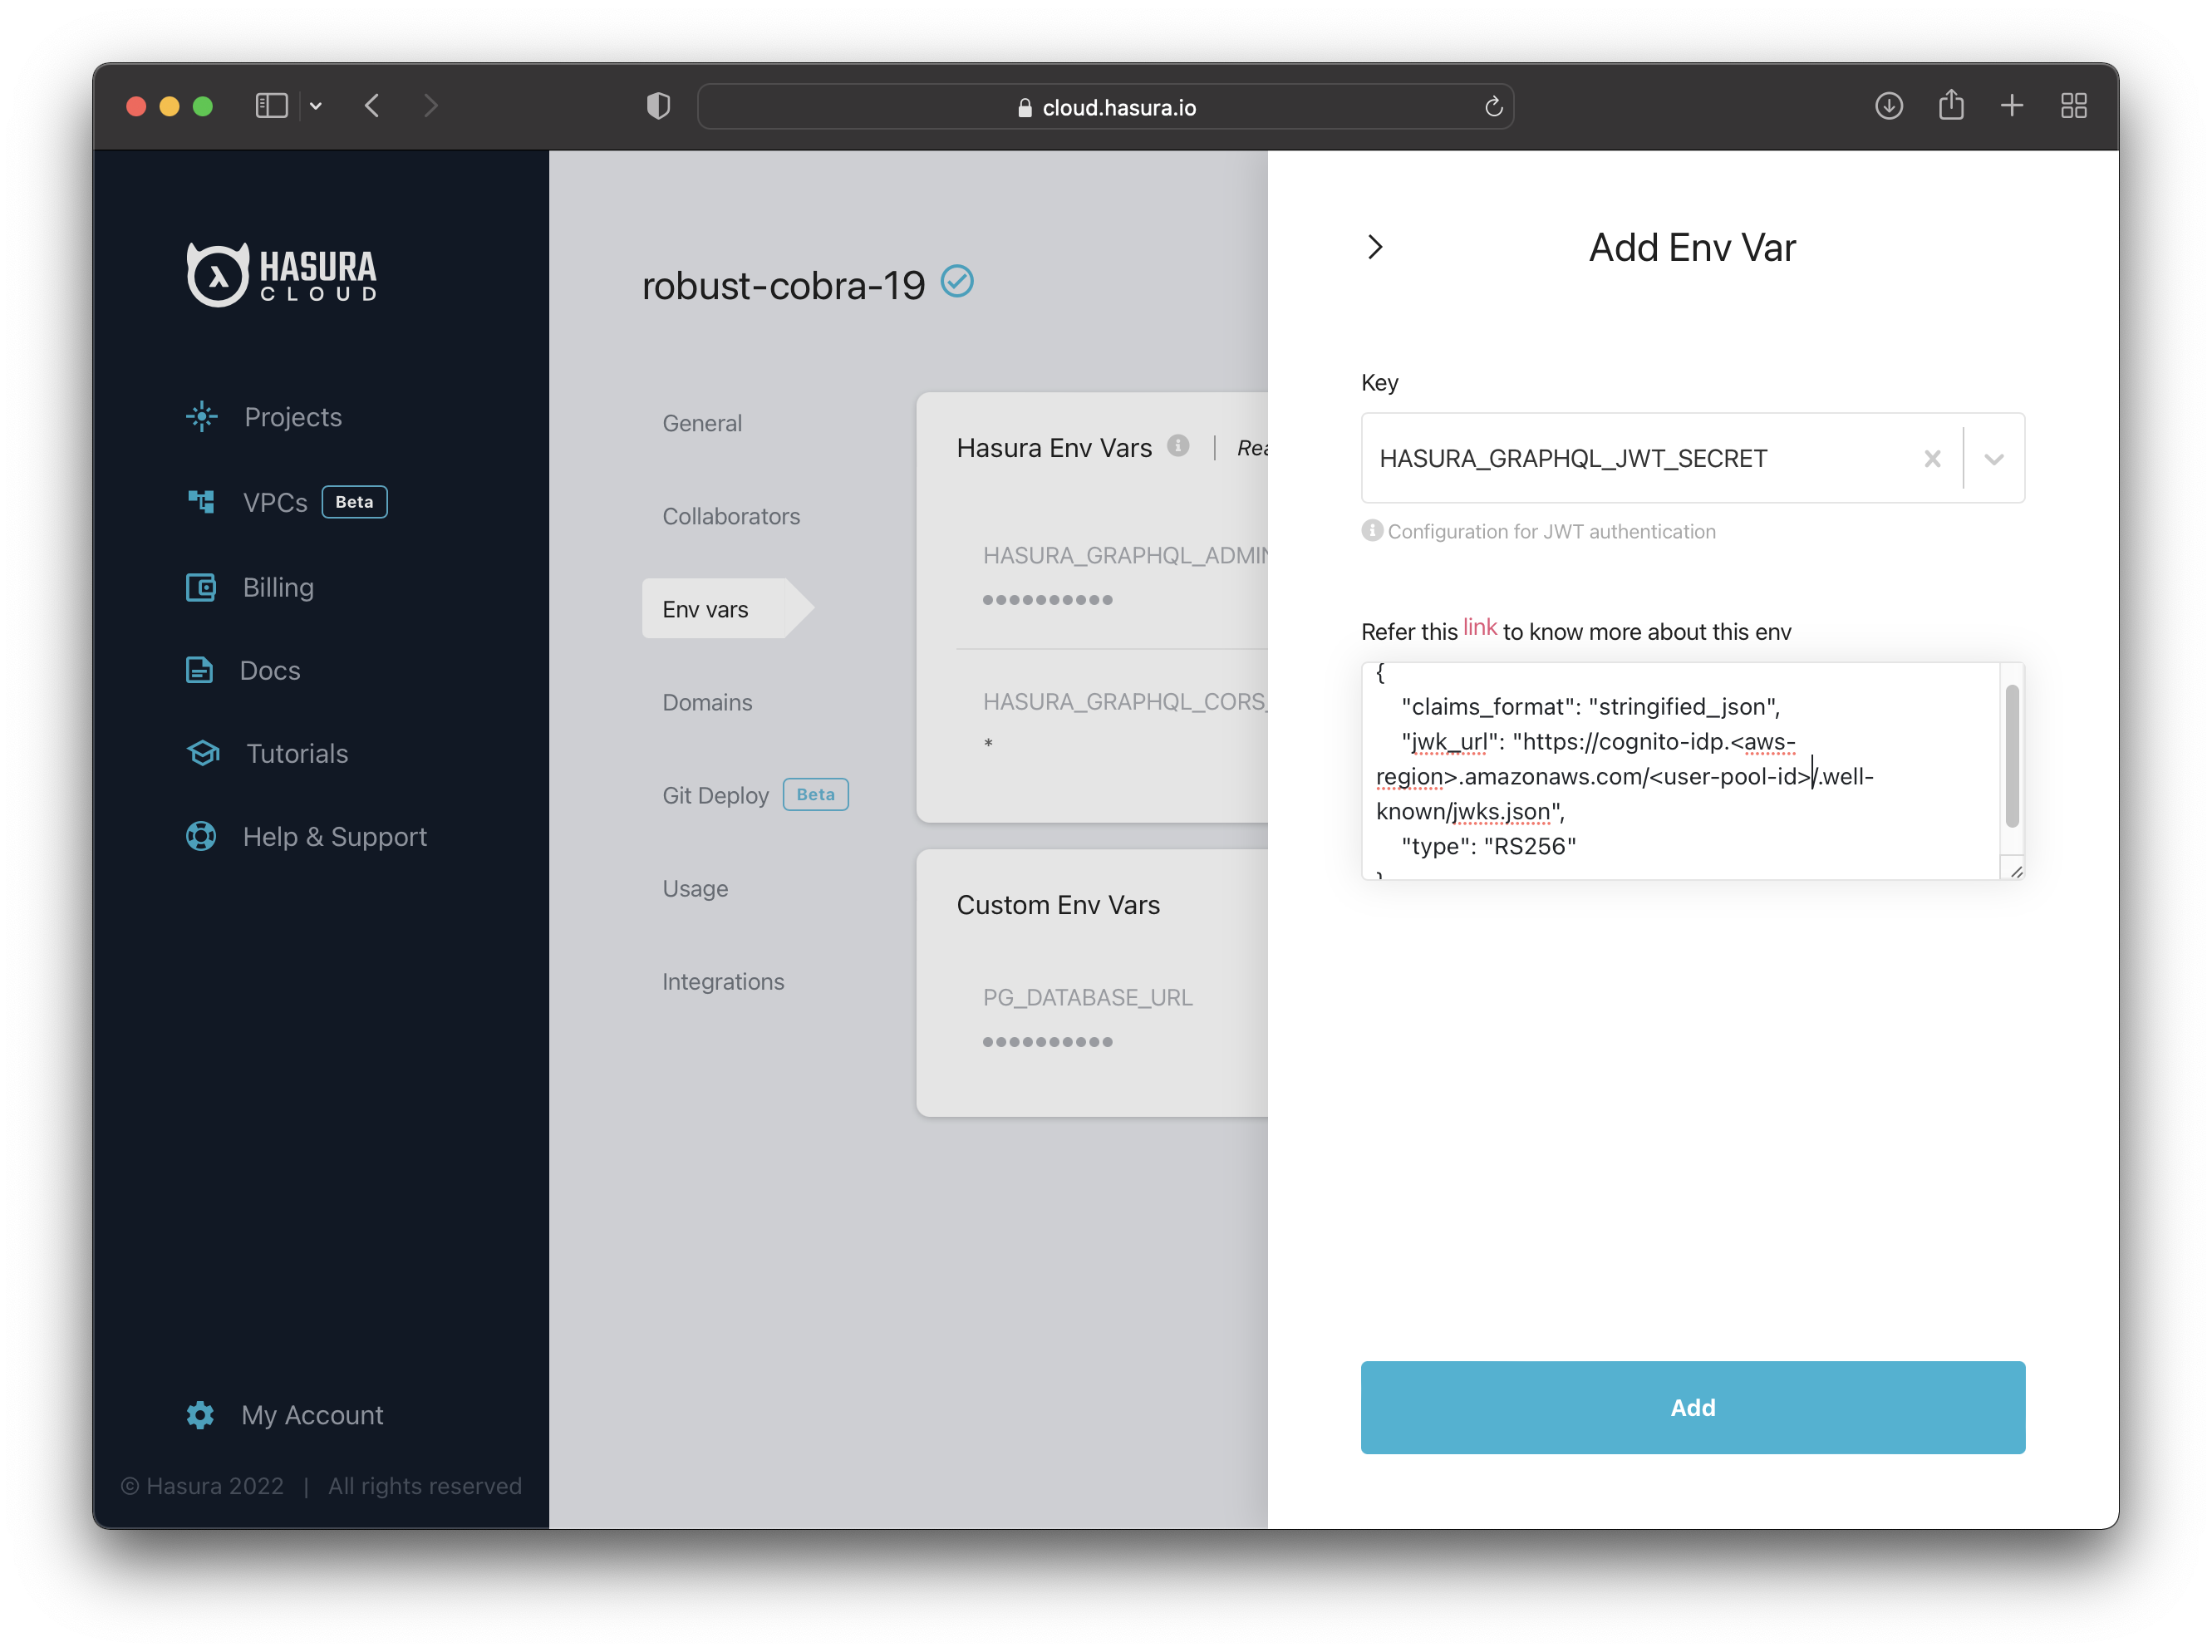
Click Add to add the environment variable to your project.
Sync Users Between Hasura and Cognito
There should be a sync between Cognito and Hasura, so the users from Cognito are present in your Hasura database as well. You can keep the two in sync with another Lambda function.
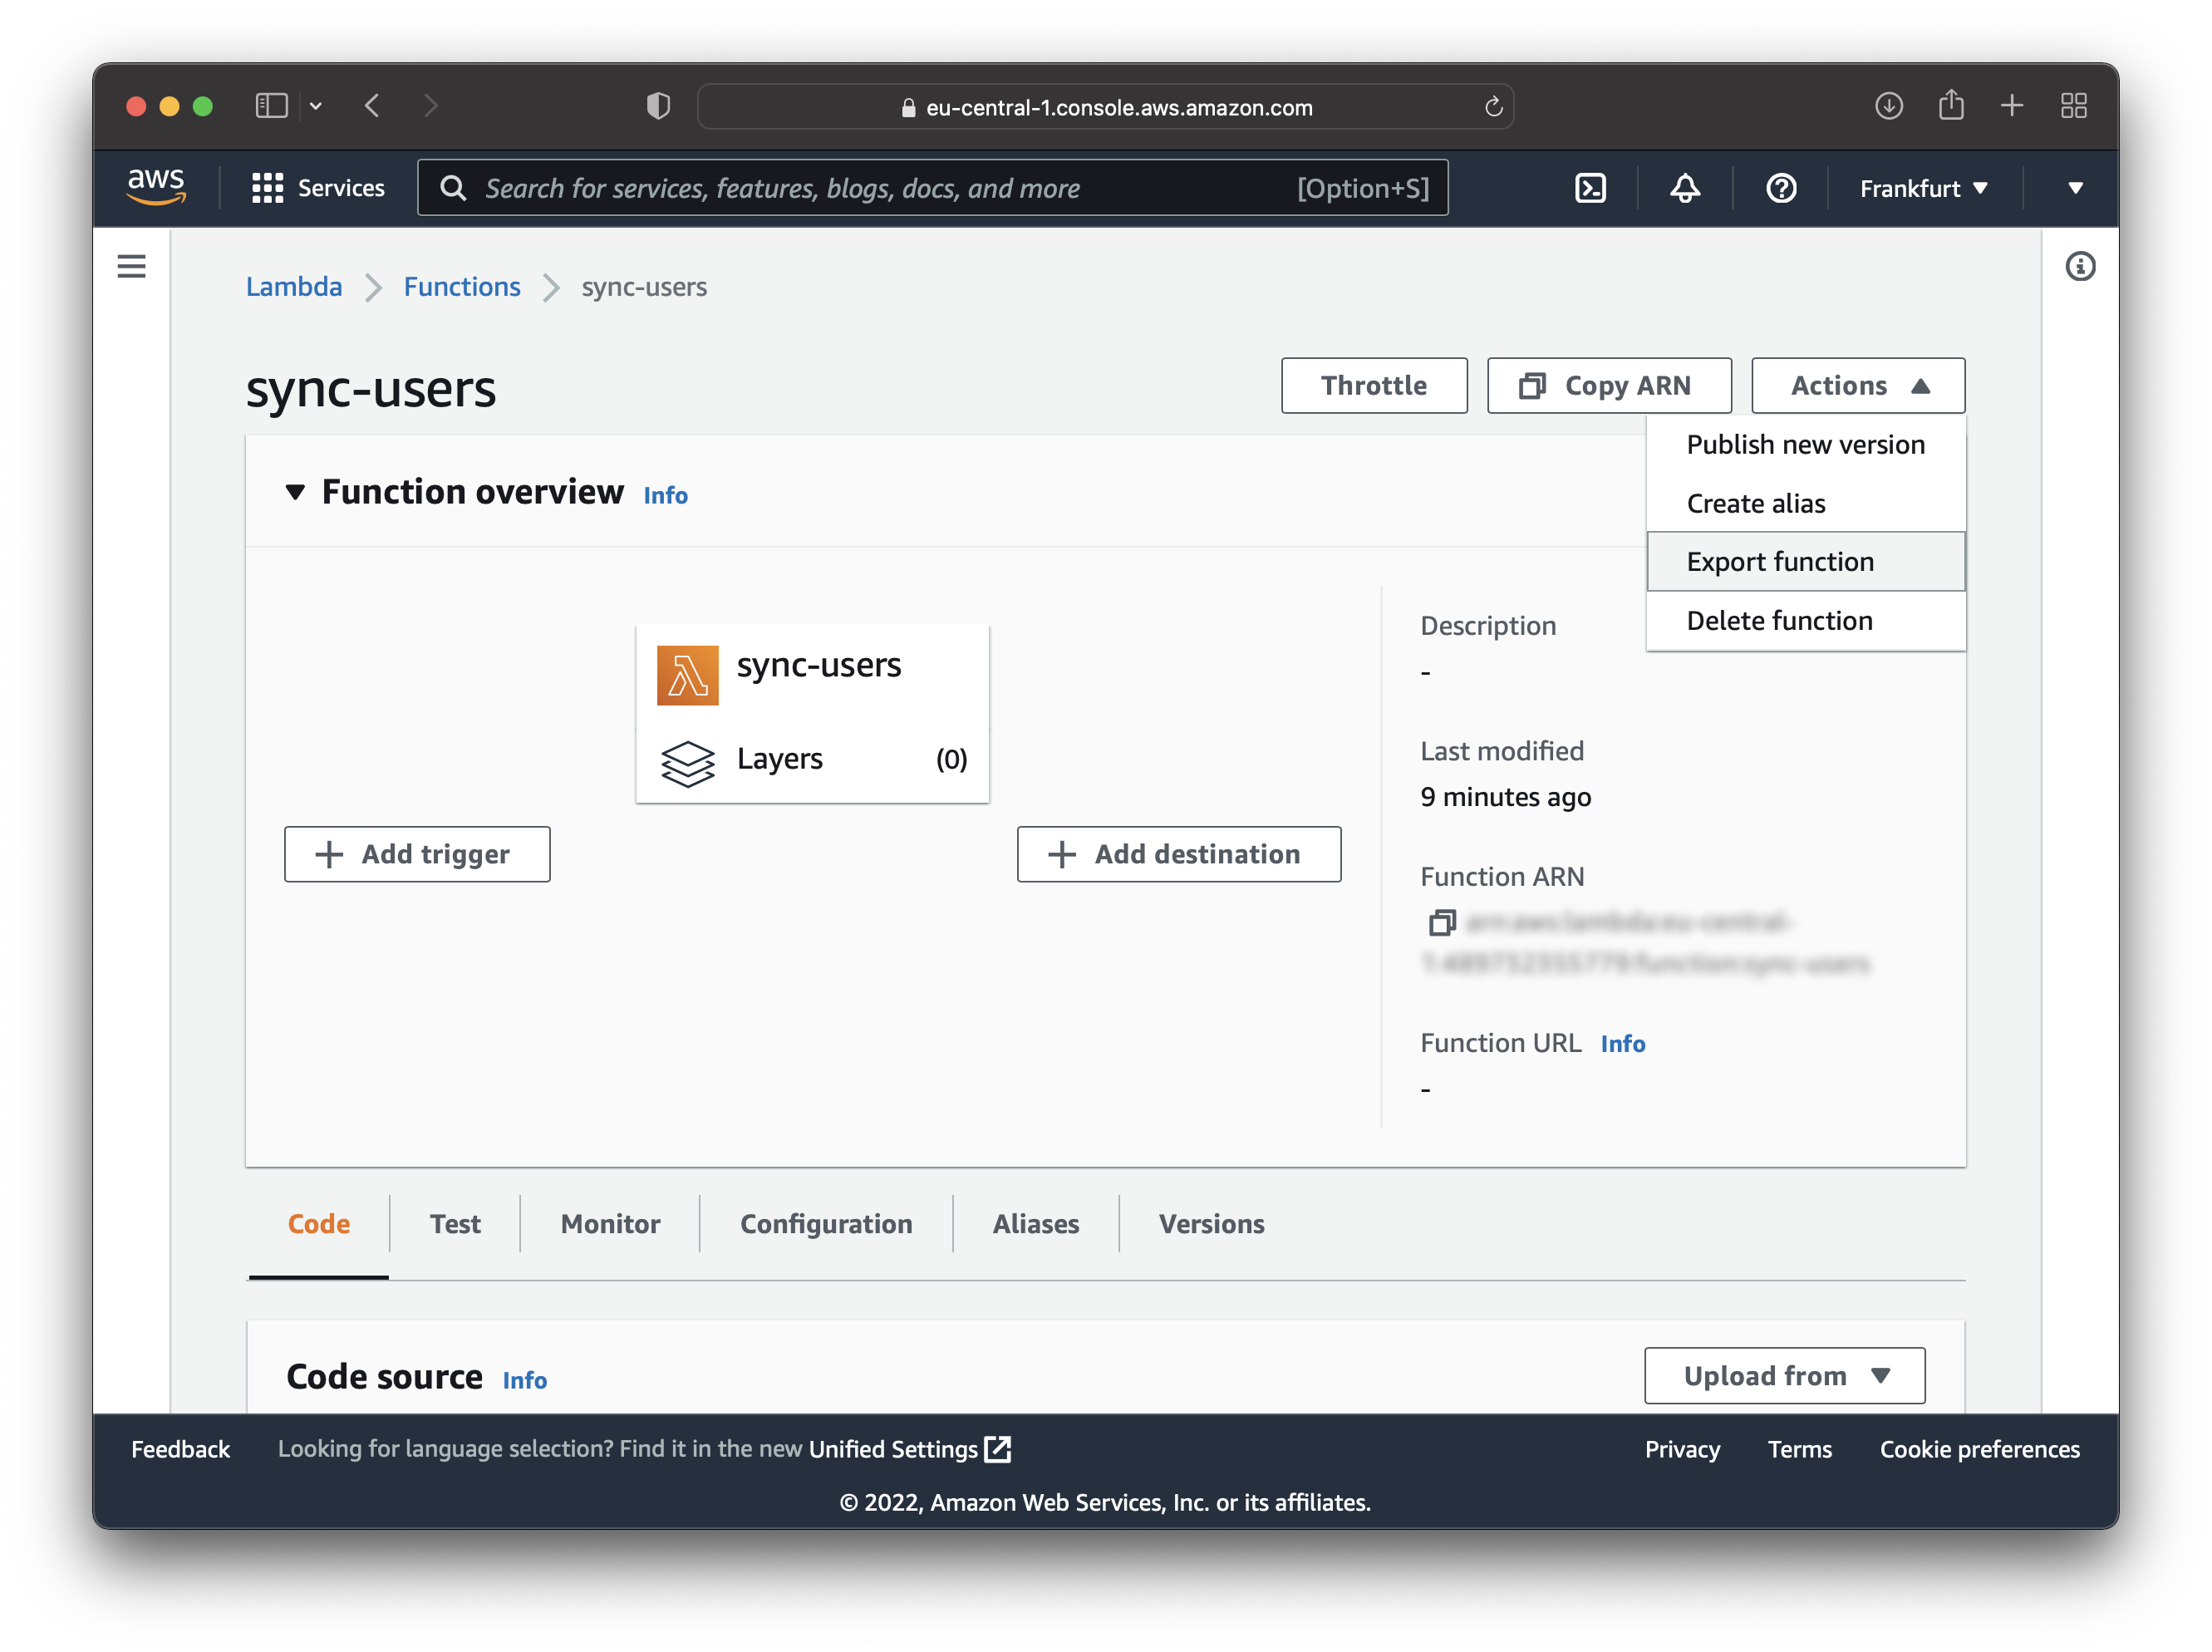
Create a new Lambda function and name it “sync-users”. After that, export the function to your machine. Click on “Actions” and choose “Export function” from the dropdown menu.
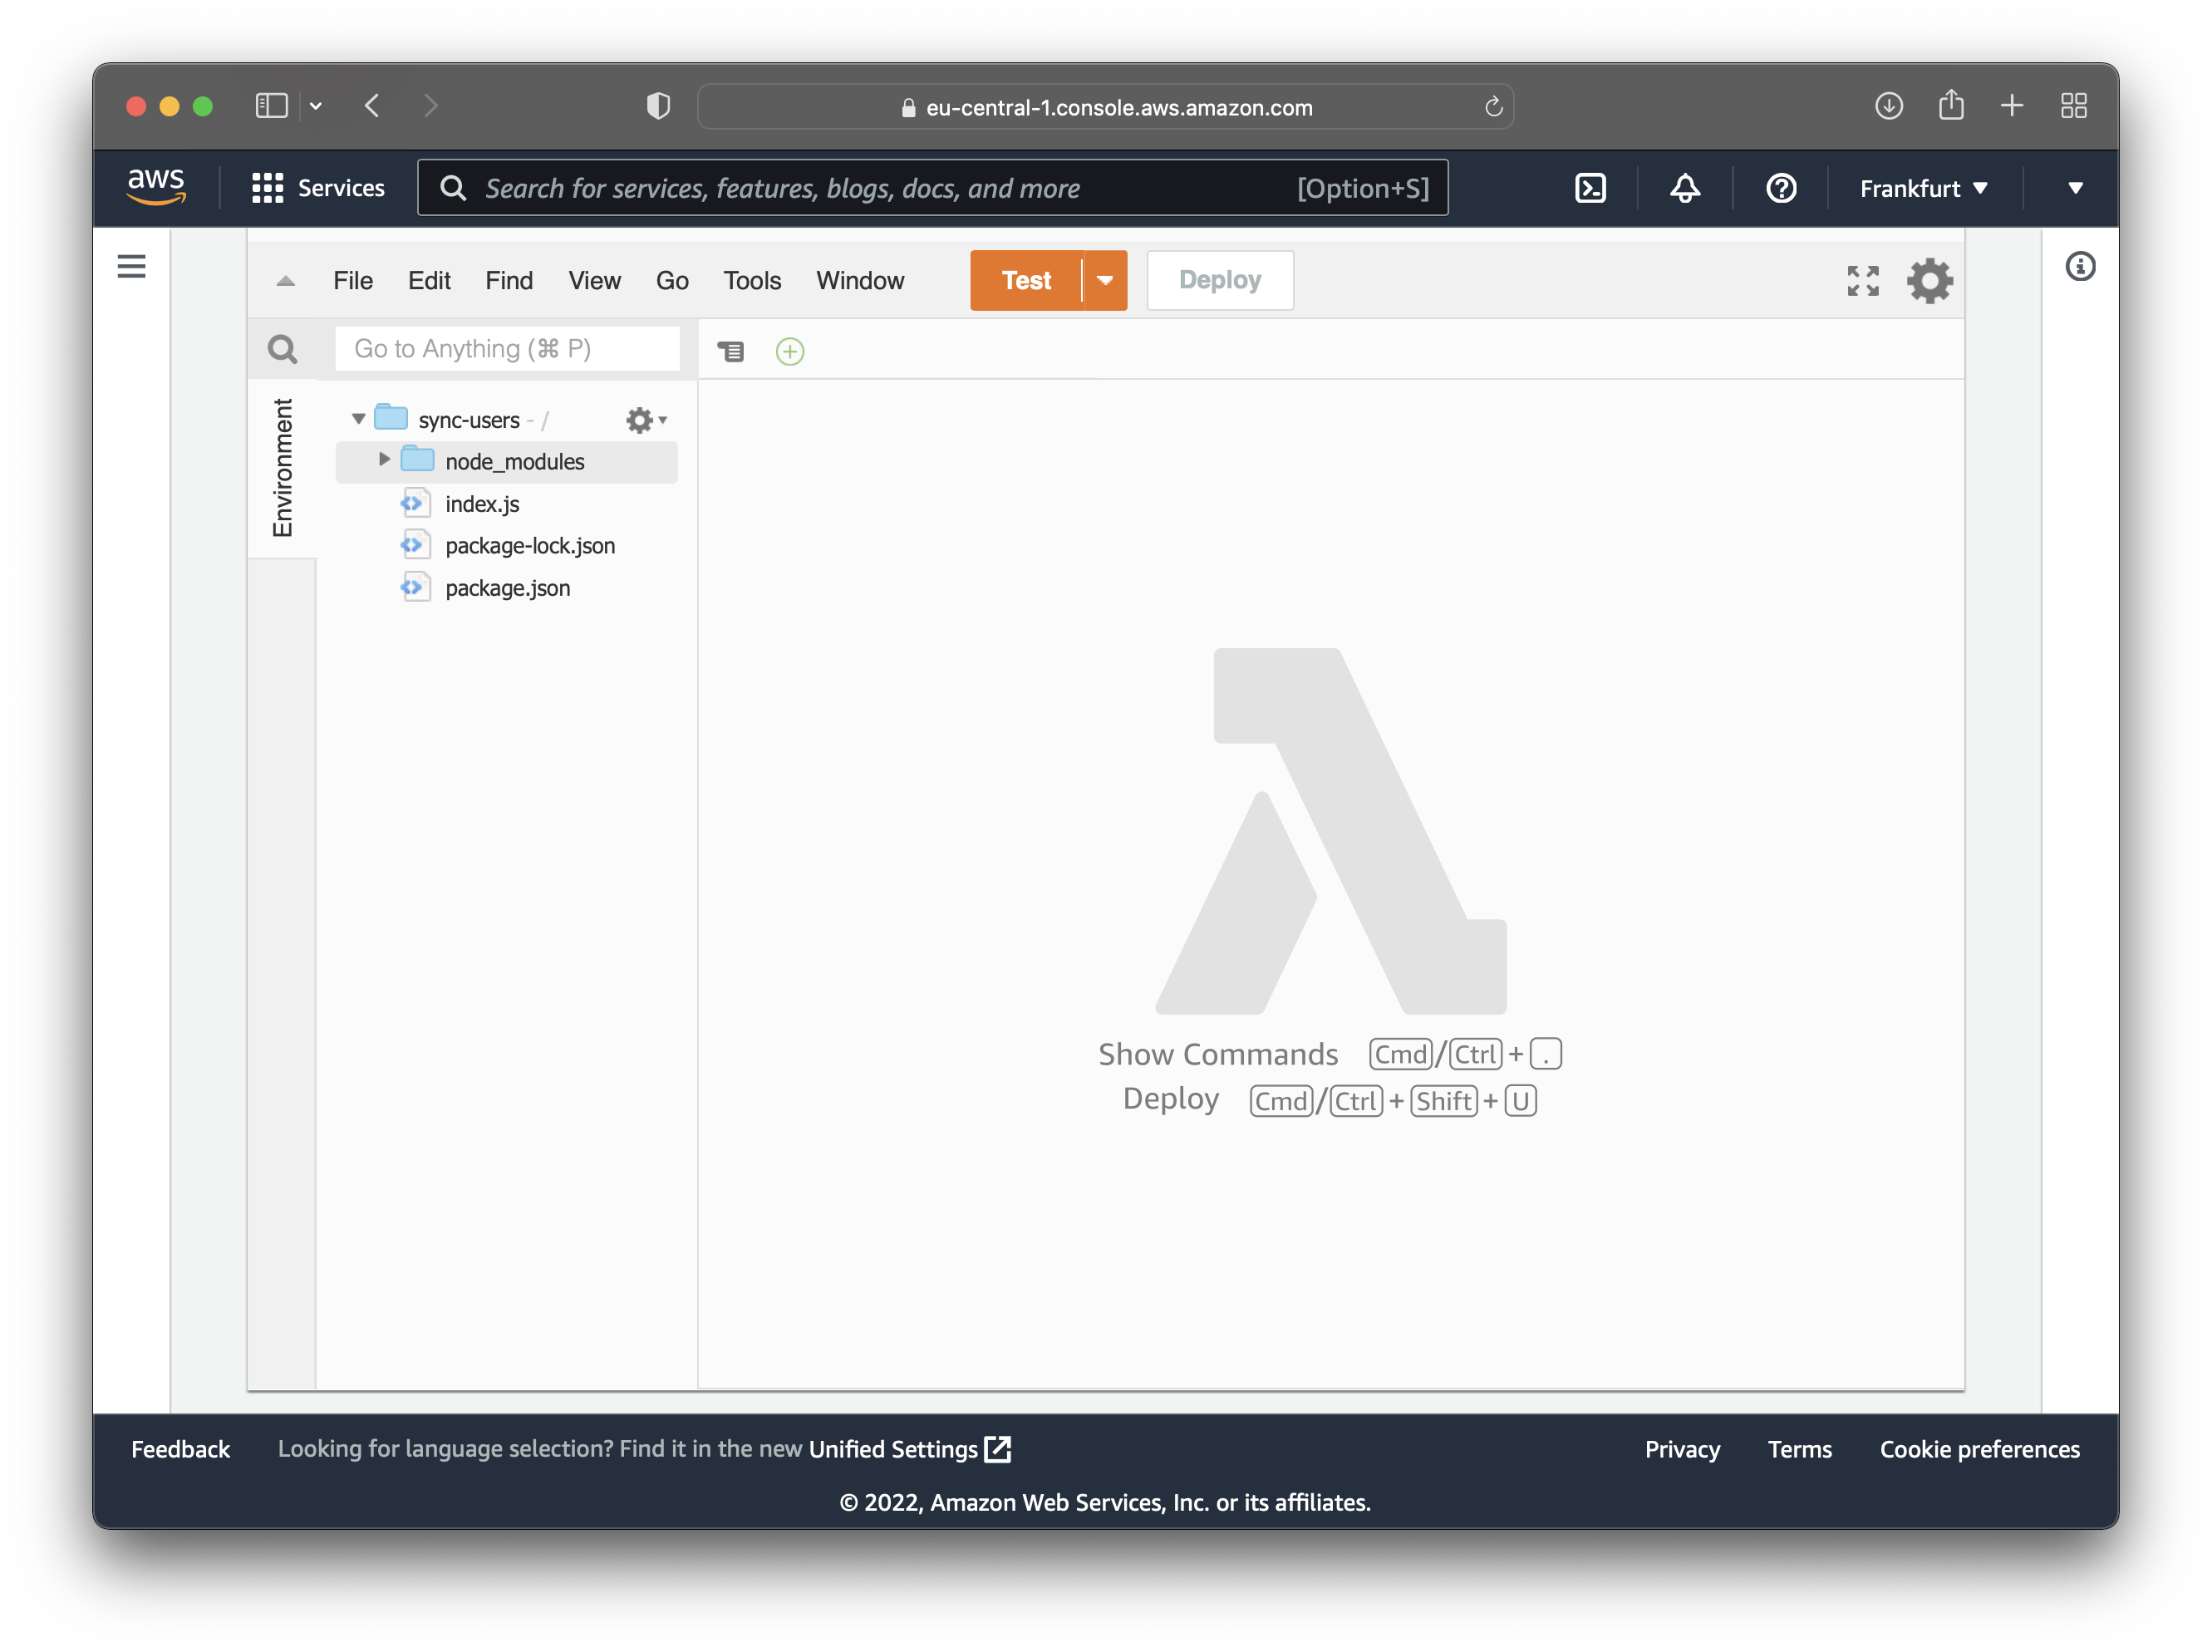
Create a new folder called “sync-users” and move the function file there. Open the index.js file and add the following
code:
const request = require("request");exports.handler = (event, context, callback) => {const userId = event.request.userAttributes.sub;const userName = event.userName;const hasuraAdminSecret = "<your-admin-secret>";const url = "https://<your-hasura-app-url>/v1/graphql";const upsertUserQuery = `mutation($userId: String!, $userName: String!){insert_users(objects: [{ id: $userId, username: $userName }], on_conflict: { constraint: users_pkey, update_columns: [] }) {affected_rows}}`const graphqlReq = { "query": upsertUserQuery, "variables": { "userId": userId, "userName": userName } }request.post({headers: {'content-type' : 'application/json', 'x-hasura-admin-secret': hasuraAdminSecret},url: url,body: JSON.stringify(graphqlReq)}, function(error, response, body){console.log(body);callback(null, event, context);});}
Save the file and then open the terminal. In the terminal, run the following commands:
npm init -ynpm i request
After the commands finish, you should have the following files:
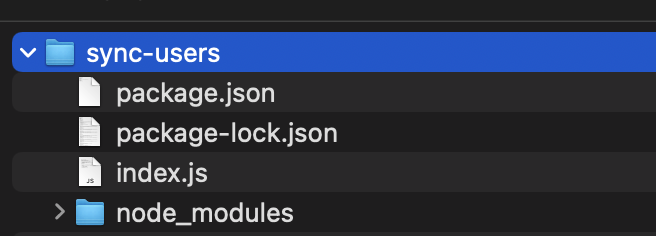
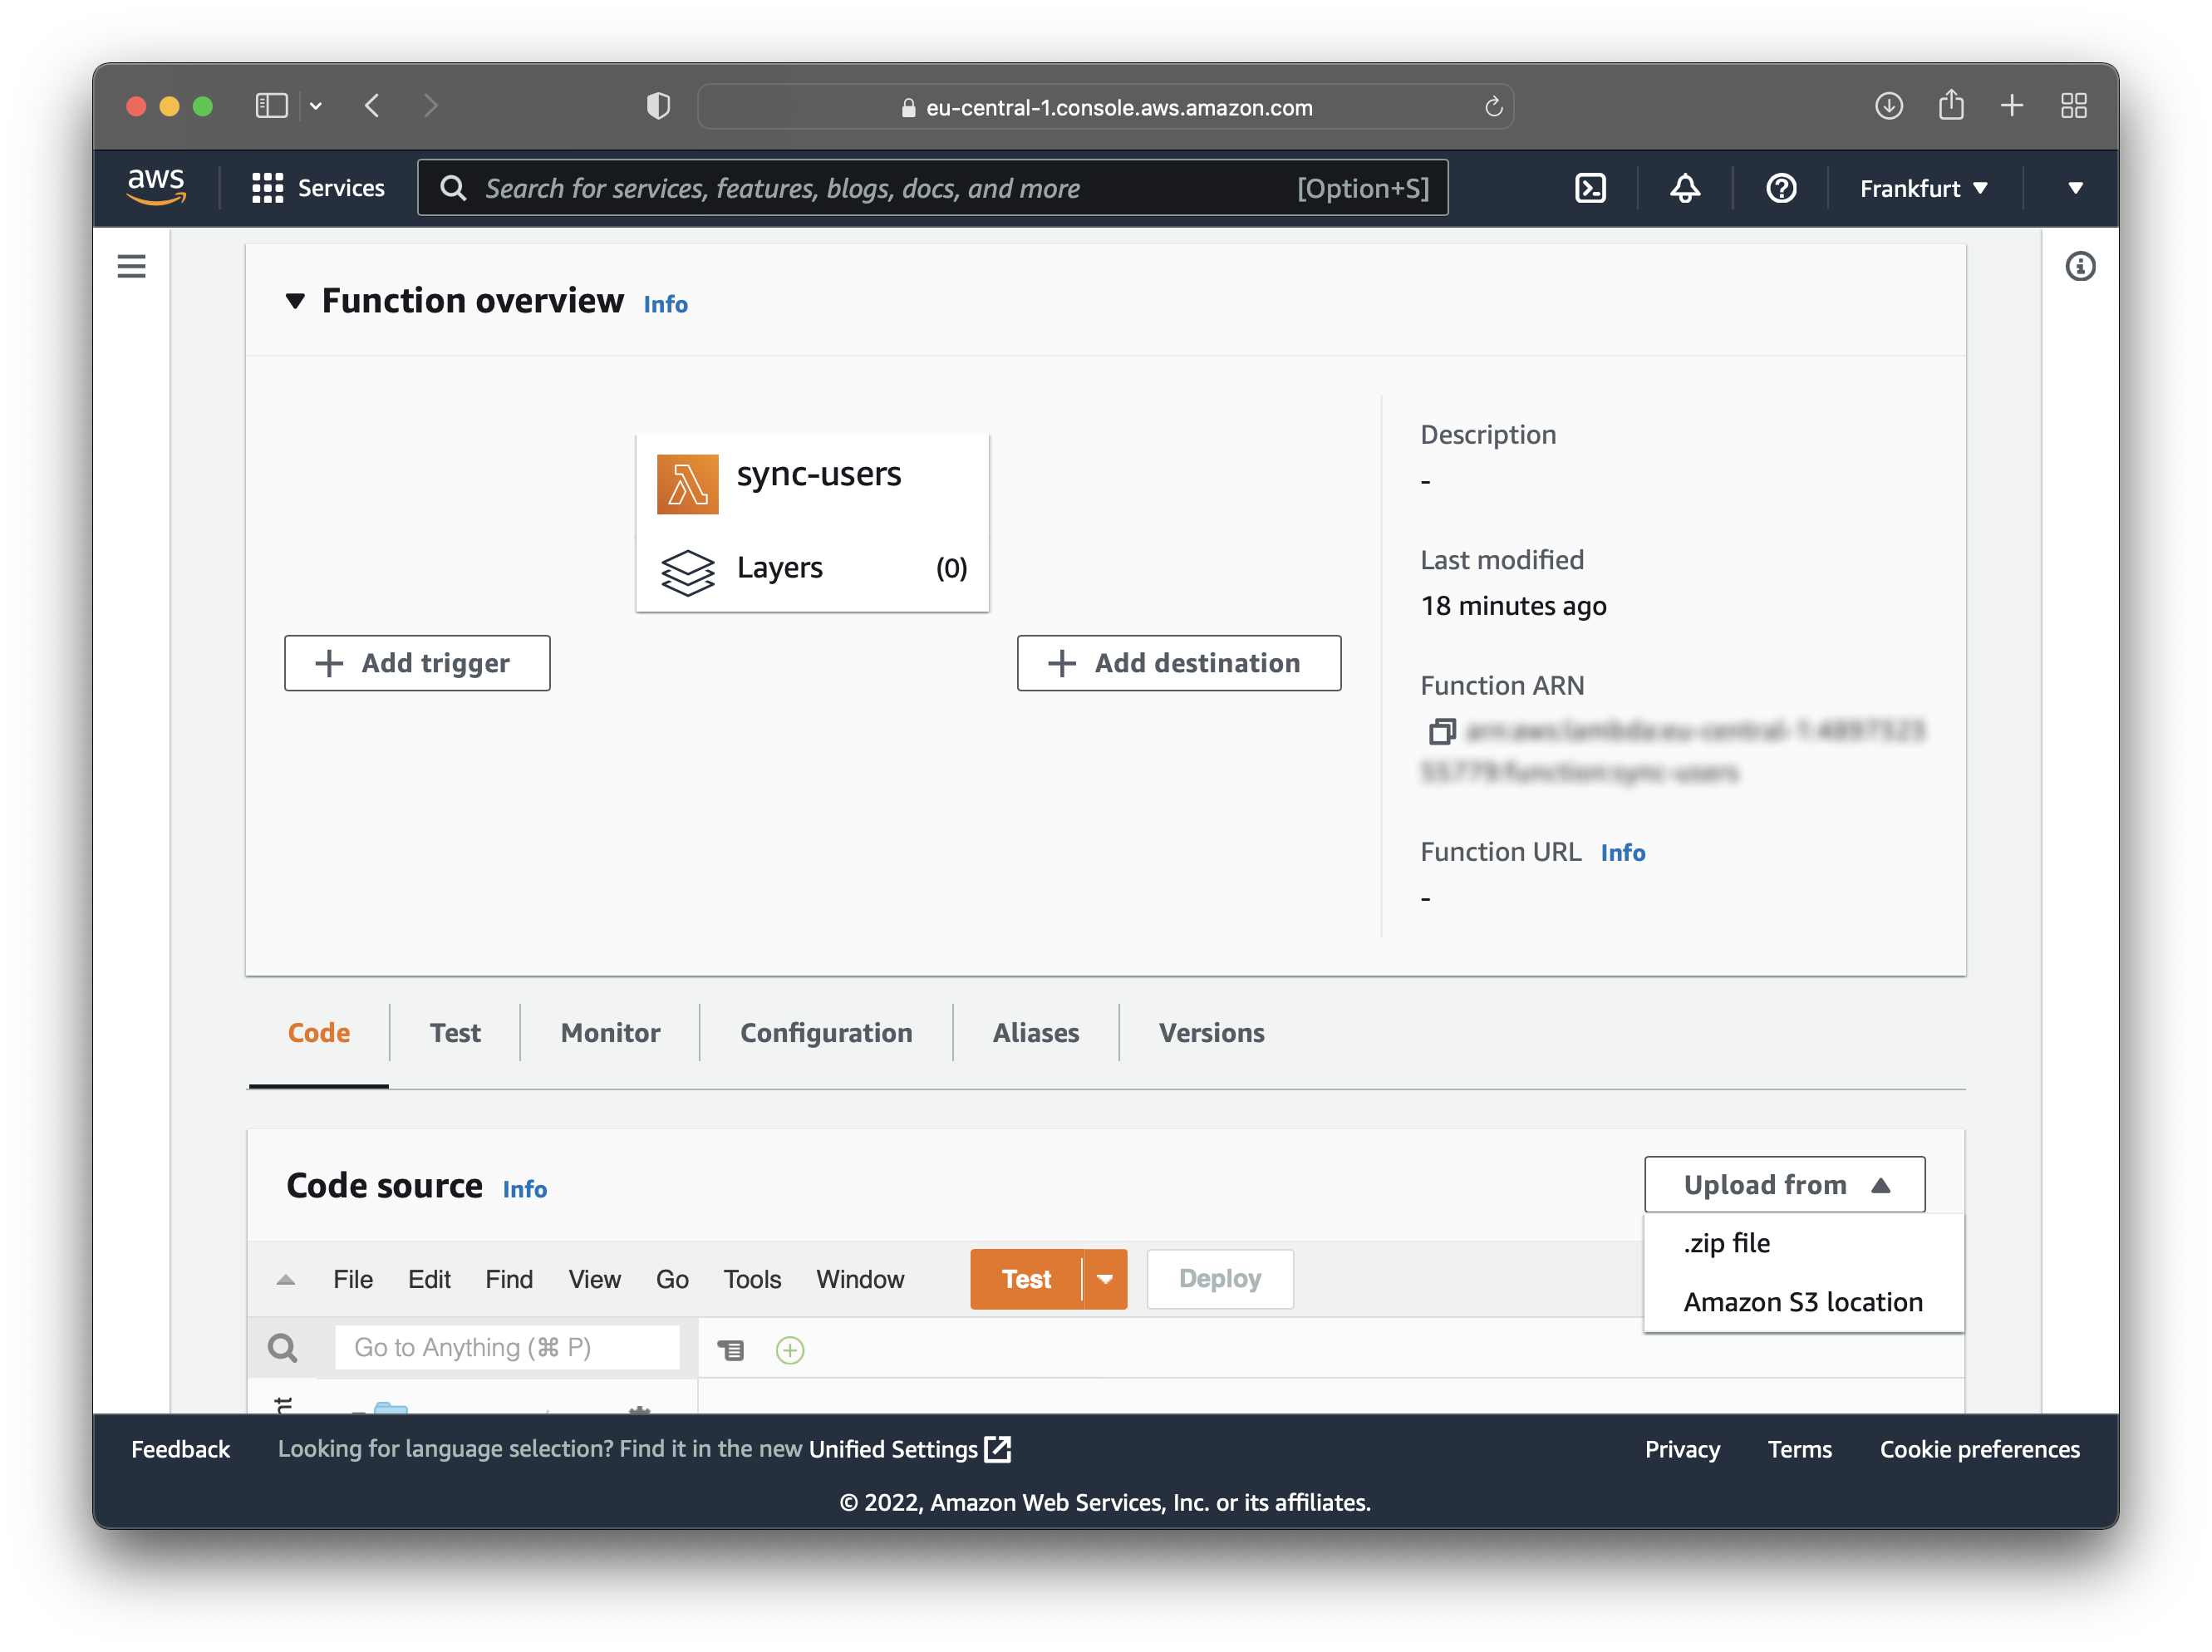
Now zip the folder because you will upload it on AWS. Click on “Upload from” and choose “.zip file”. Upload the zip file and then deploy the changes.
The image below illustrates how the function folder structure should look:
Cognito triggers the Lambda function each time a user logs in or registers to sync the Postgres database with Cognito. If the user is already in the database, the function does not do anything. Otherwise, it adds the user to the Postgres database.
The reason for using an upsert operation is because the social logins do not distinguish between sign up and log in.
Add the following Lambda trigger:
- Trigger type - Authentication
- Authentication - Post authentication trigger
- Lambda function - Choose the
sync-usersLambda
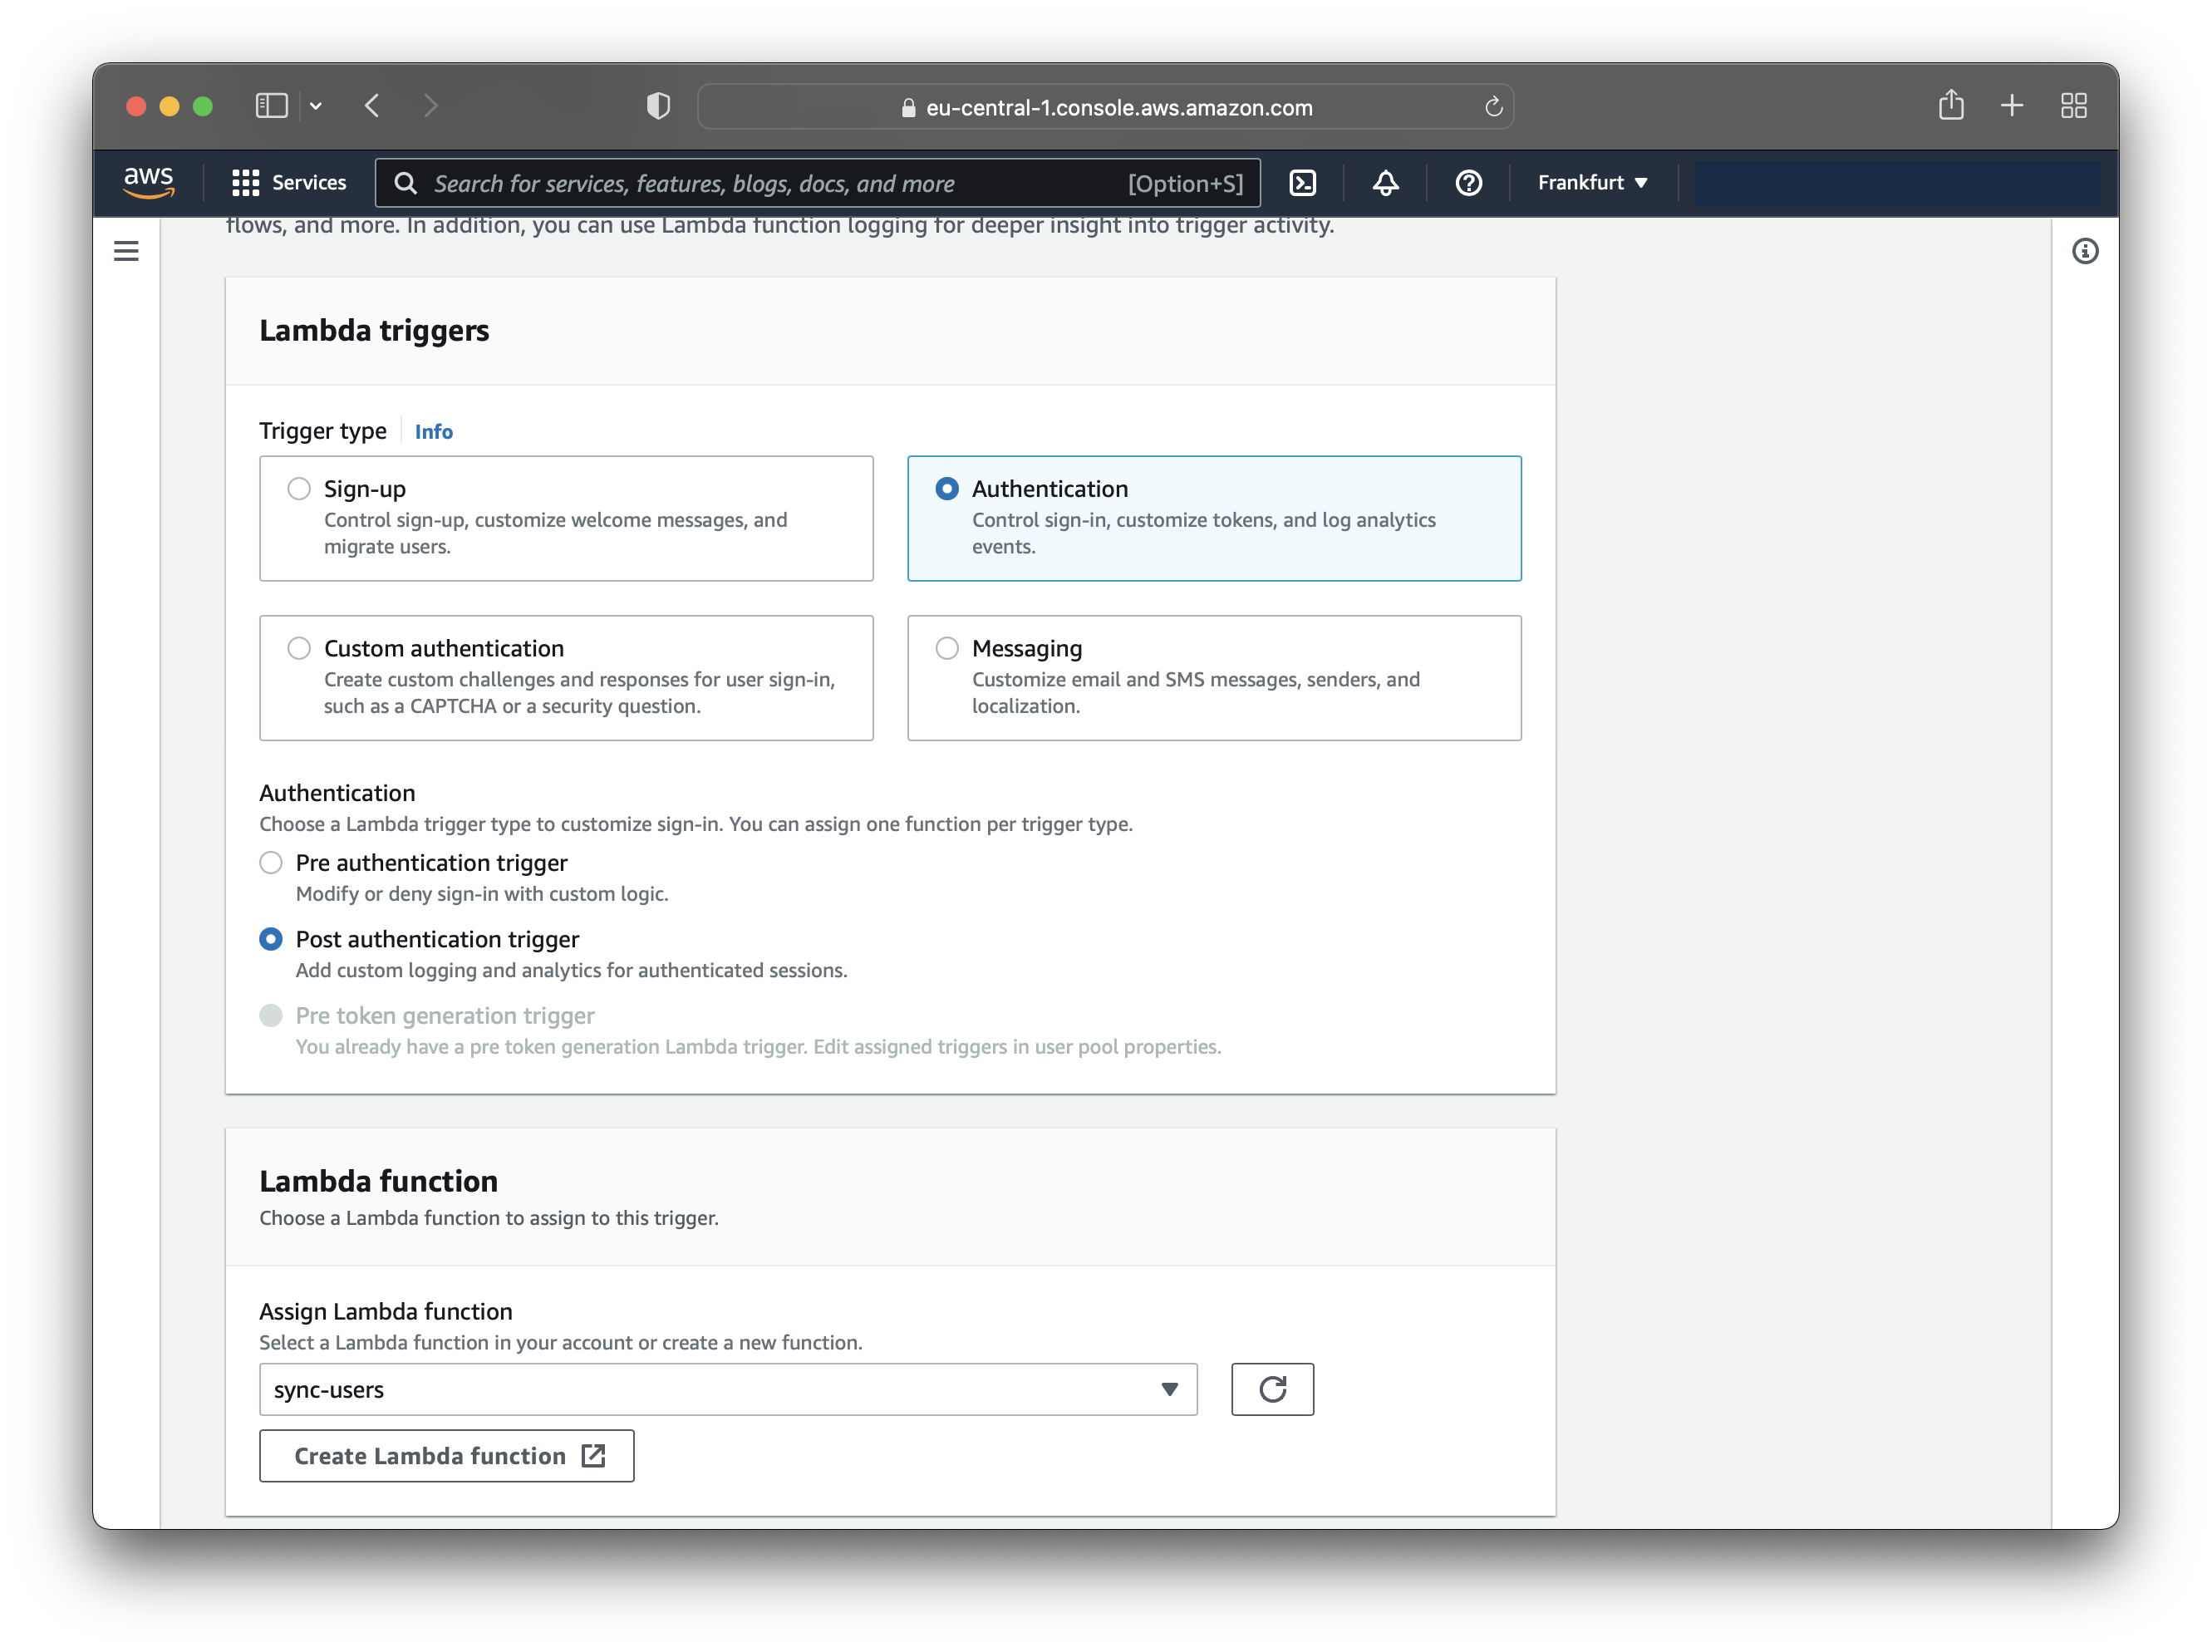
Save the trigger after configuring it!
Test the Integration
The first step is to create an account. After you create the account, you need to log in. The login triggers the
sync-users Lambda function, which adds the newly created account to the Postgres database.
You can access the hosted Cognito UI as follows:
// Login pagehttps://<your_domain>/login?response_type=token&client_id=<your_app_client_id>&redirect_uri=<your_callback_url>// Register pagehttps://<your_domain>/signup?response_type=token&client_id=<your_app_client_id>&redirect_uri=<your_callback_url>// Logout pagehttps://<your_domain>/logout?response_type=token&client_id=<your_app_client_id>&redirect_uri=<your_callback_url>
When you access the hosted UI login page, you should see this page:
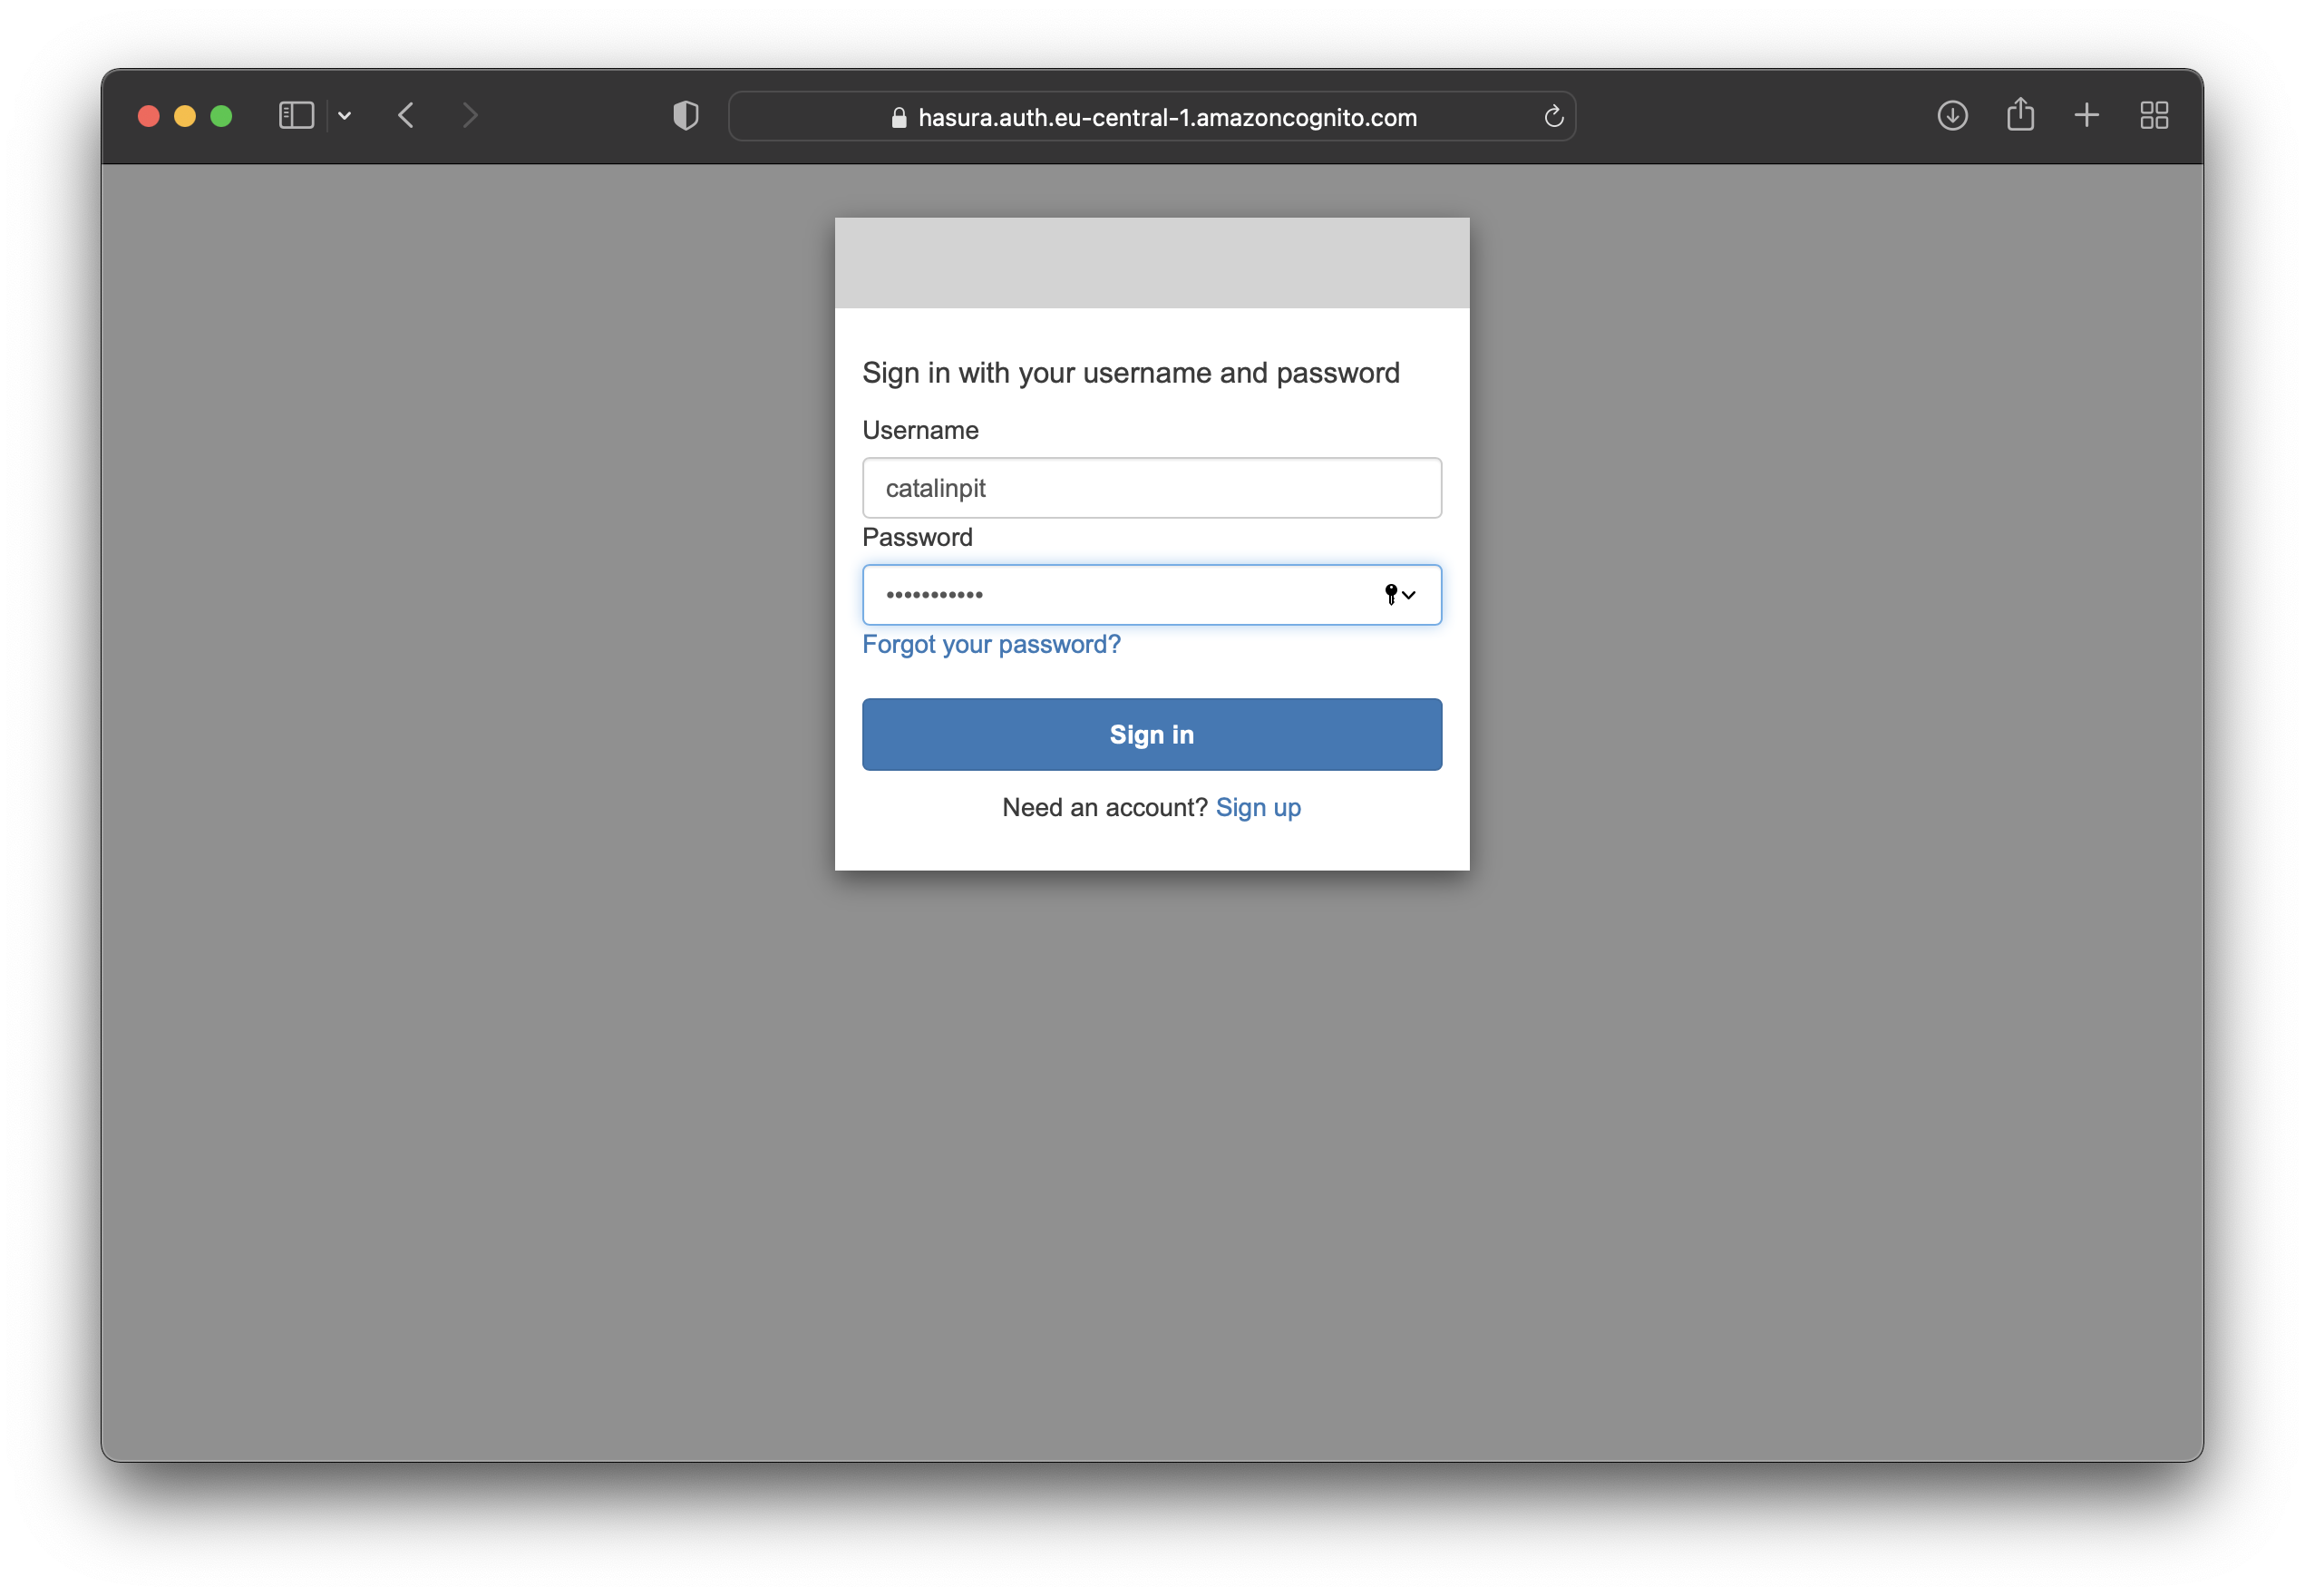
Enter the details of the account you created earlier and sign in. Sign-in redirects you to the callback URL you set
earlier https://localhost:3333/cognito-callback.
You will get an error since no app runs on “localhost:333”. That’s fine because you need the id_token from the URL.
You should see something similar to the picture below but with different values.
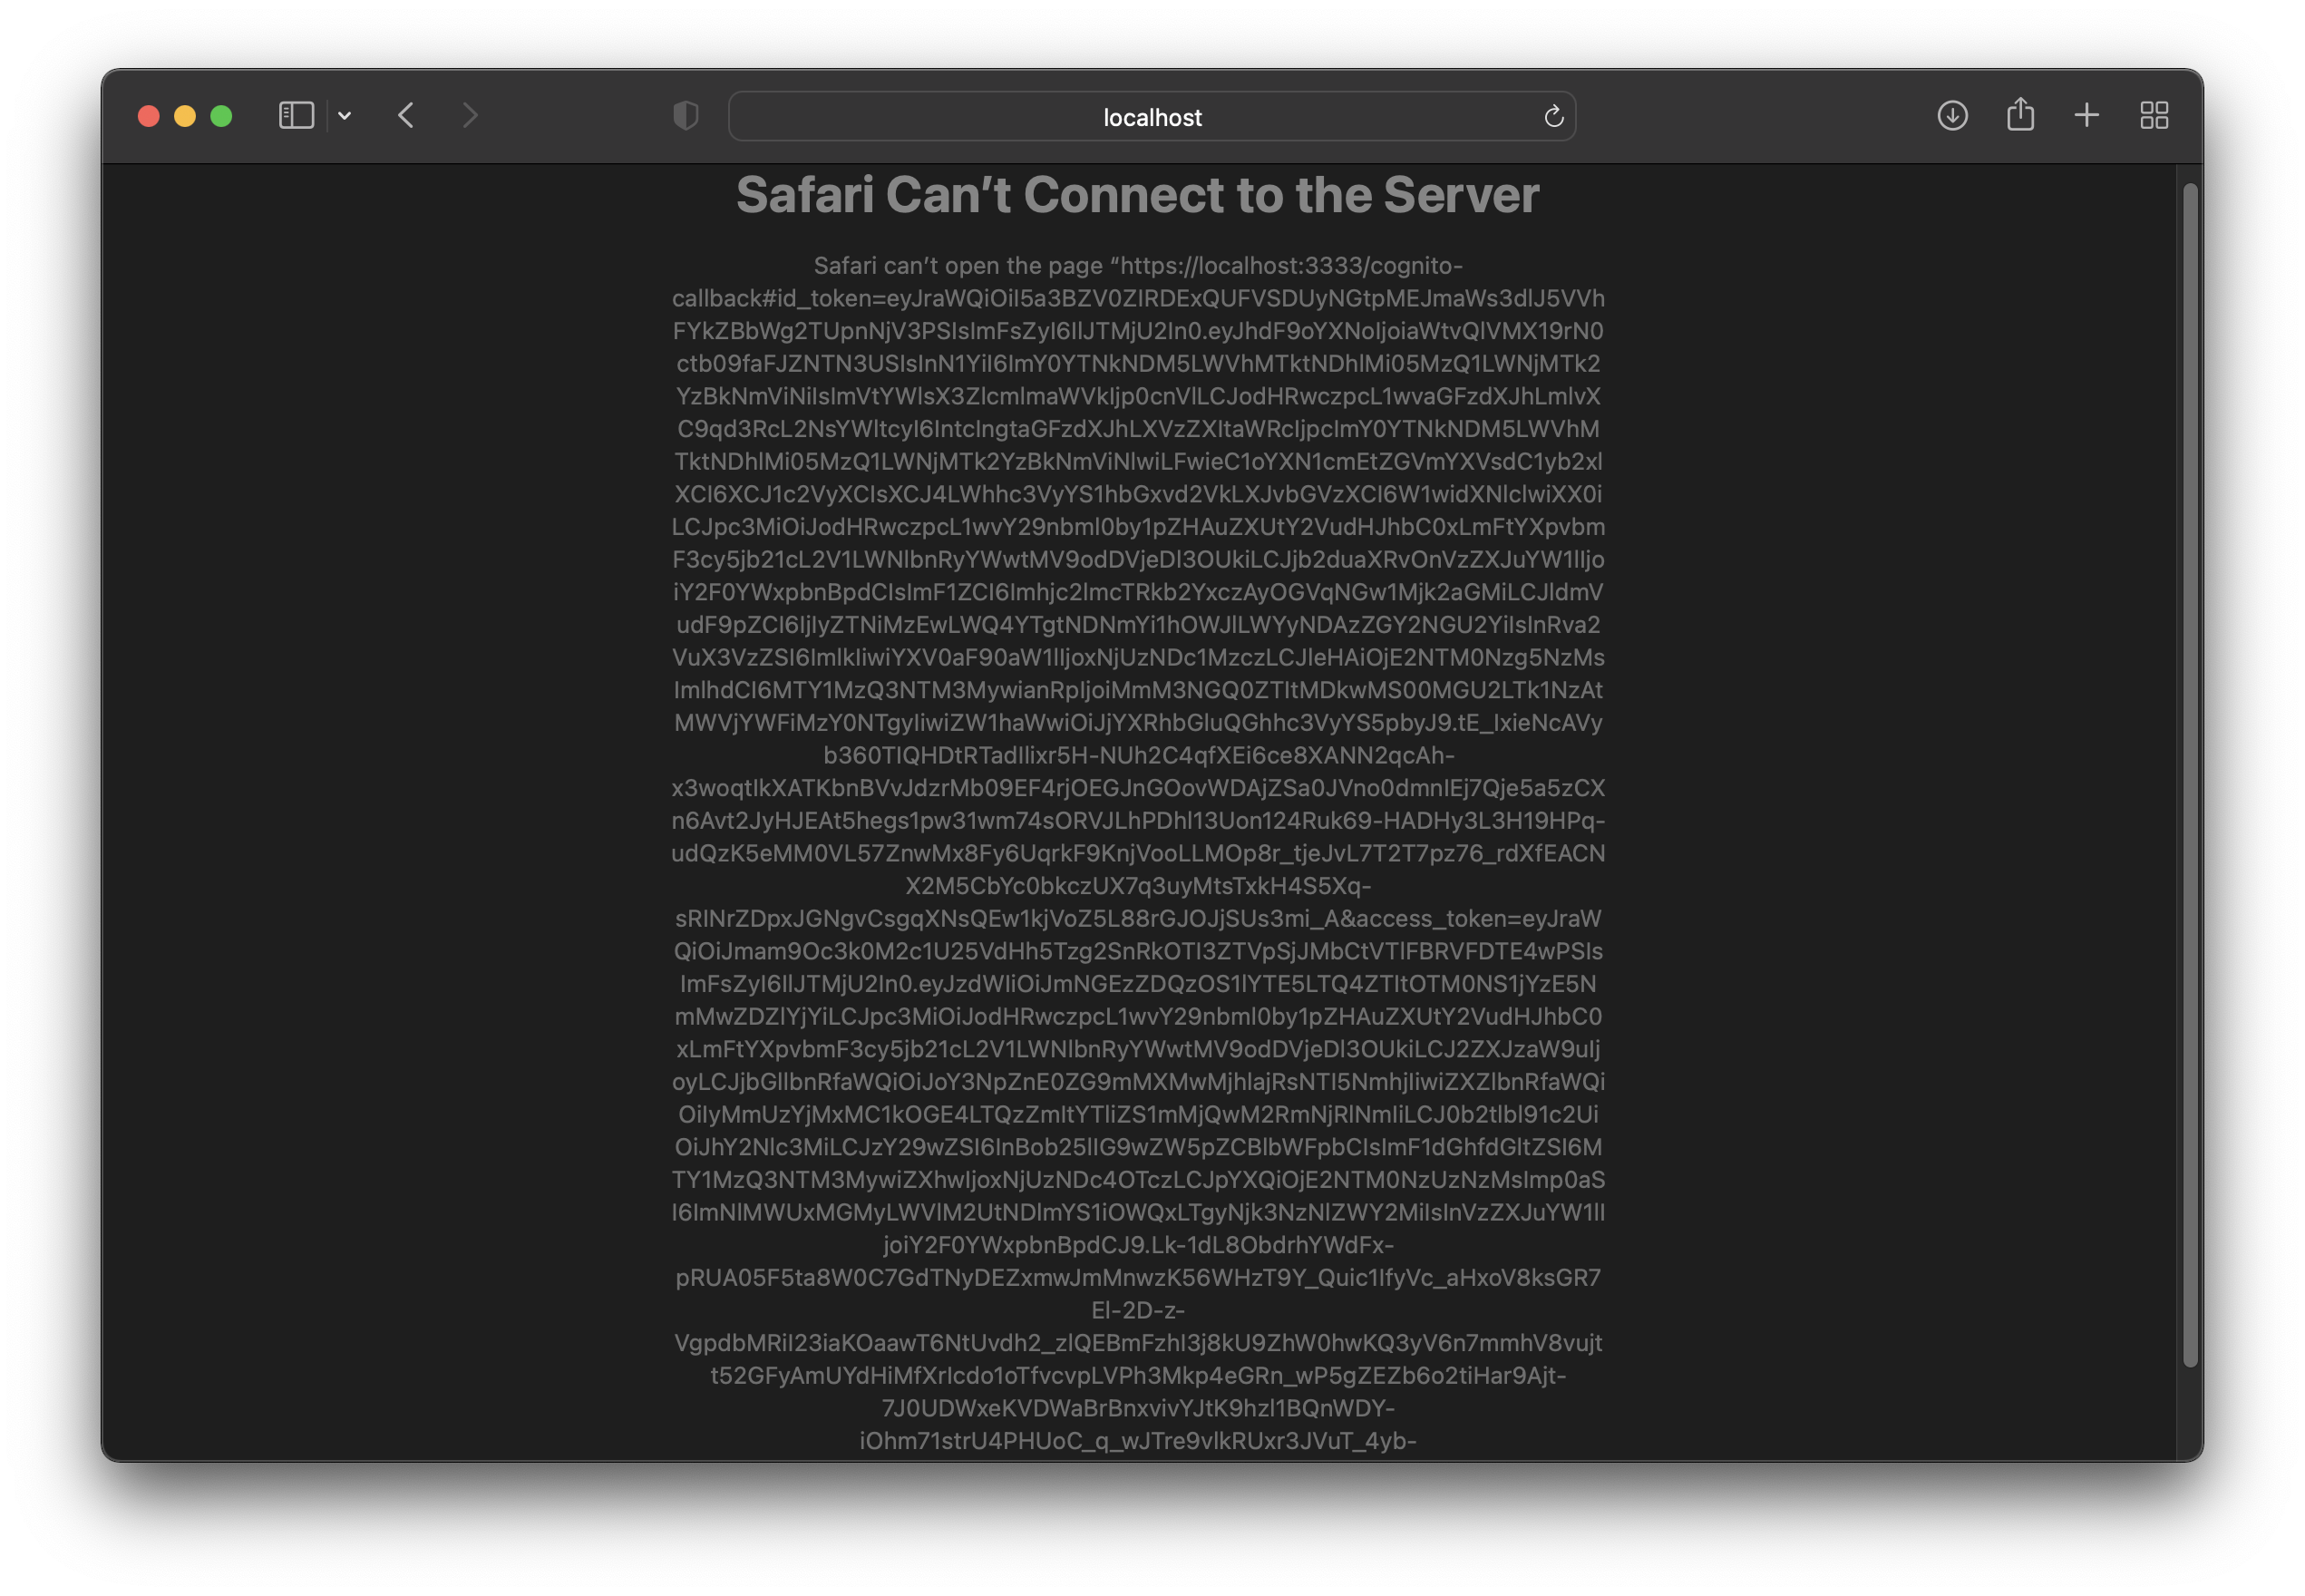
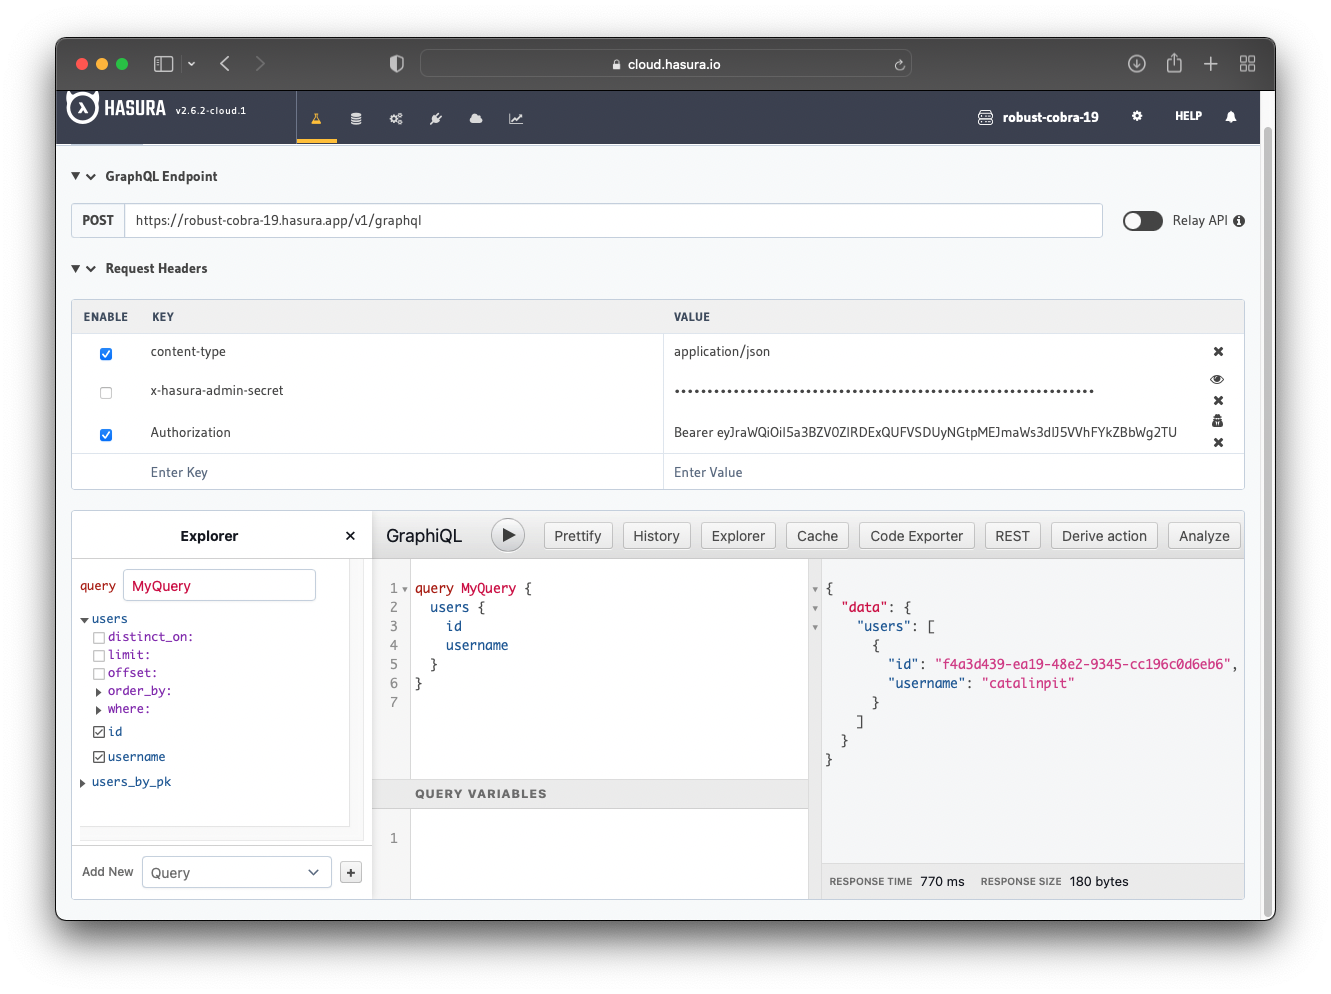
If you extract the id_token and use it to make a request in your Hasura app, you should get only the details of your
user.
Well done for finishing the tutorial! You learned how to integrate Cognito with your Hasura application.
 Build apps and APIs 10x faster
- Built-in authorization and caching
- 8x more performant than hand-rolled APIs